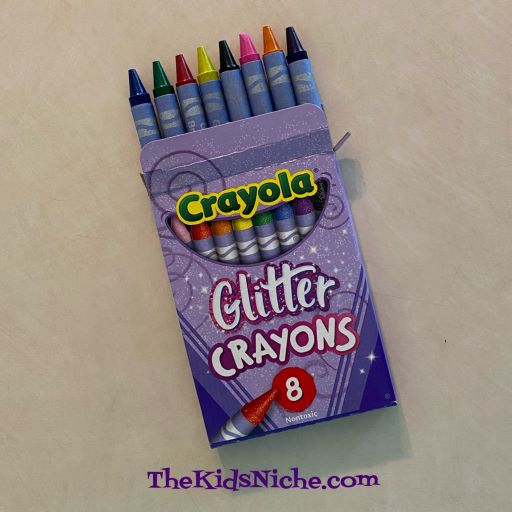
It’s that time of year when the cute little yellow marshmallow birds are spotted all over the place. Yes, I’m talking about Marshmallow Peeps. They seem to go with Easter, don’t they? It seems to me people either love them or hate them. (I’m sorry, but I have never cared for the little guys.)
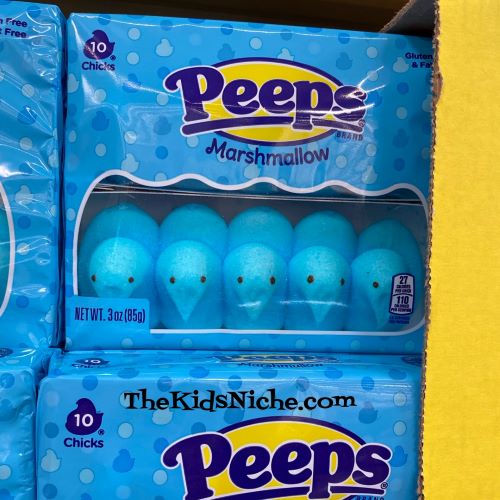
What I didn’t realize until this year is that there are MANY colors and flavors of peeps! (If you don’t like the original, is it possible to like the other flavors?) There are the classic yellow Peeps and also blue Peeps…
Pink Peeps…
Purple Peeps…
I found out today that there are also Sour Watermelon Peeps…
Dr. Pepper Peeps…(Double eww!)
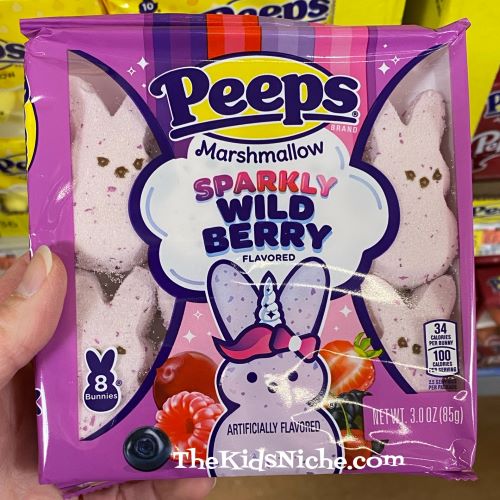
Sparkly Wild Berry Peeps…
Fruit Punch Peeps…
Party Cake Peeps…
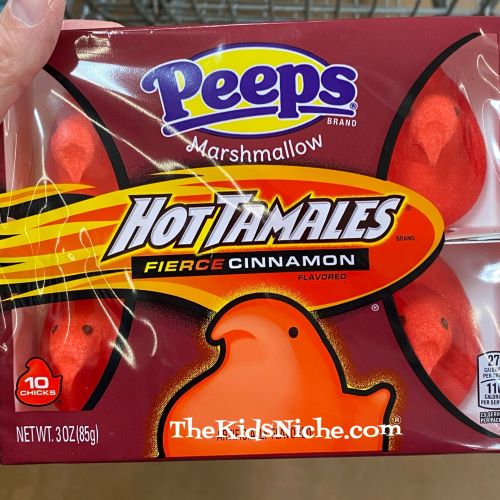
And last, but not least, Hot Tamales Peeps.
WOW! So I gotta ask…do YOU like Marshmallow Peeps?? (I think just the texture of them kinda grosses me out.) IF you like them, what flavor do you like? If you do like them, this must be your favorite time of year with a gazillion Peeps at your disposal! Enjoy!! 🙂 If you don’t like Peeps, hang in there…it’s only a few more days till Easter and they will hopefully go back into hiding again! 😉
Easter is only a few days away now and if you are still looking for some goodies for those Easter baskets, here are a few things I spotted at a Dollar Tree store. They have LOTS of plastic eggs for sale! 😉
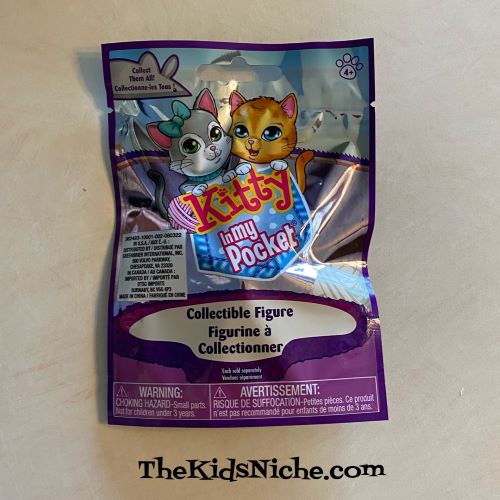
I found this cute little Kitty in my Pocket surprise packet that has 1 kitty inside.
Looks like there are 10 different kitties.
My package had a cute brown kitty inside. 🙂
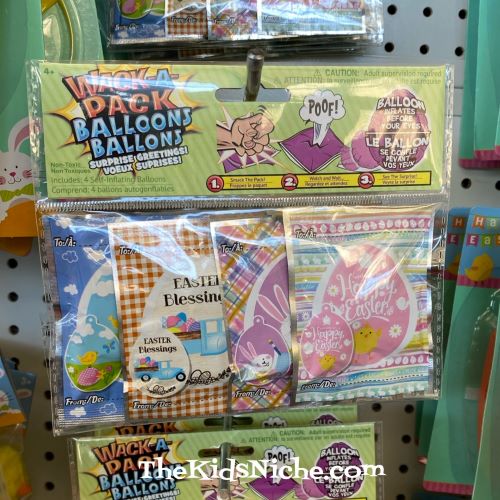
I’m not exactly sure what this “wack-a-pack balloon” is, but it looks like you “wack” the flat package and it swells up into a balloon that has a message on it.
Then there are some cute Easter notepads.
And some glitter putty…
Some cups for dying/coloring eggs…
A wooden Easter egg to paint or color…
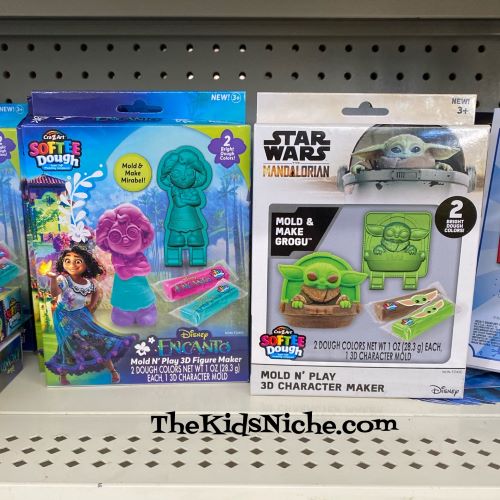
Some Softee Dough kits…(like Play-Doh)
And some magic towels that come in a small round package, but swell up when you put them in water and they become a small towel or washrag.
Of course, they also have lots of Easter candy! Hope these ideas will be a help to you for filling up the kiddos Easter baskets! 🙂
Hello and welcome to The Kids Niche once again! 🙂 Today we’re going to put a little bounce in your step! Or maybe a little bounce into some fun characters that you make yourself. Ready, set…let’s go!
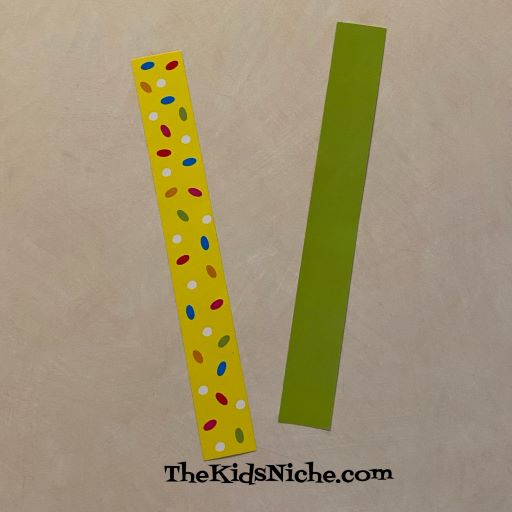
You will need some strips of paper…approximately 1″ wide and at least 7″ long, but they could be a little different from that and still work. Construction paper or scrapbook paper works great. I used some paper that was printed on both sides, but that isn’t necessary. Then you’ll need some scraps of paper, glue or double-sided tape, markers, scissors and a pencil.
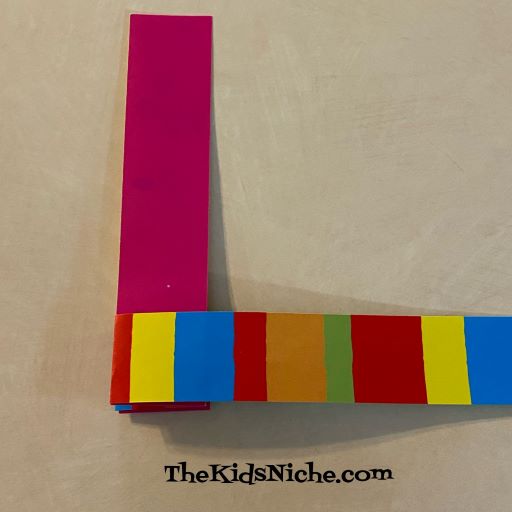
Begin with the 2 strips of paper.
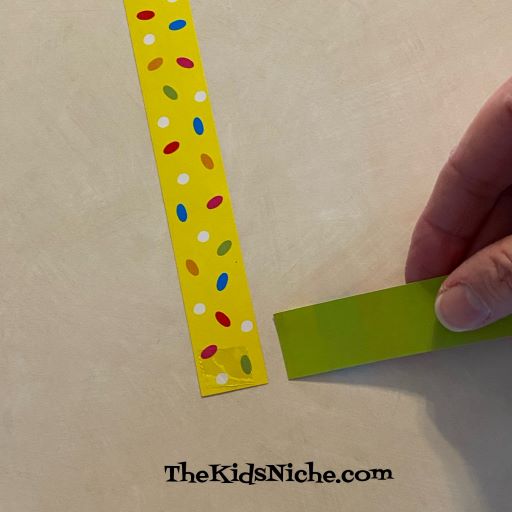
Put a small amount of glue or double-sided tape on the bottom edge of one strip.
Place the second strip at a right angle to the first one on top of the tape or glue.
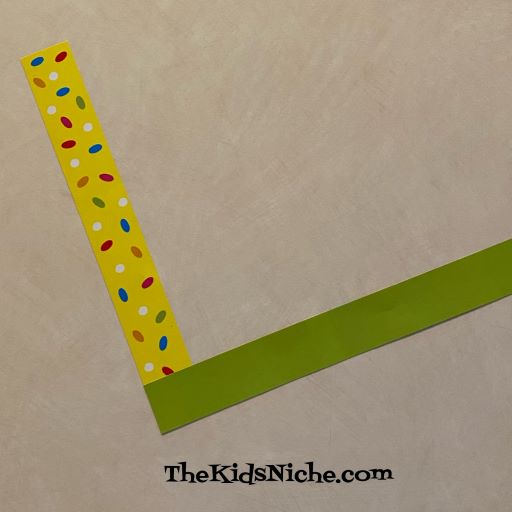
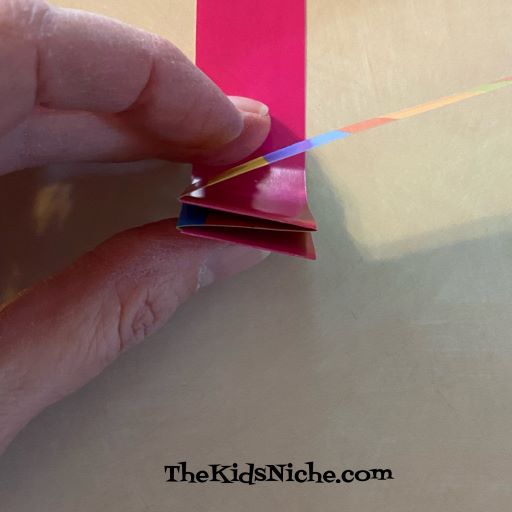
Now you will fold the strips of paper across each other…one at a time…keeping them straight to the corner.
Continue folding the strips until you come to the end of the strips.
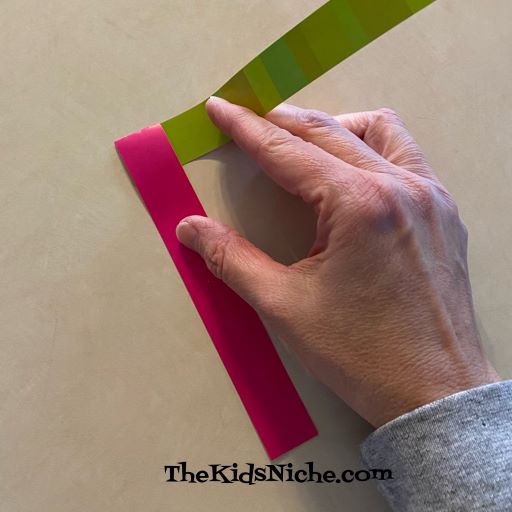
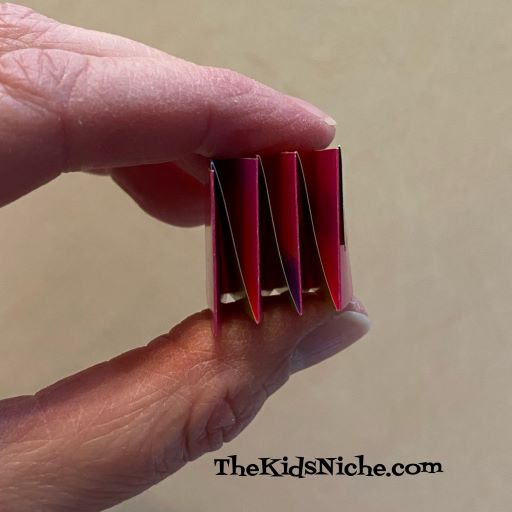
This is a side view of what it should look like.
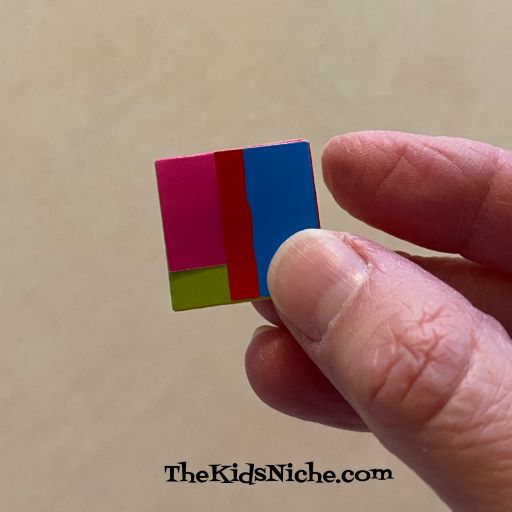
Here we are at the end of the strips.
Fold the last bits over and glue or tape in place.
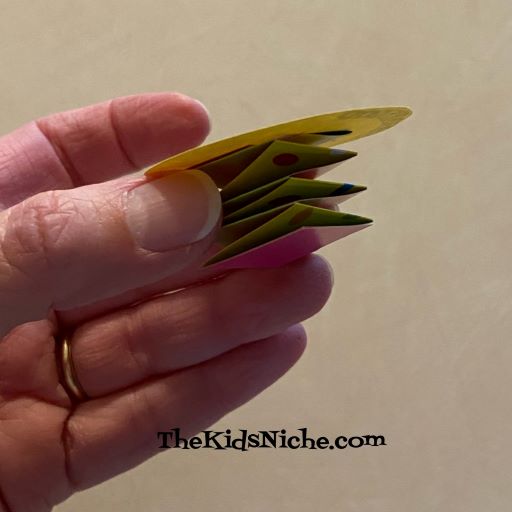
Another side view…this is the part that makes the bounce. It’s rather like an accordion.
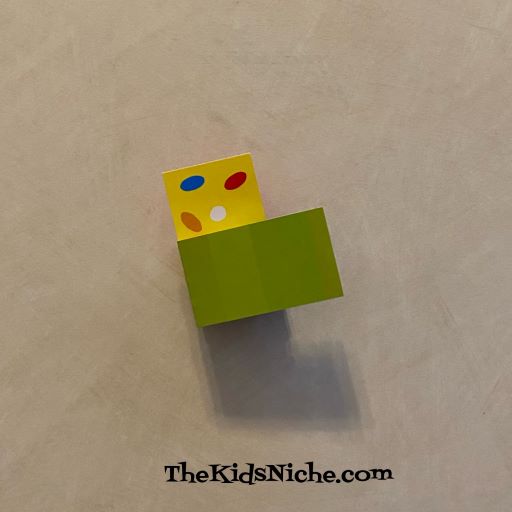
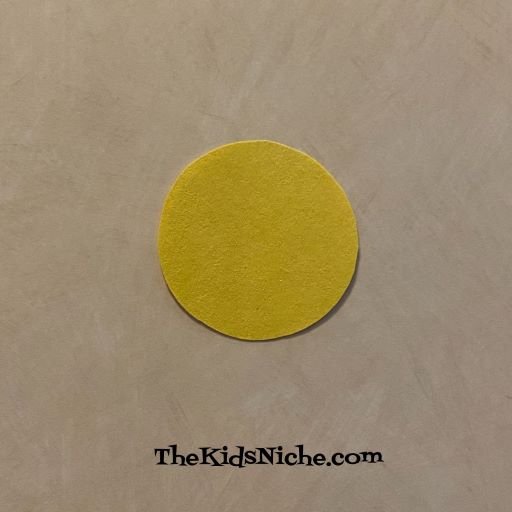
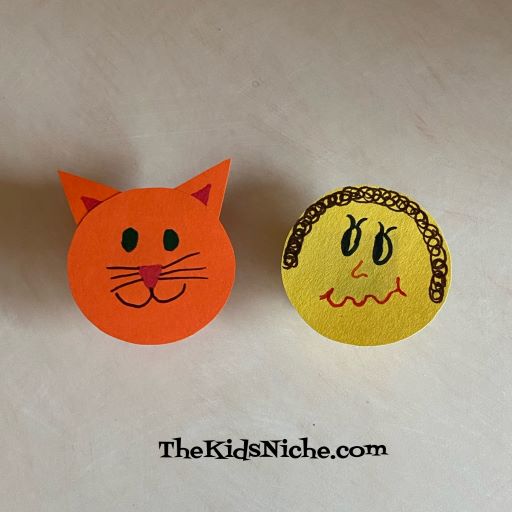
Now let’s make the character’s face. Start by cutting out a circle from your scraps of paper. I used a very small cup to trace around.
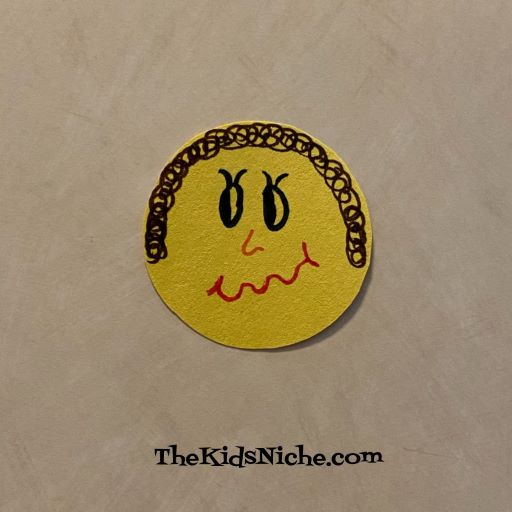
Draw a silly face on the circle.
Put some glue or double-sided tape on the top of the accordion piece.
And stick the circle on top.
Put your bouncing character on the tabletop and press it with your finger. It will bounce up and down. 🙂
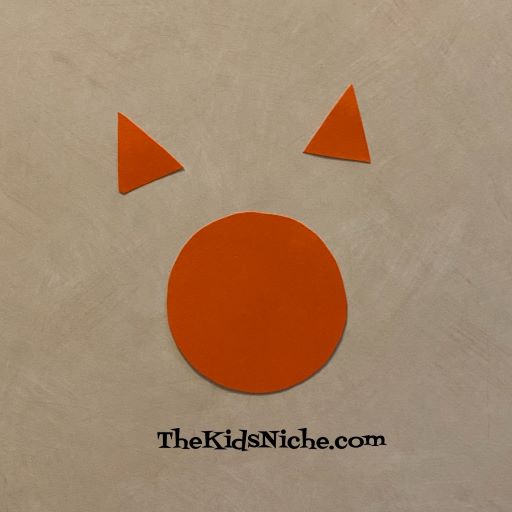
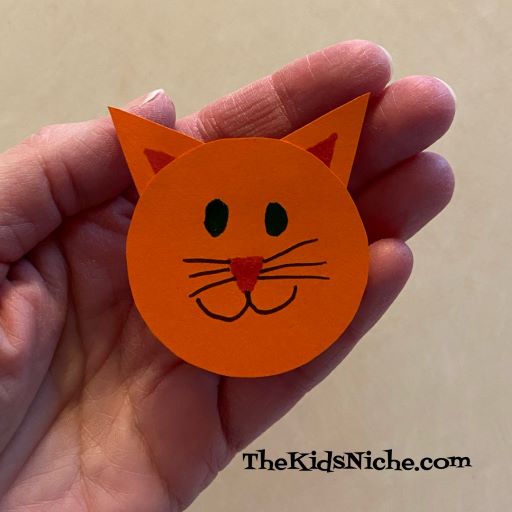
I also made a bouncing cat by folding 2 more strips of paper together. I cut out an orange circle and 2 orange triangles.
Draw a cat’s face on the circle, color in a bit of the ears and glue or tape it together.
Tape it onto the bouncing part you made and you’re ready to play with your bouncing friends!
I hope you’ll have fun bouncing these guys all over the house! 😉
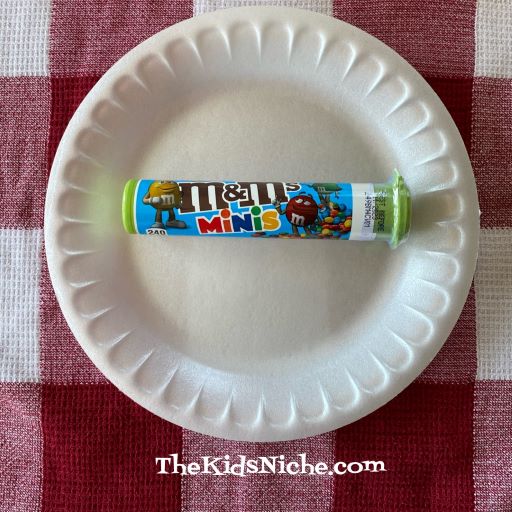
Whoohoo! I am so ready for Spring! How about you? The calendar says it is Spring, but boy, it is cold and windy outside! Let’s pretend not to notice and have some fun inside today! We can have some great fun making pictures with Mini M&M’s candy pieces! You will need a white plate or a white piece of paper and some Mini M&M’s.
And a bowl will make it easier to pick out the color of M&M that you want to use.
This project is so simple! All you do is arrange the M&M’s in such a way that it makes a cool picture. Like this simple flower…
When you are done with the picture, just dump the M&M’s back into the bowl and start over! 🙂 Here’s a more elaborate flower…
You could try a smiley face…
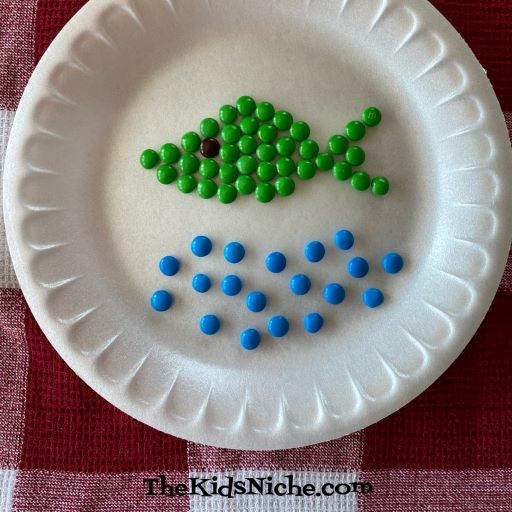
Or maybe a fish in water…
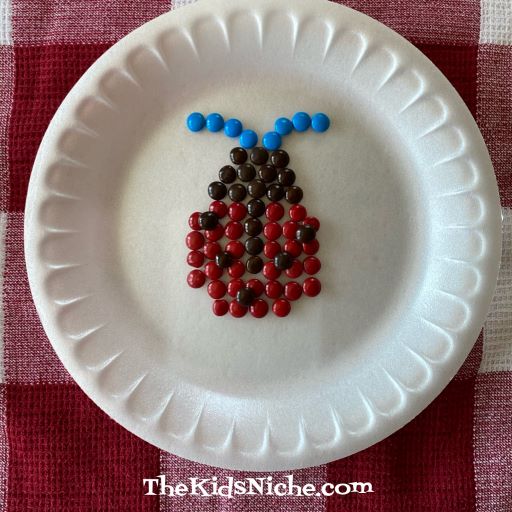
Or how about making a lady bug with blue antennae? 😉
The things you can make are endless! 🙂 And the best part? You can eat the M&M’s when you are finished! Super simple, but lots of fun! 🙂
Here’s a fairly simple food idea to help celebrate St. Patrick’s Day. Leprechauns love Lucky Charms cereal and gold coins, right? So this is a way those sneaky leprechauns can leave a special treat for your kids. 🙂
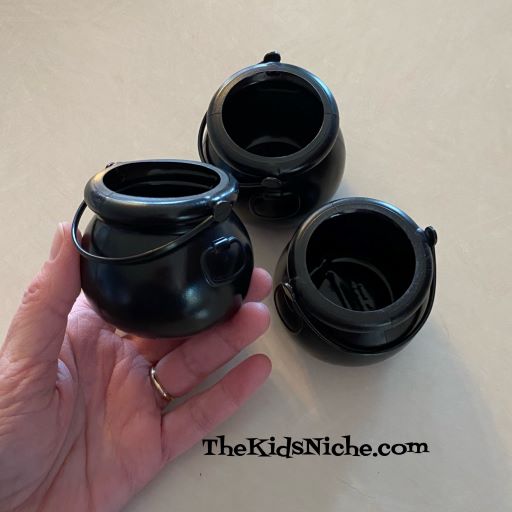
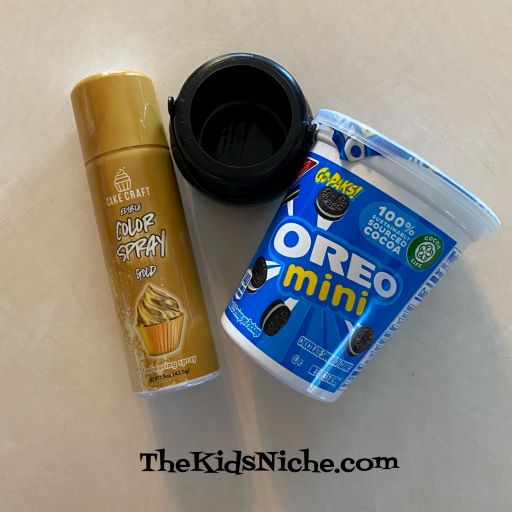
I found these black pots like the ones leprechauns hide their gold in at our local Dollar Tree store.
You will also need some Lucky Charms cereal.
And you’ll need some mini Oreo cookies and a can of gold food spray.
Lay some mini Oreo cookies out on a disposable plate. (Lay some newspaper down under the plate to catch the overspray.) Spray one side of the cookies and allow them to dry for the time mentioned on the spray can.
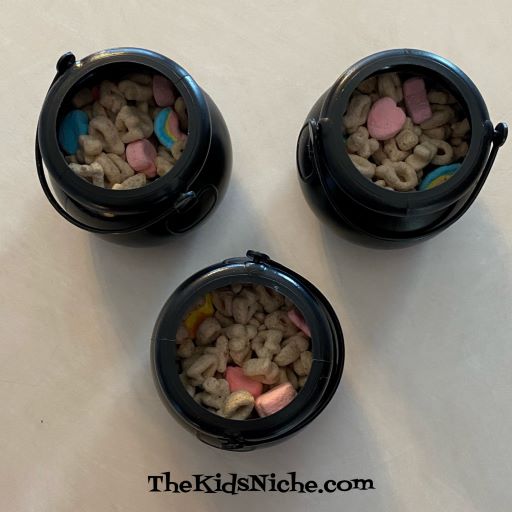
While the cookies are drying, fill the black pots not quite full with the cereal.
When the cookies are dry, turn them over and spray the second side. After the cookies are dry the second time, add a few cookies to each black pot.
And your leprechaun pots are ready to serve to your favorite leprechauns! 😉 You can add to the fun by hiding the pots and letting your little leprechauns search for them. I hope this brings some fun to your St. Patrick’s Day! 🙂
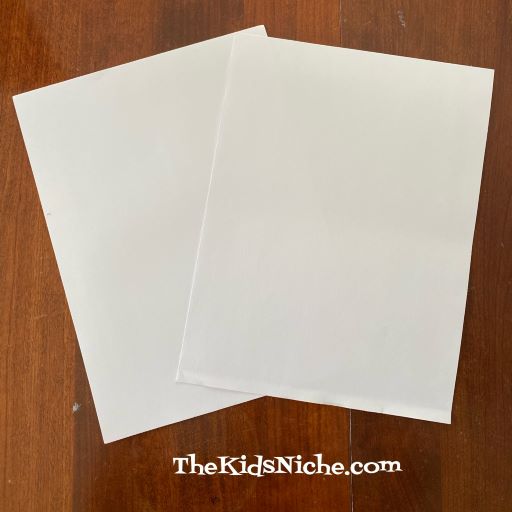
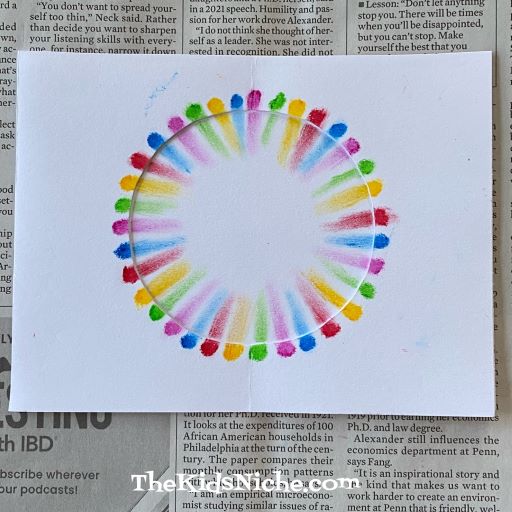
Today we’re looking at a way to make your own stencils AND make a really cool looking picture with them! I tried this 4 different ways, so I will first show you the way that I think worked the best. But if you don’t have those supplies on hand, there are some other fun things you can try that still come out looking pretty great. 🙂 Here’s a sneak peek!
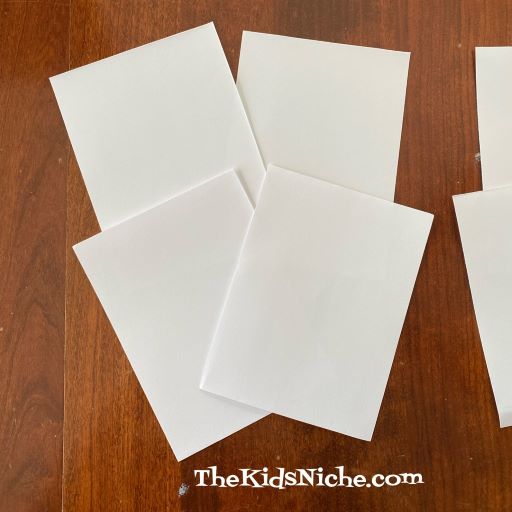
You will need 2 sheets of white paper. I used a sturdy type of construction paper. (I am showing you how to do this project 4 ways, but if you’d rather you can use just one piece of paper and still make 2 pictures.) 🙂
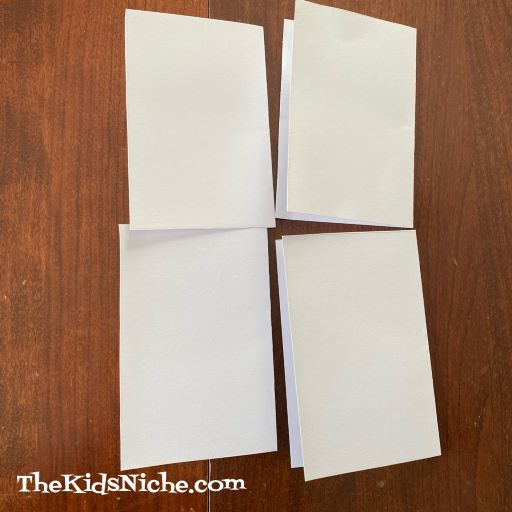
Cut or fold and tear each sheet into 4 equal pieces.
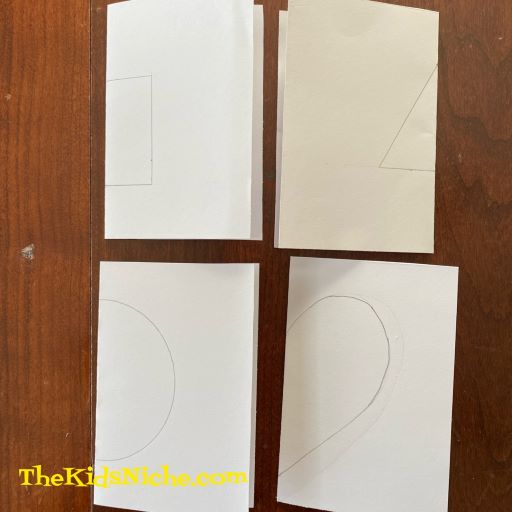
Take 4 of the smaller pieces and fold each one of them in half. Leave 4 smaller pieces of paper flat.
On the folded edge, draw half of a shape. For example, draw half of a heart, triangle, circle, square, etc. Leave some space on both the top and bottom edges.
While keeping the paper folded, cut out the shape. Cut through both pieces of the folded paper at the same time.
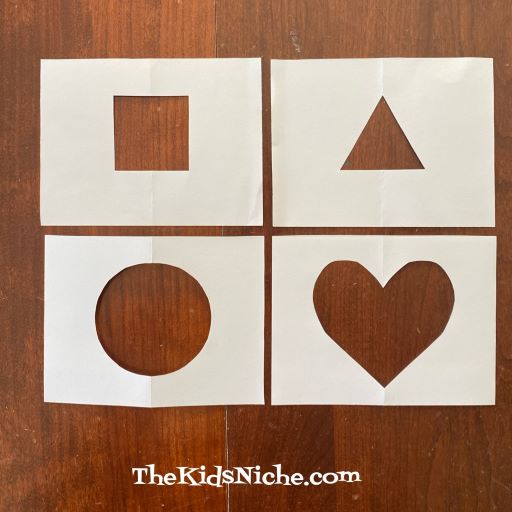
Now open up the folded paper and you should have the complete shape cut out of the middle of the paper.
You might want to lay down some old newspaper or paper towels to put your project on. Pick one stencil and lay it on the newspaper.
For the first example, I used water color crayons. They gave the best color to the finished picture.
Pick out 3-5 colors that you want to use. Begin by coloring dots on the edge of your stencil. I like using colors in the same order all around the edge of the stencil. It’s great practice for the kids to help learn about making a pattern.
Make colored dots all around the edge of your shape.
Next lay your stencil on top of one of the flat pieces of paper. Make sure that the 2 pieces of paper stay together all the time for the next step. Use one end of a Q-tip to brush from the colored dot onto the paper laying underneath the stencil. Use the same Q-tip to do all of one color.
Then switch to a new Q-tip end for each color.
Doesn’t it look amazing?! 🙂 Remove the stencil and look at the beautiful design you’ve made underneath.
For my second design I tried using sidewalk chalk. It worked too, but the colors came out very light and rather hard to see, especially in a picture.
I used colored pencils for another try, but this time I didn’t use the Q-tips. I simply colored little patches both on the stencil and the paper underneath. I think the circle and heart shape worked better than the triangle shape did.
And then with the stencil removed. Still made a neat picture!
For my last attempt, I used regular crayons and colored circles or ovals on the stencil and the paper underneath. I think it would look better if I had colored bigger circles, but it still is pretty.
Without the stencil…looks rather like a picture frame. 😉
You can, of course, simply use a pencil to trace inside the stencils and then color the shapes without having the stencil there.
It was a fun experiment! I definitely liked using the water color crayons the best as they gave the best results. I hope you’ll give this project a try! 🙂
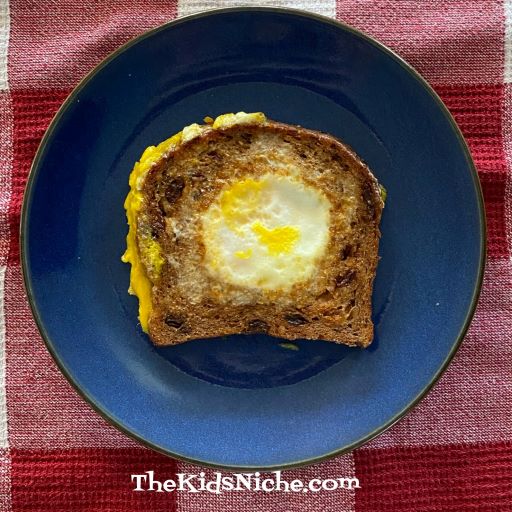
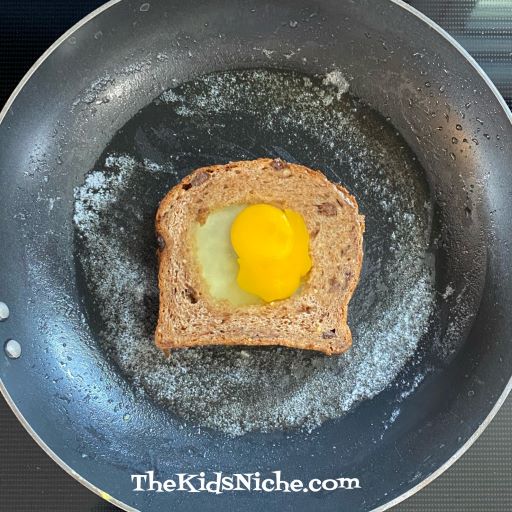
There is a fun way to cook an egg and a piece of toast at the same time in the same skillet. But there are MANY names for it. 🙂 This is what it looks like…
I found all these names that seem to refer to the same food. ..Egg in a Basket, Egg in a Hole, Egg in a Nest, Toad in a Hole, Bullseye Toast, One-Eyed Gypsy Bandit and Spit in the Eye. Wow! I am very curious to know what you call it at your house! But let’s talk about how to make it, in case you’ve never seen this idea before. 🙂
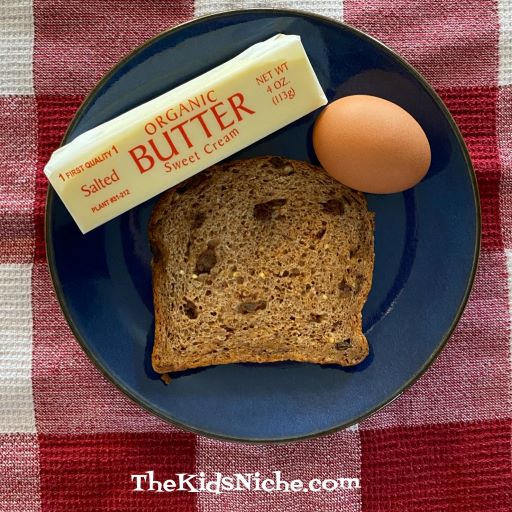
All you need is a slice of bread, some butter and an egg plus a skillet to cook it in.
Cut a hole out of the center of the slice of bread. I used raisin bread but you can use your favorite bread.
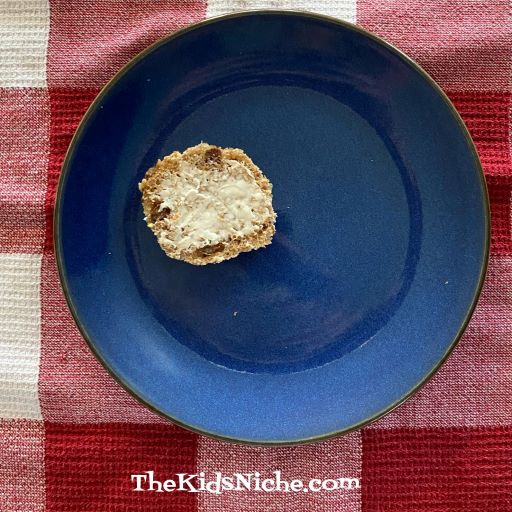
Save the circle of bread and fix it in your favorite way. Maybe add a bit of butter or jelly or toast it and add some cinnamon and sugar.
Melt some butter in the skillet. When the skillet has warmed up, lay the bread in the skillet.
Crack open the egg and pour it into the hole in the bread.
Cook over a medium heat until the egg reaches the stage of doneness that you like. I flipped my Egg in a Basket over and cooked it some on both sides.
Once your egg is cooked, serve it up with a smile! 🙂 Don’t forget to add the circle of bread to your plate! I’m thinking this would be very tasty with a little maple syrup drizzled on top.
This dish is yummy and easy any time of the day! 🙂 Enjoy! And let me know what your family calls it! 😉