Fun With Kenetic Sand

Have you ever checked out Kinetic Sand? I tried it for the first time the other day and it’s great fun! You can buy small containers fairly cheaply and the fun lasts for hours!

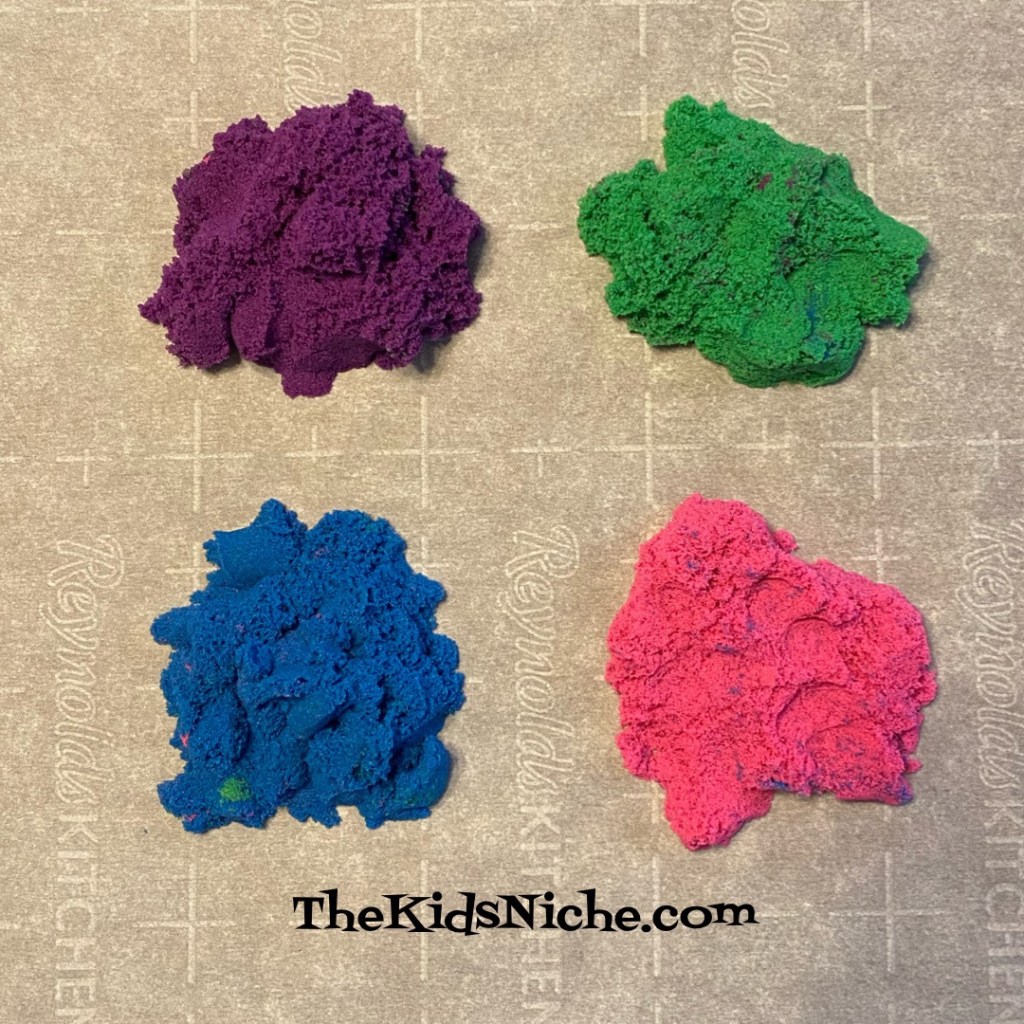
The one I picked up had 4 different colors inside. Pretty cool, right?

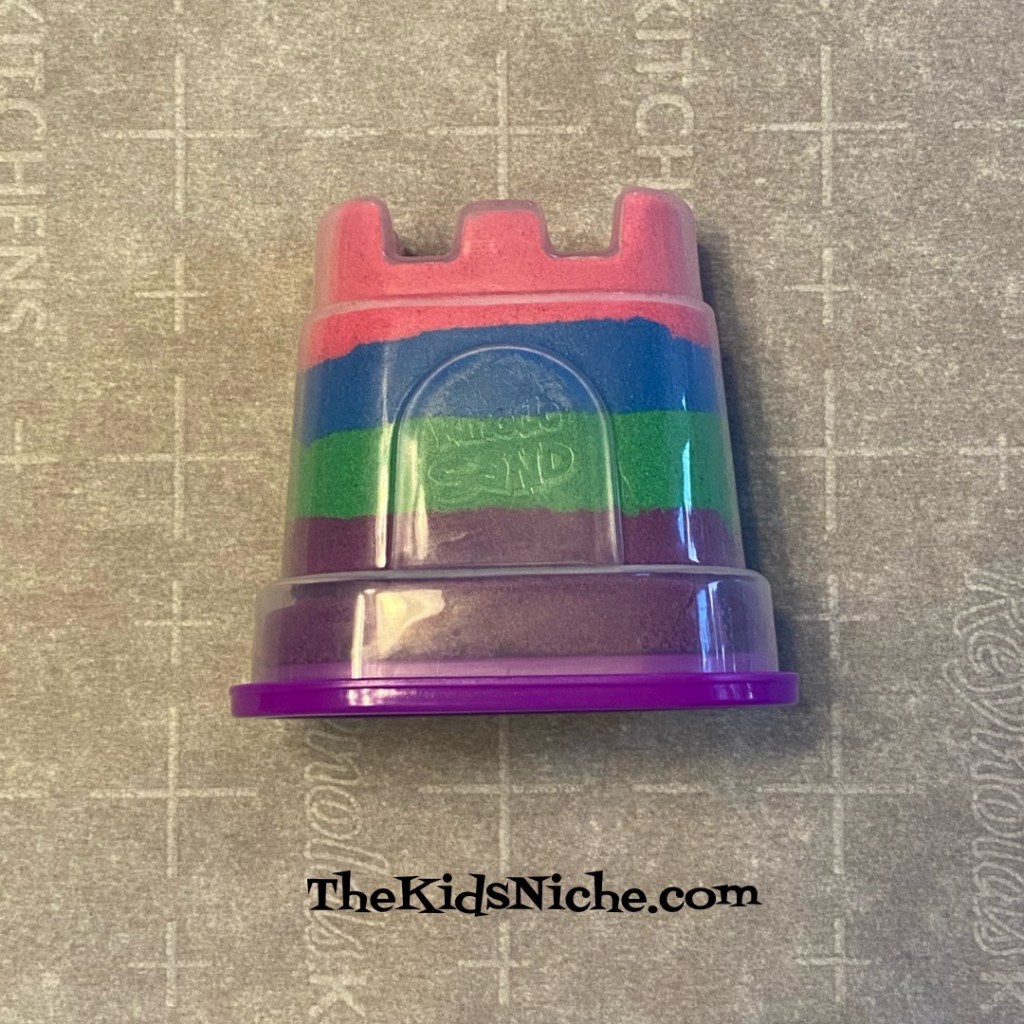
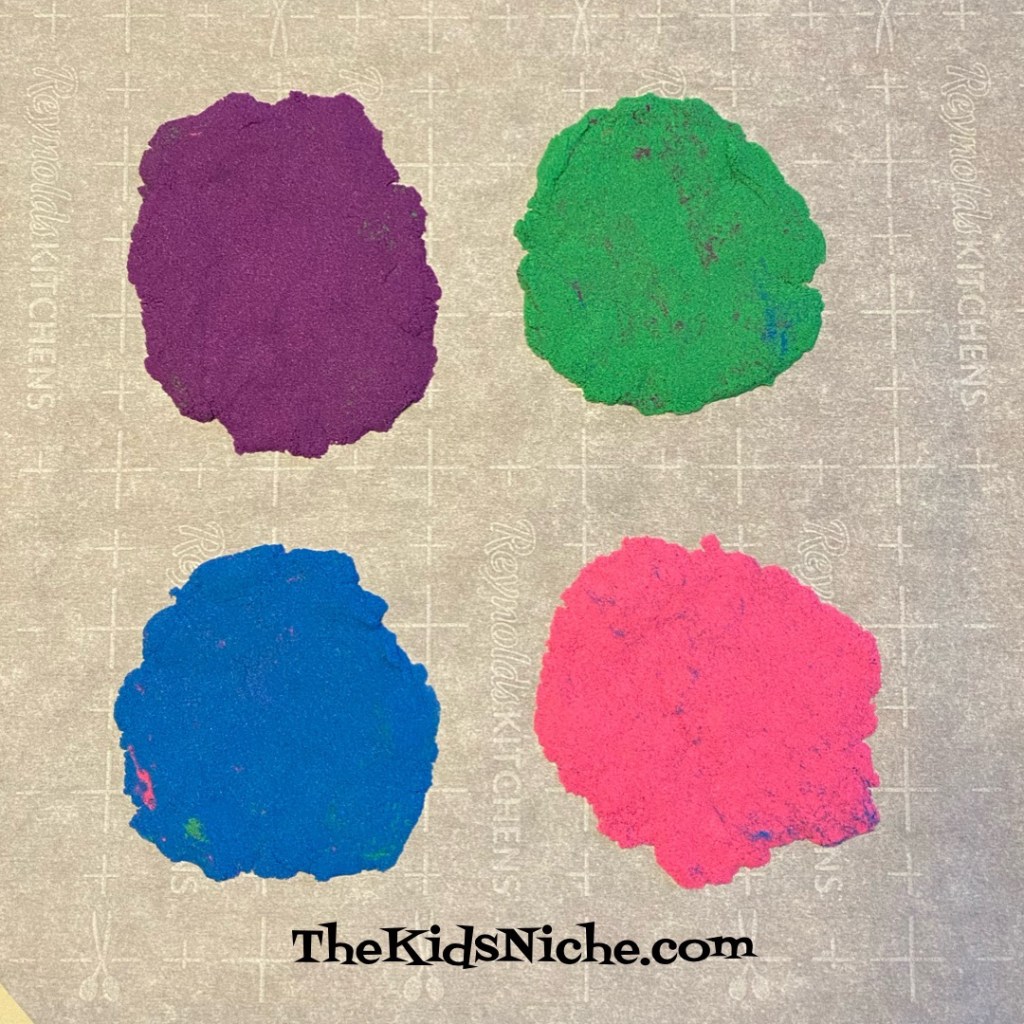
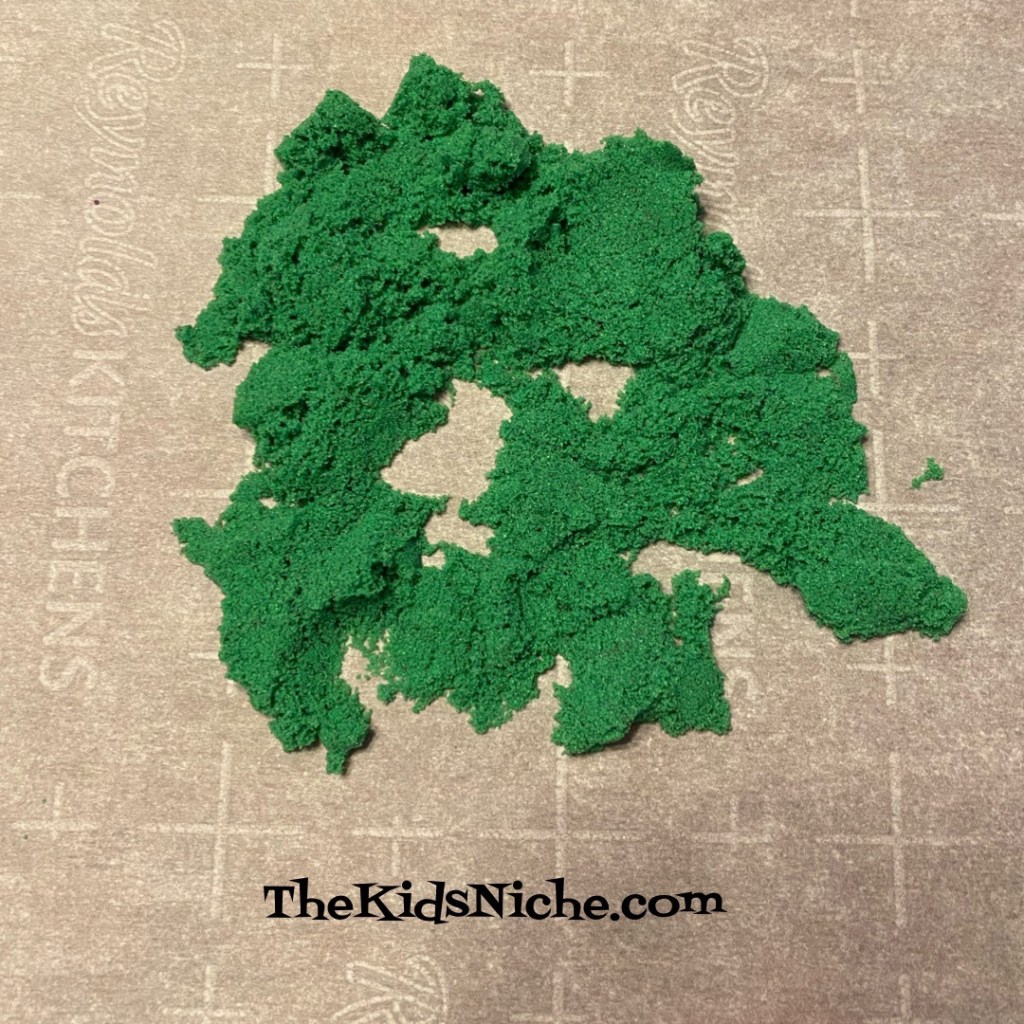
I taped a piece of parchment paper to our table before I started. I was able to separate the colors for the most part with a little bit of the colors mixing together.

This sand feels pretty cool and “smooshie”. It holds together much better than regular sand and it doesn’t stick to your hands. You can flatten it.

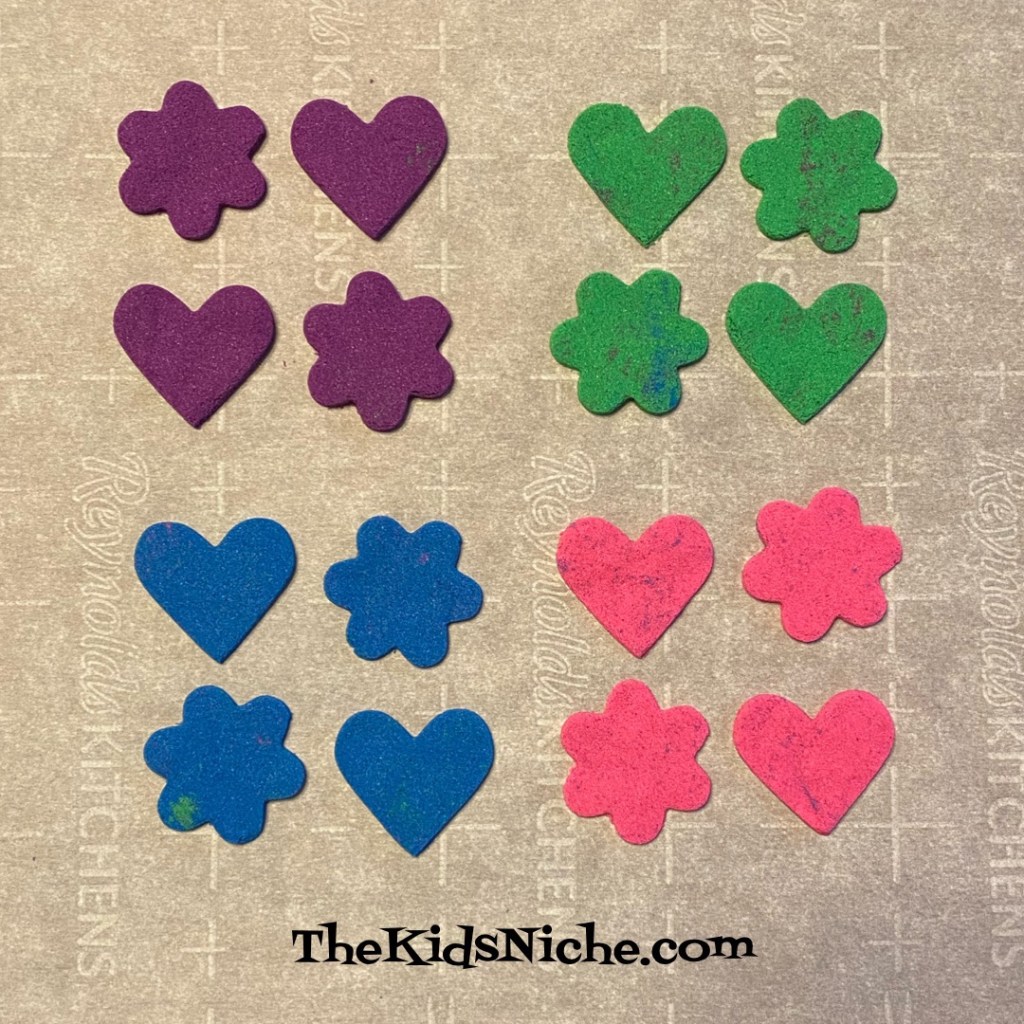
You can use a cookie cutter to cut out shapes.

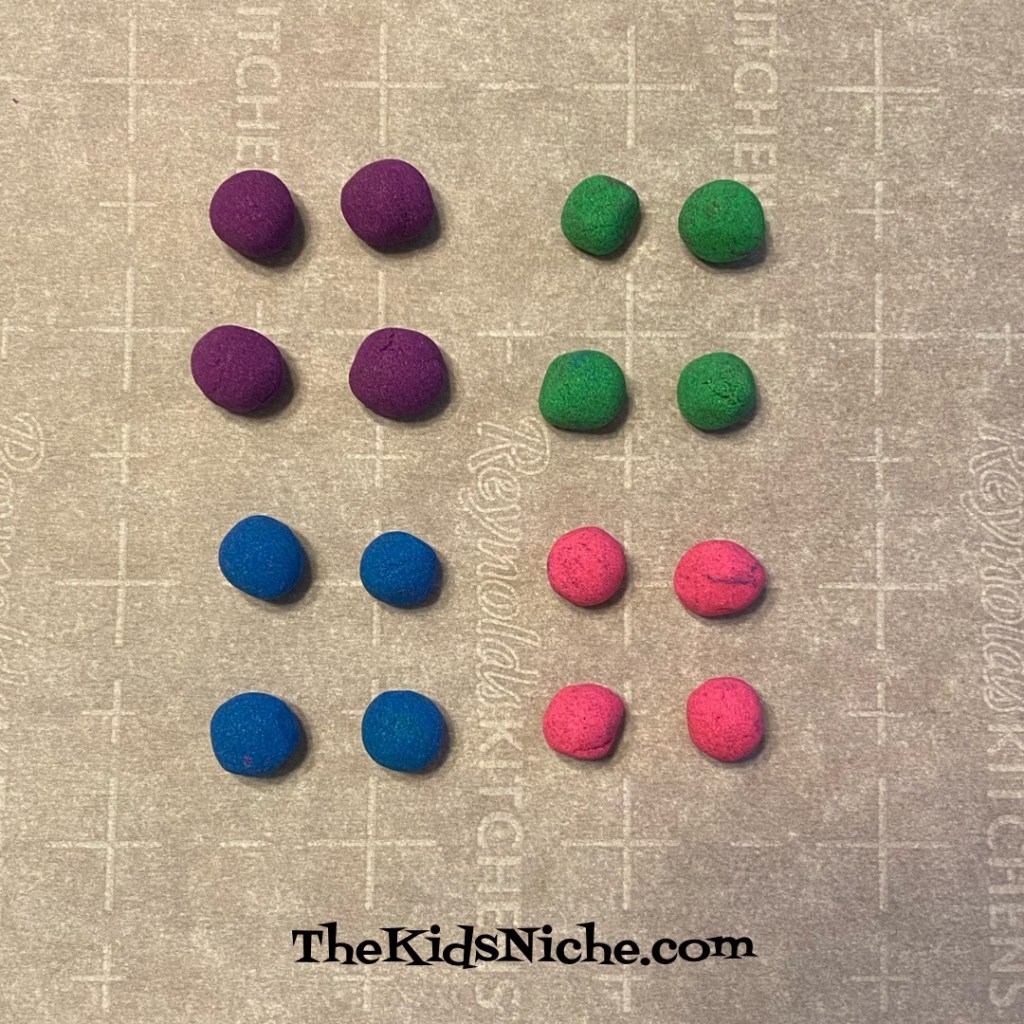
You can roll it into little balls…

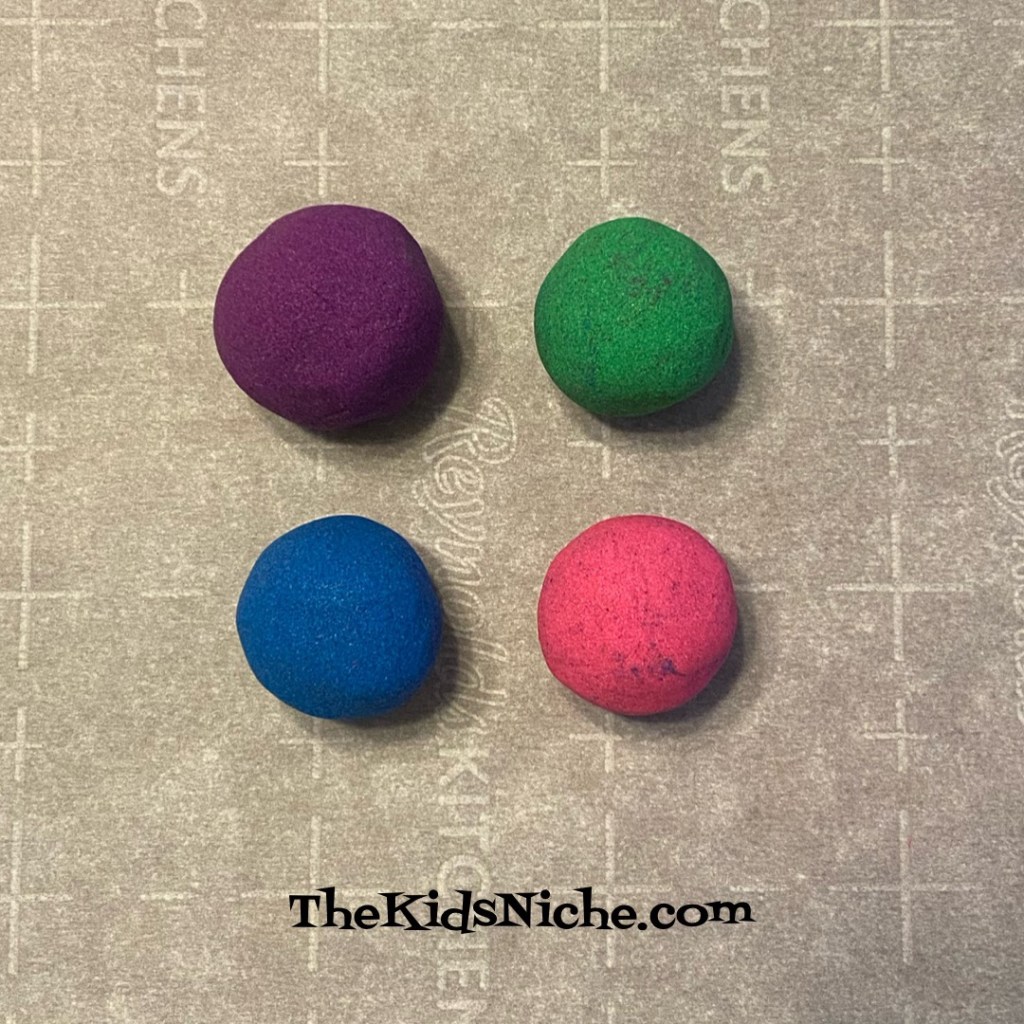
Or roll it into larger balls.

You can make snakes…

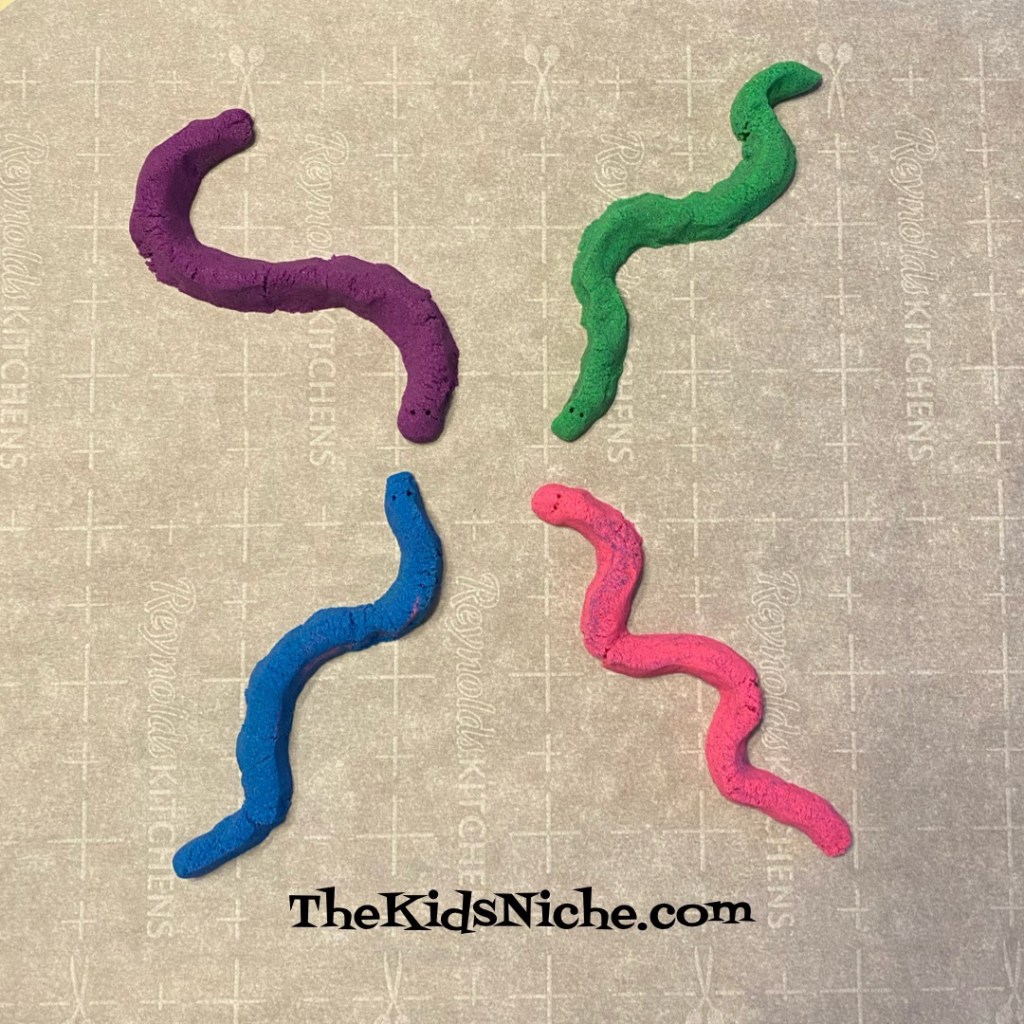
I used a toothpick to give the snakes eyes.

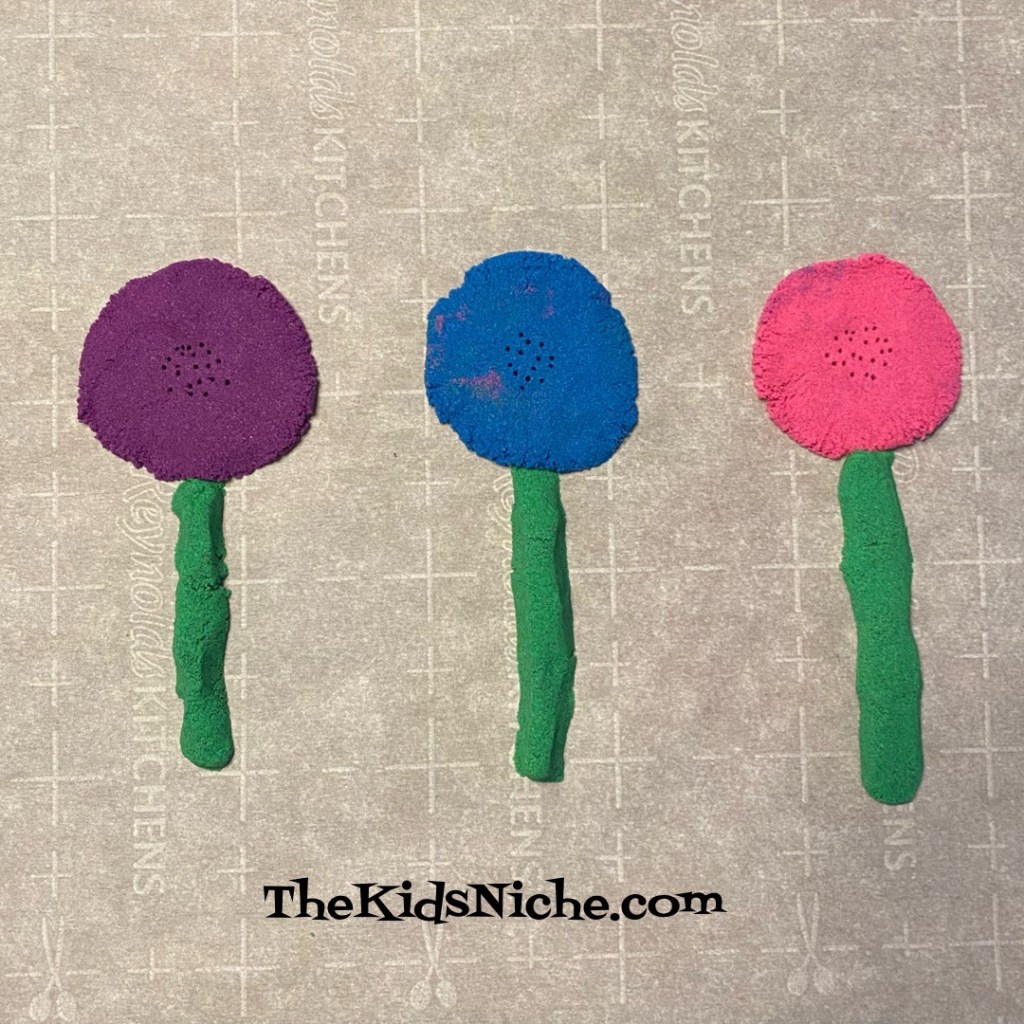
You can make flowers.

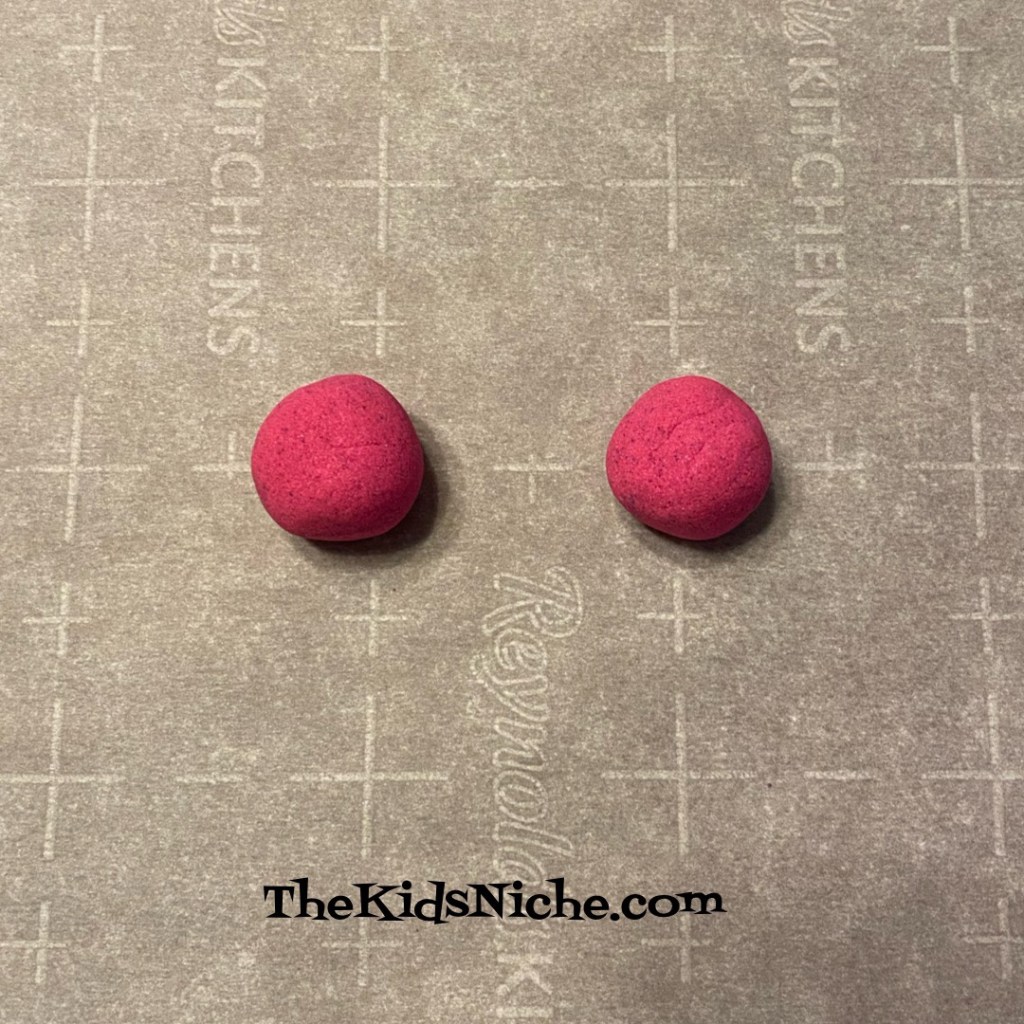
Or pretend to make peanut butter cookies by rolling little balls…

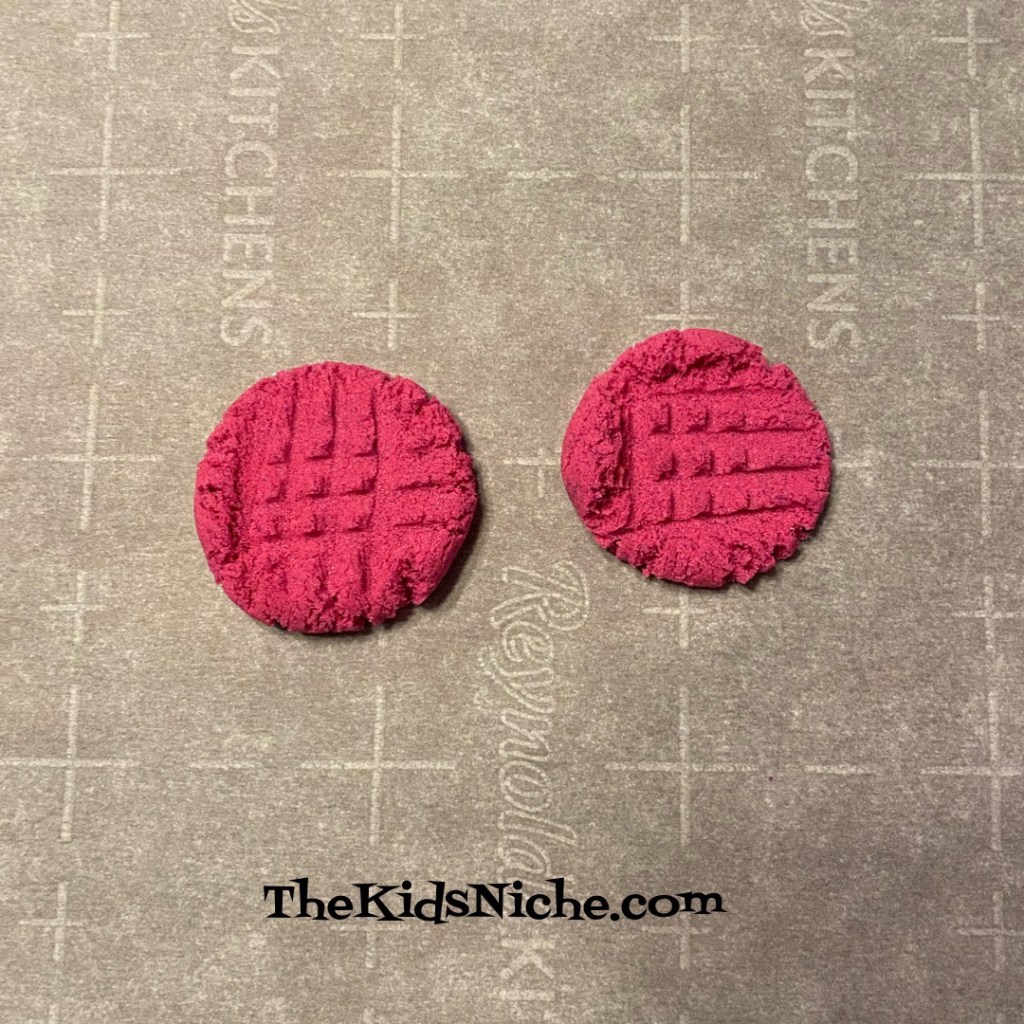
Using a fork to press a mark into the top…

And then crisscross a mark in the other direction.

If you want to hold the sand in your hand, it will crumble up nicely like regular sand does.

You can pack the kinetic sand into a cookie cutter…

And gently push it out of the cookie cutter and you’ll have a 3-D shape.

I’m guessing there are a lot of other things you can think of to do with kinetic sand so be sure you give it a try! 😃

Can You Spy Our Little Friends?

Just for fun today, I have 4 pictures for you to look at and see if you can spot a little animal friend or friends. The first one is the easiest one…here we go!

#1.) 5 little babies are in this picture. Can you find them all? (You can see part of a 6th one too.) (Baby chicks)

2.) Can you spot 1 little brown friend in this picture? I almost stepped on him before I saw him! (Baby toad)

#3.) This little yellow, white and black striped friend was crawling on one of my flowers. (Monarch butterfly caterpillar)

#4.) And now the tiniest of all our friends today! Can you spot him? He’s a smaller version of picture #3. (Monarch butterfly caterpillar)

Wasn’t that fun? Keep your eyes open when you are outside because you never know what little friend you might see! 🙂

More Toys on Clearance at Walmart!

When I made a quick stop at our local Walmart today, I found LOTS of things on clearance! Of course, since this blog is about kids, I checked out the toy clearance. 😉 There were too many things to mention even half of them, but here are a few that I thought had super good prices. Some prices are more than half off!

Cocomelon Deluxe Family House Playset. On sale for $19.00/normally $42.44!

Cocomelon School Time Deluxe Playtime Set. Sale price was $11.00/ normally priced at $26.88.

Googly Toss Game. Price today was $9.00/ regular price $23.88.

Baby Alive – 2 skin colors. Clearance price was $17.00/ normal price $25.97.

Jumbo Kickball Set. Sale price was $13.00/ regular price $23.88.

Baby Shark’s Big Show – Shark House Playset. On sale for $15.00/regular price is $32.44.

If you have been thinking about purchasing any of these item, RUN to your closest Walmart store and see if you can get them for a super price!! Christmas will be here before you know it! Good luck! 🙂

A Simple Tree for Kids to Draw

Hi there! Welcome to a new week of fun things for kids to do! Today I want to show you a way for kids to draw a cool tree.

All you need is a piece of paper and a brown crayon and several different shades of green crayons. You might want to start out with a smallish sized piece of paper, say, around 6″ x 9″. A full sheet of paper for this tree could take quite a while to finish and therefore lose your child’s attention.

Grab your paper and your brown crayon and here we go! Start by drawing the outline of a tree with a few main branches.

Color the tree trunk and branches with your brown crayon.

Add a few branches to each of the main large branches on your tree.

Then add a few more smaller branches to the medium sized branches you just drew. It’s fine if your branches overlap each other.

Switch to a green crayon. Color small little patches all over the tree branches. Don’t cover the entire tree because you will switch and use a few more shades of green to fill up your tree with leaves.

Switch to the second shade of green crayon and make some more small patches of green.

Continue adding small patches using as many shades of green crayons you have. Green color number 3…

Green color number 4…

And number 5… If you don’t have 5 different colors of green, just use as many different greens as you have. Continue making leaves until your tree is as full as you would like it to be.

Your tree can be finished now or you can add a few more details. Maybe you would like to lightly add some different shades of brown to your tree trunk and branches. Or maybe you would like a hole in your tree trunk for some animals to nest in. Some green grass around the bottom of the tree would be great.

Using a red crayon, you could add some tiny little red circles to your tree for apples. 🙂

And your tree looks wonderful! Great job! Remember, all the gazillions of trees in the world and none of them look exactly like another. 😉 Your tree is unique and is as wonderful as you are! 🙂 Have fun and maybe draw a whole forest of trees! 😉

Hide & Seek With ABC’s!

Here’s a simple game that can help your kids practice their observation skills, counting skills and learning the alphabet! All while having a treasure hunt and finding a prize at the end! 😉 You will need some paper (different colors or all one color will work), a marker, scissors and a prize. Cut the paper into 26 squares. Whatever size you want to do is fine, but I made mine 2 inches.

Once your paper is cut, write the letters of the alphabet on the squares – 1 letter on each square.

Prepare a prize for the end of the game before you actually start the game with the kids. You can just have the prize hidden somewhere they can’t find it or you can do like I did and make up a paper bag to hold the prize. I added colored dots to my bag just to spiff it up a bit.

The prize can be something simple that the kids will have fun with or a special snack, a new box of crayons, a small Lego set, etc. As you can see in the picture, I used bubbles.

Hide the letter papers around your house in places the kids can look for them. You can keep them all in one room or spread it out a little farther for kids that are a little older.

Maybe on the piano…

Or among the cereal boxes…

In the bathroom…

Maybe by their favorite books…

Have the kids go around and find all 26 papers. This uses their observation skills to find the papers and then they also practice counting the papers. 😉 Once they have all the papers, let them line them up in the correct order of the alphabet.

When they finish that, they have finished the game (or treasure hunt) and they receive the prize!

Tweak the game to work for your situation and your kids. Hope the kiddos will have fun while practicing some good skills! 😉

Lego Clearance at Walmart!

Yes, really! I was grocery shopping at Walmart and took a slight detour through the toy department and I discovered quite a few Lego sets that have been marked down with clearance prices! That’s always good, right?! So I took some pictures to share with you. 🙂 Note: There are some clearance prices for some Lego sets online too, but the in-store prices seem to be cheaper, for the most part.

LEGO CITY Stuntz sets. Not all the Stuntz sets were marked down so look carefully for which ones are cheaper. Fire Stunt Bike #60311, Demolition Stunt Bike #60297 and Selfie Stunt Bike #360309. $5.00/marked down from $7.97.

LEGO CITY Wildlife Rescue ATV #60300 and LEGO CITY Roadwork Truck #60284. $7.00/marked down from $9.97.

LEGO Friends Magical Caravan #41688. $25.00/marked down from $39.97.

LEGO Friends Olivia’s Electric Car #41443. $9.00/marked down from $12.00.

LEGO Friends Magical Acrobatics #41686. $13.00/marked down from $16.00.

LEGO Friends Pet Clinic #41695. $16.00/marked down from $19.97

LEGO CITY STUNTZ Stunt Competition #60299. $25.00/marked down from $29.97

LEGO STAR WARS Resistance X-Wing #75297 $17.00/marked down from $20.00.

LEGO Friends Forest Horseback Riding Center #41683. $45.00/marked down from $69.97.

LEGO CREATOR Ferris Wheel #31119. $64.00/marked down from $79.97.

LEGO Harry Potter Hogwarts Polyjuice Potion Mistake #76386. $13.00/marked down from $16.00.

LEGO Harry Potter Hogwarts Express #75955. $64.00/marked down from $80.00.

LEGO Disney Jasmine and Mulan’s Adventure #43208. $30.00/marked down from $39.97.

LEGO Disney Mickey Mouse & Donald Duck’s Farm #10775. $19.00/marked down from $29.97.

LEGO NINJAGO LEGACY Ultra Sonic Raider #71739. $64.00/marked down from $80.00.

LEGO MINECRAFT DUNGEONS The Jungle Abomination #21176. $30.00/marked down from $39.97.

LEGO MARVEL ETERNALS In Arishem’s shadow #76155. $49.00/marked down from 60.00.

LEGO INFINITY SAGA Avengers: Endgame Final Battle #76192. $54.00/marked down from $70.00.

There were more sets but that’s all I had time for. Remember, your store may have different LEGO sets on clearance than what our store does. Think ahead to birthdays and even Christmas presents! 😉 Happy shopping!

Taste Testing Tuesday #77 – Peanut Butter Rice Krispies Treats

Have you ever eaten Rice Krispies treats? The oh, so yummy snack/dessert made from Rice Krispies cereal, butter and marshmallows? Rice Krispies Treats have been a very popular treat for a long time now, so I’m guessing most of you have eaten them. Wikipedia says “Rice Krispies Treats were invented in 1939 by Malitta Jensen and Mildred Day at the Kellogg Company home economics department as a fund raiser for Camp Fire Girls.” Thank you, Malitta and Mildred!! 🙂

Some amazing Peanut Butter Rice Krispies Treats made an appearance at our 4th of July picnic this year (Thank you, Megan!) and I wanted to share this easy recipe with you.

You will need Rice Krispies cereal (6 cups), butter (1/4 cup), mini marshmallows (10 oz. package) and peanut butter (1/2 cup).

Melt the butter in a large pan on the stove using a medium heat.

Add the mini marshmallows…

Add the peanut butter.

Stir together as the ingredients begin to melt.

Keep stirring, over a medium heat, until all the marshmallows have melted.

Remove from the heat and add the Rice Krispies cereal.

Stir until well mixed.

Evenly press the mixture into a 9″x13″ greased pan. You can use a buttered spatula or wax paper to spread the mixture.

After it’s cooled a little, cut into squares and serve!! Oohh, yummy! 🙂

These treats are great to take to a potluck (which we did last Friday and they were a hit!). Or just having them for dessert or snack at home will make any day special!

You can find many other flavors of Rice Krispies treat to make by searching online. I even saw “Grilled Rice Krispies Treats! It’s a simple versatile recipe but loved by many! 🙂

Merry Christmas in July! Free Coloring Page!

Do you celebrate Christmas in July? If you do, (and if you don’t) here’s a fun free coloring page for the kids to do today for Christmas in July!

The free coloring page can be found on the Crayola website:

https://www.crayola.com/free-coloring-pages/print/surfing-santa-and-reindeer-coloring-page/?trk_msg=E6GSJ2303EBKT7IO4L2JE5OD98&trk_contact=AFE9GFT3EODCG383KJMRED10TC&trk_sid=T4C0GQ2K1S62856J0NCKA8UTGG&trk_link=8462ESN61E64T523A344GR4QTS&utm_source=listrak&utm_medium=email&utm_term=View+Surfing+Santa+and+Reindeer+free+coloring+page&utm_campaign=072322_Ecomm_ChristmasInJuly

(Click on the link, not on the “view page” button.)

Grab this freebie by printing it out and your crayons or markers and have fun coloring today! 🙂

From Chrysalis to Butterfly!

Hello and welcome to another adventure in the life cycle of the Monarch butterfly! Yesterday we looked at how the Monarch caterpillar changes into its chrysalis. Today we’ll see what happens when it’s time for the butterfly to emerge from the chrysalis. (Hang on until the end of this post for a video!) So just to remind you, here’s what the Monarch butterfly’s chrysalis looks like.

When the time for the butterfly to emerge is getting close, the chrysalis will start to turn a darker color and look black. Notice in this picture that one chrysalis looks green but the one in the background is black.

Here is a closer look.

Did you notice that you can see the butterfly’s wing inside the chrysalis? My pictures aren’t super clear because they are taken looking through the plastic container, but here is a picture taken with a flashlight shining on the chrysalis.

Whoa!! How cool is that?! The chrysalis is now very thin and you can see the butterfly! Next, the chrysalis starts to slowly open. Can you see along the left hand side that the chrysalis is splitting open?

Then the split becomes a little wider. The butterfly is hanging upside down right now and you can start to see its head coming out first.

The butterfly is dropping down a little lower now. You can start to see its legs that are folded up close to its head.

It’s now beginning to slide out of the chrysalis!

Sliding farther out…almost there! The chrysalis will stay attached to the top of the container as the butterfly slides down and out of it.

And it’s out! Look how big it’s body looks right now and how small and folded up it’s wings are.

The butterfly grabs a hold of the empty chrysalis and it will hang right side up now.

As the butterfly hangs on the empty chrysalis, it will pump fluid from its abdomen into its wings and the wings will begin to expand and the body will become smaller. This next picture was taken 5 minutes after the butterfly emerged or eclosed. Its wings are still wrinkled looking.

Then 10 minutes…it’s wings are looking straighter.

And then here is 15 minutes after emerging.

It takes a couple of hours for the butterfly to finish this process and for it’s wings to expand and dry off. They don’t need to eat right away so it’s good to give them time to dry off and to begin to flex their wings. After a few hours have passed, I carefully open the container and put my hand close to the butterfly and they usually climb onto my finger. And then it’s time to set them free outside.

Here is a video I took of the process of the butterfly emerging from it’s chrysalis. It is so amazing to watch this happen!

It has been such a rewarding experience for me to help these beautiful creatures along in their transformation from a tiny little egg into an amazing gorgeous butterfly! This is my fourth year of raising and releasing Monarchs and I hope I can continue to do so for many years to come! I hope you have enjoyed coming along with me on this journey! 🙂