Taste Testing Tuesday #50 Zucchini Bread

(Wow!!! We’ve shared 50 Taste Testing Tuesday’s with you!) If you live in the country and have a garden, you probably know all about zucchini bread. Maybe you buy zucchini squash at your local farmer’s market or grocery store. Recipes are all over the internet of things you can make with zucchini. My favorite thing to make is Zucchini Bread which, if you have never had it, is a sweet quick bread. Our family loves several kinds of zucchini bread and so I make a lot each summer and freeze loaves for the winter. For today’s taste test, we’ll look at some types of zucchini bread that we like.

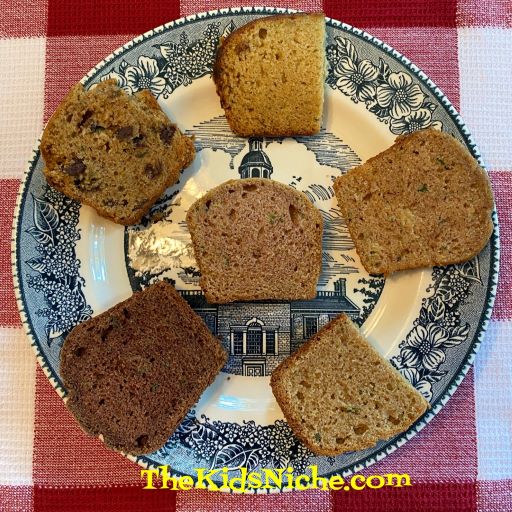
#1.) Zucchini bread. The original Zucchini bread, the one that all the others came from. (At least I think so. Lol)

#2.) Peanut Butter with Milk Chocolate Chips Zucchini Bread.

#3.) Maple Zucchini Bread (My hubby’s favorite!)

#4.) Pina Colada Zucchini Bread. (My favorite!) With crushed pineapple and coconut flavoring.

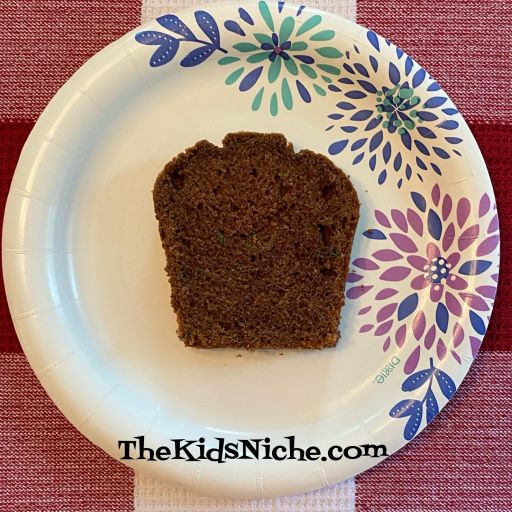
#5.) Chocolate Zucchini Bread. Made with cocoa.

#6.) Peanut Butter Zucchini Bread. Think of peanut butter cookies…mmmm!

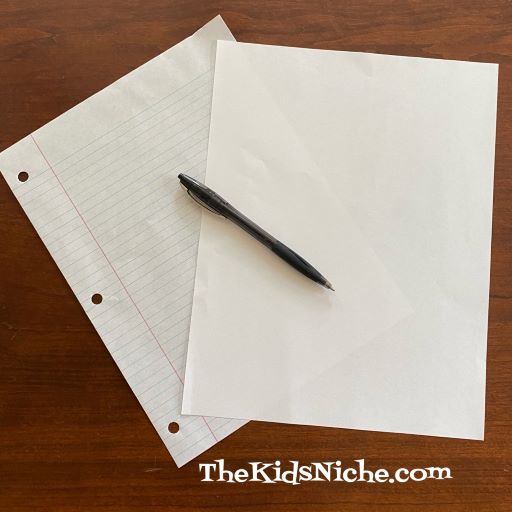
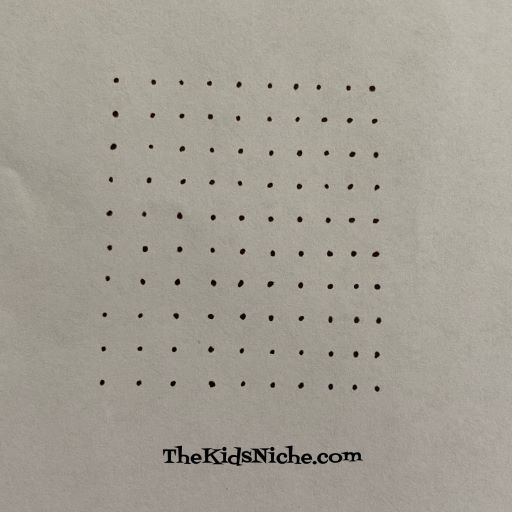
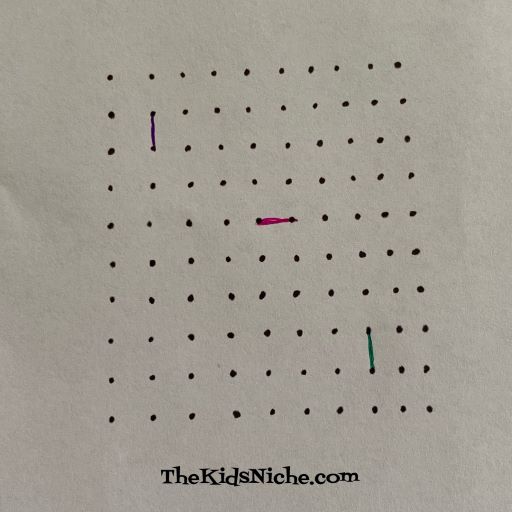
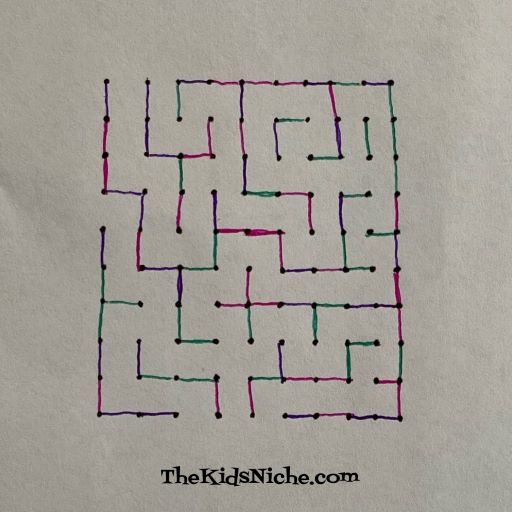
We took some pieces of each kind of zucchini bread and did a taste test on them. We made a simple chart and recorded what we each thought of each kind of zucchini bread. You can do the same thing. 🙂 A smiley face means “Yum!”, a straight face means “It’s ok.” and a frowning face means “No, thank you!” You can also leave a space on your chart for each person to write in their favorite zucchini bread.

I hope you’ll try some zucchini bread recipes and you will find some that your family can rate #1!! Good luck and have fun…and may your zucchini grow for a long season! 😉

Happy Coloring Book Day!

Yes, my calendar says it’s Coloring Book Day. So get out your favorite coloring books and crayons or markers or colored pencils and have some fun coloring. 🙂

What is your favorite kind of coloring book? I’ll share some of the coloring books we have to give you some ideas of what you might like.

How about a book that’s just for coloring?

Or maybe one that has activities to do and also has stickers to use?

There are some coloring books that teach you about the colors.

Oh and coloring books with dot-to-dots to follow first! Isn’t it fun to be surprised when you see what the picture is after you follow the dots in the right order?

There are also books that are color by number where they tell you what color to use for each numbered space. I’ve always liked these!

And for older kids and even adults there are coloring books they can enjoy! Here’s one that looks like a stained glass window when you color it.

And one of my favorite coloring books that I own is a color by number but for adults because it’s too hard for little kids. You really can’t tell what these pictures are until you color them.

And one more really cute coloring book for big people. 😉

Whatever kind of coloring book you enjoy, I hope you will take some time to relax and do some coloring today to celebrate Coloring Book Day! 🙂

Anti-Stress Lavender Play Dough

We hear a lot these days about stress and how much it negatively affects us. Even kids are dealing with stress. I came across a recipe I had stashed in a drawer for Anti-Stress Lavender putty. (Sorry but it doesn’t say who posted the recipe and I don’t remember where I got it.) Kids love play dough and the lavender essential oil used in this recipe is good to use for calming little people. (And big people!)

So here is my version that I made today. You’ll need 1/2 Cup of flour, 1/4 Cup salt, 4 1/2 teaspoons of cream of tartar, 1 1/2 teaspoons of oil (almond, canola or coconut), 1/4 Cup boiling water and lavender essential oil.

In a medium size bowl, put the flour…

Salt…

Cream of Tartar…

And oil, then start mixing.

Add in about 5 drops of the lavender essential oil, then mix a little more. If you want a stronger scent, add a few more drops.

Add the boiling water and stir. To finish mixing it all together, I dumped it out on the counter top on a piece of wax paper and kind of kneaded it.

You can add a little more water or flour as needed to get the consistency you want. I needed a little more water. You can also add in glitter but that was more mess than I wanted! LOL It makes a nice soft and easy to shape fragrant playdough.

It’s ready for little people hands and playing! 😉 The idea is that the lavender will help to give the kids a calm feeling while they play. The play dough can be stored in a ziploc bag and should keep for a few months. This is my first batch so I can’t really say how long it will last.

I hope you’ll give this idea a try and that you’ll have great results with it! Think relaxing thoughts as you breathe in the lavender! 🙂

Dots and Squares Game

Here’s a fun game to entertain the kids even if all you have with you is a pen and a piece of paper. 🙂 We’ll call it Dots and Squares Game.

The first thing you’ll do is to make 100 dots on your piece of paper, in 10 rows of 10 dots each. If you want a little help to keep the dots in line, you can use a lined piece of paper behind a plain piece so you can see the lines showing through on the top paper.

Hanging both pieces of paper on a window also helps to see the lines more clearly.

10 dots down the side and 10 dots across…

Keep going…you’re getting there. It doesn’t take as long as it sounds like it will take when you say “100 dots”. 😉

Presto! There we are!

The game can be played with just one pen being passed around to each player or you can use a different colored pen for each person. (Or use a pencil.)

The idea of the game is to make the most squares. Each person takes a turn drawing ONE line, either horizontally or vertically, between 2 adjacent dots. (No diagonals.)

Play continues this way while each player tries to NOT add the third side to a square because if you do, that means the next person can make a square.

Eventually the game board gets so full that someone HAS to add the third line. Can you spot the place that is ready to be closed off into a square? Hint: look on the lower right side.

In this game, Jasper was the first one to make a square. When you complete the fourth side of a square, you get to claim that square as yours and add your initial to the square. These are the names and initials we used for our example game:

So you can see the J in the box in the bottom right corner of the game board. When you finish a square, you get to take another turn. And sometimes you can make only 1 square, but sometimes you are able to make a LOT of them! When Jasper played his bonus move, he set it up so that Rick was able to make a square on his turn.

Play continues in this manner until the entire game board has been made into squares and claimed by the player making each square.

Count up the squares for each person and see how many squares each one made.

The player with the most squares wins the game!

It’s a great game to play to keep the kids occupied while you are somewhere waiting for someone or in a restaurant waiting for your food to be served. Tuck a little tablet into your purse or pocket along with a pen and you’re ready to go! Have fun!

Taste Testing Tuesday #49 – No crusts, please!

“But Mom, I don’t like the crust on my sandwich!” Have you heard that one? I’m guessing a big percentage of moms have! LOTS of kids don’t like the crust on their sandwich. So you can…#1.) Make them eat it anyway, #2.) Cut the crusts off OR #3.) Buy Uncrustables! What is an Uncrustable? A sandwich with no crusts! Brilliant invention, right? What mom isn’t looking for a simpler, more peaceful way to have lunch sometimes?! So for today’s taste test, let’s see what the kiddos think of Uncrustables. (I can’t eat most kinds of bread because of a food allergy, so I couldn’t actually participate in the taste test this week.) I found 3 flavors of Uncrustables at our local grocery store.

#1.) Peanut Butter and Grape Jelly. Mmmm! 🙂

#2.) Peanut Butter and Strawberry Jam. (This would be my favorite!)

#3.) Chocolate flavored Hazelnut Spread.

If you’ve never seen these before, they are in the frozen food section. So are these super tasty? Are they better without the crust? Inquiring minds want to know!! 😉 Which is your favorite? I’d love to hear what your opinion is! Have fun and SMILE, kids, because there are no crusts on these! LOL 🙂

Extra note: After some research online I see that there are more flavors of Uncrustables than I found and some even have meat in them! Also, there are a gazillion youtube videos that show you how to make your own! 🙂

Monarch New Beginnings

It’s that most wonderful time of the year again! No, I’m not talking about Christmas. It’s the time of year when the Monarch butterflies have come back into the United States from wintering over in Mexico. The females are laying eggs on their favorite plants and people all over are doing their part to help the Monarch caterpillars survive to become butterflies. The number of Monarch butterflies has greatly declined over the last decade. It’s a great feeling to know you are helping to preserve these beautiful butterflies! And so, let’s take a peek at how the process gets started. Monarchs like the Milkweed plants and the female Monarch butterflies will lay their eggs on Milkweed. Here are a couple types of Milkweed that grow around where we live in Ohio.

Common Milkweed. This plant will grow wild along roadsides and its fun to watch as you travel around and see how many Common Milkweed plants you can find.

Swamp Milkweed. This plant I purchased from a greenhouse and planted in my flowerbed in hopes of bringing the Monarch butterflies close by where we could see and help them.

Butterfly Milkweed. This plant I also bought at a store and planted in my flowerbed in hopes of drawing the Monarchs here. Aren’t the little orange flowers so pretty?

When you see these types of milkweed plants, look at the leaves and see if you see any Monarch caterpillars crawling around on them. They are often on the under side of the leaves. What does a Monarch caterpillar look like? Here is a picture of some Monarch caterpillars that are partially grown.

But I’m getting the cart before the horse! Whoa, back up there! When you see milkweed plants, not only should you look for the Monarch caterpillars, but you should look for their eggs. They are usually on the bottom side of the leaves too. They are super tiny so they are easy to miss seeing. Can you find the egg in this picture?

Yep, that little dot on the leaf over on the left hand side of the picture is a Monarch caterpillar egg. 🙂 We’ll call the egg the first step in the process. So the next step is when the egg hatches. The caterpillar that hatches from that tiny egg is so small it can be very hard to see it. I tried to take a close up picture of one that had just hatched. It’s rather hard to make it out, but that black dot is the caterpillar’s head.

The baby caterpillar will first eat the egg it hatched from and then they will look around for some milkweed to munch on. Milkweed is the only plant that a Monarch caterpillar will eat. There are 4 caterpillars in this next picture. Can you find all 4? 2 of them are super little! The other 2 have been around for a few days.

Here is another picture of a caterpillar that is really small, but bigger than the newly hatched ones. You can also see 3 more caterpillars that are older.

So now you know what plants to look at to see if you can find any Monarch caterpillars or eggs. And you know how super super tiny they are when they hatch. We’ll take a look at watching them grow on another day’s blog post. Happy hunting! 🙂

Cute Fishing Number Game

I made a quick run to Walmart yesterday and I found this cute fishing number game for only $3.00.

Each fish is a different color and has a certain number of dots on it. There are fish with dots that number from 1 to 10. (I just realized that the fish in the picture are NOT in the correct 1-10 order! Lol That little pink fishy swam out of line!)

The little fishing pole has a magnet on the end and each fish has a little strip of metal on the backside of it. The idea is for your child to use the fishing pole to catch a fish and then say what color the fish is and/or count how many dots the fish has.

I added one thing to this game. I wrote the numbers on the backside of each fish so the kids playing can also see the number written to help them learn what the numbers look like.

A small red bag for storing all the fish and the fishing pole is included in the set.

Little ones will have fun going fishing for these colorful fish and be learning at the same time. 🙂 I hope these are available at your local Walmart store too. Have fun and while you’re at it, sneak in some learning! 😉

A Shaving Cream Treasure Hunt

Ok, that title sounds rather crazy, doesn’t it? Well, it just might be! Lol I saw this idea in a magazine a while back, but we just tried it out today. The most important thing I can tell you about this activity is…#1.) Do it outside and #2.) Put swimming suits on the kids first! Ok, now that we have that out of the way, here’s how it works:

Grab a dishpan, some little washable toys and a can of shaving cream.

Put a little shaving cream in the bottom of the dishpan, then add some of the toys.

Add more shaving cream, then more toys until all the toys have been added. Make sure to end up with shaving cream on the top.

Now comes the part where you go outside! Have your water hose handy! Haha! Tell the kids how many toys are in the tub and let them go digging for them. (This will be the shortest time of the whole activity!) 😉 Let them wash the toys off with the hose.

The next part is where it can get a little crazy so it’s your call just how far you let this proceed. Kids and shaving cream just kinda automatically lead to shaving cream finding its way to a lot of other places besides the dishpan.

Haha! If we had thought of the swim suits earlier, we could have just hosed them down when they were done playing. 😉 But that’s part of summer fun, right? Making messes outside and playing in the water when you’re done! A special thanks to this sweet, tolerant mama for letting her kids try my crazy ideas! I hope you’ll give this a try! Your kids will be glad you did! 🙂