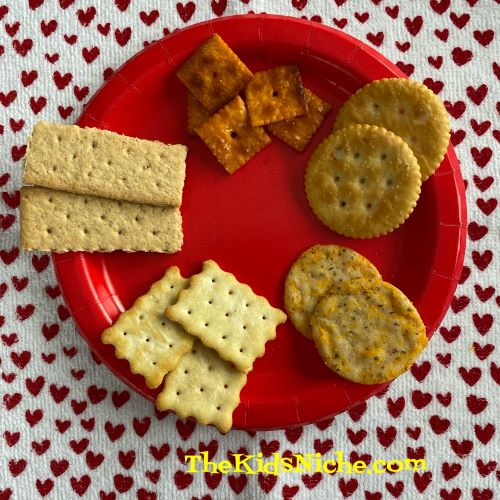
Hi everyone! How’s your Tuesday going? Kids going bonkers? Here’s a fun way to get them to sit still for a few minutes! Today’s Taste Testing Tuesday is all about crackers! So round the kids up for a quick silly snack and let’s get started! You can use whatever crackers you have on hand. Here are the 5 we taste tested.
#1.) Chicken in a Biskit
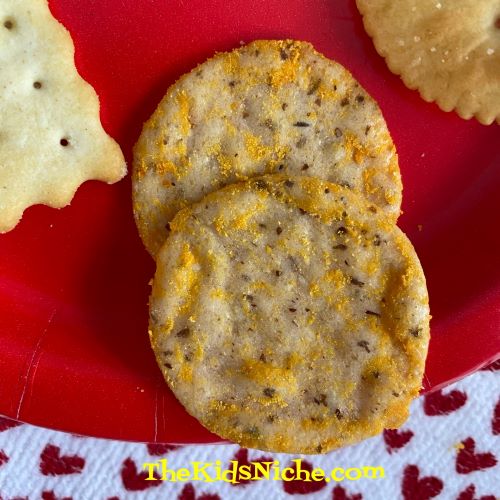
#2.) Almond Nut-Thins Cheddar Cheese
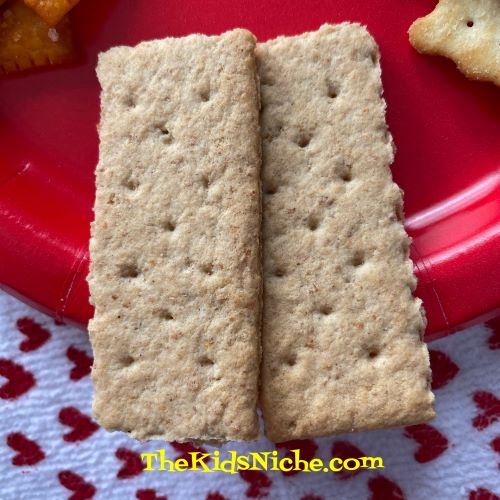
#3.) Honey Maid Graham
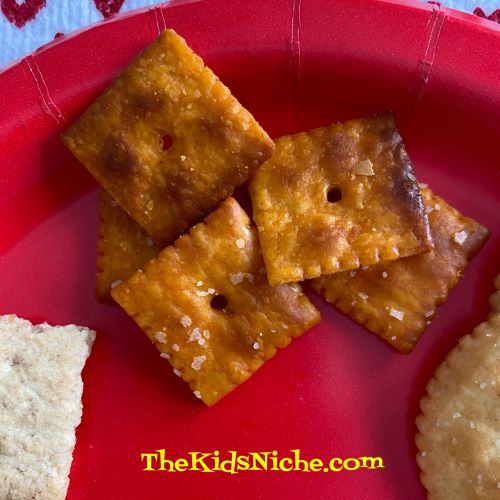
#4.) Cheez-It – there are many kinds of Cheez-It crackers but I love the Extra Toasty ones.
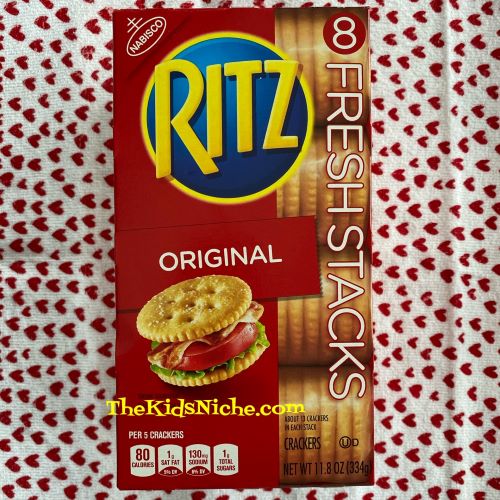
#5.) Ritz
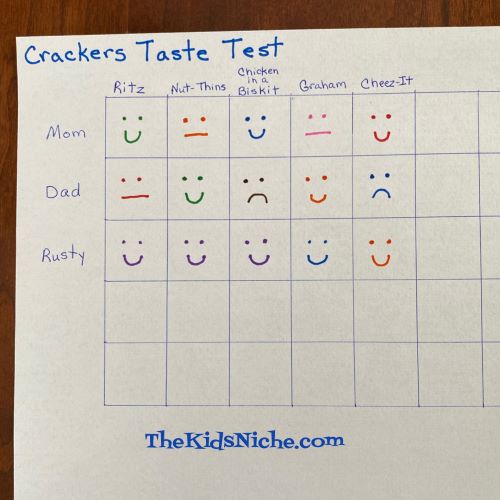
For added fun, draw a quick chart…nothing fancy…with a place for each person’s name and across from their name a place to draw a face for each kind of cracker. Something like this maybe:
After they taste each cracker, let them draw in a face that describes what they think of it. A smile means yummy! A straight mouth means it’s ok, but not amazing. And a frown means no thank-you!
Did you notice that Rusty liked ALL of the crackers? Wow! Oh, yea, Rusty is a dog so that might explain it. Haha! 😉 I hope you have fun with our latest Taste Testing Tuesday and you find some crackers that you really like!
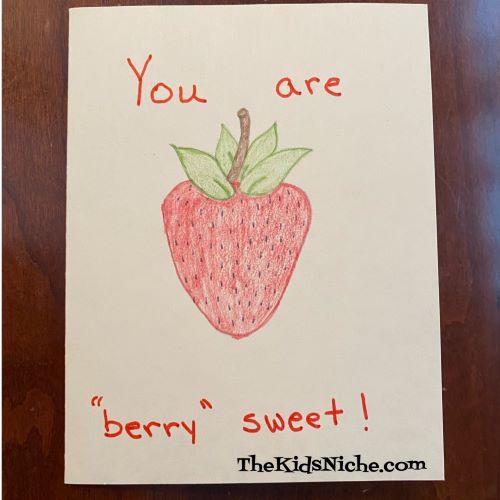
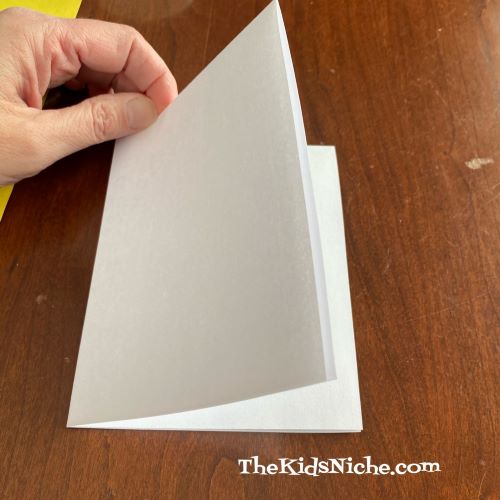
We’re back with another idea for a Valentine card kids can make. This one involves strawberries and blueberries. Ready? Grab a piece of paper or a blank card, a pencil and colored pencils or crayons and some markers. Start with a half a sheet of paper, cardstock or construction paper.
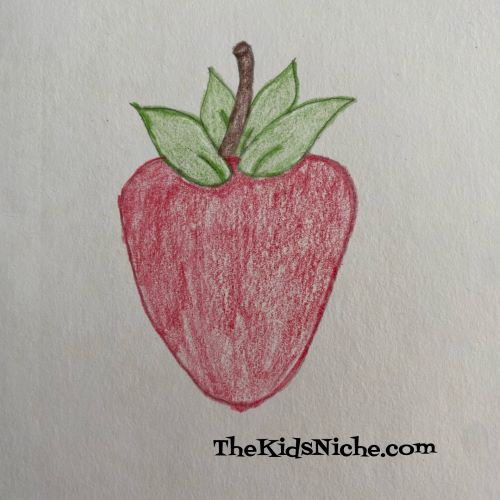
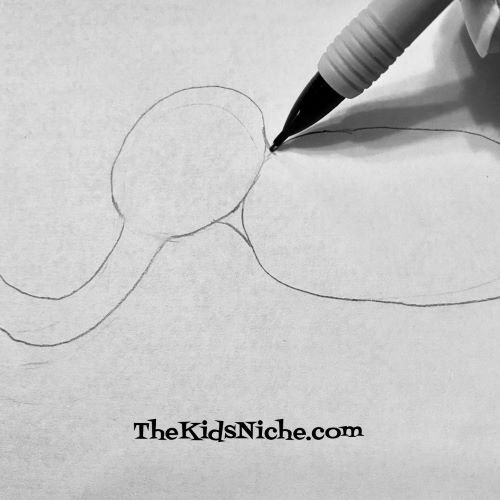
Fold it in half to make it card-sized. On the front of the card, we’re going to draw a strawberry. Start out by drawing this shape.
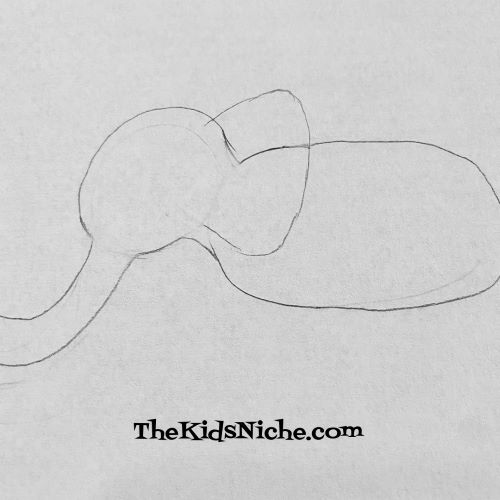
Next, add some leaves and a stem.
Use your colored pencils, markers or crayons and color the strawberry. I used colored pencils.
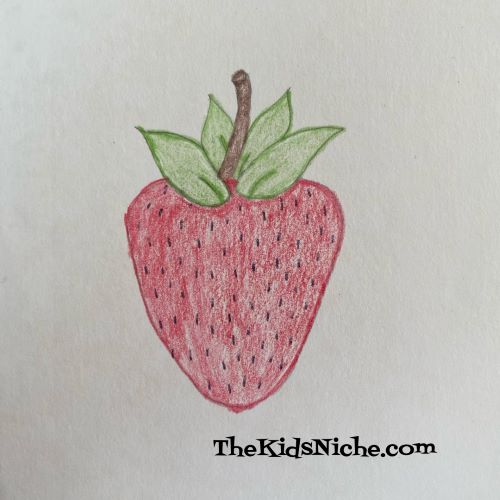
Looking good! Now make some tiny little lines for the seeds on a strawberry. I used a black pen to draw mine.
Your strawberry is finished! Now add the words, “You are “berry” sweet!” to the front of the card.
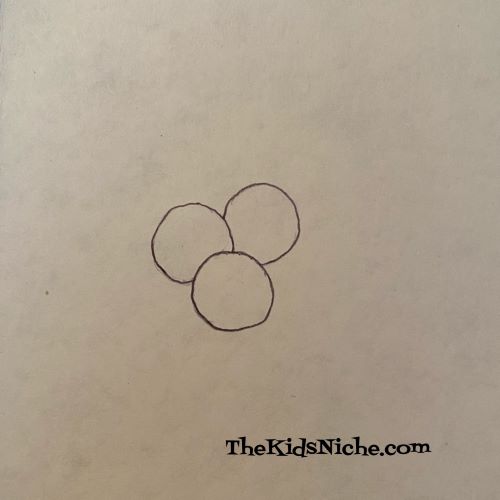
Open the card and on the inside right hand side, let’s draw some blueberries. I drew 3 but you can draw however many you like. Start with a circle and then add 2 more circles that are partially hidden behind the first one.
Add one small circle inside each of these circles. Then add 5-6 almost triangles to the little circle.
Color the blueberries. You’re almost done! Add the words, “Have a “berry” Happy Valentine’s Day!”
Great job! Who will you give your handmade Valentine to? Remember to sign your name. I hope you’ve had fun making this “berry” nice Valentine’s Day card! 🙂
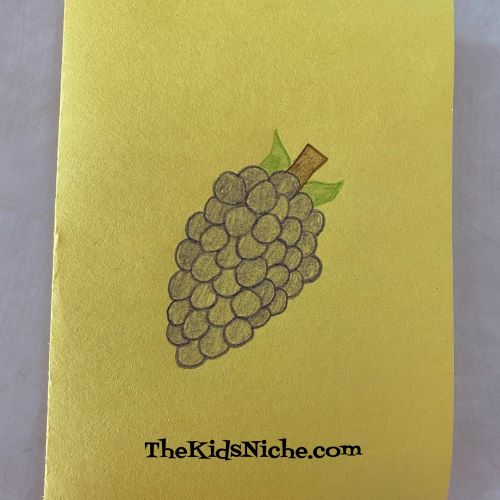
We’re coming at you today with another fun card that kids can make for Valentine’s Day. All you need is a piece of paper, colored pencils or crayons and a black marker.
My paper is construction paper so I cut it in half.
Take 1 of the pieces and fold it in half to make a nice size for a card.
Now draw a bunch of grapes on the front of the card. Draw circles and partial circles to make the grapes. I used a purple colored pencil but grapes can be other colors too.
Keep drawing and coloring in the grapes until you like how big your bunch is.
Add a brown stem at the top of the grapes.
Use green to draw in a couple of leaves.
Now add a simple face. I used a black marker to draw 2 dots for eyes and a curved line for a mouth.
Add the words “I love you a “bunch”! ” at the bottom of the card.
Open the card and on the right hand side, draw another bunch of grapes like you did on the front of the card. Write the words at the bottom…”Have a “grape” Valentine’s Day!”
Remember to sign your name. Give it to someone special on Valentine’s Day! I hope you enjoyed today’s craft! Have a “grape” weekend! 😉
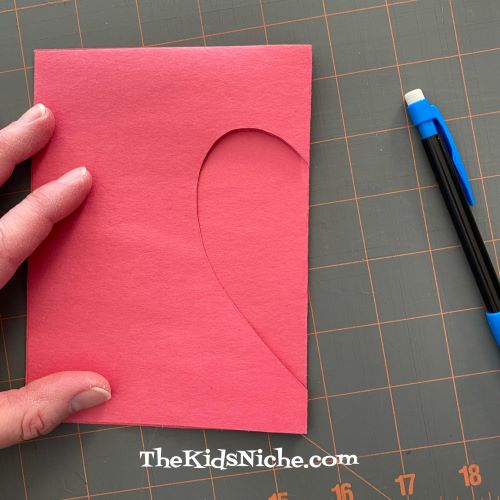
We’re back with another great Valentine’s Day craft project! If you saw yesterday’s post about a tissue paper heart activity and you saw that I suggested you save the stencil looking part of that project for another project, this is it!
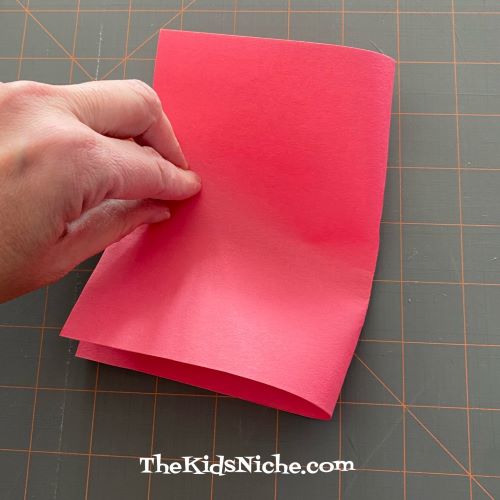
If you didn’t see that post, what you need to do is cut a piece of construction paper in half. Then taking one of those pieces and fold it in half.
Draw half of a heart shape on the folded edge of your paper. Then cut along the line you drew. When you open it, you will have a heart. 🙂 For this project, we will be using the piece with the heart cut out, but you might want to save the heart to use it for something else.
For today’s project, you will need another half sheet of construction paper, a pencil, scissors, glue and several different colors of tissue paper. First cut a 1″ wide strip from each color of tissue paper. You will need only a short piece of each color. (I had a lot left over!)
Now, take the half piece of construction paper and fold it in half. Lay the first stencil on top and trace the half of a heart on the fold like you did for the first one.
Cut out the second heart so you have 2 matching pieces.
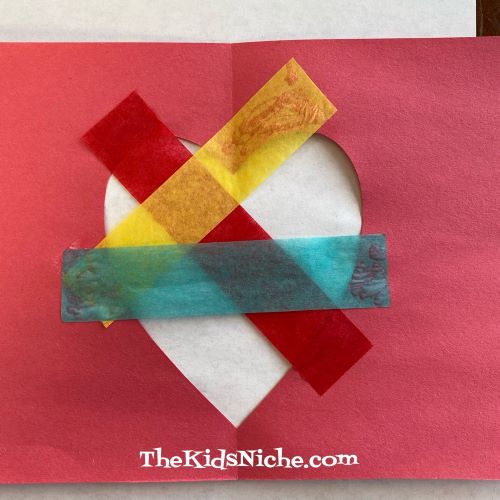
Unfold the 2 pieces. Place the side that you drew on facing up. This will become the backside of the stained “glass” heart. Using the strips of tissue paper, lay one across the heart opening and glue the ends down.
Take additional pieces of the tissue paper strips and place them, one at a time, in different directions over the heart opening…and glue the ends down.
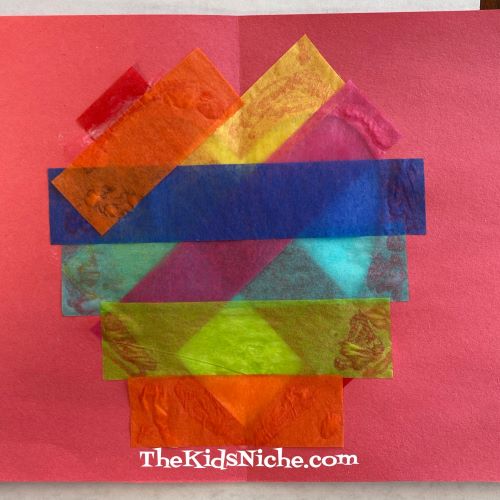
Add a few more strips…
Keep adding strips until all the open spaces of the heart have been covered with tissue paper.
Take the other piece of construction paper you cut the heart out of and apply glue as it is shown in this picture.
Place it on the paper you have been gluing the strips to so that the edges meet and the 2 hearts match up. This will cover up all the ends that you glued down and allow the light to shine through the heart cutout. And there you have it! You’ve made a stained “glass” Valentine heart! Put it up to a window and look how pretty it is when the sun shines through the heart!
Doesn’t that look nice? Make as many as you like (Or as many as your parents will allow!) and put them close to your windows to make your house look festive. 🙂 You could also make a hole at the top and put a piece of string through so you can hang up your stained “glass” art. I hope you had fun today! Check back for more Valentine’s Day ideas soon!
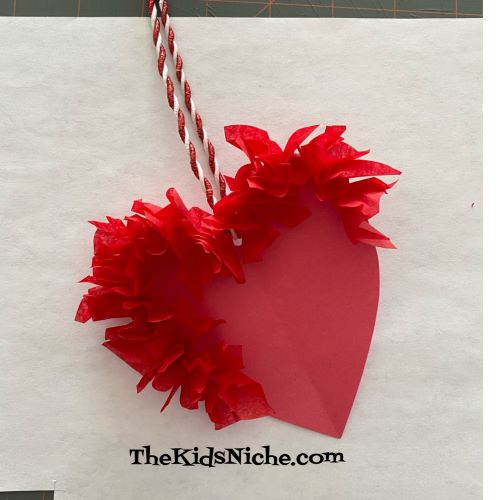
Are you ready for another fun Valentine’s Day project? Let’s make a really pretty 3-D heart!
You will need some construction paper, red tissue paper (or the color of your choice), scissors, glue, a piece of string and a pencil with an eraser.
You will need to cut approximately 75 little squares of the red tissue paper. I cut mine about 1 1/2″ square. They don’t need to be perfect because the paper will be “scrunched up”. Any smaller than that could be difficult to work with. If you have a cutting mat and a rotary cutter, this part will go much quicker, but scissors work fine. 🙂
Take HALF of a sheet of construction paper and fold it in half.
Drawing on the folded edge, draw half of a heart shape.
Sorry, that’s rather hard to see. Cut out the half -heart shape and you will have a whole heart when you unfold it.
Set aside but save the piece that looks like a heart stencil for a project we will do another day. 🙂
Your finished heart can be added to a card, have a magnet attached to the back or be made to hang up like an ornament. If you would like your heart to hang as an ornament, now is the time to add a hole at the top. Go ahead and put your string through the hole because it will be harder to do later. (I found that out the hard way!)
You are now ready to start using the tissue paper squares. Take 1 square and your pencil with an eraser.
Place the pencil eraser in the middle of the square of tissue paper.
Wrap the tissue paper down around the pencil end.
Apply a very small amount of glue to the tissue paper at the end of the pencil eraser.
While holding the tissue paper onto the pencil end, place the tissue paper onto the heart you cut out. Start out close to the outside edge of the heart.
Hold in place for a few seconds, then carefully pull the pencil out leaving the tissue paper on the heart. Continue adding more pieces of tissue paper in the same way.
Keep adding…you’ve got the hang of it now!
The closer together you put the tissue paper pieces, the fuller your heart will look. Try to get the pieces right up against each other where they attach to the heart. If you like, you can just make an outline of the heart with the tissue paper.
I like it better when the entire heart is filled up. It will take a little more time but it will be worth the effort.
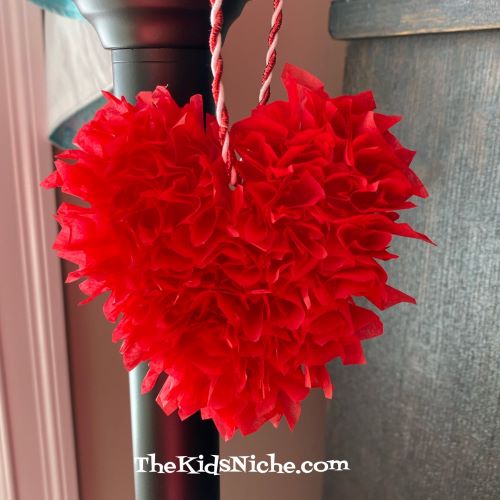
You did it! Isn’t that a pretty ornament to decorate your house for Valentine’s Day? I think it would be really pretty to use more than one color of tissue paper. If you used red, white and pink, wouldn’t that look nice? I hope you’ve enjoyed this Valentine activity! I’d love to see your hearts, if you care to share them!
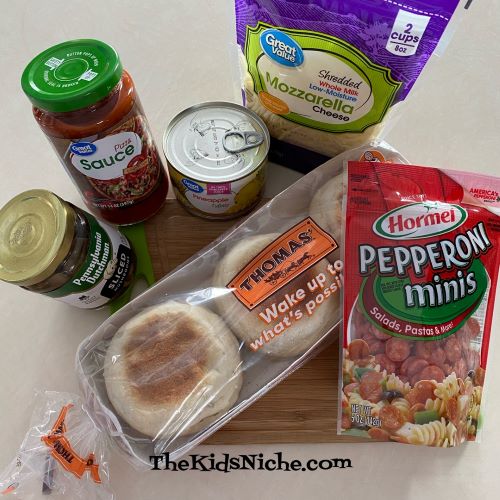
Does your family love eating pizza but its hard to buy one because everyone likes different toppings? I hear you! Enter English Muffin Individual Pizzas! This is the fastest way you will ever make pizza at home and everyone can have the toppings they want! Let’s take a look at what you need for today’s Taste Testing Tuesday: some English muffins, pizza sauce, mozzarella cheese and your favorite pizza toppings like pepperoni, mushrooms, onions, peppers, ham, pineapple, black olives, etc.
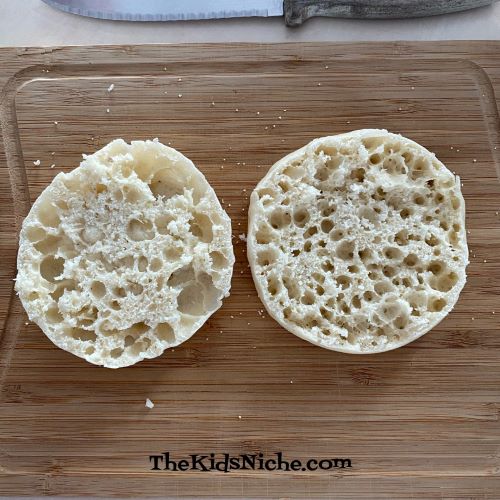
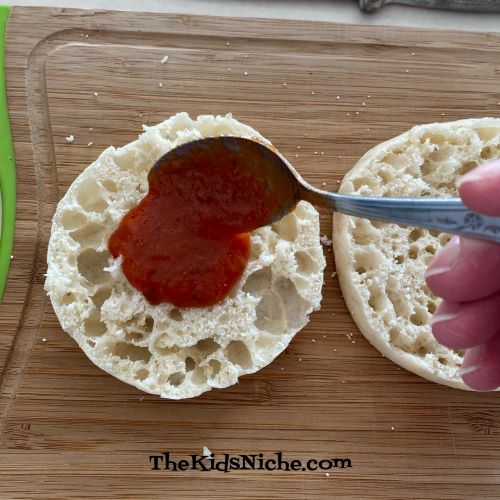
Start by cutting an English muffin in half.
Spread each half with pizza sauce. (Or some people use spaghetti or pasta sauce.)
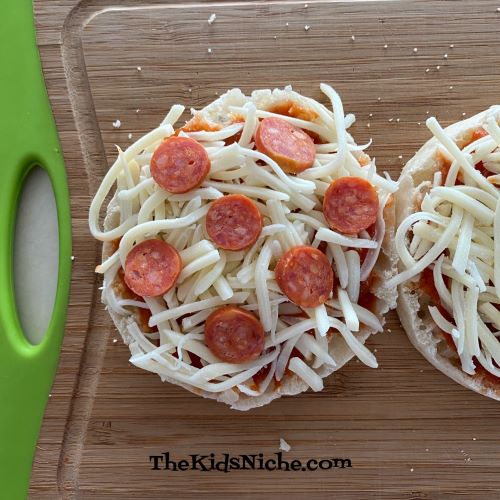
Top with mozzarella cheese.
And now for the toppings! Let each person add whatever toppings they like to their personal little pizza. Here’s one with mini pepperoni slices…
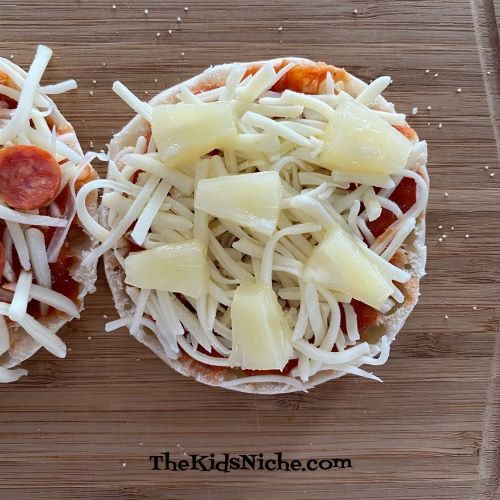
One with pineapple tidbits…
One with pepperoni and mushrooms…
And one with extra cheese.
Now your pizzas are ready for the oven. Special tip: cover your cookie sheet or pan with aluminum foil and cleanup afterwards will be a breeze! 😉
Bake at 375 degrees for 10-15 minutes until the cheese melts and begins to brown just a little. Remember, ovens differ so keep an eye on your pizzas.
Don’t they look scrumptious?! They are! 🙂
Except for cutting the English muffins in half, this meal is a great one for even really young kids to make. Even teenagers can have fun making their own pizzas. Have fun and I hope your bellies are smiling when you finish! 🙂
I love this idea! Many years ago, I worked at a nursing home and I know the residents would have just loved this! Thanks to Lynn Carver-Quinn who shared this on Facebook.
We made it through January 2021! Whoohoo! Welcome to February! What is the most fun thing that happens in February? I think it’s Valentine’s Day! I hope we can share lots of ideas of fun things to do that center around Valentine’s Day. Today’s fun is an activity making a Valentine’s Day card involving pears! Pears? Yep, pears! 🙂 You’ll need 1 piece of white paper, (printer paper is fine) 1 piece of yellow paper or a yellow crayon or marker, glue, some markers or crayons and a pencil.
Let’s start by folding the white paper in half.
Then in half again the other direction.
This is your card base.
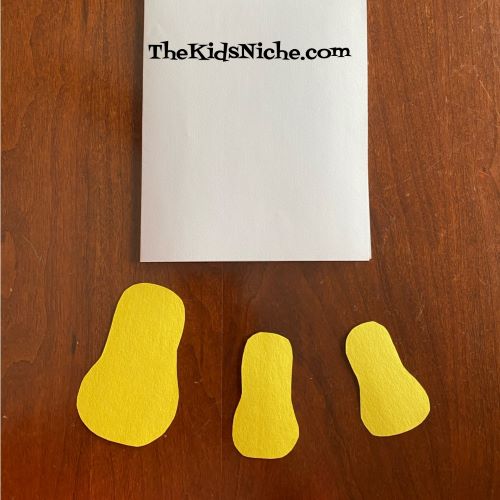
Using your yellow paper, lightly draw 2 small pear shapes and 1 larger pear shape. The larger pear shape needs to fit on the front of your card.
Cut out your pear shapes and get ready to put your card together. 🙂
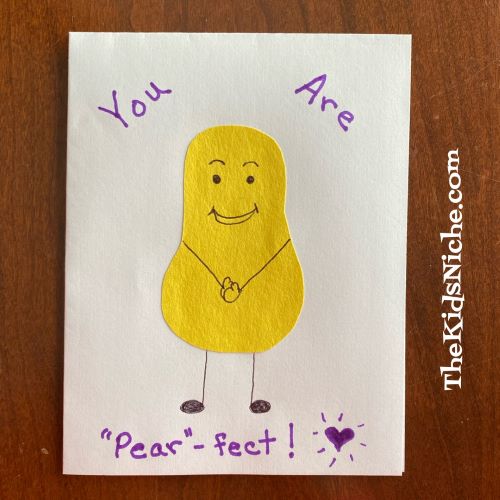
Glue the large pear onto the front of your card. You can draw a face, arms and hands, legs and feet or anything else you want to do to make your “pear” person. Here is how I did mine.
Now add the words “You are “pear”-fect!” 🙂
Now open your card and glue the 2 smaller pears onto the right hand page. You can give them arms and legs and a face and whatever else you would like to add. Then write the words, “We make a great “pear”.
Decorate the rest of your Valentine’s card and save it to give to that special someone on Valentine’s Day! Hope you had fun making this “pear”-fect card! 😉
Knock! Knock! Who’s there? It’s me and I’m here to share some funny jokes with you! Knock! Knock! jokes have been around a long time. Let’s look at some today that might tickle your kiddos funny bones. And maybe yours too! 😉
#1.) Knock! Knock!
Who’s there?
Tank.
Tank who?
You’re welcome!
—————————————–
#2.) Knock! Knock!
Who’s there?
Honey bee.
Honey bee who?
Honey bee a dear and open the door!
——————————————————-
#3.) Knock! Knock!
Who’s there?
Lettuce.
Lettuc who?
Lettuce in please! It’s cold out here!
—————————————————
#4.) Knock! Knock!
Who’s there?
Icy.
Icy who?
Icy you looking at me!
——————————————————–
#5.) Knock! Knock!
Who’s there?
A herd.
A herd who?
A herd you were home so I came over to see you!
———————————————————-
Haha! I hope you had fun with these Knock! Knock! jokes. Maybe you can try them on your friends sometime! 😉
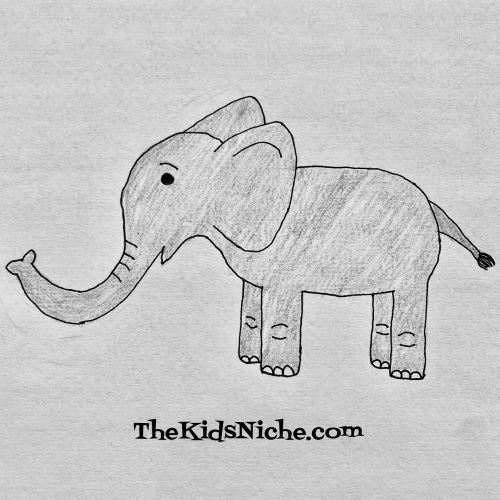
We haven’t drawn anything in a while so let’s do another drawing activity today! We’ll start with some simple shapes and we’ll end up with Eloise the Elephant! 😉
Grab a pencil and eraser, a piece of plain paper, a black pen or thin writing marker and something to color with. Here we go! Start by drawing a nice fat oval laying on it’s side.
Add another smaller oval which will be the elephant’s head.
Elephants are known for their trunks so let’s draw a trunk for Eloise next.
Add 2 small curved lines to better connect the head and body and make a neck area.
Now you can erase the lines of the 2 ovals that are between the 2 little curved lines you just drew.
Draw an ear. Then erase the lines that are inside the ear area.
Add just the top part of the second ear…it’s behind the elephant from our viewpoint so we can only see a small portion of it. Also draw in an eye, the bottom part of the mouth and 3-4 lines on the trunk.
Let’s move down and draw in 4 legs. Only 2 legs are seen completely from this viewpoint so draw in 2 legs using a rectangular shape. Then add 2 more legs that you can only see part of. Make the 2 legs that are on the other side of the elephant’s body a little shorter than the 2 on our side.
Erase the lines of the body that are on the 2 legs we can see from this side of the elephant.
It’s time for her tail!
Add some toes on her feet and some lines on her legs to show her wrinkly knees.
If you would like the outline of your elephant to be darker and more permanent, you can use a black pen or a marker that draws a fine line and trace back over what you’ve drawn.
After you are very sure that your ink is dry, you can gently erase any leftover pencil markings that are showing up. Test a very small spot first to make sure the ink won’t smear. That’s what I did, but you might not be able to tell the difference in these pictures.
Get out your coloring supplies and give Eloise some color! 🙂 And you’ve done it! Eloise is now ready for any adventure you can dream up!
I hope you’ve had fun drawing an elephant with me! Of course, you can name your elephant something different from Eloise. 😉 If you really enjoyed today’s activity, you can draw a whole herd or parade of elephants!