Easy Cheesy Bread Snack

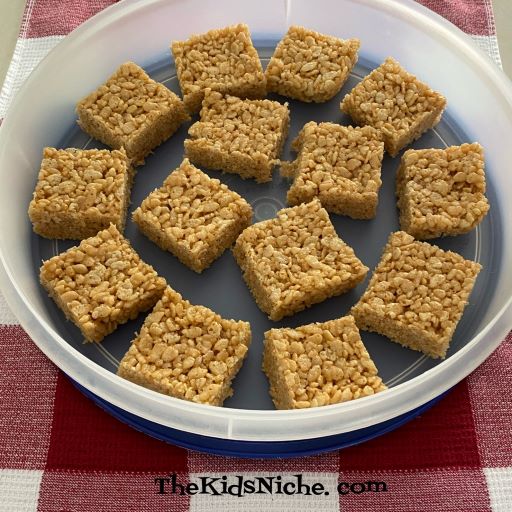
Is your belly grumbling for something tasty to eat? Is your mouth tired of eating the same things all the time? Let’s try a fun but simple way to liven up some bread! We’ll call it Easy Cheesy Bread! Doesn’t this look delicious? 🙂

Let’s start out with some Italian bread, though feel free to try whatever bread you have on hand. I found this little loaf of Italian bread at our local grocery store and it seemed the perfect size for 2 people.

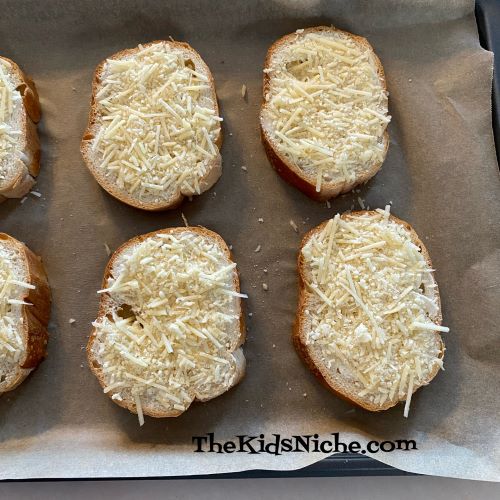
This snack only needs some butter, grated parmesan cheese and maybe garlic powder in addition to the bread. Another item that will make it extra tasty is some pasta sauce…but I’m getting ahead of myself! First cut the bread into slices and place them on a cookie sheet with some parchment paper covering the pan for easy clean up.

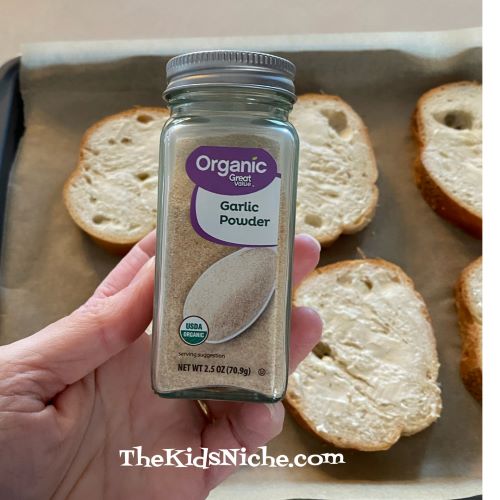
Spread some softened butter on each slice of bread.

If you like garlic flavor, sprinkle some garlic powder on each piece of bread next. The Easy Cheesy Bread is still yummy without the garlic powder if garlic is not your thing.

Sprinkle a generous amount of grated parmesan cheese onto each slice of bread.

Pop the tray of bread slices into the oven on broil. Keep a close eye on the bread so it doesn’t burn! The time needed to toast the bread will depend on the broil temperature you use and what type of oven you have. Just watch the bread till it starts to turn brown and smells delicious! It only took a few minutes when I made these.

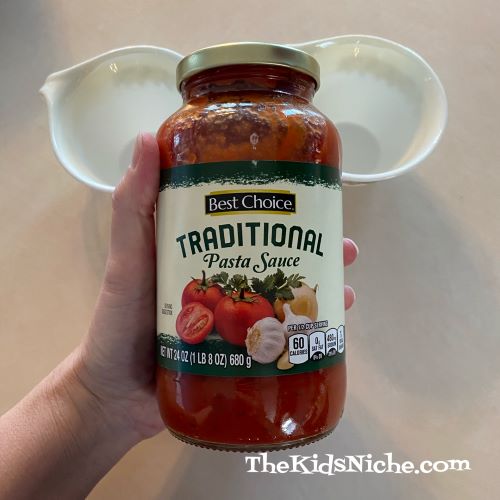
You can eat the Easy Cheesy Bread just like it is or for an added bonus, heat up some pasta sauce in a cup and dip your bread in it. MMmmm! So tasty!

That’s how simple it is to make Easy Cheesy Bread! Try some and make your mouth AND your stomach happy! 😉

Simple Patriotic Flag Snack

Here’s a simple but cute idea to whip up a patriotic flag snack in just a few minutes. We’re less than a month away from the 4th of July, so this might be an idea to save for next month too. You will need some blue fruit – like blueberries, some red fruit – like strawberries or raspberries and some white cheese – like white cheddar or baby swiss. Wash and prepare the fruit. I used a white plate so the colors show up well against the background. Begin by lining up some blueberries in the upper left hand corner. I did 4 rows of 4 berries in each row.

Add a row of your red fruit beside the blueberries on the right hand side.

I think this would look the best with small chunks of cheese, but all I have on hand is sliced cheese. If using sliced cheese, cut the cheese into thin strips.

Alternate rows of red fruit with rows of white cheese.

That’s all there is to it! You can vary how many rows you have in your flag according to how much your kids can eat at one time. This would be a great project for the kids to each make their own flag and practice their small motor skills. Then they get to eat a healthy snack too! 😉

Easy Banana Pops

Wow! Summer is speeding by soooo fast! We have been so busy! We plant our own vegetable garden every spring and we have been super busy processing all the veggies we’ve grown. But now I want to take a minute and share a quick snack idea with you. 🙂 Let’s call them Banana Pops!

The main ingredients you’ll need to make them are a banana, peanut butter, assorted toppings and cookie sticks. You might like to also use some strawberry jam and yogurt.

Slice the banana into chunks and place on a plate.

Spread some peanut butter on the top of several pieces of banana.

You can put peanut butter on all the banana chunks or spread some pieces with strawberry jam or your favorite yogurt.

Put a cookie stick in each banana chunk. I cut my sticks in half.

Add your favorite toppings to each banana pop and they are ready to eat! I used multi colored sprinkles, raisins and Teddy Graham cookies. You could also use chopped nuts, chopped dried fruit or chocolate chips.

These are great for a quick and easy snack or even for breakfast! Enjoy! 🙂

Great Use for Leftover Frosting

One thing my mom used to do with leftover frosting was always a big hit with my siblings and me. Super simple, but we always enjoyed this treat. All you need is graham crackers and frosting, but sprinkles or colored sugar can make it look even more special.

You can make little “sandwiches” or go with open-faced pieces. Break some graham crackers into the size you like. Maybe in half or into quarter pieces.

Spread frosting on one side of one piece of graham cracker.

Add a matching piece of graham cracker and you have a graham cracker and frosting sandwich. 🙂

As you can probably guess, you can also put frosting on a piece of graham cracker but not add the second top piece.

Sprinkles and colored sugar add to the fun so you might want to add some to your snack.

This can be a fun activity to do with the kids at Christmas time when they are begging to decorate Christmas cookies, but you haven’t had time yet to make them! Think of it as a “warm-up” to decorating Christmas cookies. 😉

And that, my friend, is a fun tip from “way back” during my childhood! 😉 Hope you enjoy making graham cracker and frosting sandwiches!

Easy Nilla Wafer Banana Pudding

Do you look for easy dessert or snack recipes to make with your kids? Here’s a great one that’s been around for a long time and has many different versions. There are ways to make this dessert from scratch, but this way is quicker and easier because it uses instant pudding. Doesn’t it look delicious? 🙂

You will need a box of Nilla wafers, 1 box of instant vanilla pudding, milk and bananas.

Begin by making a layer of Nilla wafers in the bottom of your dish.

You can use the Nilla wafers whole or you can break them in half. I prefer to break them because it’s easier for little mouths to eat them in smaller pieces.

Take a handful of Nilla wafers and put them in a ziploc bag and crush them into very small pieces.

Set the crumbs aside for a later step.

Next add a layer of sliced bananas on top of the Nilla wafer layer. I prefer to also cut the banana slices in half for little mouths.

Prepare the instant pudding with milk according to the package directions.

Pour the prepared pudding on top of the banana slices immediately after mixing, before it sets up.

Sprinkle some Nilla wafer crumbs on top to make it look nice.

Pop your bowl of yumminess into the refrigerator and let the pudding chill and set up. Then it’s time to enjoy! You can add whipped cream or sprinkles on top. You can also make 2 layers of each item or prepare it in individual bowls. But this dessert is super quick and easy and great fun for the kids to help make! 🙂

Super Easy, Super Fast Snack!

Hello again! 🙂 Sorry I’ve not posted much for a few days! It’s been a rather crazy time here with a few small crisis thrown in lately, but I hope to be back to posting more next week.

So are you ready for a super easy, super fast snack idea? Here it is: tortilla chips and cheese! Bring out of bag of tortilla chips…

Open a jar of cheese dip…

Put some cheese dip in a little bowl and warm it for a few seconds in the microwave.

Put them together and chow down! Yum!!

Are you drooling yet? 😉

If that isn’t flavorful enough for your taste buds, add a little salsa too!

Voila! You’ll have a very yummy snack in a matter of just a couple of minutes! 🙂 Enjoy!

Taste Testing Tuesday #77 – Peanut Butter Rice Krispies Treats

Have you ever eaten Rice Krispies treats? The oh, so yummy snack/dessert made from Rice Krispies cereal, butter and marshmallows? Rice Krispies Treats have been a very popular treat for a long time now, so I’m guessing most of you have eaten them. Wikipedia says “Rice Krispies Treats were invented in 1939 by Malitta Jensen and Mildred Day at the Kellogg Company home economics department as a fund raiser for Camp Fire Girls.” Thank you, Malitta and Mildred!! 🙂

Some amazing Peanut Butter Rice Krispies Treats made an appearance at our 4th of July picnic this year (Thank you, Megan!) and I wanted to share this easy recipe with you.

You will need Rice Krispies cereal (6 cups), butter (1/4 cup), mini marshmallows (10 oz. package) and peanut butter (1/2 cup).

Melt the butter in a large pan on the stove using a medium heat.

Add the mini marshmallows…

Add the peanut butter.

Stir together as the ingredients begin to melt.

Keep stirring, over a medium heat, until all the marshmallows have melted.

Remove from the heat and add the Rice Krispies cereal.

Stir until well mixed.

Evenly press the mixture into a 9″x13″ greased pan. You can use a buttered spatula or wax paper to spread the mixture.

After it’s cooled a little, cut into squares and serve!! Oohh, yummy! 🙂

These treats are great to take to a potluck (which we did last Friday and they were a hit!). Or just having them for dessert or snack at home will make any day special!

You can find many other flavors of Rice Krispies treat to make by searching online. I even saw “Grilled Rice Krispies Treats! It’s a simple versatile recipe but loved by many! 🙂

Make Your Own Popsicles

We’re getting some of those warm “dog days” of summer here in Ohio. When I get hot, I like to have something cold to eat or drink. That always reminds me of a recipe my mom used to make for my siblings and me…homemade popsicles! This recipe takes just a few common ingredients: 1 – 3oz. box of Jello gelatin mix (fruit flavor), 1 packet of the same flavor of Kool-Aid drink mix (Unless you are feeling adventurous and want to mix up your flavors!), 3/4 Cup sugar and some water.

Place the Jello powder, Kool-Aid mix and sugar into a large bowl. As you can see from the picture, this time we are making cherry flavored popsicles.

Bring 2 Cups of water to a boil and carefully pour it into the bowl with the Jello mixture. Stir until everything is dissolved.

Now add 2 Cups of cold water and stir again.

You are ready to pour this mixture into whatever forms you are using to make the popsicles. You can use popsicle molds, small paper cups (I recommend using the Dixie 5 oz cups and fill them 2/3’s full) or ice cube trays. (The cups pictured are the 9 oz size because those are the ones I had on hand.)

I filled my popsicle molds first.

I had enough Jello mixture to also fill an ice cube tray and 2 – 9 oz. paper cups about half full.

Place on a flat surface in your freezer for 2-3 hours until the popsicles are frozen. You can place wooden sticks in the cups or ice cube trays after the popsicles are partly frozen.

Here is the recipe card that I have the recipe written on.

The number of popsicles you will get from one batch depends on what size containers you use for making your popsicles. Let’s take a look at a finished popsicle! Ta dah! Ready to eat! 🙂

A word of caution: eat these slowly as they feel colder than ice cream and its easy to get a “head freeze” if you eat them too quickly! Looks like someone is enjoying this popsicle! 😉

The popsicles that are made in the ice cube trays are great for adding to a cup of juice to add more flavor and keep your drink cold longer. There are lots of ways to make popsicles but this one is a favorite because it comes from my childhood. Maybe we will look at some other ways to make your own popsicles on a blog post another time. For this time, enjoy your popsicles! 🙂