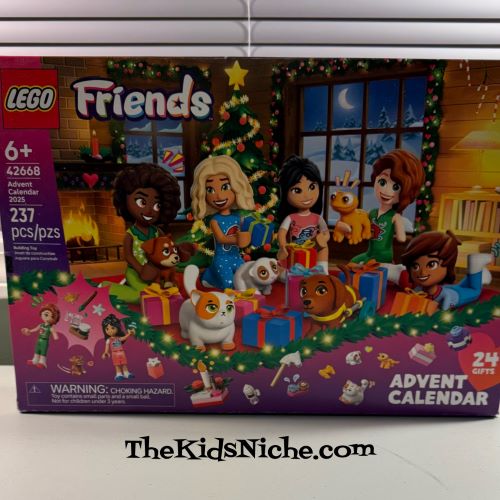
WHOOHOO!! We have made it to December!! Every year I buy a Lego Advent calendar and then for every day in December leading up to Christmas, I open one door on the calendar and share what is hiding behind it. 🙂 I hope you will join me! This year I picked the Lego Friends Advent calendar.
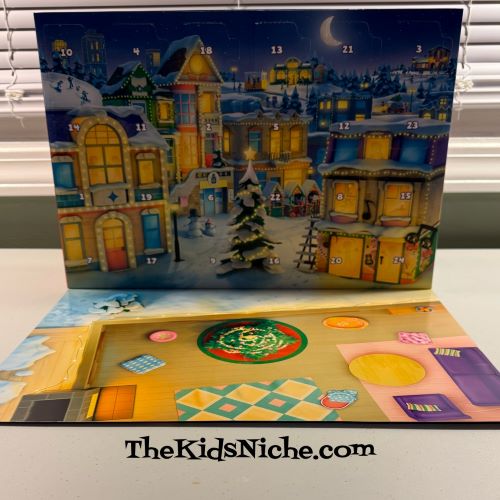
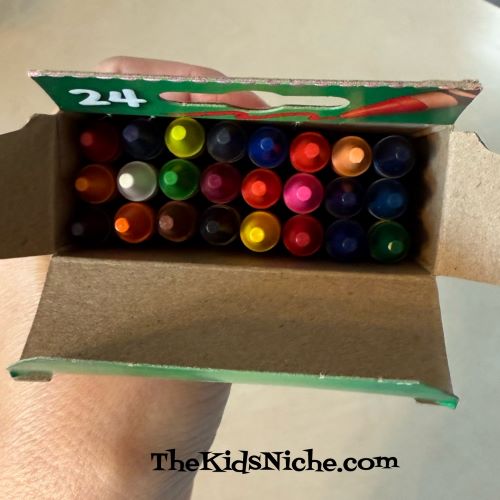
There are several Lego Advent calendars to choose from including Disney Frozen, Harry Potter, Minecraft, City, Star Wars and Friends. Each calendar includes 24 surprise gifts. On the back of the box is an extra flap that lays down to give you some scenery to arrange your assembled gifts on. The Lego Friends calendar has a sleepover scene this year.
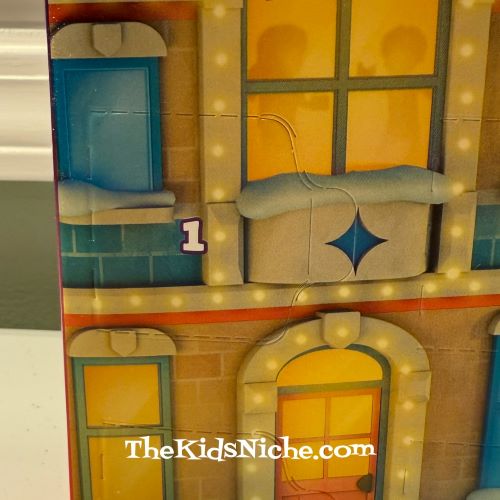
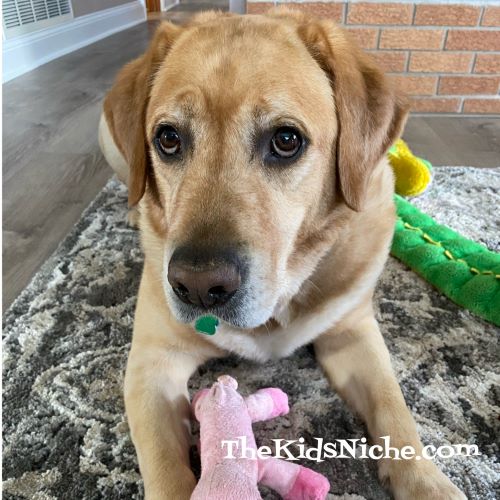
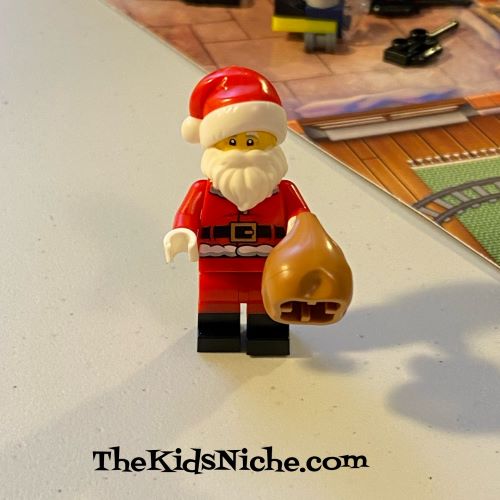
Ok, it’s Day #1!! Let’s get this party started! 🙂 We found the first door!
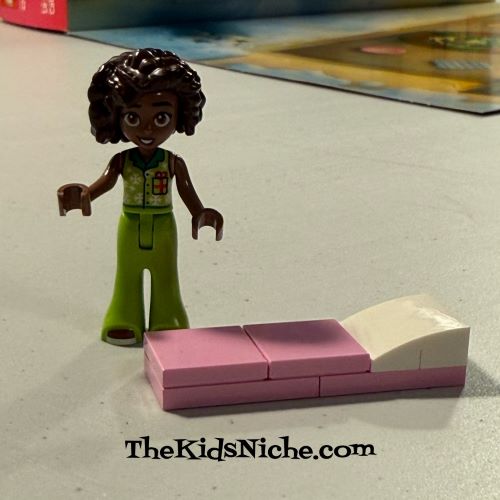
What is hiding behind door #1?
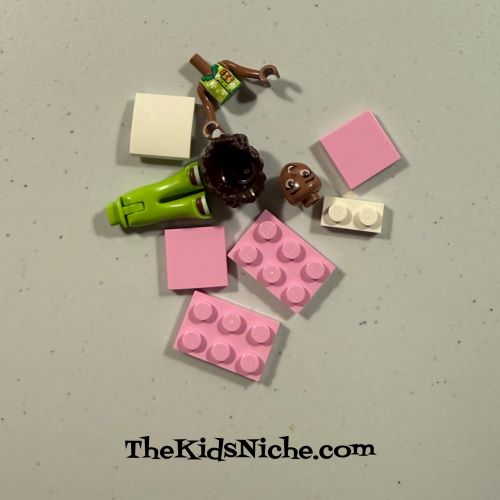
Here are the pieces included behind today’s door.
I don’t know the characters names but I think this young lady has her sleeping bag and pillow with her for the sleepover. 🙂
I found a place to put her in the scenery, at least for now.
That’s it for today! Be sure to come back tomorrow to peek behind door #2! 🙂
Hello! Welcome to my blog! 🙂 Today I’d like to talk about ways you can teach young children by just using simple colored paper shapes. There are several skills you can practice while having fun with just basic colored shapes like squares. Let’s get started! 🙂
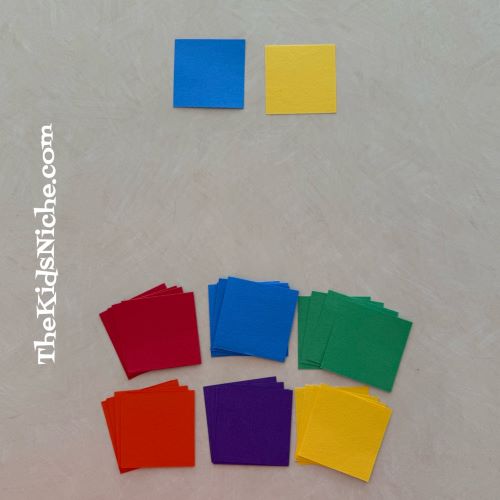
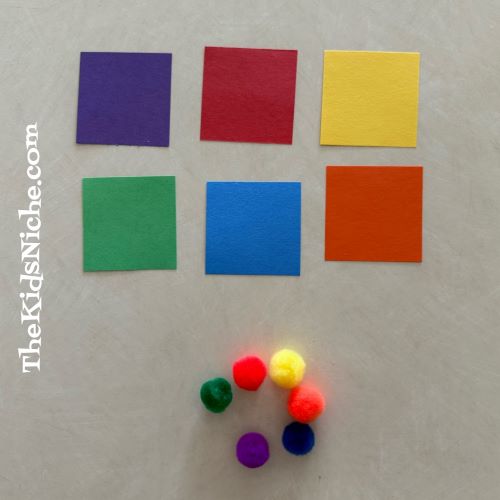
First, cut out squares from colored construction paper or similar. I went with 2 inch squares and the colors red, blue, orange, yellow, green and purple. You will want 8-10 squares of each color.
Separate each color into 2 piles with 4-5 squares of each color. One pile of each color goes to the adult playing and one pile of each color goes to the child playing. The more players you have, the more squares you will need to make.
The games you choose to play will be decided by the age of the children playing. I will show you different games that you can make easier or harder to fit your child’s age. We’ll start with a very simple game. The adult places 1-2 colored squares in front of the child. In this picture we’re using 1 blue square and 1 yellow square.
Then have the child lay down their squares to match the adult’s squares.
You can start with 1-2 squares and gradually work your way up to more. Three…
And on up to 5…and 6…
Positive praise goes a long ways towards making this game fun. Comments like “You got it!” or “Great matching!” offer positive reinforcement and help build self-esteem. You can take turns with who lays down the first squares and who does the matching. 😉
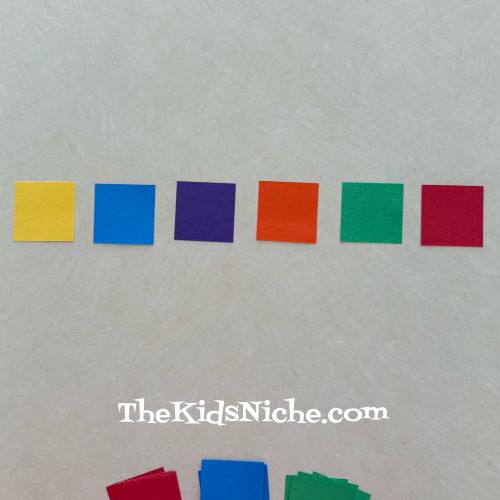
Try laying the squares horizontal like we’ve already done and then switch it up by laying some vertical.
To bring more fun and a little more difficulty, you can also add in some other shapes like circles. Add new shapes according to your child’s age and what difficulty they are ready for.
Not only does the child need to match the shape but also match the color. For instance, a purple square, a yellow circle and a red square…even though they have 2 shapes with different colors, they need to find the ones that match.
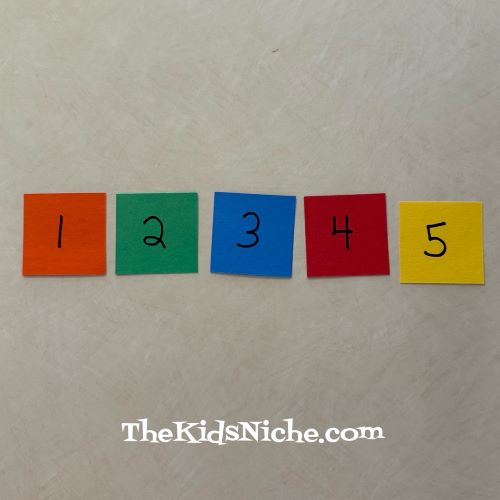
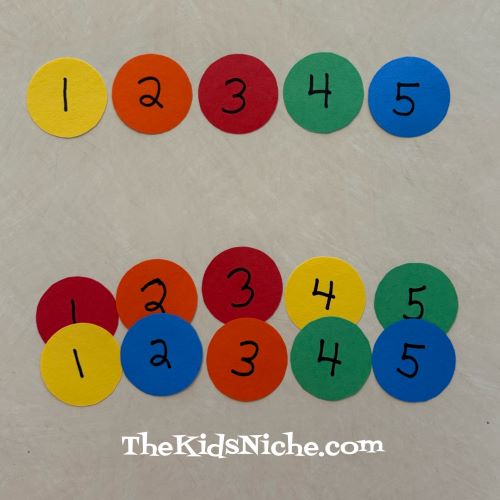
As you’re ready to move onto harder matches, you can add numbers to the shapes. You can practice getting the numbers in the correct order.
You can also practice getting the numbers in the correct order AND the correct colors AND the correct shapes.
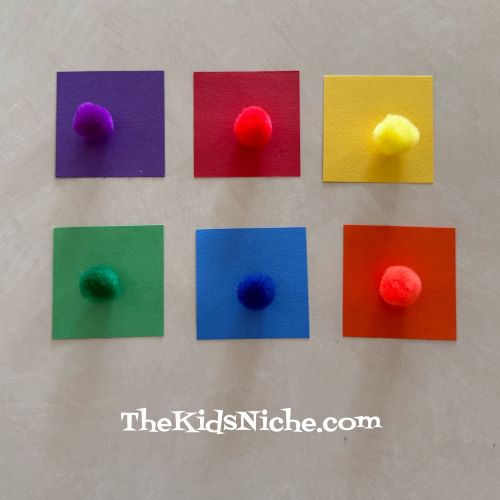
If you have some colored pom poms on hand, you can also use them for matching to the shapes.
The ideas are endless! I’m betting you will think of other ways to play with shapes, colors and numbers that will have the kids having fun and not even realizing they are also learning. 😉 Just make sure you have enough matching sets and you are good to go…and all you need is some colored paper shapes. 🙂 Have fun and happy learning!
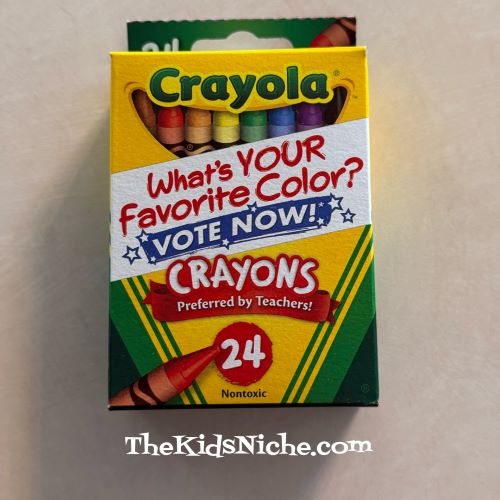
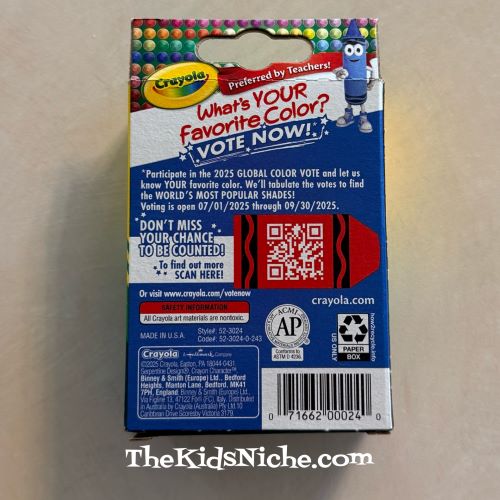
Does anything smell better than a bunch of crayons? 🙂 Do people still get excited to open a brand new box of crayons? That was a huge highlight for me when I was little and starting a new school year! Oh, to think of all the things those crayons were going to color! 🙂 I spotted these crayons yesterday in a local store and saw that you can vote for your favorite color!
Oooo, how do you pick ONE favorite color?! 😉 There are sooo many great colors!
If you would like to participate in the voting, there is a QR code on the back of the box that will take you to the right website for voting. Or you can visit http://www.crayola.com/votenow.
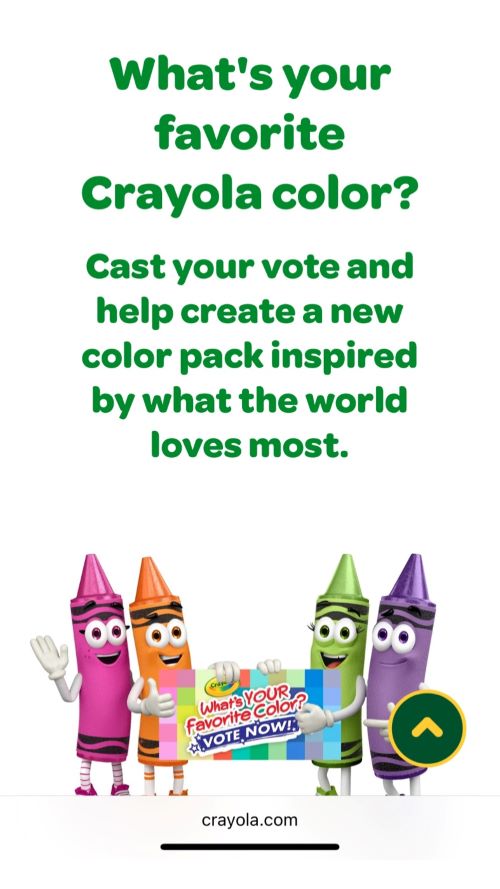
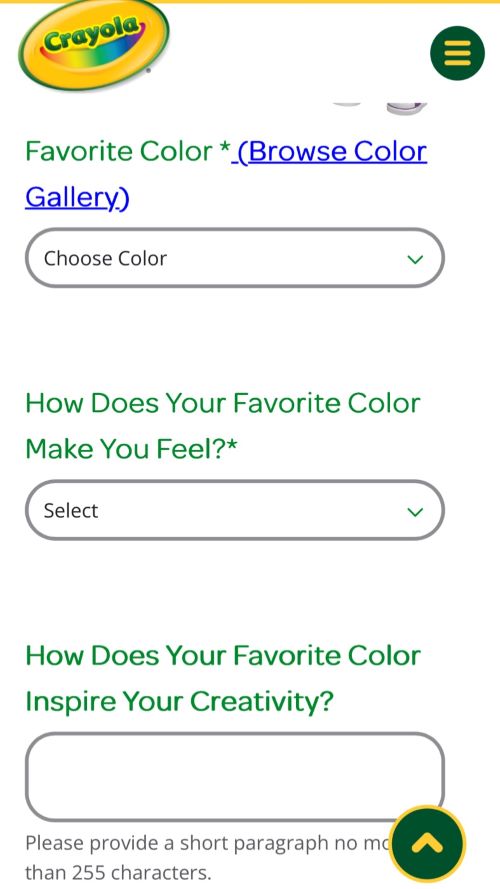
Here’s what you’ll find at the website:
If you would like to vote, you’ll need to hurry! Voting closes on September 30, 2025. (Sorry I didn’t find this sooner!)
Happy Voting! I’m still trying to decide which color is my favorite… 😉
Hello and greetings from me, Rusty, the head of Homeland Security for the state of….well, for this household. Mom is feeling a bit under the weather today so she asked me to do a blog post for her. (Ok, you’re right, she has no idea I’m doing this.) Typing on a computer with paws is no easy feat, let me tell you!
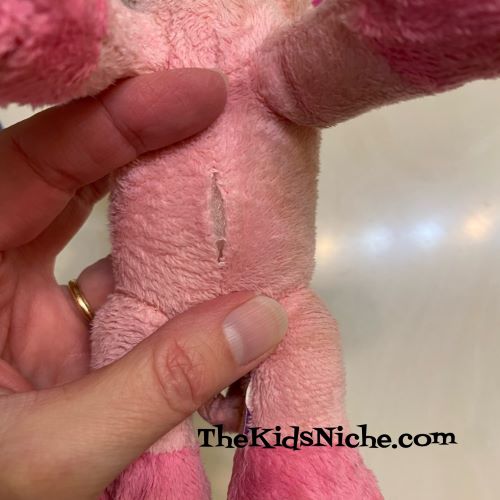
I have to say I am looking pretty dapper in my handkerchief, don’t you think? So as I was saying, I’m in charge of all the security here and I must say I do an amazing job. All visitors to the property must first pass my inspection or I sound the red alert. Mom says I sound the alert before I know what’s there, but she doesn’t have my keen sense of hearing. I don’t want you to think we security folks don’t have a soft side too and this brings me to my post today. I had a rather rough day…it all started when Mom found my friend, Piggy, and decided that piggy was very dirty and stinky. (I thought he smelled lovely.)
“Ewww! It’s time we wash this toy, Rusty!”, she said. Toy?? That is my dear friend and…where are you taking him??! 😦
And just like that poor Piggy was getting scrubbed.
Do you know how hard it is to be without your best friend?! I did my best to keep a close eye on the proceedings and offer Piggy some moral support.
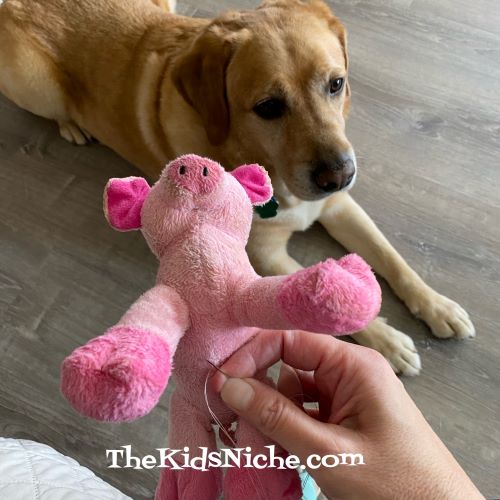
Finally the washing was done and I thought I would soon have my friend back when Mom said Piggy also needed surgery.
SURGERY??? Oh, my word, this is getting serious! I was at least allowed in the operating room, I’m thankful to say.
I was able to offer a few licks and words of encouragement. I am so proud of Piggy for the way he went through the entire surgery and never cried at all. I will confess to a few whimpers myself, but it’s always harder on the one waiting, isn’t it?
The surgery was successful, but then Piggy had to go to the recovery room for a while. Piggy reported that the sunshine was lovely, but it was very hard for me to let him rest without me. (Yes, if you really must know, I got myself banned from the recovery room…)
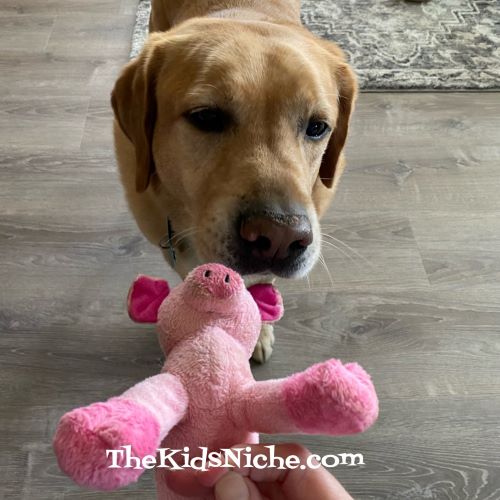
After many, many hours…ok, maybe not many, but it was a looooong time…Piggy was released from the hospital! I was so relieved to be back with my buddy! He did smell a bit weird, but I gave him some licks and I’m sure he will be back in good smelling order soon.
So as you can see, even we brave security guys, who aren’t afraid of anything, have soft hearts for those we love.
Wait, what was that?! Sound the alarm! ARRROOOOO! Hold on there…was that thunder? Gotta run folks! There’s a place under the desk in the back bedroom that needs me to check it out urgently….
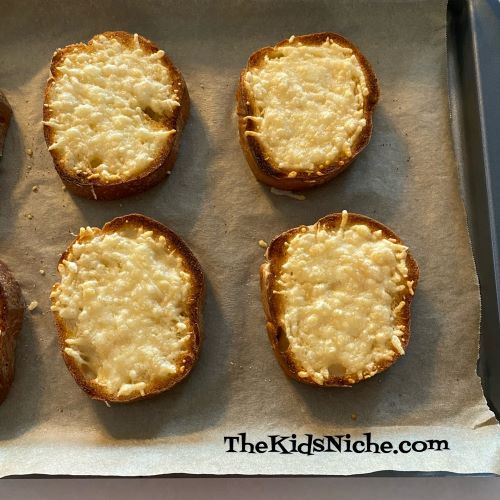
Is your belly grumbling for something tasty to eat? Is your mouth tired of eating the same things all the time? Let’s try a fun but simple way to liven up some bread! We’ll call it Easy Cheesy Bread! Doesn’t this look delicious? 🙂
Let’s start out with some Italian bread, though feel free to try whatever bread you have on hand. I found this little loaf of Italian bread at our local grocery store and it seemed the perfect size for 2 people.
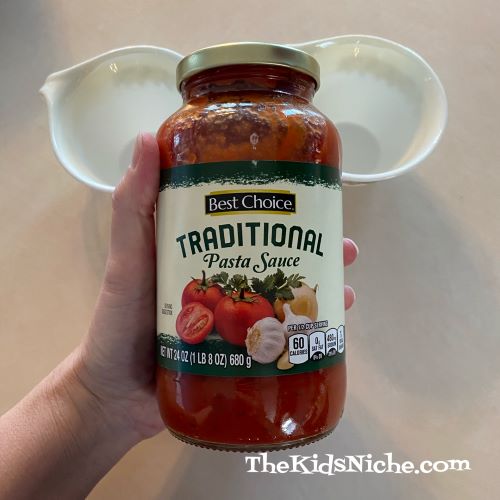
This snack only needs some butter, grated parmesan cheese and maybe garlic powder in addition to the bread. Another item that will make it extra tasty is some pasta sauce…but I’m getting ahead of myself! First cut the bread into slices and place them on a cookie sheet with some parchment paper covering the pan for easy clean up.
Spread some softened butter on each slice of bread.
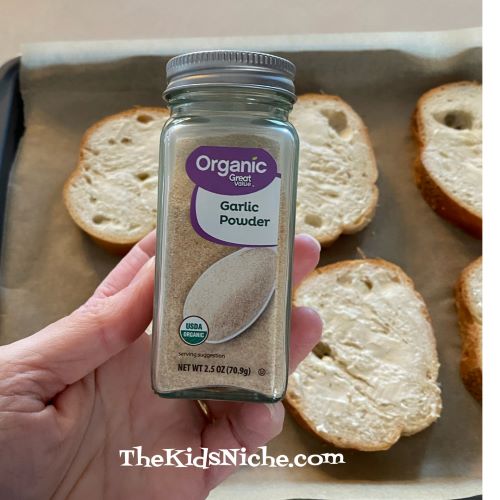
If you like garlic flavor, sprinkle some garlic powder on each piece of bread next. The Easy Cheesy Bread is still yummy without the garlic powder if garlic is not your thing.
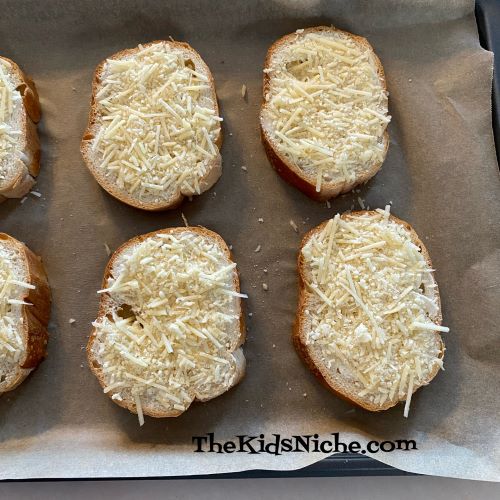
Sprinkle a generous amount of grated parmesan cheese onto each slice of bread.
Pop the tray of bread slices into the oven on broil. Keep a close eye on the bread so it doesn’t burn! The time needed to toast the bread will depend on the broil temperature you use and what type of oven you have. Just watch the bread till it starts to turn brown and smells delicious! It only took a few minutes when I made these.
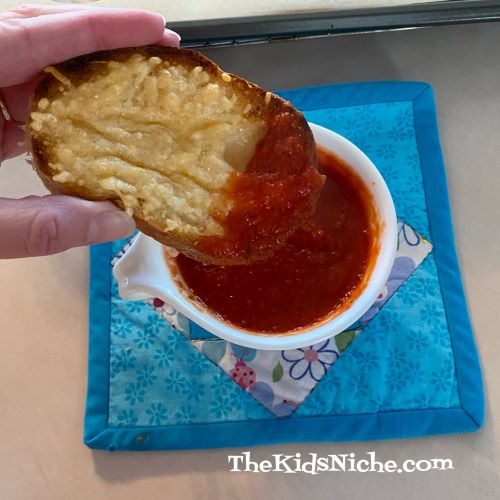
You can eat the Easy Cheesy Bread just like it is or for an added bonus, heat up some pasta sauce in a cup and dip your bread in it. MMmmm! So tasty!
That’s how simple it is to make Easy Cheesy Bread! Try some and make your mouth AND your stomach happy! 😉
Wow, life has sure been getting in the way of my time to post to this blog! We are in the middle of remodeling our house and if your luck is anything like ours, you know how these projects go…you start a SIMPLE project and it turns into many more steps than you planned on! Whew! But while my hubby is staining some trim pieces, I’m jumping on here to say hello! Let’s look at some riddles today and give ourselves a giggle break, ok? 🙂
#1.) How do frogs make breakfast?
Answer: The use a toad-ster!
#2.) What do you call an elephant in a tiny car?
Answer: Stuck!
#3.) What does it mean when you find a horseshoe?
Answer: That some poor horse is walking around in his socks!
#4.) What is it called when a snowman has a temper tantrum?
Answer: A melt-down!
#5.) What do you get when you drop a pumpkin from the 10th floor?
Answer: Squash!
#6.) What did Obi-Wan Kenobi say at the restaurant?
Answer: “Use the fork, Luke!”
#7.) Why are frogs always so happy?
Answer: They eat whatever bugs them!
#8.) What do you call a train carrying bubble gum?
Answer: A chew-chew train!
#9.) When do ducks get up each day?
Answer: At the quack of dawn!
#10.) What was the kitten’s favorite subject in school?
Answer: Mew-sic!
I hope these brought a smile to your face and a giggle in your belly! 🙂
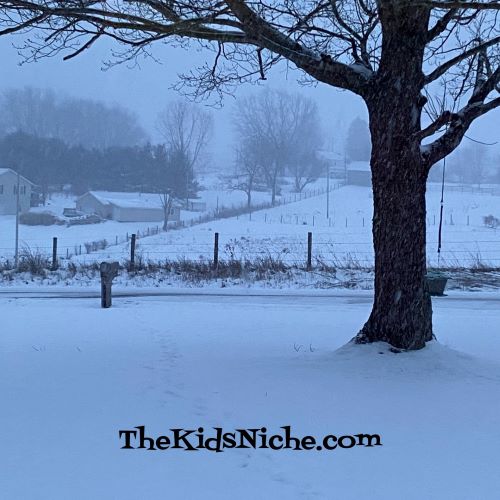
Oh my goodness, it is COLD outside!! Are you freezing where you live? (If you are warm, can I come visit you?!) It’s January weather in Ohio and this morning it was -14 degrees with a windchill of -26 degrees! Yes, those are minus signs in front of the numbers! Yikes!! And we have plenty of snow…it seems to snow more almost every day. It’s beautiful to look at…from inside a warm house! 😉
I thought it would be fun to share some wintertime jokes with you. Maybe laughing can make us feel warmer? It’s worth a try, right? 🙂
#1.) What did the icy road say to the car?
Answer: “Do you want to go for a spin?”
#2.) What do you call a snowman in the summer?
Answer: A puddle!
#3.) What do you get when you cross a vampire with a snowman?
Answer: Frostbite!
#4.) What do snowmen eat for breakfast?
Answer: Frosted Flakes and Ice Krispies!
#5.) What did one snowman say to the other snowman?
Answer: “Do you smell carrots?”
#6.) What kind of ball doesn’t bounce?
Answer: A snowball!
#7.) What falls but never gets hurt?
Answer: Snow!
#8.) What do snowmen call their kids?
Answer: Their chill-dren!
#9.) What do you get if you cross a wizard and a blizzard?
Answer: A cold spell!
#10.) What did the snow say to the road?
Answer: “I’ve got you covered!”
I hope these jokes cheered you up and made your insides warm! 😉 Grab a blanket and some hot chocolate and stay warm!
Hi everyone and thanks for stopping by! Raise your hand if you love Bluey! Ok, now how would you like to have Bluey for breakfast? 😉 If you don’t know who Bluey is, here is a picture of Bluey that I took at our local store.
We have a couple of grandkids that love Bluey! A sweet friend of mine shared the following picture with me. (Thanks, Carolyn!)
(Sorry I don’t know who originally posted this, but it’s awesome!) After seeing this picture I decided to have a go at making a Bluey for breakfast at our house. Here’s how I did mine:
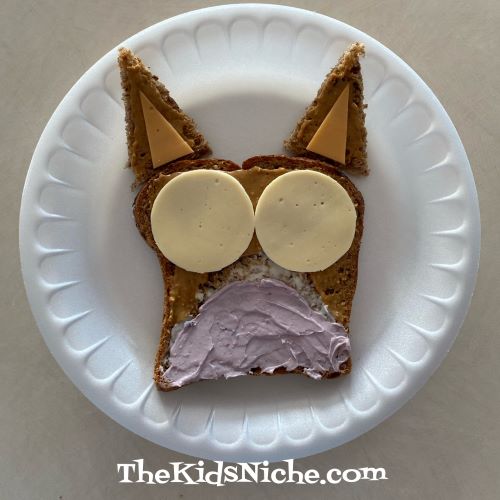
I started out with 2 pieces of bread. The first slice of bread I added peanut butter to the top portion, a little strip of butter to make it look white and then I used blueberry cream cheese on the bottom to make it blue. (A blue or purple jelly would work as a substitute for the cream cheese.)
Using the second slice of bread, I cut 2 triangles to use for ears. I put peanut butter on them too.
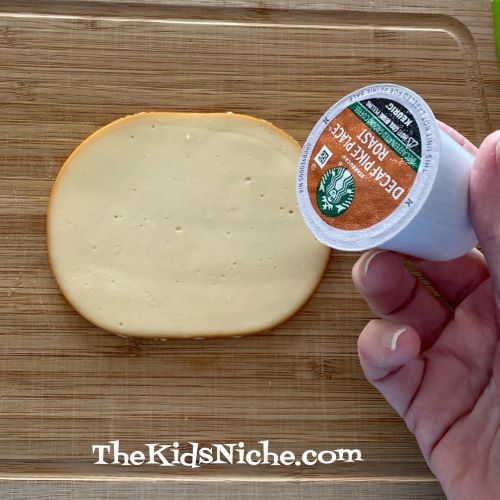
Next I used a slice of orange cheese to make 2 small triangles for the inside part of the ears.
I then placed these items on a plate with the ears at the top.
A white or whitish slice of cheese came next. I used a k-cup to cut around and made 2 circles in the cheese.
Yep, you guessed it, these are part of Bluey’s eyes.
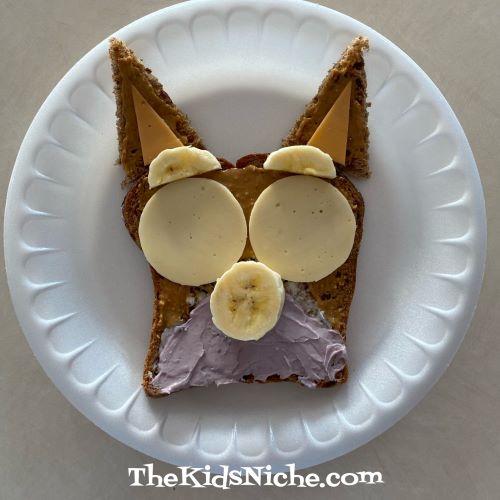
I cut a banana into 1-2″ pieces and used the straightest piece for the nose.
2 small slices of banana cut in half provided Bluey with eyebrows.
3 blueberries on the eyes and end of the nose supplied the finishing touch! And I present to you….Bluey for breakfast! 🙂
I think Bluey turned out very cute! This is a fun breakfast to make for your kids! And maybe even more fun if they help you make it! One last note, my husband thought Bluey tasted pretty yummy! 😉
And just like that, 2024 is done and we’ve opened up a brand new year!
Did you make any New Year’s resolutions? It could be a fun time to start some new habits with the kids. Maybe make up a chart with some boxes to check off each day when they complete a chore or activity. A chore could be making their bed or cleaning up their toys and an activity could be reading a book together or doing a simple craft. Some folks are really into making New Year’s resolutions and some folks think they are silly. To each his own! 🙂
Let’s start our new year together with a bit of silliness. Today I’m sharing some things that have made me grin or even laugh out loud when I saw them. I hope they will brighten your day! 🙂