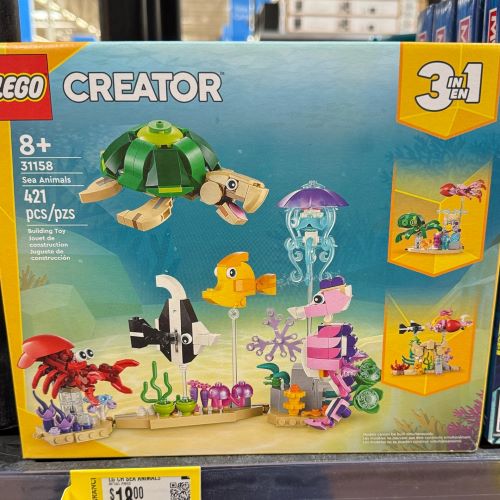
Hello there! 🙂 I hope you’re having a marvelous day! I saw some amazing clearance prices on Lego at our local Walmart store and wanted to share them with you. It’s almost time for some Christmas shopping and this might be a good way to get some great gifts at great prices too! Here’s some Lego sets I spotted:
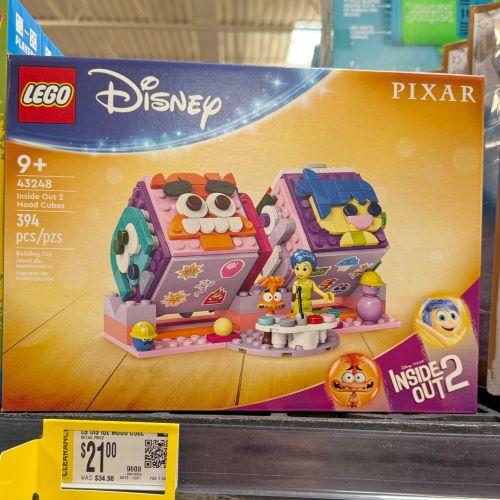
#2.) Lego Disney Inside Out 2 Mood Cubes #43248 – Regular price $34.98, Sale price $21.00
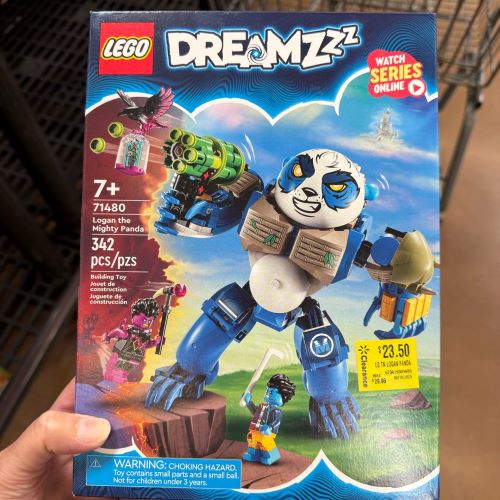
#3.) Lego Dreamzzz Logan the Mighty Panda #71480 – Regular price $29.96, Sale price $23.50.
#4.) Lego Animal Crossing Isabelle’s House Visit #77049 – Regular price $39.97, Sale price $22.50
#5.) Lego Super Mario Adventures with Interactive Lego Peach #71441 – Regular price $49.97, Sale price $31.50
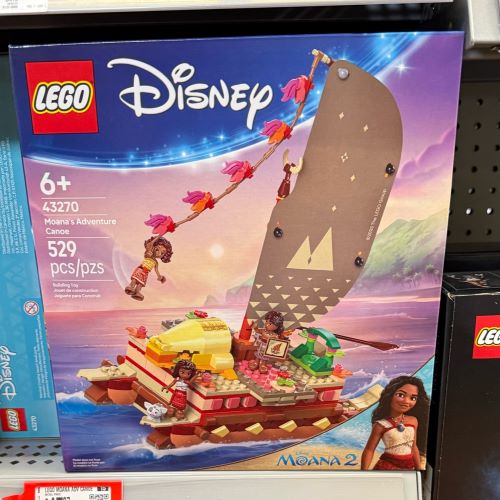
#6.) Lego Disney Moana’s Adventure Canoe #43270 – Regular price $59.97, Sale price $47.97
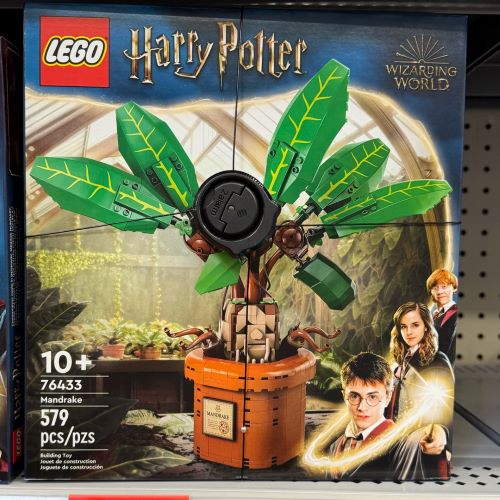
#7.) Lego Harry Potter Mandrake #76433 – Regular price $69.96, Sale price $55.97
Wishing you happy bargain shopping! 🙂 I’m sure all these sets are not available at all Walmart stores. Maybe you’ll find some bargains I don’t have here. Good luck!
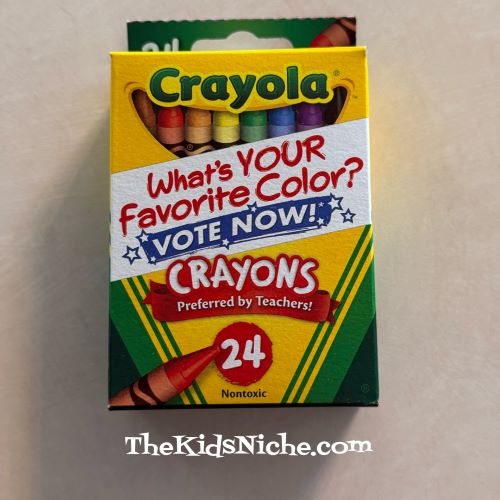
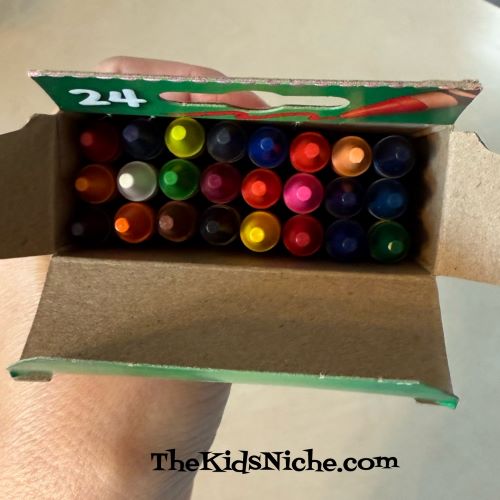
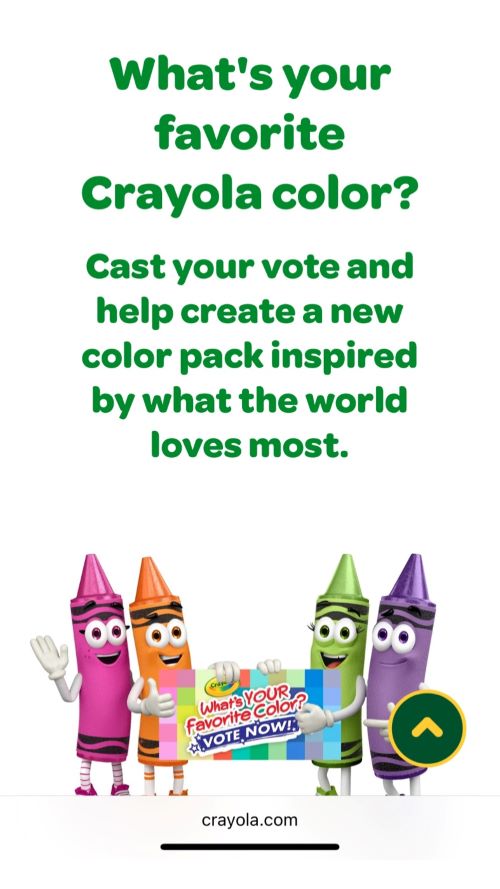
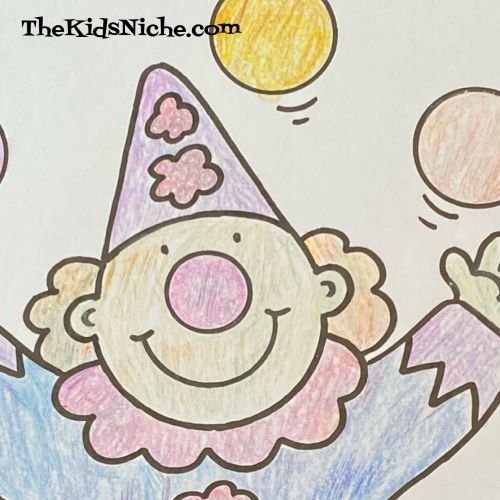
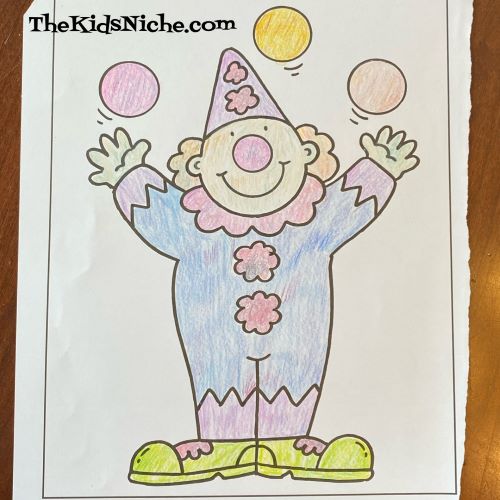
Does anything smell better than a bunch of crayons? 🙂 Do people still get excited to open a brand new box of crayons? That was a huge highlight for me when I was little and starting a new school year! Oh, to think of all the things those crayons were going to color! 🙂 I spotted these crayons yesterday in a local store and saw that you can vote for your favorite color!
Oooo, how do you pick ONE favorite color?! 😉 There are sooo many great colors!
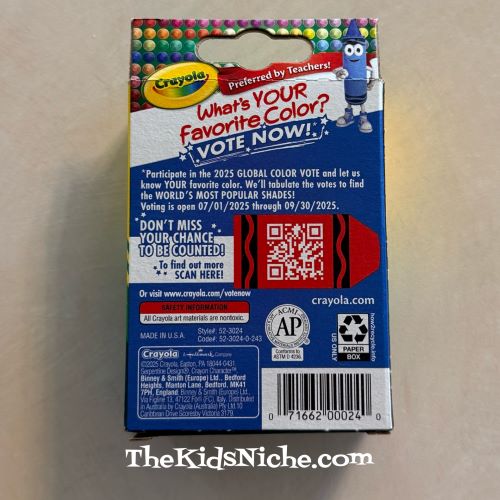
If you would like to participate in the voting, there is a QR code on the back of the box that will take you to the right website for voting. Or you can visit http://www.crayola.com/votenow.
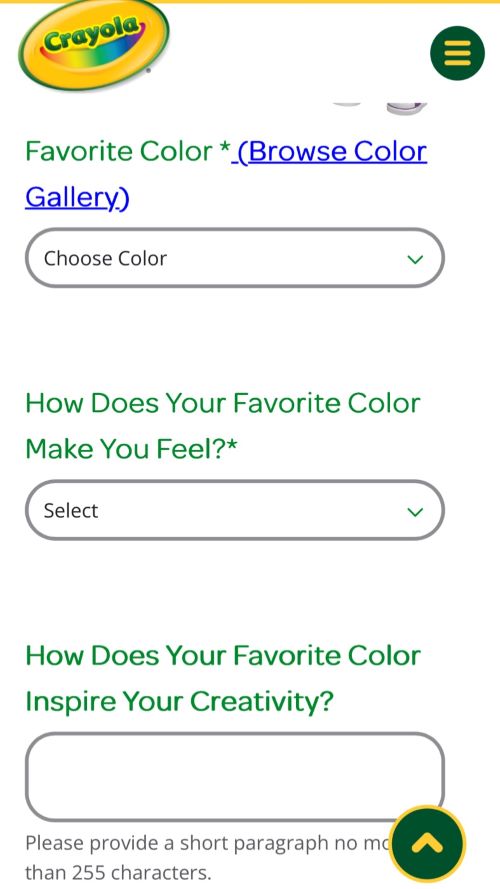
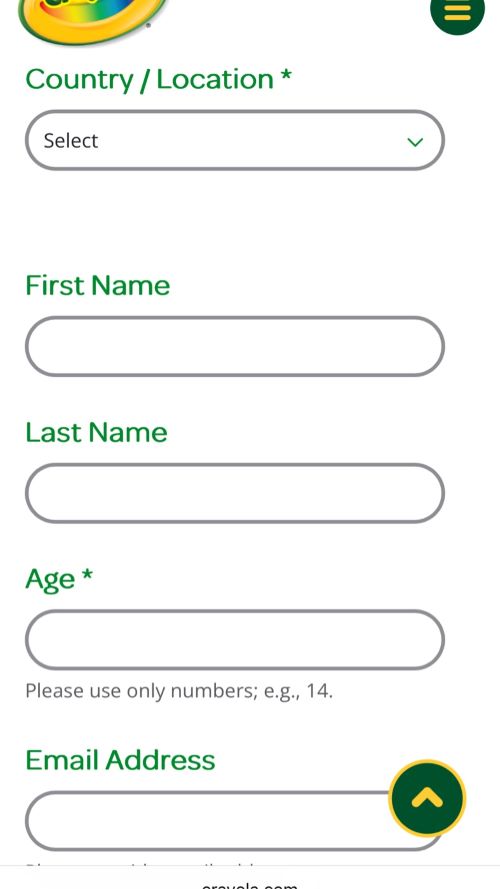
Here’s what you’ll find at the website:
If you would like to vote, you’ll need to hurry! Voting closes on September 30, 2025. (Sorry I didn’t find this sooner!)
Happy Voting! I’m still trying to decide which color is my favorite… 😉
Wow, life has sure been getting in the way of my time to post to this blog! We are in the middle of remodeling our house and if your luck is anything like ours, you know how these projects go…you start a SIMPLE project and it turns into many more steps than you planned on! Whew! But while my hubby is staining some trim pieces, I’m jumping on here to say hello! Let’s look at some riddles today and give ourselves a giggle break, ok? 🙂
#1.) How do frogs make breakfast?
Answer: The use a toad-ster!
#2.) What do you call an elephant in a tiny car?
Answer: Stuck!
#3.) What does it mean when you find a horseshoe?
Answer: That some poor horse is walking around in his socks!
#4.) What is it called when a snowman has a temper tantrum?
Answer: A melt-down!
#5.) What do you get when you drop a pumpkin from the 10th floor?
Answer: Squash!
#6.) What did Obi-Wan Kenobi say at the restaurant?
Answer: “Use the fork, Luke!”
#7.) Why are frogs always so happy?
Answer: They eat whatever bugs them!
#8.) What do you call a train carrying bubble gum?
Answer: A chew-chew train!
#9.) When do ducks get up each day?
Answer: At the quack of dawn!
#10.) What was the kitten’s favorite subject in school?
Answer: Mew-sic!
I hope these brought a smile to your face and a giggle in your belly! 🙂
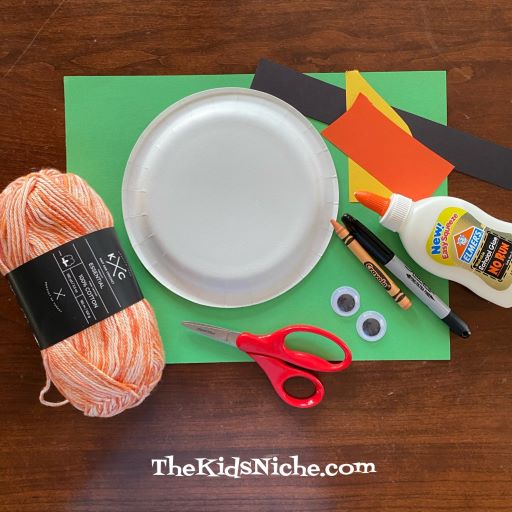
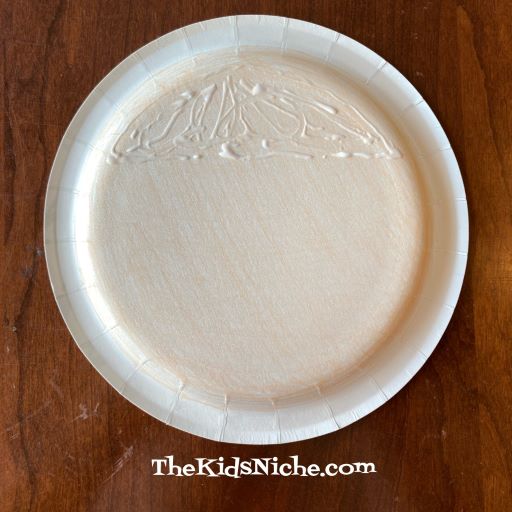
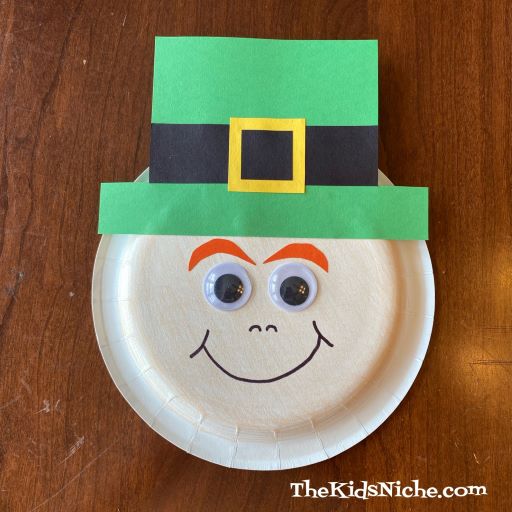
Happy St. Patrick’s Day! 🙂 Did you remember to wear green? I hope nobody pinches you if you forgot! Today’s post is about making a leprechaun out of a paper plate! Sound fun? Let’s get started!
You will need a small paper plate that is blank on the back, some orange yarn (I couldn’t find solid orange yarn), glue, scissors, a peach or tan crayon, a black marker, green construction paper, a set of large wiggly eyes (or draw your own eyes) and some scraps of black, yellow and orange construction paper.
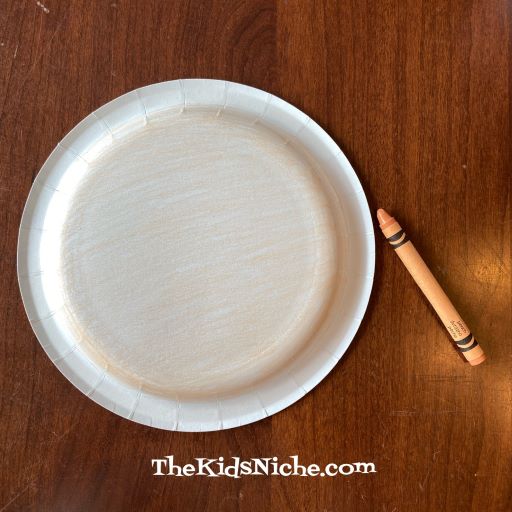
You will create your leprechaun on the BACK of the plate. Depending on how you look at the pictures, you might think we used the front, but we didn’t. 😉 Use the peach or tan crayon to color the back of the plate. It’s rather hard to see in the picture because the color is so light, sorry.
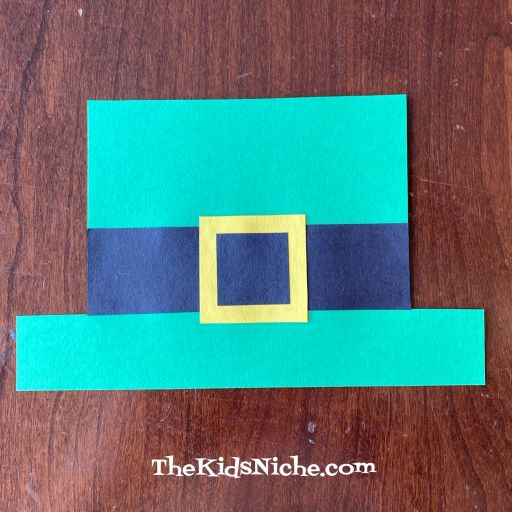
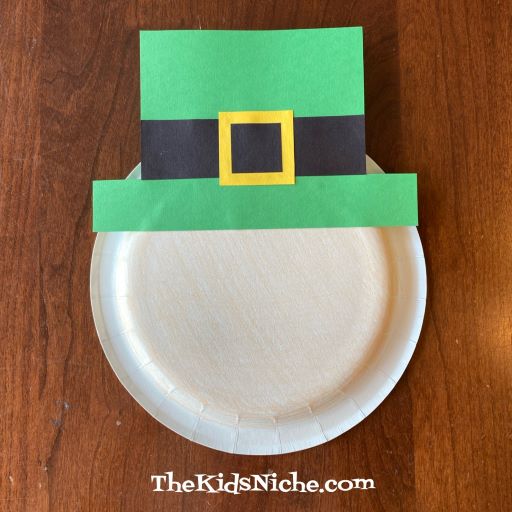
It’s time to make the leprechaun’s hat. Using the green construction paper, cut out a simple hat.
Use a strip of black paper to add a band to the hat.
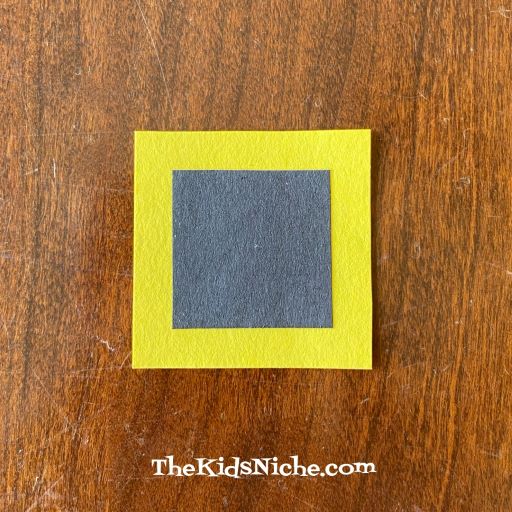
Now we’ll make the buckle for the hat. Cut a square from the yellow paper that is a little bit larger than the height of the black band. Cut a small square from the black paper that is smaller than the yellow square. Glue the black square in the center of the yellow square.
Glue the buckle in the center of the black band on the hat.
To glue the hat onto the leprechaun’s face, apply glue to the top portion of the plate where the hat will touch.
Press the hat onto the plate.
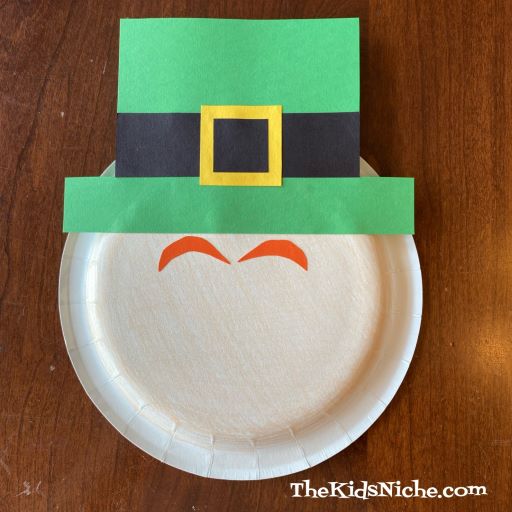
Next cut 2 eyebrow shapes from the scrap of orange paper. Glue them on just below the bottom of the hat.
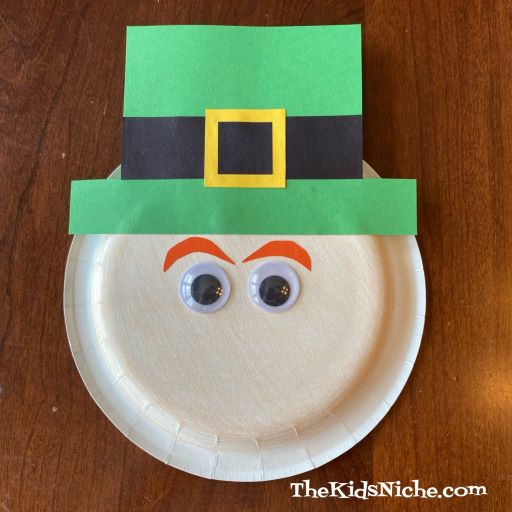
Glue on the wiggly eyes or draw on some eyes with the black marker.
Now draw on a bit of a nose and a mouth.
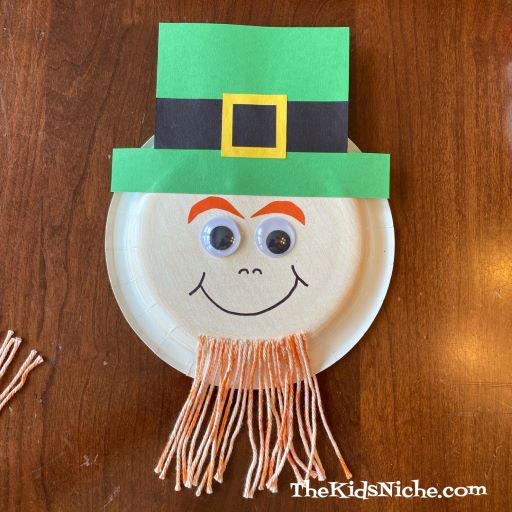
Cut a bunch of yarn pieces around 3 1/2 – 4″ long. You will need a lot of them! Lol This bunch is just a start. 😉 I used 102 pieces of yarn.
Put a small line of glue on the plate where the leprechaun’s chin would be. Lay the ends of the pieces of yarn on the glue, lining them up evenly.
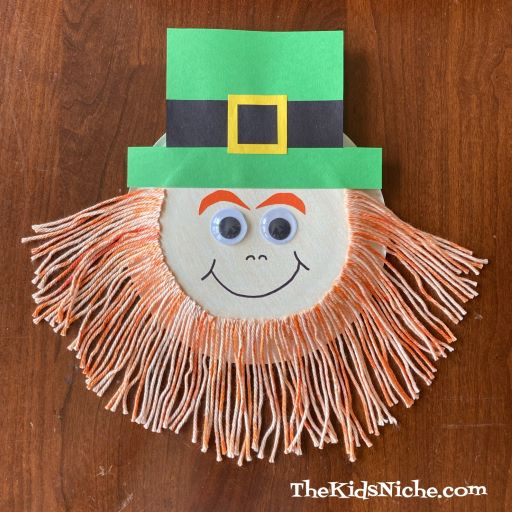
Continue adding pieces of yarn until the leprechaun’s beard is as full as you want it to be.
And you’re finished! Great job! Your leprechaun is now ready for St. Patrick’s Day! Better keep an eye on him because leprechauns can be pretty sneaky and they love to play tricks on people! 😉 Happy St. Patrick’s Day! 🙂
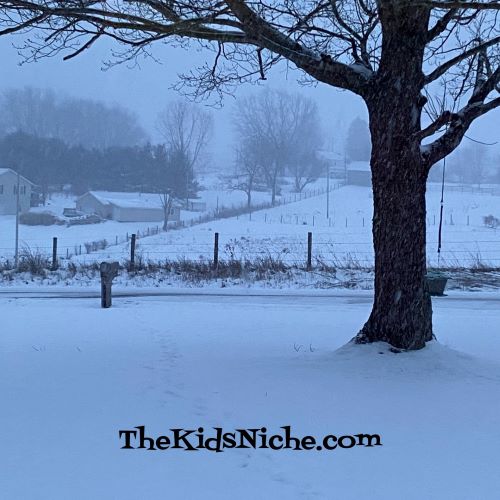
Oh my goodness, it is COLD outside!! Are you freezing where you live? (If you are warm, can I come visit you?!) It’s January weather in Ohio and this morning it was -14 degrees with a windchill of -26 degrees! Yes, those are minus signs in front of the numbers! Yikes!! And we have plenty of snow…it seems to snow more almost every day. It’s beautiful to look at…from inside a warm house! 😉
I thought it would be fun to share some wintertime jokes with you. Maybe laughing can make us feel warmer? It’s worth a try, right? 🙂
#1.) What did the icy road say to the car?
Answer: “Do you want to go for a spin?”
#2.) What do you call a snowman in the summer?
Answer: A puddle!
#3.) What do you get when you cross a vampire with a snowman?
Answer: Frostbite!
#4.) What do snowmen eat for breakfast?
Answer: Frosted Flakes and Ice Krispies!
#5.) What did one snowman say to the other snowman?
Answer: “Do you smell carrots?”
#6.) What kind of ball doesn’t bounce?
Answer: A snowball!
#7.) What falls but never gets hurt?
Answer: Snow!
#8.) What do snowmen call their kids?
Answer: Their chill-dren!
#9.) What do you get if you cross a wizard and a blizzard?
Answer: A cold spell!
#10.) What did the snow say to the road?
Answer: “I’ve got you covered!”
I hope these jokes cheered you up and made your insides warm! 😉 Grab a blanket and some hot chocolate and stay warm!
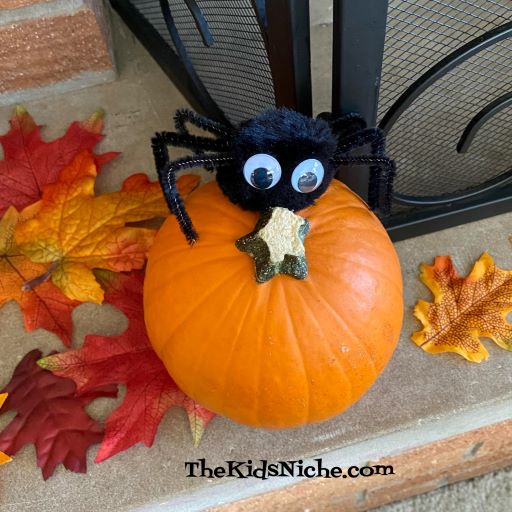
Halloween is almost here! Have you gone trick or treating? Have you been to a Halloween parade or party? Have you laughed at any Halloween riddles? We can definitely help you with the Halloween riddles! Here’s some spooky jokes that will be sure to tickle your funny bone!
#1.) Why do ghosts never lie?
Answer: Because you can see right through them!
#2.) What kind of music do mummies like?
Answer: Wrap music!
#3.) What do you call a skeleton who sleeps all day?
Answer: Lazybones!
#4.) What fruit does Dracula like?
Answer: Neck-tarines!
#5.) What musical instrument do skeletons play?
Answer: A trom-bone!
#6.) What kind of pants do ghosts wear?
Answer: BOO jeans!
#7.) How do you fix a broken jack-o-lantern?
Answer: With a pumpkin patch!
#8.) How are vampires like false teeth?
Answer: They both come out at night!
#9.) What do you call a ghost that gets too close to a fire?
Answer: A toasty ghosty!
#10.) When is it bad luck to see a black cat?
Answer: When you are a mouse!
I hope you share some of these funny Halloween riddles with someone else and they make someone else smile too! Have a great Halloween! 🙂
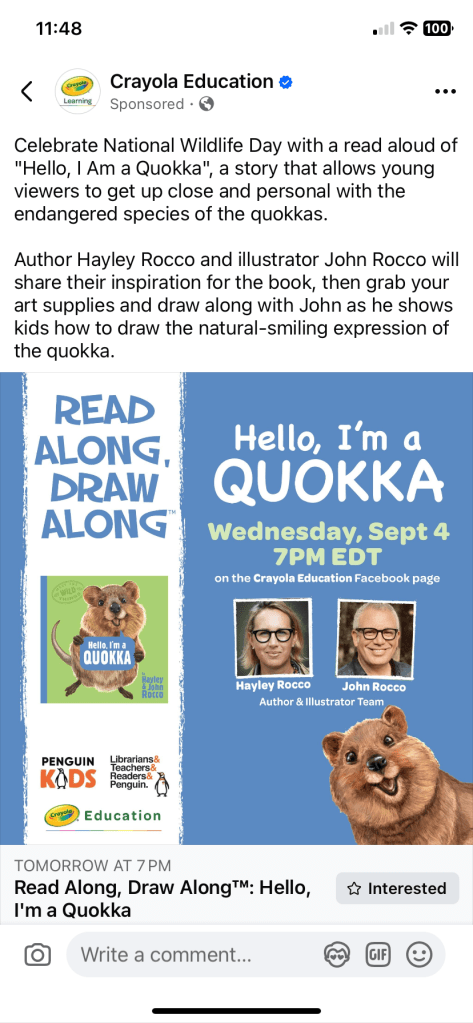
I just came across the Crayola Education Facebook page and saw that they will be hosting a fun online event for kids! It centers around the book “Hello, I’m a Quokka” and it’s happening tomorrow, September 4, 2024 at 7:00pm Eastern.
If you can’t make it at that specific time, the event will be recorded and you can find it later on the Crayola Education Facebook page or YouTube page later.
I’ve never seen a Quokka in person but wow, they are cute! They look like they are always smiling! Should be a fun event for families! 😃
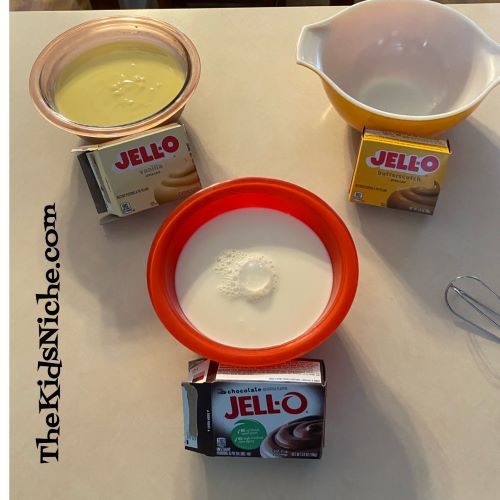
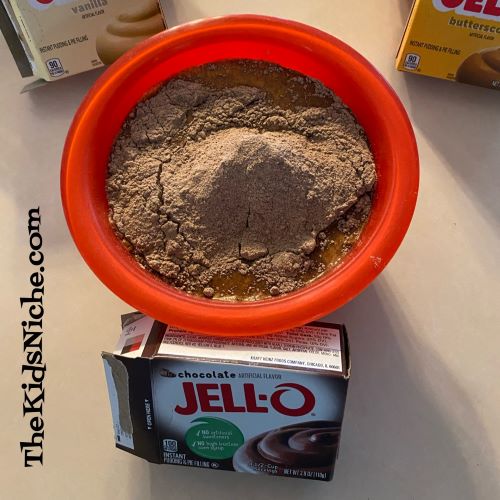
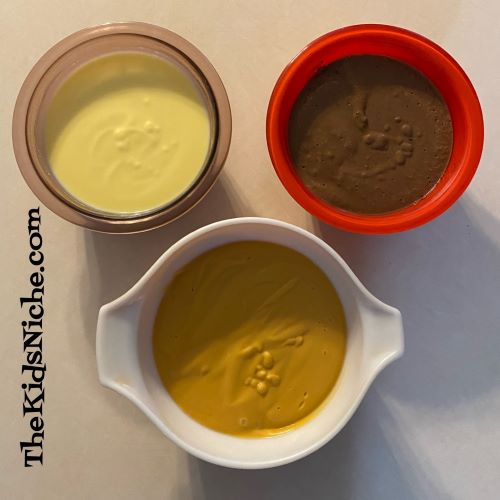
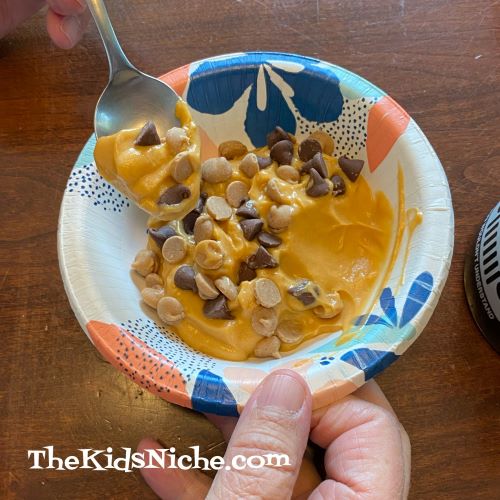
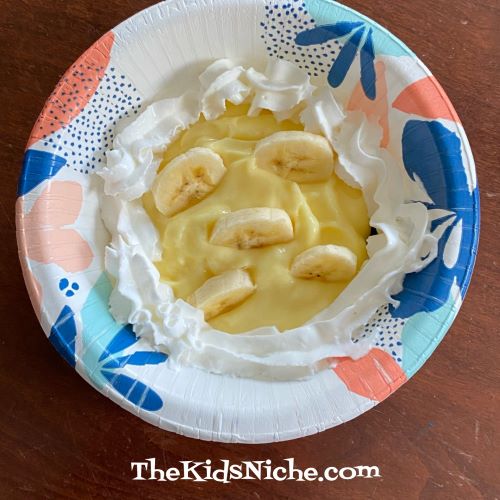
Hello again! I don’t know if I have invented something new or if this idea has been out there and I just never saw it, but here goes! You know how you can have an ice cream or a frozen yogurt bar where you put your ice cream or frozen yogurt in a cup and then add all the toppings you like? Well, let’s do that but use pudding! We made a pudding bar yesterday and it was lots of fun. First select your flavors of pudding and make the pudding. I chose vanilla, chocolate and butterscotch and I used instant pudding because it’s so quick and easy to make. The kids will have fun just making the pudding and helping to set up the pudding bar!
For this brand of instant pudding, you pour 2 cups of milk into a bowl, add the pudding powder from the box and stir for 2 minutes. This pudding is soft set in 5 minutes, but I made ours on Saturday evening, put them in the refrigerator overnight and served them for lunch on Sunday.
Pudding is ready to go!
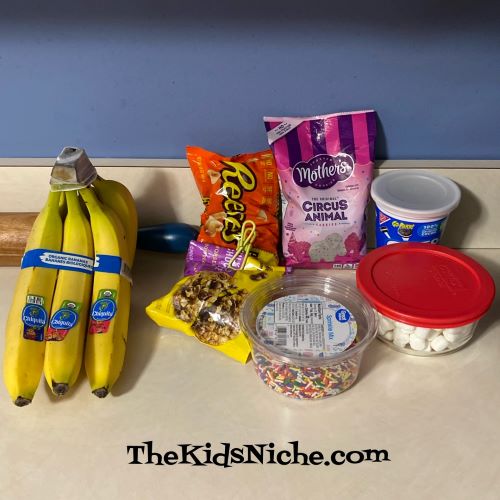
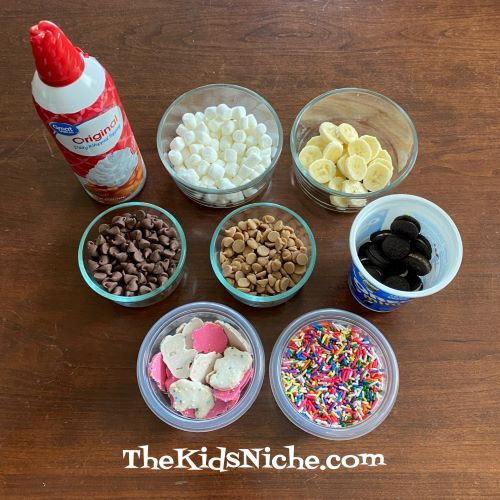
Now gather up all the things you would like to use for the toppings.
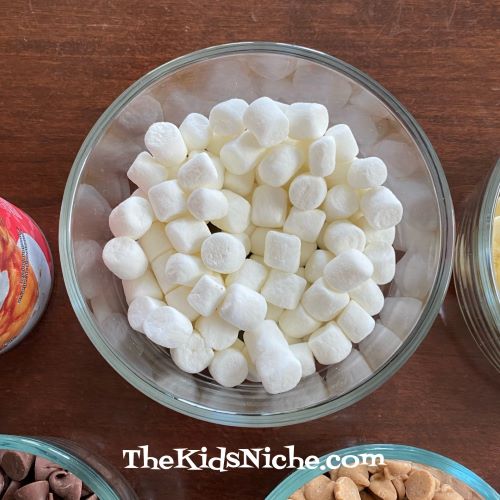
Put them into small containers so they are easy for people to serve themselves from. Here’s what we used: miniature marshmallows
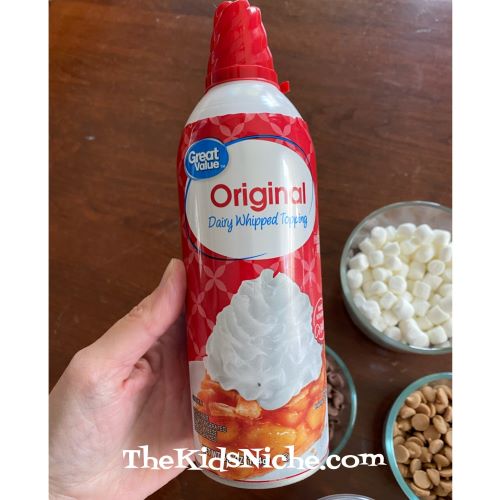
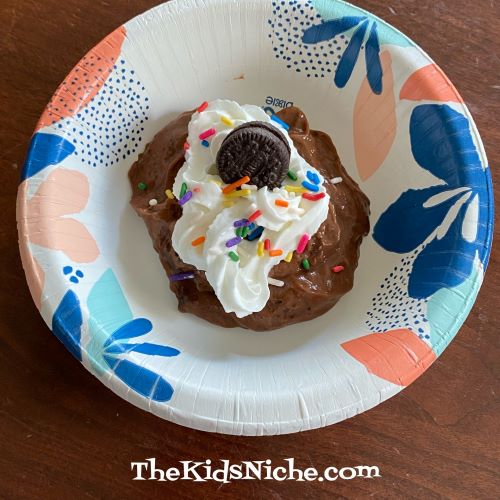
Whipped cream
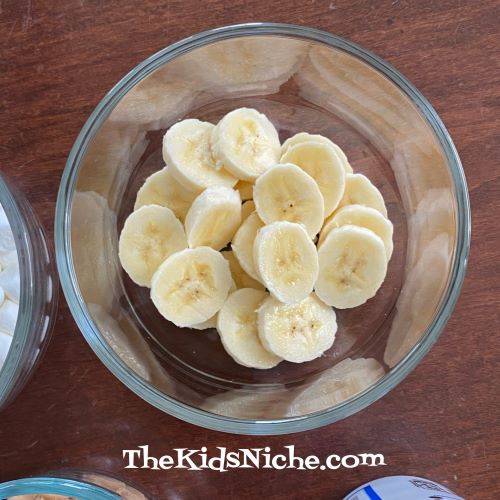
Banana slices
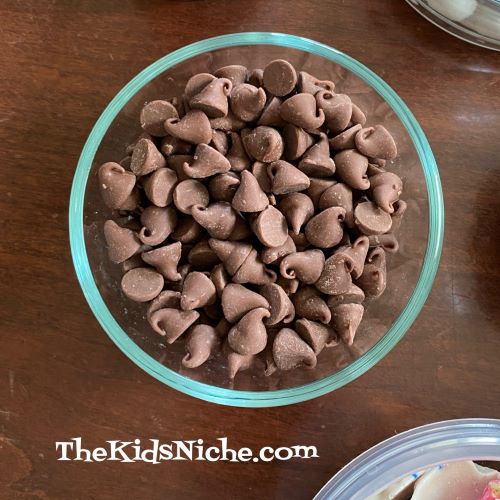
Chocolate chips…I used milk chocolate
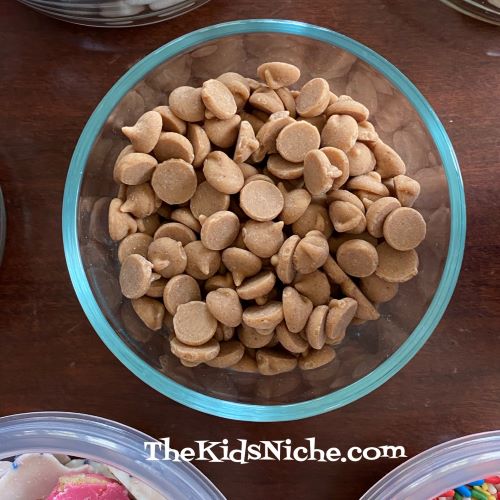
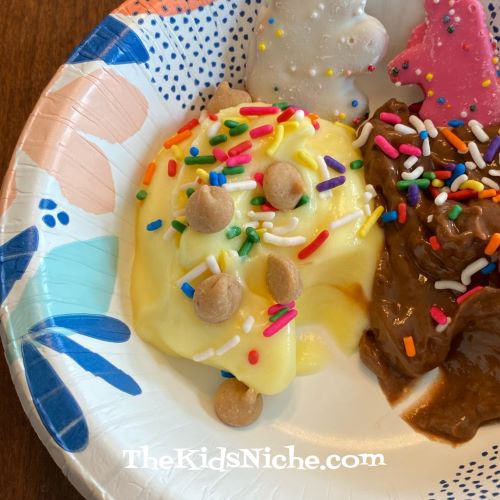
Peanut butter chips
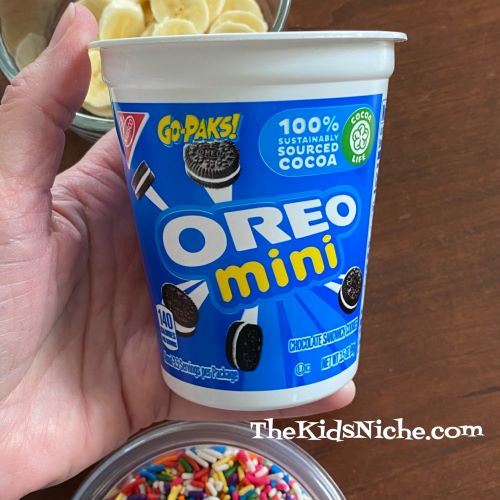
Miniature Oreo cookies
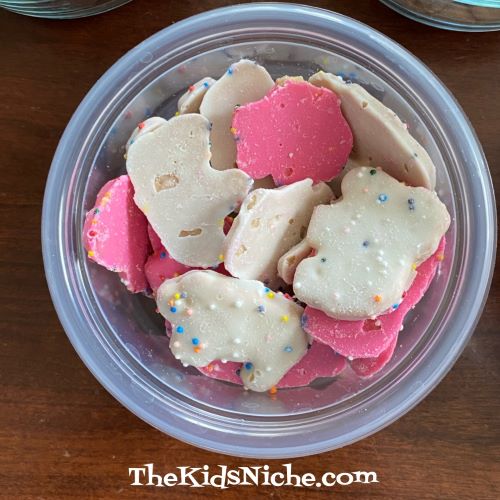
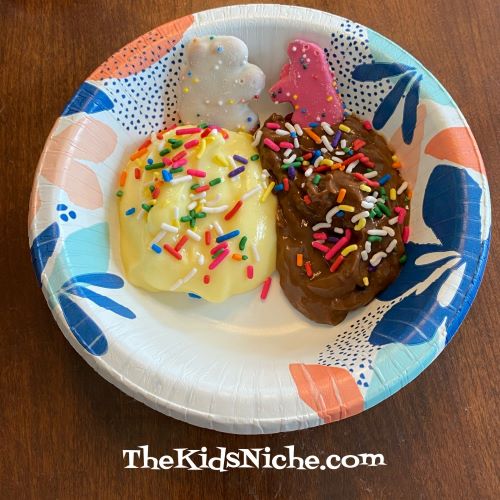
Small animal cookies
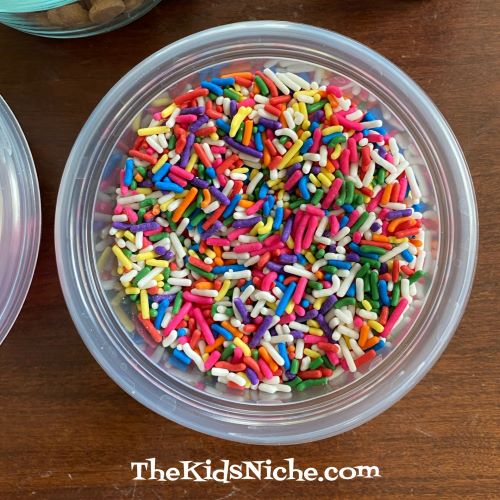
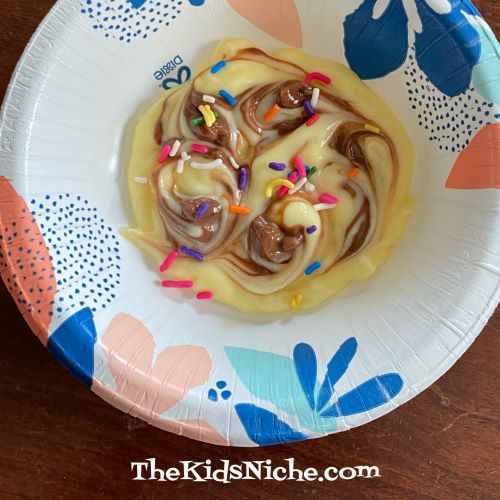
And sprinkles…sprinkles are very important. 😉
Assemble the toppings together and bring out the pudding!
Use small bowls for serving the pudding in. Let each person put the type and amount of pudding in their bowl and then add their own toppings. You can serve it like a cafeteria line with each person serving themselves. Here are some interesting combinations we saw at our house: Butterscotch pudding with peanut butter chips and chocolate chips.
Then there was some vanilla and some chocolate pudding topped with sprinkles and 2 animal cookies.
How about vanilla pudding with peanut butter chips and sprinkles?
What do you think of chocolate pudding topped with whipped cream and a mini Oreo cookie?
One bowl had vanilla pudding with banana slices and whipped cream.
And last, but not least, how about some vanilla pudding with a little bit of chocolate pudding swirled in? Oh, and sprinkles…gotta have those sprinkles!
A pudding bar is a simple dessert to serve and so much fun for kids. It’s a fun novelty to serve your dessert up just the way each person likes it and it’s fun to see what combinations others pick. I hope you’ll give this a try and have as much fun as we did! 🙂
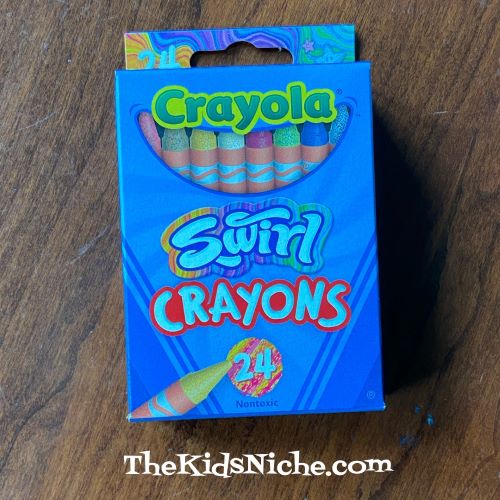
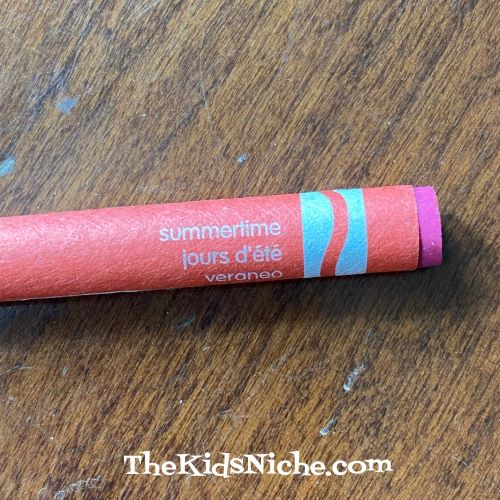
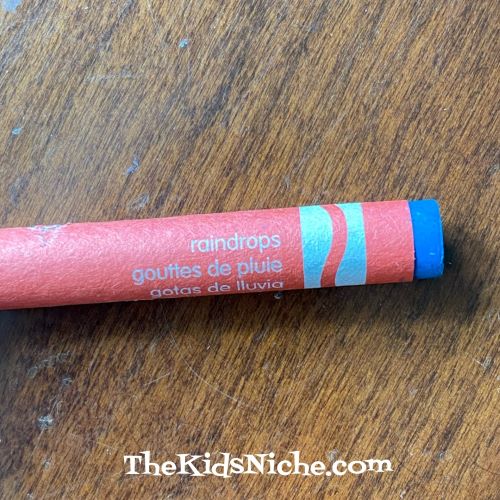
I spotted a new type of Crayola crayons while shopping the other day! Of course, I had to buy a pack and try them out. They are called Swirl Crayons.
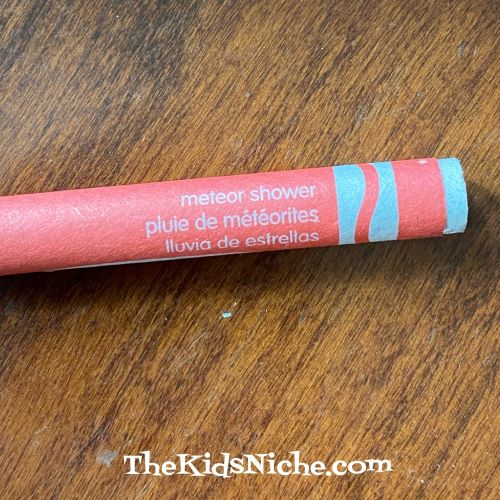
Here’s the description from the back of the box: “Crayola Swirl Crayons contain hidden specks of color swirled in for a surprising stripey, streaky effect!” After coloring a picture, I would agree that that is true. 🙂 But first I want to tell you that each crayon also has a fun name. There are names like Meteor Shower…
Summertime…
And Raindrops, just to mention a few.
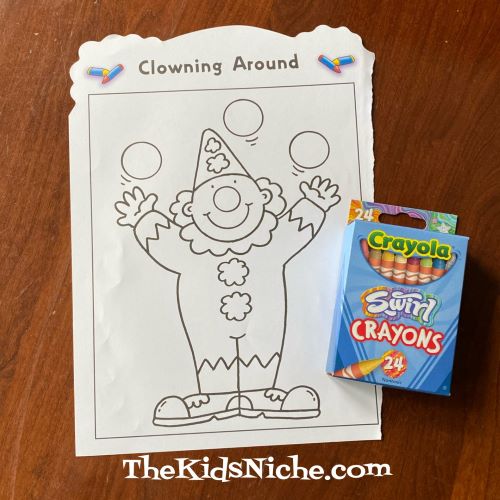
I got a page from a coloring book to try out these new crayons.
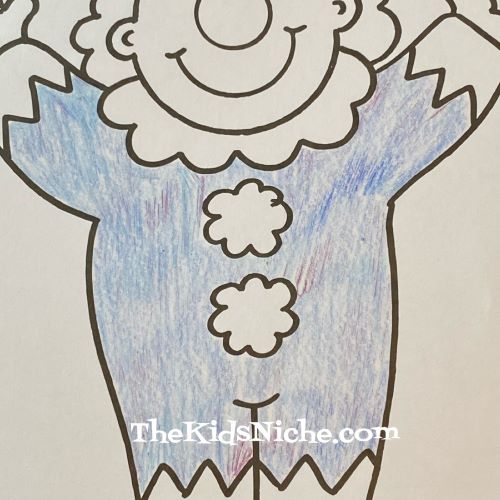
Can you see the fun streaks of a different color that show up when you color with these swirl crayons?
I hope you can see the special flecks and streaks that show up.
This type of crayon is fun to use and it’s a surprise what flecks or streaks of color might show up to add that extra special something to your picture. 🙂 The colors in the box are not the basic colors needed for school, but the Crayola Swirl Crayons are a great addition to fun art projects at home. 🙂
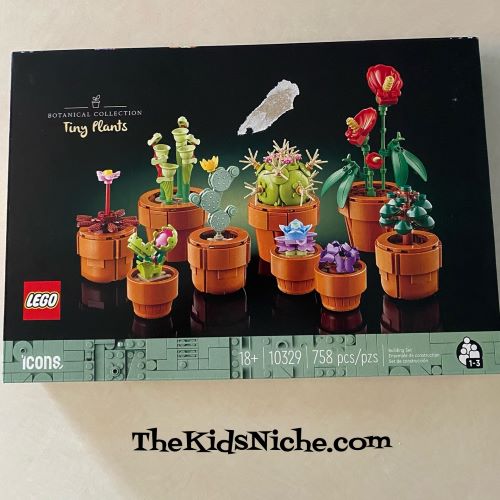
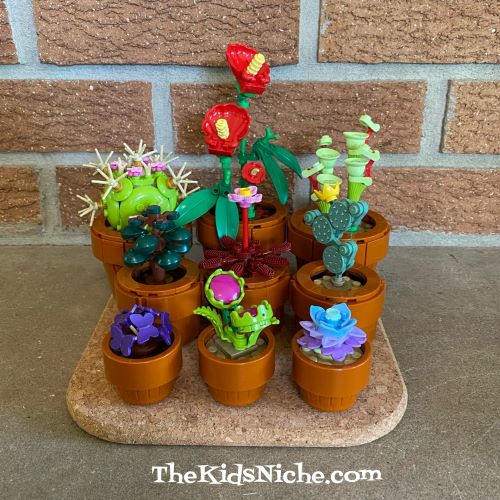
Hello, everyone! If you have followed my blog for any length of time, you have probably realized that I am a great fan of Lego! (I should maybe say fanatic!) I put a set together the other day and I absolutely loved it, so I just have to tell you about it! 🙂 The set I’m talking about is the Lego Tiny Plants set #10329.
What is so cool about this set? Ooo, I was hoping you’d ask! 😉 You can make 9 tiny plants out of this set, but it’s much more than that. This set TEACHES you about the plants in a fun way that your kids won’t notice that they are learning while building Lego! For example, the plants you make are fashioned after real plants. Let’s look at the first building booklet that’s included:
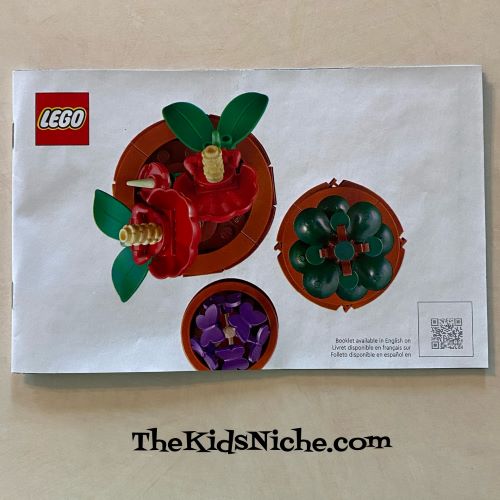
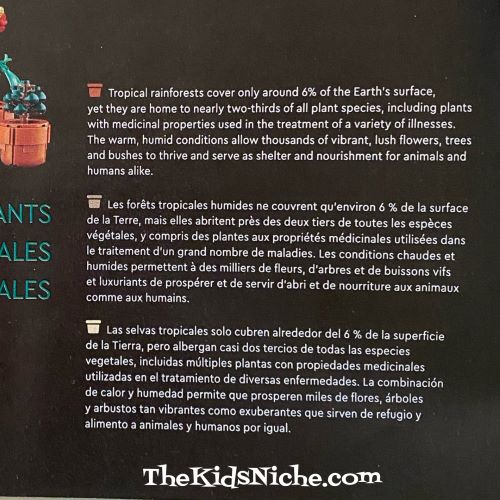
This set of 3 plants are found in tropical rainforests. Lego has included a few interesting facts about rain forests.
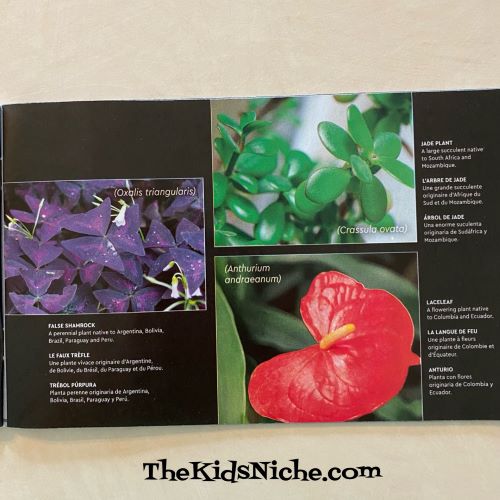
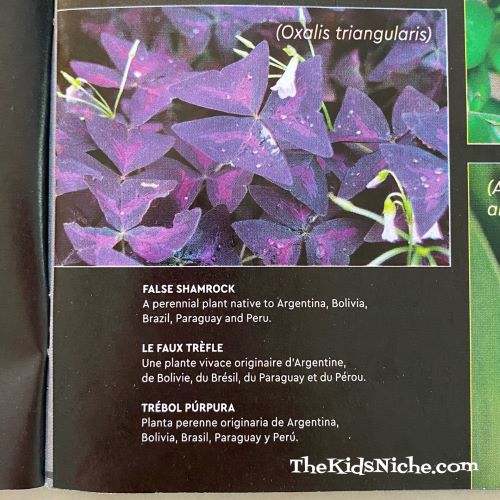
Then you’ll see pictures of what the real plants look like with their botanical names and their every day names. They have included just enough facts to be interesting, but not boring or overwhelming. It adds to the fun of building each Lego plant when the kids will be able to tell others what the plant’s name is.
For instance, let’s look at the first plant you’ll build, the False Shamrock or Oxalis Triangularis. Some kids will love being able to spout off the “fancy” botanical name. 😉
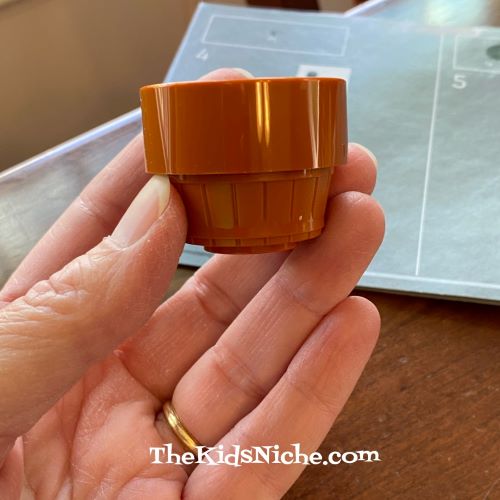
Building each plant is also fun! Look at these cute little pots the plants go in! Yep, you put the pot together too.
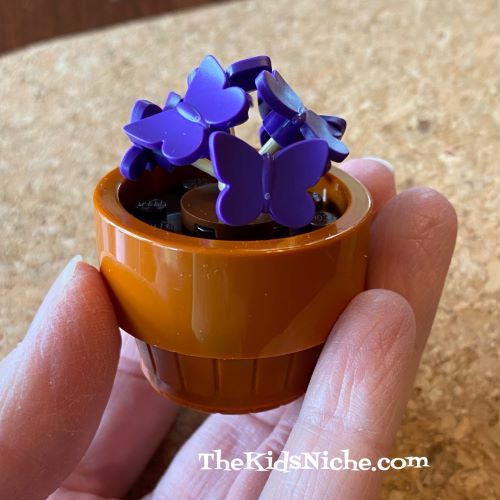
Here’s your False Shamrock! Isn’t that pretty?
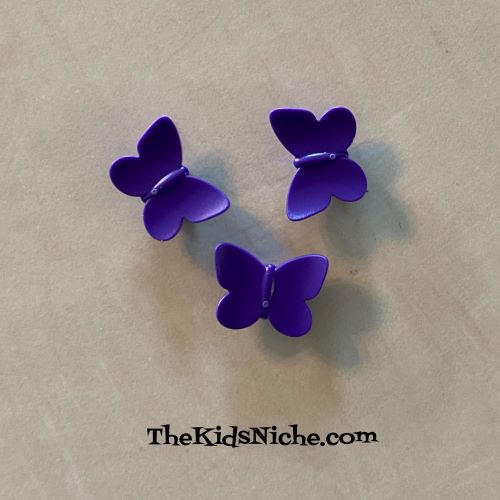
Wait, did you notice something familiar about the purple flowers on the False Shamrock?? Here’s a closer look at those pieces…what do you see?
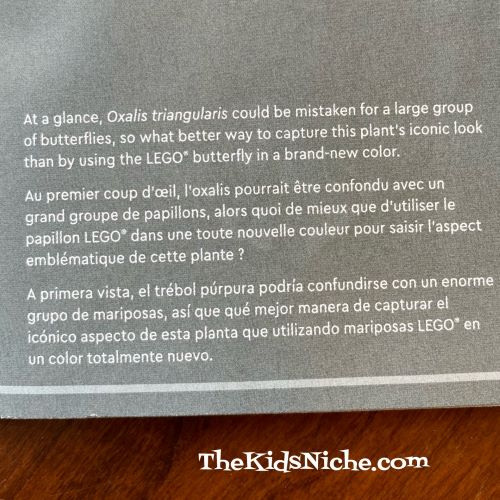
Yes, those are butterflies!! 🙂 Good eye! Some of the pieces Lego selected to use for these plants are pieces that have been used in other previous sets. 🙂 Look at what the booklet says about these butterflies…
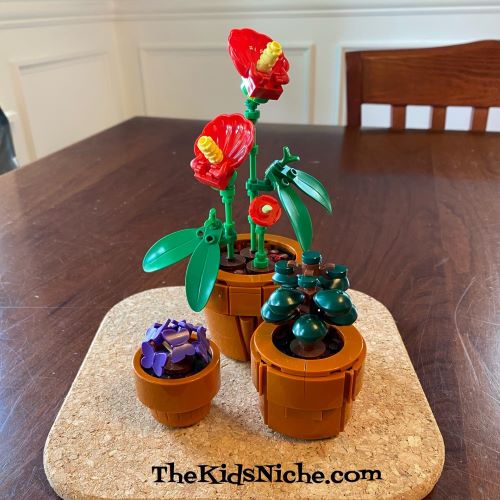
It adds to the fun of building the tiny plants when you are on the lookout for other pieces that you will recognize as having been also used in other sets! I won’t spoil the fun by telling you about the others, but keep your eyes open as you are building! 😉 The 3 plants made from the tropical rain forest plants look like this…
They are quite realistic, aren’t they? Another fun thing you could add to building these tiny plants is a visit to your local greenhouse and see if you can purchase any of these as a live plant to grow in your home. While I doubt you can find all of them, you might find a Jade plant or a Venus Fly Trap plant. (Venus Fly Trap plants are very cool, by the way!)
This has to be one of the most fun Lego sets I’ve built and I can see where it could be a wonderful project to work through with your kids. 🙂 Oh, you can build the tiny plants in any order that you like. They do not build on each other, but are separate.
I hope you’ll try building this set! What a great rainy day project! Or if it’s as hot where you live as it is here, its a great staying-inside-where-its-cool project. 😉 Have fun!