After Christmas Blues

*This post is a repeat from a couple years ago, but it is so applicable to today! I hope it helps! 🙂

When all the hustle and bustle and excitement leading up to Christmas has passed, do the After-Christmas Blues show up at your house? Sometimes taking a break from all the “new” toys and kits that arrived on Christmas Day, can be a help. Try going back to some of the “old” crafts they’ve done before but haven’t thought about in a while. New toys and things will seem more fun again after the kids have had a little break from them. There is comfort to be found in the tried-and-true. Here are a couple of suggestions of things we’ve done on here before but might be fun to pop out for the kids again.

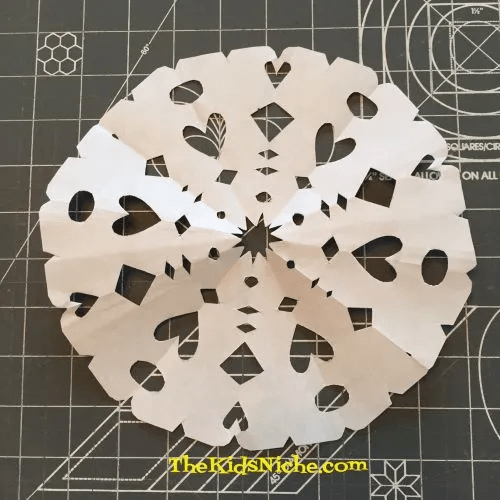
#1.) Making paper snowflakes. It’s still obviously winter and cold outside so how about doing a craft with snowflakes that don’t make your fingers cold when you play with them. Follow the link to this project:

#2.) You can even make a snowman with your paper snowflakes.

#3.) Hide and Seek Snacks. Try making up a fun snack in little cups and hiding the cups for the kids to find. Look for that post here:

#4.) Make some craft stick snowflakes. These are easy and fun! Follow the link to see how they’re made:

https://wordpress.com/post/thekidsniche.com/3254

There are over 700 posts here on my blog so I hope you can find some fun things to do with your kids to help everyone get back on an even keel again. Those new gifts will look even better afterwards! Have fun! Hugs to all of you! 🙂

Lego Advent Calendar – Day #7

Wow, today makes a full week of opening doors on our Lego Friends Advent calendar! The time is going by fast and it will be Christmas before you know it! Let’s look behind door #7 now!

What have we here?

Just a few pieces to assemble…

Awwwwww, he is soooooo cute!! 🙂

Hmmm, what do you think he is? A dinosaur? A gecko? A salamander? Here are 2 more views of him to give you a better look.

So what is your opinion of this adorable little thing? My grandson suggested he might be like Bruni, the fire salamander from the movie Frozen 2 and I think I agree! They are different colors but they look very similar! 🙂

He is very, very cute! 😉 And that’s a wrap on Day #7! See you tomorrow!

Lego Advent Calendar – Day #6

We are back and knocking on door #6 today of our Lego Friends Advent calendar!

Are you ready to take a peek inside? Let’s do this!

Oooo, I bet you can tell what today’s prize is! Look closely at the 5 pieces from today’s set. What do you think it is?

If you guessed a snowman, you are absolutely right!

He is quite the handsome guy, don’t you think? 😉

(Oops, I see in the background that the puppy fell out of his doghouse! Haha! I better go fix him!) See you tomorrow for more Lego fun! 🙂

Lego Advent Calendar – Day #5

It’s time to check behind door #5 of our Lego Friends Advent calendar! Are you ready? 🙂

Here we go!

It’s a little kitten! 🙂 There are just 2 pieces behind today’s door…the kitten and a stand for the kitten. It’s about the same size as the little puppy we found on Day #3. This is a close-up picture of it so you can see the adorable holly on the kitten’s head!

I’m not sure if I should put the kitten beside the puppy? Do you think they will get along with each other? Maybe I’ll start them out with a little space between them and see how it goes. 😉

I hope you are having as much fun as I am opening a door each day! Be sure to check back again tomorrow! 🙂

Lego Advent Calendar – Day #4

Hello again! 🙂 I’m so glad you’re back! Let’s see about door #4 of our Lego Friends Advent calendar!

Opening the door now to find…what is it?

Here’s a pile of pieces. What do they make?

Aww, it’s a little doghouse for the little dog we found yesterday! 🙂

And the little dog fits right inside the doghouse! How cute is that?!

Adorable find today! See you tomorrow for more fun!

Lego Advent Calendar – Day #3

Day #3 of our Lego Friends Advent Calendar is coming your way! Door #3 is in the upper left hand corner of the box.

Drum roll, please, as we open today’s door!

Hahaha! I have to admit that I was a little surprised to see what was hiding behind door #3! It’s a tiny little puppy and…you guessed it…some doggie poop and a shovel to clean it up! 🙂

Let’s put this adorable little puppy into our Lego Christmas scene.

Be sure to stop back tomorrow for our next reveal! 🙂

Lego Advent Calendar – Day #2

It’s Day #2 of our Lego Friends Advent calendar reveal! Let’s find door #2! 🙂

What surprise awaits us…? Open the door!

Here’s all the pieces…

To be honest, I’m not exactly sure what this is? Maybe an archway? What’s your take on it? There are 3 extra pieces with this set.

Maybe it’s an archway where you take pictures? It’s cute and festive!

See you tomorrow for Day #3! 🙂

It’s the Most Wonderful Time of the Year!

Welcome to December! It’s time once again to share a Lego Advent Calendar with you! 🙂 I hope you’ll join me each day as we open a door and find a surprise inside. There are a few different kinds of Lego Advent calendars…we’ll be doing the Friends version. Let’s get started! Here’s what the front of the box looks like…

And the back of the box…

There is an extra flap on the box which you can open and it makes the box into a cute background for all the treasures you will find inside the box.

Ok, so we open one door each day from December 1st through December 24th. Today is the first so we start with the door that has a number 1 on it.

Opening the door…

Pull out the plastic bag and open it. Let’s take a second here and make a note that if the pieces in the plastic bag don’t match up with the picture on the door, you probably need to take the inner box out and turn it around and put it back into the outer box. This happened to me last year and it took me a while to figure out what was wrong. Haha! Hopefully your advent calendar was put together correctly and the picture you see on the door will help you put the little set together each day.

Here is today’s set! The figure can wear her hair or the blue helmet for when she’s playing in the snow! (And yes, she is missing one hand, but that’s how she’s made.)

So this is the first set to start off the advent calendar! 🙂

See you tomorrow for door #2! 🙂

Fun Foam Gingerbread Kit

Greetings once again! I hope everyone had an awesome Thanksgiving weekend! 🙂

Do you find it hard to make edible gingerbread houses, but you think gingerbread houses are just so cute? (Am I the only one?! I can’t tell you how many gingerbread houses have ended in failure at our house!) How would you like to make a simple gingerbread house out of foam pieces that’s easy enough for the kids to make mostly on their own? While it’s not edible, it’s very cute and totally mess free! 😉 I found this adorable kit at our Target store for $3.00.

The foam sheets are already cut and some designs have been printed on the foam shapes.

The pre-printed shapes punch out very easily.

There are some instructions provided in the box, but our 10 year-old granddaughter didn’t even look at them. 😉 It goes together quite nicely. First she did the house part…

…and then added the roof pieces.

The Disney characters have stands so they will stay upright on their own. Stickers are included and you can decorate your gingerbread house as much or as little as you like.

So simple and yet so cute and festive! 🙂

Timeless Turkey Craft for Kids

It’s less than a week now until Thanksgiving! Are you ready? We aren’t, but we are working on it! Do you need a few more decorations to make your house look festive? Here is an age old craft that you’ve likely seen…and done…many times before but this can serve as a reminder for you. We’ll call it the trace-around-your-hand-turkey. 🙂 All we need for this craft is a piece of paper, a pencil and something to color with. I used markers for my example.

Place your (or your child’s) hand on the sheet of paper.

Trace around your hand using the pencil.

Lift your hand off after you finish tracing around it and then add a line at the bottom to close up the hand.

You have the outline of your turkey! Great job! Draw the turkey’s eye, beak, feet and wattles. (Wattles on the turkey are the parts done in red on top of and underneath his head.)

I probably should have turned my paper the other direction since my hand is rather big and there isn’t much room for his legs and feet. But maybe this guy is just short! haha! The fingers of the hand will serve as the turkey’s feathers, so go ahead and color them whatever color you like.

Now you can draw on a wing and then color the turkey’s body.

I chose to add the words “Happy Thanksgiving!” to my picture. You could also draw and color in the background with things like grass, blue sky, a barn, a tree, etc.

And you did it! How do you like your Thanksgiving turkey? I’m sure he looks great! Now for a little Thanksgiving turkey humor… 😉