Let’s Take a Walk Together

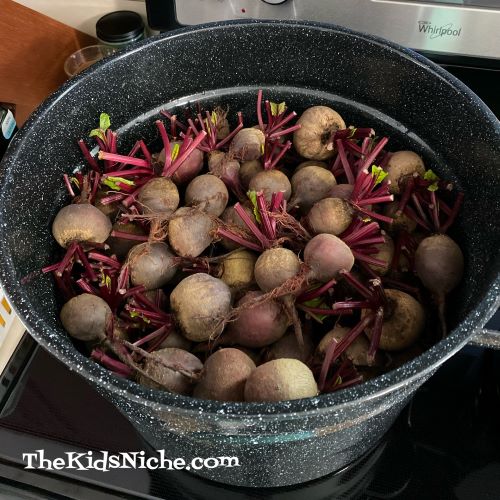
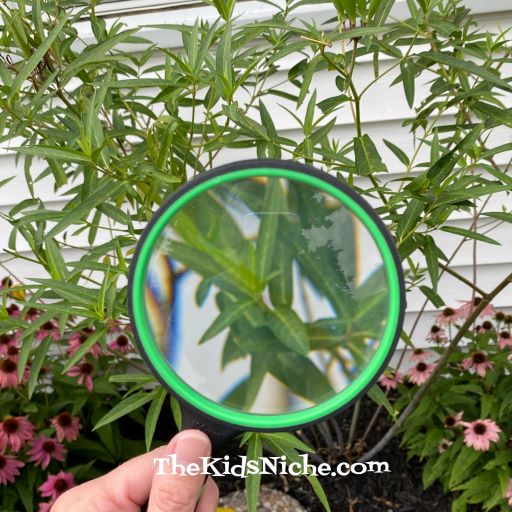
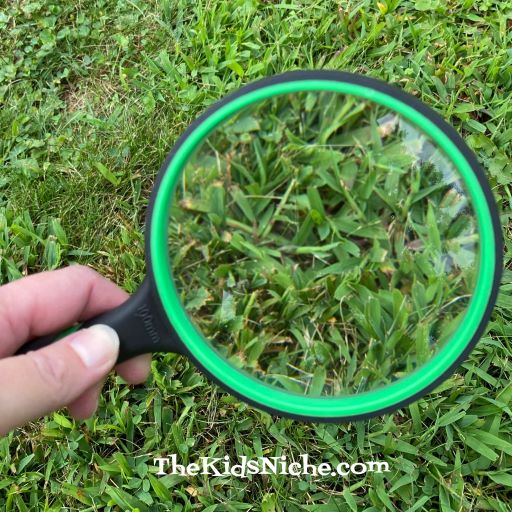
The days of summer are slowly coming to an end, though the temperatures here this week have felt very warm! Let’s take a walk in nature together and see what fun things we can find. I call this “finding joy in nature and in the simple free things in life”. If you have a camera or a cell phone with a camera, take some pictures of the interesting things you find. Kids love to take pictures of special things. 🙂 I’ll show you some of the cool things I found on my walks in nature lately.

It can be fun to see how many different colors of wild flowers or weed flowers you can find. Here is a light blue flower that grows along the roadside where we live.

You can also make a note of what size the flowers are that you see. For instance, these little yellow flowers are very small.

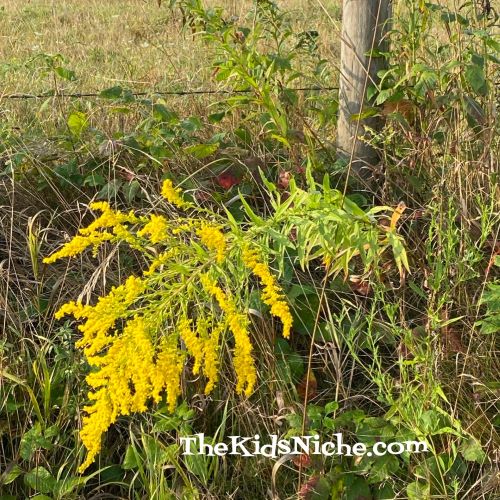
While the yellow flowers on this plant are quite large.

Here we have a little feather that I almost missed seeing, but look how pretty and soft it is!

This is a dandelion whose days of being yellow are gone and all that’s left are the seeds. But look how pretty and perfect it looks! Some people call these “wish flowers” because they pick the flower, make a wish and then blow all the seeds and their wishes into the air.

These tiny, tiny pink flowers are on a weed, but they are so delicate and pretty!

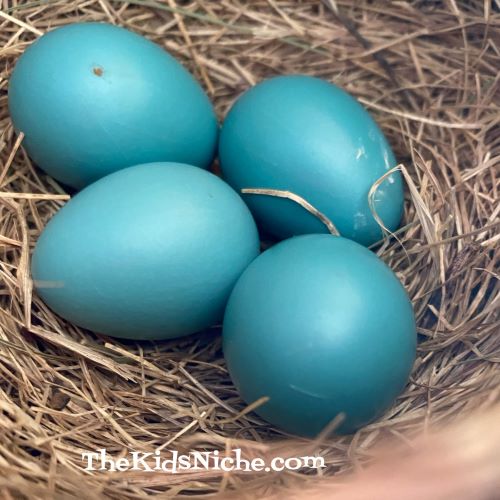
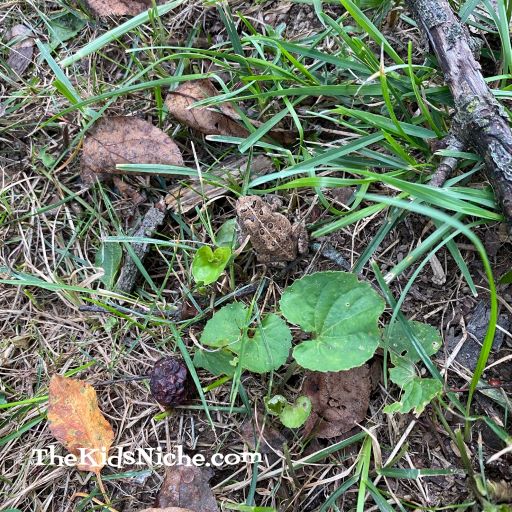
We even found a little friend hopping through the grass!

We added another color of flower to our list when we found this purple weed!

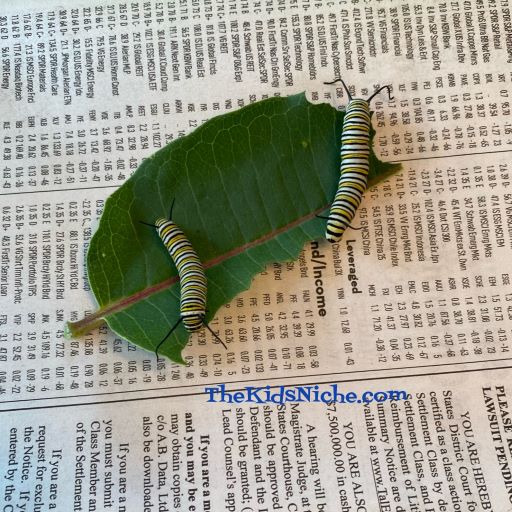
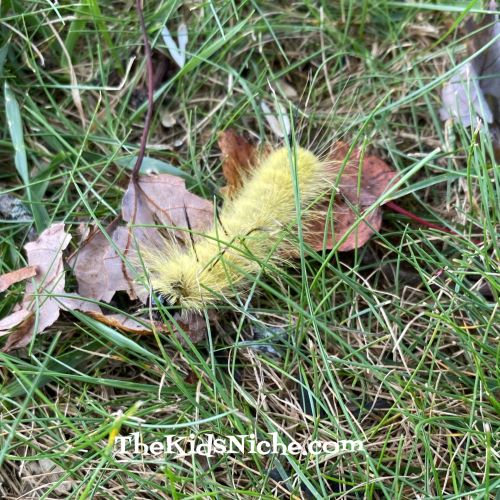
And who do we have here? Why hello, there, little caterpillar! You can make up a story about where the caterpillar came from and where he is heading now. Why is he running so quickly through the grass? 🙂

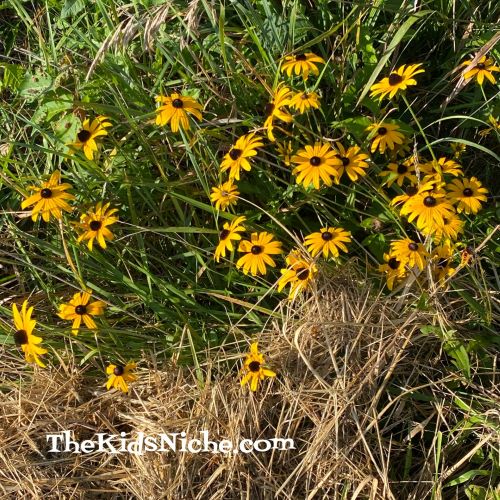
These flowers were also growing along the roadside but they look very much like the Black-eyed Susans that are growing in my flowerbed.

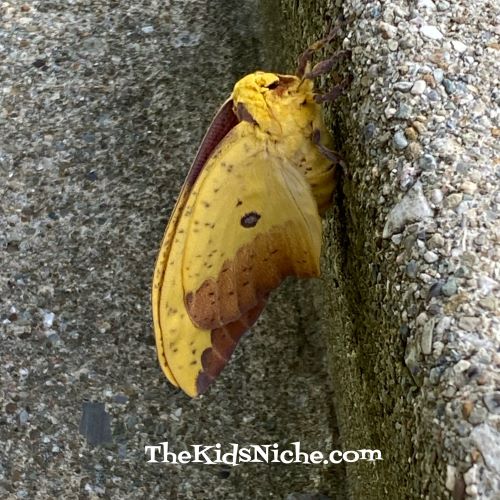
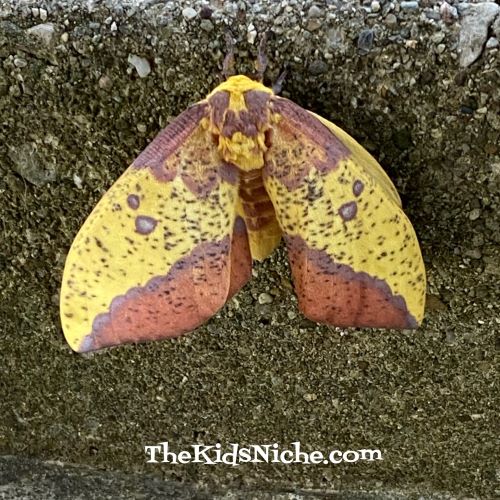
Keep an eye out for butterflies! We have lots of these little ones flying around our house. I think this might be a Great Spangled Fritillary butterfly. So pretty!

You never know when you might spot a man raking hay… 😉

Taking a walk in nature can be so refreshing and calming and gets you away from screen time and gives you quality time together. You can take it a step further and print out your pictures and make a scrapbook together. I hope you’ll take a few minutes out of your busy last-of-summer days and enjoy some time outside. 🙂

An Adorable Update for You

Hello, again! Just wanted to share a very adorable update with you that I think you might enjoy seeing! Earlier this week for Earth Day I posted some pictures from our nature walk. One of those pictures was this Robin’s nest with 4 eggs in it.

I checked on the nest yesterday and guess what?! Yes, the eggs have hatched! 🙂

Look at those tiny baby birds! Awww, it makes my heart soft and mushy just looking at their cuteness! 🙂 Just wanted to share them with you to brighten your day!

Where Do Red Beets Come From?

You’ve probably seen red beets and even eaten them. I’m guessing you bought them from the store in a can like this:

But do you know where red beets come from? Have you ever seen a red beet plant? We grew our own red beets this year in one of our garden boxes. (The orange flowers you can see are Marigolds which can help keep bugs away from the red beet plants.)

The red beets grow under ground and then they are dug or pulled up. Here’s a closer look at the plants and what you can see above ground.

This is what one red beet looks like when it’s taken out of the ground.

A raw red beet is hard and is best eaten cooked. There is a process to follow if you want to cook red beets. First you cut off the top leaves, but it’s important to leave about 1-2″ of the stem intact. And you don’t cut off the roots. If the roots or the stem are cut off, the color will bleed out of the red beet when its cooked.

We sprayed the red beets outside with the water hose in order to remove the biggest part of the dirt from them. Then they were taken into our kitchen and put in the sink.

Next they are washed by hand and put into a large pot.

Water is added to the pot so that the red beets are all covered with water.

The water is brought to a boil and the red beets are cooked until the skin of the red beet will slide off the outside of the beet. The beets are then put into a large pan of cold water so they can cool. Once they are cool enough to be handled without burning your hands, each beet is gently “squeezed” and the skin, the root and the stem will slip right off.

And ta dah, there is your red beet ready for eating or canning into jars.

We canned or preserved our red beets so we will be able to eat them all through the winter time. In order to can the beets, they are cut into smaller pieces.

The red beets are packed into special glass canning jars and some salt and boiling water is added. A two piece set of a metal lid and a metal ring and placed on the top of each jar. Then the jars are processed in a pressure canner for a while. When the right amount of time has passed, the canner slowly cools down and once the pressure is gone, the jars of beets can be removed. As the jars cool, the metal lid will seal and that is what makes it safe to keep the red beets for a longer time on a shelf.

That is an abbreviated version of the canning process, so if you ever can red beets yourself, be sure to follow the instructions that come with your pressure canner. 🙂 Now you know where red beets come from! I hope you’ve enjoyed learning more about red beets!

Can You Spy Our Little Friends?

Just for fun today, I have 4 pictures for you to look at and see if you can spot a little animal friend or friends. The first one is the easiest one…here we go!

#1.) 5 little babies are in this picture. Can you find them all? (You can see part of a 6th one too.) (Baby chicks)

2.) Can you spot 1 little brown friend in this picture? I almost stepped on him before I saw him! (Baby toad)

#3.) This little yellow, white and black striped friend was crawling on one of my flowers. (Monarch butterfly caterpillar)

#4.) And now the tiniest of all our friends today! Can you spot him? He’s a smaller version of picture #3. (Monarch butterfly caterpillar)

Wasn’t that fun? Keep your eyes open when you are outside because you never know what little friend you might see! 🙂

It’s That Time of Year Again! Raising Monarch Butterflies!

Yep, it’s begun again! In case you haven’t followed me long enough to know what I’m talking about, every summer I raise Monarch butterflies and release them back into the wild. The Monarch butterfly population had dwindled down drastically, but over the last couple of years the population has increased a LOT! Which is so exciting!! Many people are doing their part to grow plants that the Monarch’s feed on. Monarch caterpillars will only eat Milkweed plants. I look for the Monarch eggs or caterpillars and raise them in a safe place away from many of the predators that will destroy them. Here’s the start of my setup this year!

Last Sunday morning, I found 6 caterpillars and put them into their “hotels”. 😉 Some children were here that day and they discovered 5 more! And we were off and running! 🙂

I don’t put more than 4 caterpillars in one container at any given time. And I try to put the same sized caterpillars together.

Today I found 1 more caterpillar and he/she is still very tiny! Can you find him/her in the next 2 pictures?

Isn’t that pretty neat?! I won’t share all the steps today that the caterpillar goes through to become a butterfly, but for now I’ll just say eventually they form a chrysalis. They stay in the chrysalis for a while and then the Monarch butterfly emerges. It’s truly magical! (I’ll share more details in another post.) Here is a picture of 4 of this year’s caterpillars that have gone into their chrysalis now:

For some reason, it seems they all wanted to be in the same corner of their hotel! LOL Two of them are actually touching, which I’ve never had happen before. Now the wait is on till it’s time for the butterfly to put in an appearance! I really enjoy raising Monarchs each summer! 🙂 It’s a great experience to share with your kids!

Be an Explorer Like Christopher Columbus

Happy Columbus Day! How many times have you heard the saying, “In 1492, Columbus sailed the ocean blue”? 😉 I know, I know…now there is a lot of disagreement about what Christopher Columbus did or didn’t do, but one thing I think we can safely say is he was an explorer. So to celebrate Columbus Day today, let’s help the kids become explorers!

The first thing an explorer needs is a cool hat, right? 😉 I’m going to show you how to make a cool explorer’s hat out of paper. I am using a piece of construction paper so you can see more clearly how to make it, but you might want to use something bigger like newspaper. Just depends on how big the person’s head is that you are making it for.

To start, I got a piece of green construction paper.

Here’s how to make your hat. Fold it in half the long way.

Open it back up.

Now fold it in half the other way.

Leaving the paper folded, fold in one top corner of the paper to the middle line so it looks like a triangle.

Now do the same thing on the other side.

Fold one side of the paper’s straight edge up so the fold is at the bottom of the triangles.

Turn the paper over.

And fold the other side up the same way.

Your hat is done! Pull it open at the bottom folded edge.

This little guy was happy to be a model for your new explorer’s hat. 🙂

As I already mentioned, you can use different sizes of paper to make different sizes of hats. Here is the one I made with construction paper, one made with a single sheet of newspaper and one made with a full sheet of newspaper.

For the full sheet of newspaper size, you might need to let your triangles not meet in the middle so that you still have paper left over to fold the edges up.

Barbie and Ken thought it would be fun to be explorers too!

What else does an explorer need to go exploring? Maybe a spyglass? Let’s make one of those too! All you need is an empty paper towel or toilet paper roll, a piece of paper and markers or crayons.

Cover the tube with the construction paper if it has a lot of glue marks on it like this one does. Use glue or tape to hold it in place. (I used tape because it doesn’t need drying time.)

Let your kids decorate their spyglass with markers or crayons.

You are now ready to be an explorer!! What does an explorer do? Well, they put their explorer hats on and walk around the house or outside and they look through their spyglass to see what they can spy! They use their imagination to discover a new land. Be careful because you never know what kind of strange animals you might find!

Also watch out for things like carpet that might have quicksand or lava! You might need to jump from rug to rug in order to not get sucked in! 😉 I hope your new hat and spyglass will make exploring a ton of fun!

Fun With a Simple Magnifying Glass

Here’s another simple and inexpensive way for kids to have fun and learn something in the process! Yep, the title gave it away…I’m talking about a magnifying glass. I found one on Amazon for $6.99. And its pretty big.

I know…all it does is make things look bigger. But have you noticed how very COOL things look when they are huge?! Like….books.

Look at mom and dad’s coffee K-cups.

Or your dog’s nose…

Try looking at plants!

Flowers are cooler when you magnify them.

And grass! Check out what you’ve been walking on!

You might even find something cool that lives in the grass!

And dirt! Dirt looks pretty cool up close too!

The list goes on and on! Check out the carpet, your sister’s tongue, a comic book, look at your food…you could do this for HOURS!! Inexpensive, simple, safe and fun! What more could you want? 😉

A Shaving Cream Treasure Hunt

Ok, that title sounds rather crazy, doesn’t it? Well, it just might be! Lol I saw this idea in a magazine a while back, but we just tried it out today. The most important thing I can tell you about this activity is…#1.) Do it outside and #2.) Put swimming suits on the kids first! Ok, now that we have that out of the way, here’s how it works:

Grab a dishpan, some little washable toys and a can of shaving cream.

Put a little shaving cream in the bottom of the dishpan, then add some of the toys.

Add more shaving cream, then more toys until all the toys have been added. Make sure to end up with shaving cream on the top.

Now comes the part where you go outside! Have your water hose handy! Haha! Tell the kids how many toys are in the tub and let them go digging for them. (This will be the shortest time of the whole activity!) 😉 Let them wash the toys off with the hose.

The next part is where it can get a little crazy so it’s your call just how far you let this proceed. Kids and shaving cream just kinda automatically lead to shaving cream finding its way to a lot of other places besides the dishpan.

Haha! If we had thought of the swim suits earlier, we could have just hosed them down when they were done playing. 😉 But that’s part of summer fun, right? Making messes outside and playing in the water when you’re done! A special thanks to this sweet, tolerant mama for letting her kids try my crazy ideas! I hope you’ll give this a try! Your kids will be glad you did! 🙂

Very Cool Imperial Moth

Yesterday evening when I was walking up our front steps, I saw something strange looking hanging on the side of one of the steps.

At first it looked like just a blob to me, but when I looked closer I thought it was some kind of an insect, but a very weird looking one.

After studying it for a few minutes, I began to think it might be a moth, but I had never seen one like that. I have raised Monarch butterflies for a couple of years now, so I’ve seen them hatch out from their chrysalis and their wings are folded up and their body is fat with fluids. The Monarch slowly pumps the fluid into their folded up wings and they slowly expand to look like the butterfly wings you would normally see. I started thinking the wrinkly blob part might be wings from a newly hatched moth.

Our family has a lot of interest in plants and butterflies/moths and other wild animals, so I sent a text with pictures to some of our kids to see if they knew what it was. Sure enough, our daughter-in-law thought it might be an Imperial moth. After doing a little research online, I think she is right. They can have over 6″ wingspan so they aren’t exactly little moths! One of the types of host plants that they like are maple trees and there is a maple tree right above the steps we found this guy hanging on. I watched him and waited for a while and I was finally rewarded by seeing his wings expand! (I’m saying “he” but I have no idea if it’s a male or female.)

He was so cool looking!

I watched and waited a while longer and he finally opened his wings up part way!

It was starting to get dark by this time and even though I kept checking on him, I didn’t get to see him open his wings all the way. But the wind was blowing and I got a picture of him that lets you see underneath to where there is another part of his wings.

Look at this picture I found online of an Imperial moth. It looks very much like a leaf in the Fall!

I’m rather sad to say that he was gone this morning when we went outside. But what a neat experience! So keep your eyes open when you are outside because you might just see something new and interesting like an Imperial moth! 🙂

If you would like to read more about the Imperial moth, here’s a nice article from Wikipedia:

https://en.wikipedia.org/wiki/Eacles_imperialis