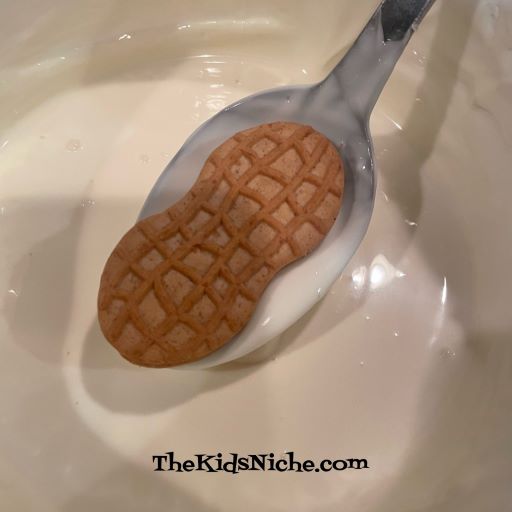
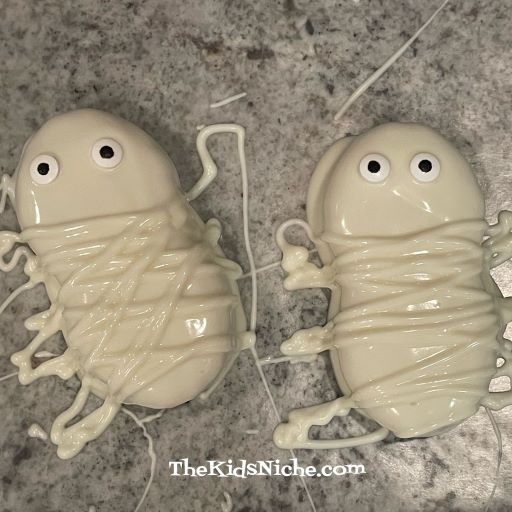
Two very special people did a Halloween food craft and were sweet enough to share their pictures with us! Our daughter and granddaughter made some very yummy looking mummies out of Nutter Butter Peanut Butter Sandwich Cookies. Don’t these look great?! 🙂
You will need some Nutter Butter cookies, some white chocolate or white candy melts and some candy eyes. Begin by melting the white chocolate. Then dip each cookie into the melted chocolate.
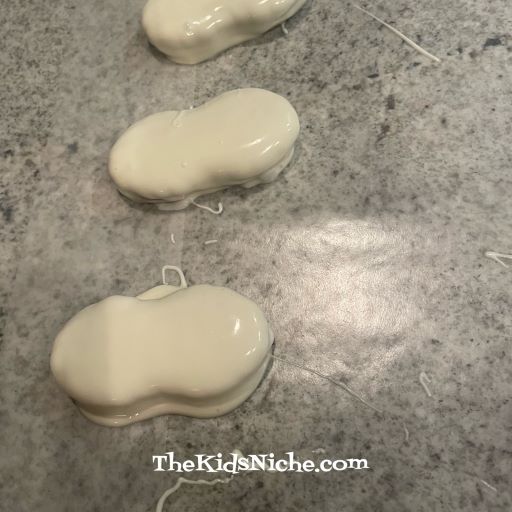
Lay the dipped cookies on a flat surface that is covered with wax paper.
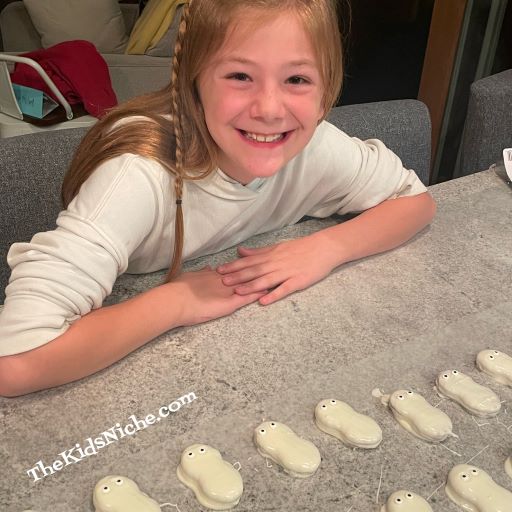
Add 2 candy eyes to each cookie while the chocolate is still soft.
I guess they could be ghosts if you stopped here! Lol Wow, it looks like they made a whole army! 😉
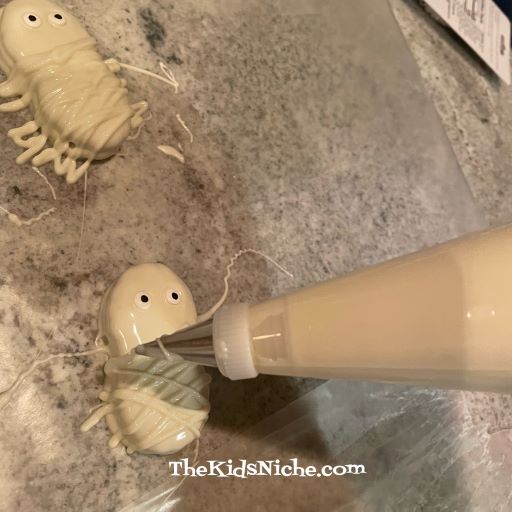
To finish making your mummies, run thin “strings” of chocolate back and forth across each cookie. You can do this by adding the melted chocolate to a pastry bag with a thin round tip on it and piping it across the cookies. Or use a ziploc bag and cut a tiny hole in one corner and use it in the same way.
That’s it! Now you have some very yummy mummies to share for Halloween! I believe this batch of mummies went to a school Halloween party!
We’re sending a special thank-you (and some hugs!) to our amazing crafters for today’s post! 🙂
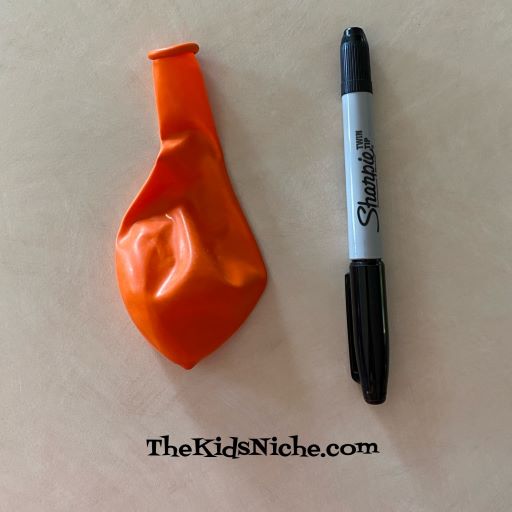
Hope you all had a good weekend! We’re back with a super fun and super easy way to make a Jack O’Lantern! (And cheap!) All you need is an orange balloon and a black permanent marker.
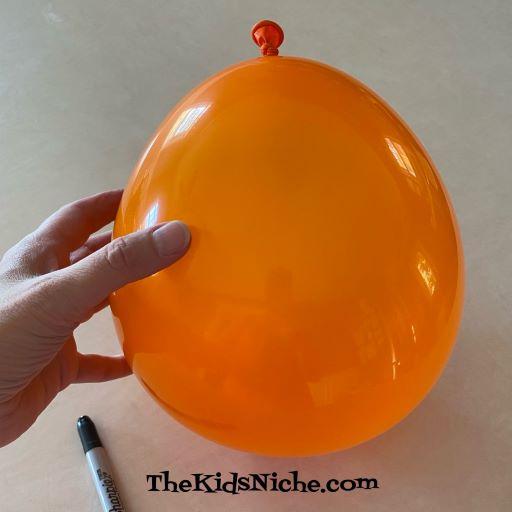
Step #1.) Blow up the balloon and tie it off.
Step #2.) Draw a Jack O’Lantern face on the balloon.
And you’re done! 🙂 You can tie a string to your Jack O’Lantern and hang it in a door way. Or find some place silly to put him. Like in your mom’s Autumn decorations… 😉
This is such a fast way to make Jack O’Lanterns that you can make a whole bunch of them! You can make a happy face or a scary one or a mean looking one. It’s a fun craft for a Halloween party too! 🙂
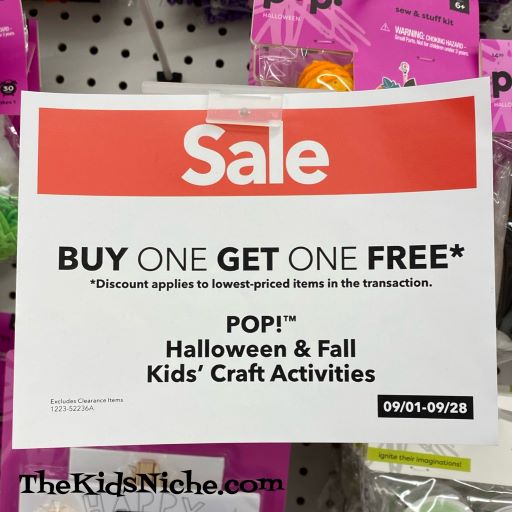
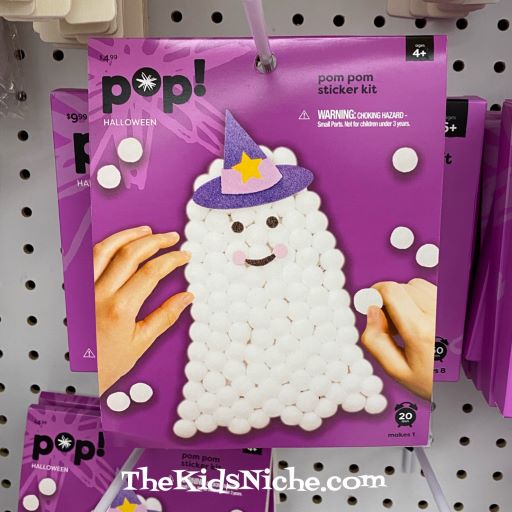
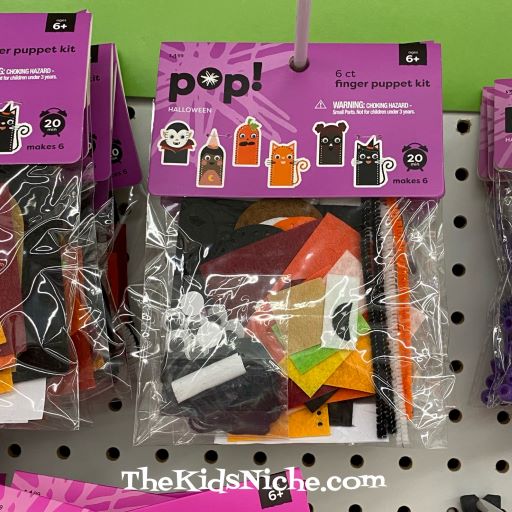
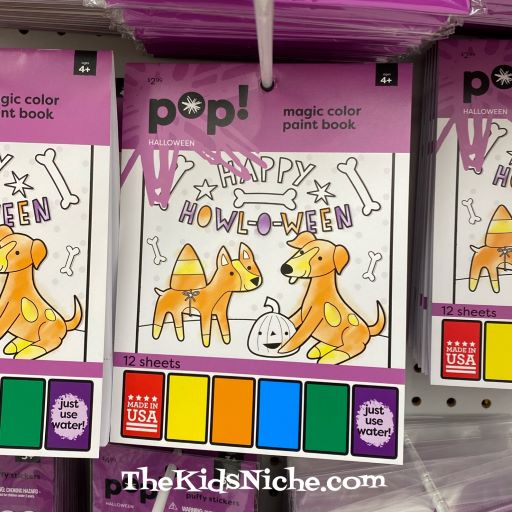
If you are looking for some fun Halloween crafts for the kiddos, here’s a sale at Joann Fabric and Craft Stores! But it looks like the sale ends today! (Sorry, I just saw it myself.)
Here are a few of the craft kits that are on hand at our local store.
There were more craft kits there, but I didn’t take time to take more pictures. I wanted to get this posted for you in case you’d like to make a quick run to your nearest Joann Fabric and Craft store today! 🙂
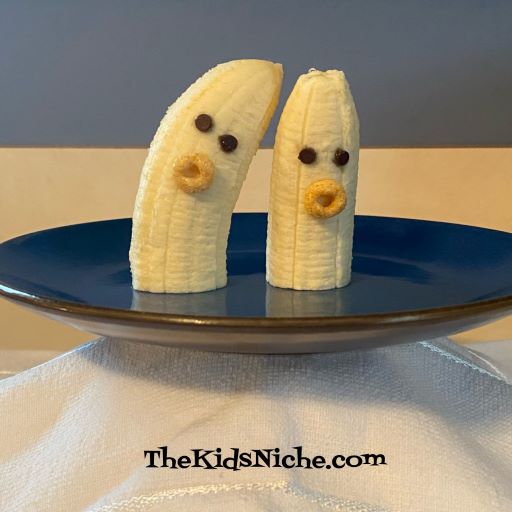
Are you looking for a last minute addition to your treat line-up for Halloween? You and the kids can have these super easy ghosts made in no time! All you need for the first project is a banana and some miniature chocolate chips. If you’d like to add an “O” for a mouth, you’ll need a few Cheerios cereal pieces.
Cut the banana in half and add 2 miniature chocolate chips for eyes. I pushed the pointed side of the chocolate chip into the banana. And there you are! 2 ghosts ready for spooking your guests!
Or if you want to give your ghosts a mouth, press in 1 piece of Cheerios cereal.
I can almost hear the eerie “OOOoooo!” these ghosts are making! 😉
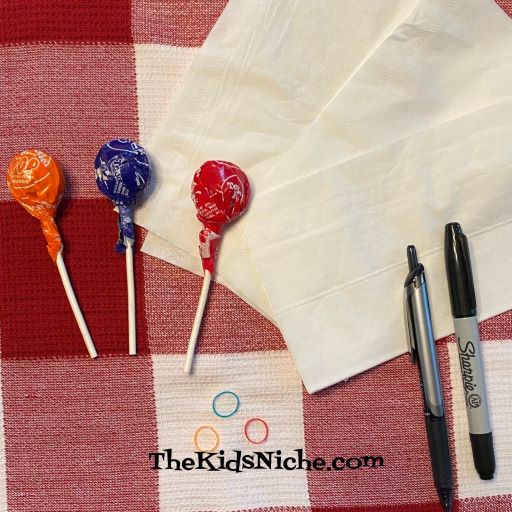
Are you ready for the second ghost treat? This one is easy too! You’ll need some lollipops or suckers, (I used Tootsie Roll Pops because the sucker part is nicely round), 1 paper tissue for each ghost, 1 small rubber band or a piece of string for each and a black marker or pen.
Ready? Let’s do this! First open up a tissue and lay it flat. Lay one lollipop on the tissue with the round part in the center and the stick pointing to one corner.
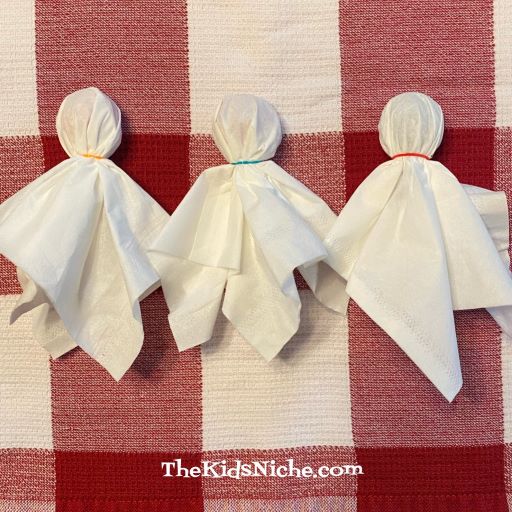
Fold the tissue over the lollipop to make a triangle.
Gather the 2 sides down around the lollipop to form a “head”.
Put the little rubber band or string around the “neck” of the ghost.
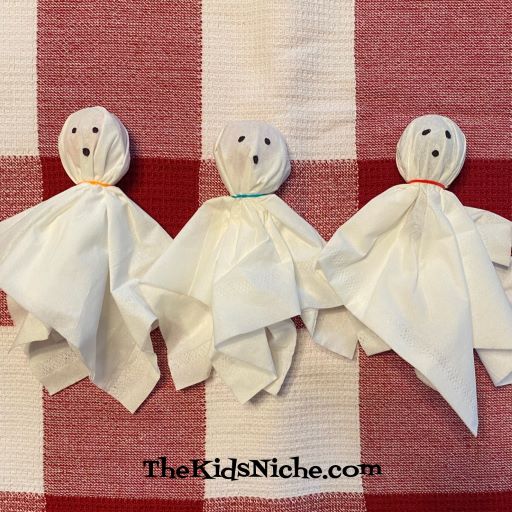
You can use the ghosts like they are or you can add some black dots for eyes and a mouth.
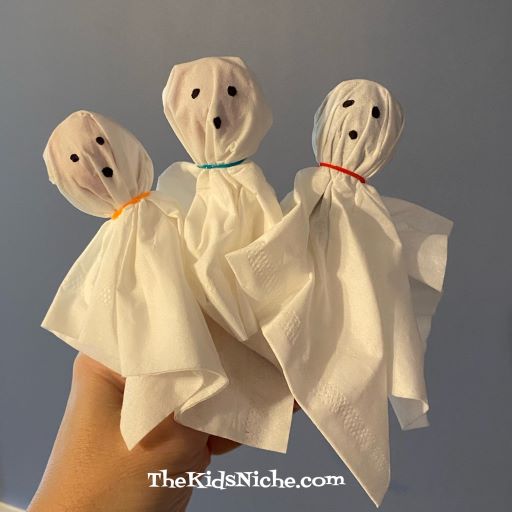
That was pretty easy, wasn’t it? Now you have 2 kinds of ghosts for your Halloween celebration!
Halloween will soon be here! And we are still in the midst of Covid-19 with a lot of places seeing the number of people affected climbing steadily each day. Are you debating on how to celebrate Halloween this year? Should you take your kids trick-or-treating or keep them at home? What about parties? I would like to offer you some options this year to make your Halloween a little safer. I will be sharing some ideas of things you can do at home so that even though this year might be different, it can still be fun. For today, let’s make some easy Spider Cupcakes! Start by making your favorite flavor of cupcakes and frosting…or purchase some from your local grocery store or bakery. I decided to make chocolate cupcakes.
And some vanilla frosting. Mmmm!
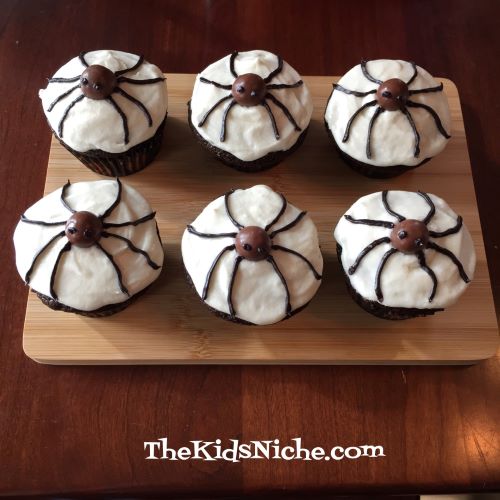
I chose Whopper Malted Milk Balls for the spider’s body. You could also use a small donut hole or something else round.
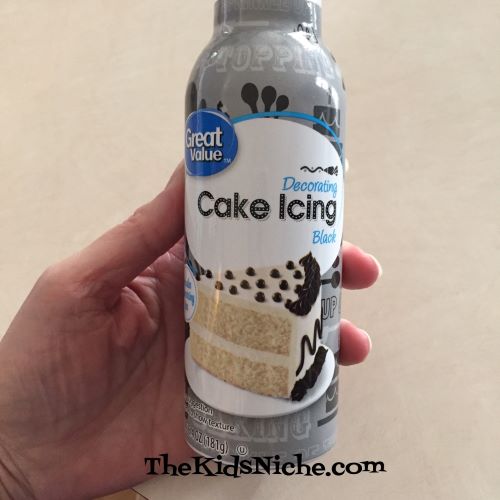
I bought a can of black frosting to use for making the spider’s legs.
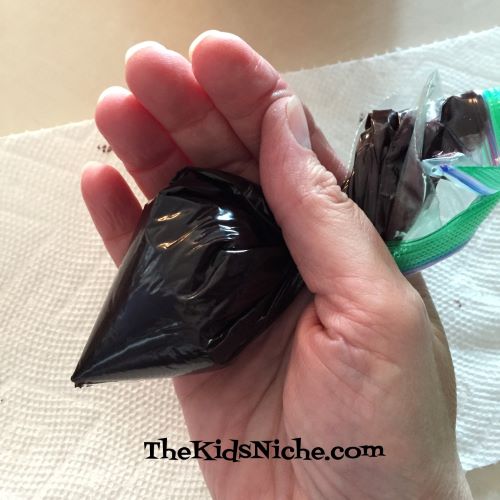
But I found it difficult to control the stream of frosting that came out of the can. It was like nothing was coming out and then suddenly, WHOOSH and there was a huge blob of frosting. 😦 Lucky for me, my daughter suggested putting the black frosting into a ziploc bag and cutting a very tiny hole in one corner of the bag. This worked great! It was much easier to get a smooth steady amount of frosting coming out this way.
Place a Whopper candy in the center of a frosted cupcake. Then using the black frosting, draw 8 legs. (Yes, spiders have 8 legs.)
I also added 2 tiny dots of frosting on the candy to give the spider some eyes.
Cute, isn’t he? (Well if spiders can ever be called cute, I guess it would have to be this kind!) I experimented a bit with different ideas of where to draw the spider’s legs and I decided I liked this way better. Feel free to draw the legs on however you like best.
And that’s all there is to it! Ta dah! You have spider cupcakes for Halloween!
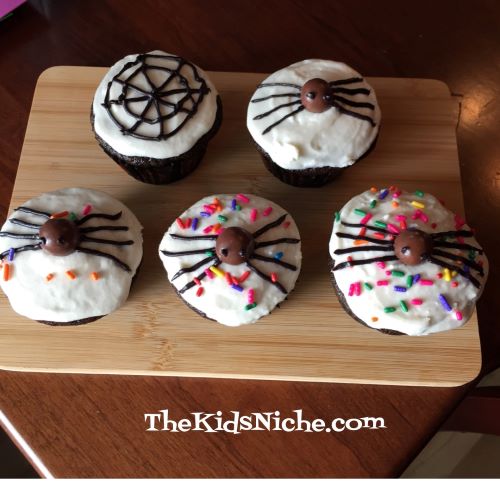
Now, just for some added amusement, here are some other ideas that I tried that may or may not have turned out quite so nicely. Haha! I tried adding some sprinkles AFTER I made the spider but the first time, the frosting had already dried enough that the sprinkles mostly bounced off the cupcake. The next time I made the spider and while the frosting was still wet I added sprinkles but then the sprinkles stuck to the spider’s eyes and legs and looked kinda weird. So I tried putting the sprinkles on first and then making the spider, but I thought it made the cupcake look too busy. It’s your call…kids love sprinkles! My daughter also suggested I try making a spider web and you can see how that turned out…a little bit wonky but kinda cute.
Maybe using orange frosting would be neat? Or maybe orange and green sprinkles? The moral of the story is, make the cupcakes in the way you think is fun and they will be great! (And taste good too!) You could make these for your kids or you could make them together for a fun Halloween project. Even if they turn out a bit wonky like some of mine, you can still spend time together and giggle over your masterpieces. 😉 Have fun! I’ll be back next week with some more safe-at-home-Halloween ideas!