If you are looking for a fun food idea for a Halloween meal or a Halloween party, may I suggest you try hotdog mummies? This is a straightforward simple way to make a cute treat that will bring smiles all around.
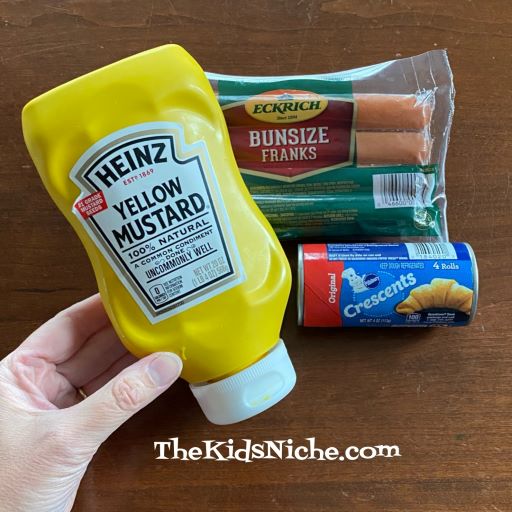
You will need a pack of hotdogs (wieners), a package of crescent roll dough and some mustard.
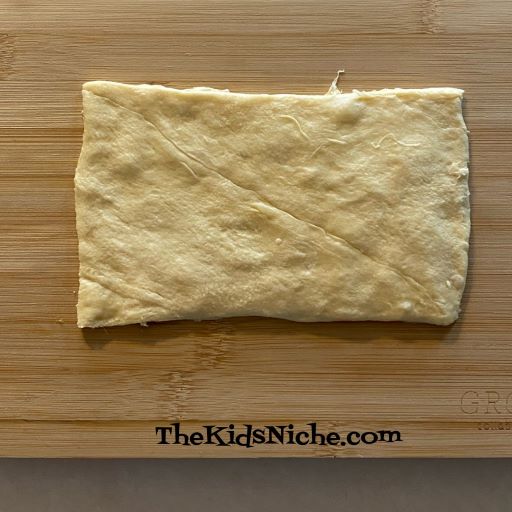
Open the package of crescent roll dough and lay out 2 crescent roll dough pieces together to form a rectangle.
Press the dough together in the middle where the dotted cut is. You want one solid piece of dough.
Using a sharp knife, cut the dough into thin lengthwise strips.
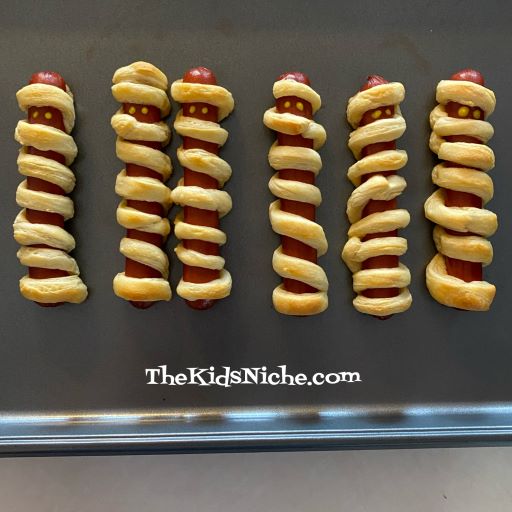
Take 1 strip of dough and begin wrapping it around 1 hotdog.
Continue adding strips of dough until you have wrapped dough the entire length of the hotdog. Leave some space between each wrapping as the dough will swell as it bakes. Press the ends of the dough strips together so you have a continuous piece of dough wrapping the hotdog.
I used bunsize hotdogs because that is the kind that were available at my store. Regular size hotdogs are fine. Once you have wrapped all the hotdogs, you are ready to bake them.
Bake according to the time and temperature listed on the crescent roll package. Bake until the dough has lightly browned and hotdogs are heated.
The mummies eyes are made with mustard. I suggest you put a little mustard on a piece of waxed paper or a plate and use a toothpick to put the little dabs of mustard on the mummy.
And that’s all there is to making hotdog mummies!
A word of caution for feeding hotdogs to young children…hotdogs are one of the foods that are easy for kids to choke on. So please cut these into smaller pieces before giving them to your kids. A half of a slice of a hotdog is a good idea. We love kids and don’t want to see anyone hurt. 🙂
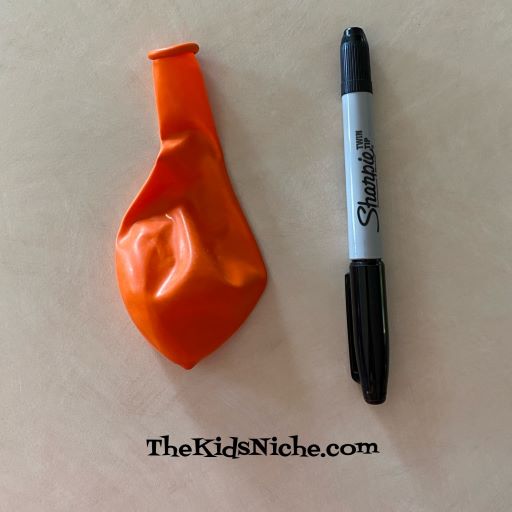
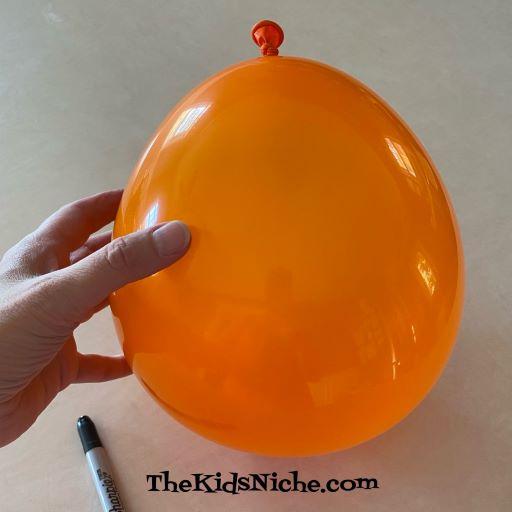
Hope you all had a good weekend! We’re back with a super fun and super easy way to make a Jack O’Lantern! (And cheap!) All you need is an orange balloon and a black permanent marker.
Step #1.) Blow up the balloon and tie it off.
Step #2.) Draw a Jack O’Lantern face on the balloon.
And you’re done! 🙂 You can tie a string to your Jack O’Lantern and hang it in a door way. Or find some place silly to put him. Like in your mom’s Autumn decorations… 😉
This is such a fast way to make Jack O’Lanterns that you can make a whole bunch of them! You can make a happy face or a scary one or a mean looking one. It’s a fun craft for a Halloween party too! 🙂
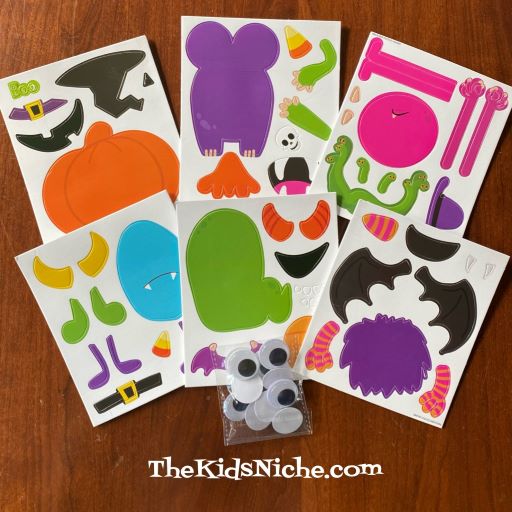
Hello, again and Happy Monday! Today I want to share an inexpensive Halloween craft with you that I found at Walmart. (I know, it’s still September, but the stores are FULL of Halloween stuff!) This package comes with 6 sets of a foam craft for only $1.98! When 6 kids can do a craft for $2, I think that’s a bargain!
Here’s what comes inside the package…
And these are the 6 Halloween characters you can make.
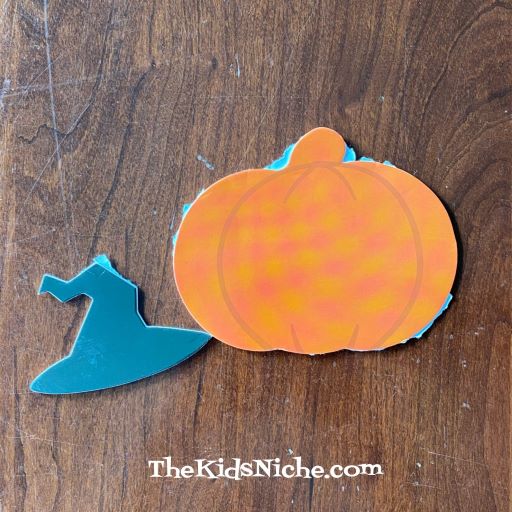
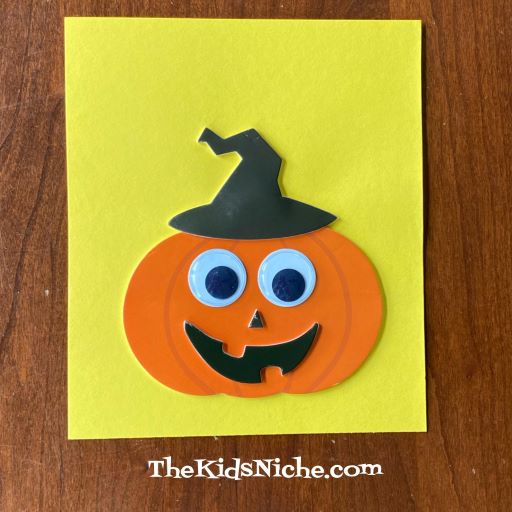
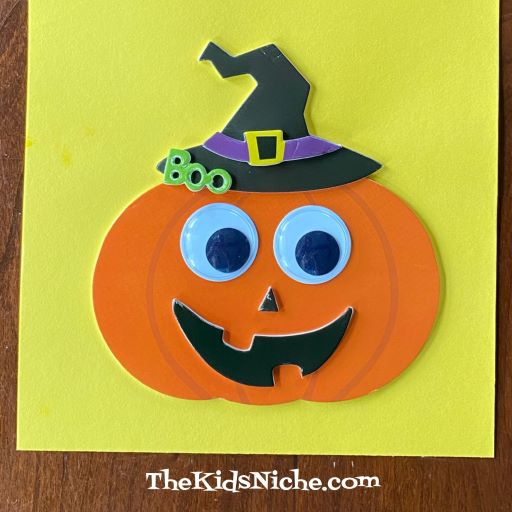
I made the Jack O’Lantern. The foam pieces are partially cut and they have adhesive on the back of them. I found it a bit difficult to punch the pieces completely out because the paper backing isn’t cut through all the way. But never fear! There is a simple way around that problem!
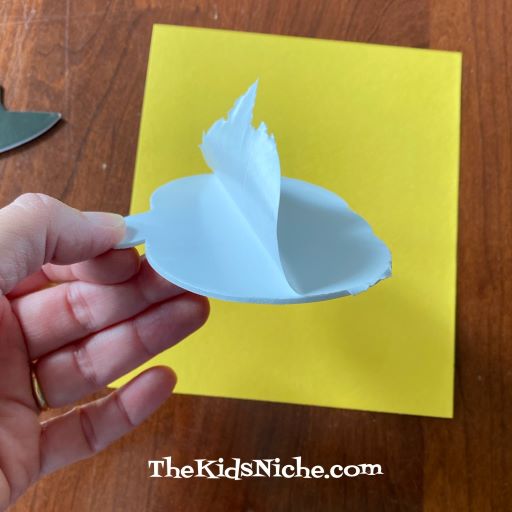
Use a piece of paper for the kids to stick the pieces on and just pull the foam pieces off the backing like you would do with a regular sticker. Don’t worry about punching each piece out because it isn’t necessary.
Use a different color of paper than the color the largest part of the character is so it will show up nicely.
Continue applying the stickers to make your character. The wiggly eyes do not have the adhesive backing so you will need some glue to apply those.
And the Jack O’Lantern is complete! 🙂 The tiny holes on the word “Boo” were a little tricky to get the extra pieces punched out, but using a toothpick helped.
You could use the picture as it is or turn it into a Halloween card. Have fun creating your 6 Halloween characters! 🙂
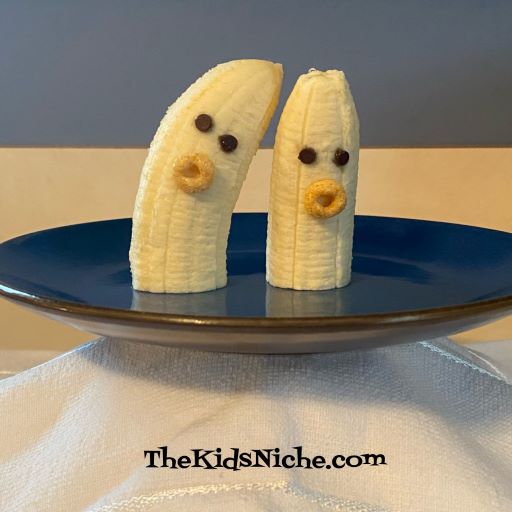
Are you looking for a last minute addition to your treat line-up for Halloween? You and the kids can have these super easy ghosts made in no time! All you need for the first project is a banana and some miniature chocolate chips. If you’d like to add an “O” for a mouth, you’ll need a few Cheerios cereal pieces.
Cut the banana in half and add 2 miniature chocolate chips for eyes. I pushed the pointed side of the chocolate chip into the banana. And there you are! 2 ghosts ready for spooking your guests!
Or if you want to give your ghosts a mouth, press in 1 piece of Cheerios cereal.
I can almost hear the eerie “OOOoooo!” these ghosts are making! 😉
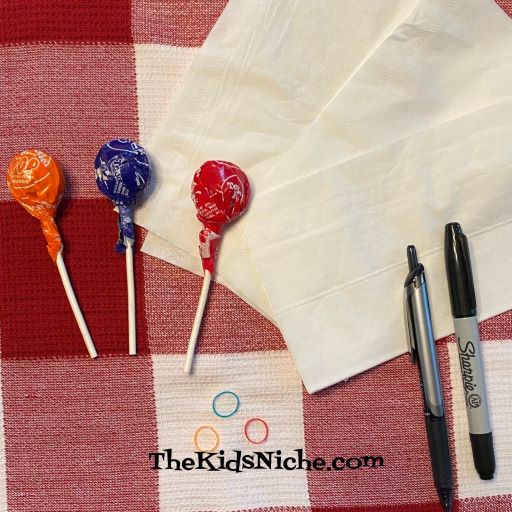
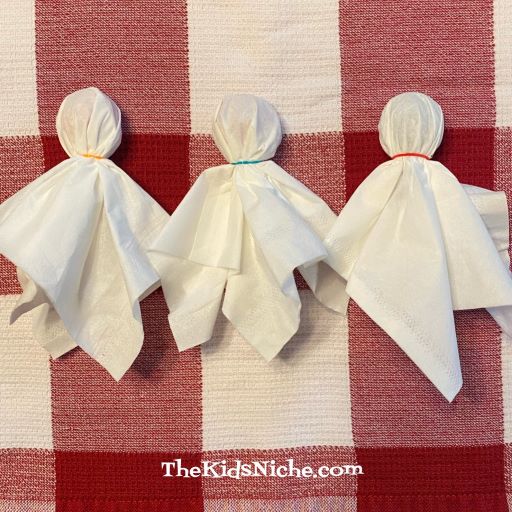
Are you ready for the second ghost treat? This one is easy too! You’ll need some lollipops or suckers, (I used Tootsie Roll Pops because the sucker part is nicely round), 1 paper tissue for each ghost, 1 small rubber band or a piece of string for each and a black marker or pen.
Ready? Let’s do this! First open up a tissue and lay it flat. Lay one lollipop on the tissue with the round part in the center and the stick pointing to one corner.
Fold the tissue over the lollipop to make a triangle.
Gather the 2 sides down around the lollipop to form a “head”.
Put the little rubber band or string around the “neck” of the ghost.
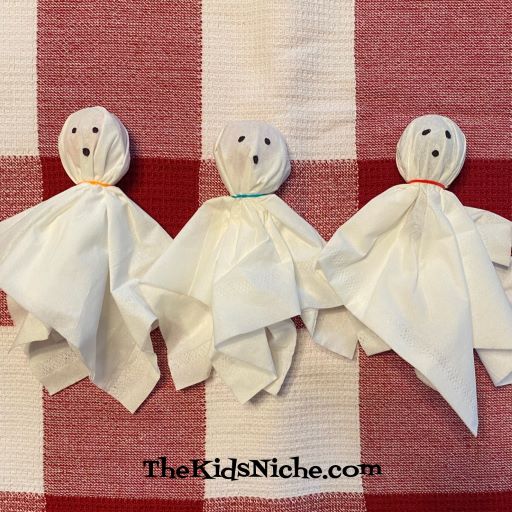
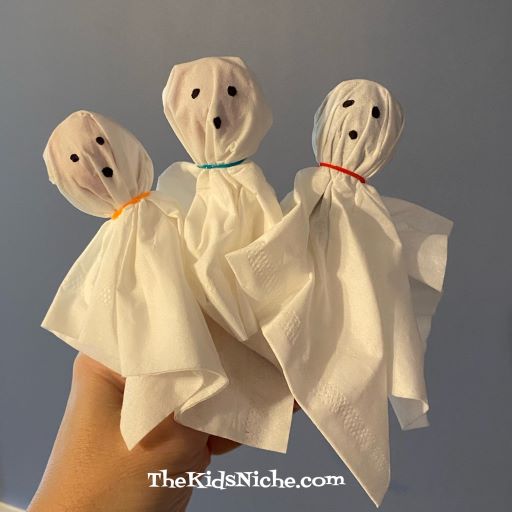
You can use the ghosts like they are or you can add some black dots for eyes and a mouth.
That was pretty easy, wasn’t it? Now you have 2 kinds of ghosts for your Halloween celebration!
Halloween 2020 is looking a bit different from other years, isn’t it? Here in Ohio we’re being discouraged from having Halloween parties or getting together with people we aren’t around much and it’s all because of the Covid-19 virus. Should you take a chance on taking your family to a party? What about trick or treating? Is it safe? For those of you looking for a way to stay home with your kiddos but still let them have a fun time, I created Halloween-Party-in-a-Box. We don’t live close to our grandkids and in the interest of keeping everyone healthy, we won’t be seeing them this year at Halloween. But I wanted to do something to help them still enjoy this crazy holiday. Maybe you can use some of these ideas for your own celebration.
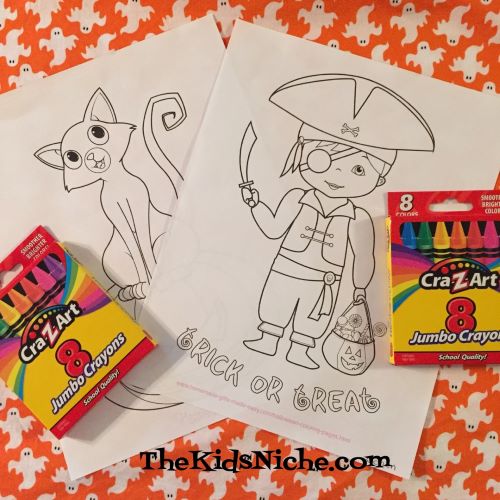
Let’s start off with coloring pages. There are quite a few free coloring pages that you can find on the internet. I just “Googled” “coloring pages” and found some cute free ones that I printed out for the grandkids. I added some new crayons or colored pencils and ta dah, there’s one activity.
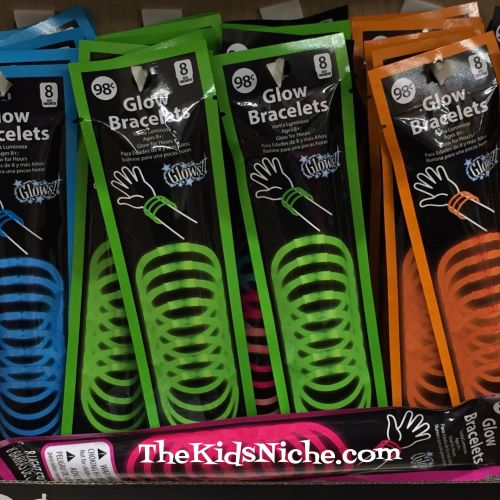
Walmart had lots of odds and ends of Halloween fun for a low price so I found it fairly easy to come up with things for a party. Glow bracelets, for example. Halloween is all about being spooky and doing things in the dark so glow bracelets fit right in. You can get 8 glow bracelets for $.98.
Decorating a small paper bag with Halloween stickers and anything else they’d like to draw on, makes up activity #2. I found a pack of Halloween pencils so I threw some of those in too.
In order to keep the items for each activity all together in the same place, I used quart and gallon sized zip plastic bags.
Activity #3 is decorating pumpkin cookies. Yum! I found a box of 16 cookies with icing and sprinkles which I shared between 2 sets of grandkids.
I divided the sprinkles into 2 small containers and purchased 2 extra small tubes of icing gel so that each group had 3 colors to decorate with…orange, green and black. Again, I put everything for this project in a zip plastic bag and wrote on the bag what the project is.
If you’re having cookies to eat, you need something Halloween-y to eat them on, right?
Halloween colored crazy straws will make drinking more fun too. 😉
Some tiny Halloween puzzles will be fun to put together for activity #4.
If you want to make it more interesting, have the kids race to see who can get their puzzle together first. I think they are cute!
I found tiny pumpkins in a clearance sale and decided to add in some markers for a drawing faces on a pumpkin activity. (#5)
Activity #6 is the grand finale with a “Wrap a Mummy” game. All you need is some toilet paper. 🙂 There are different ways to play this game so pick the one that fits your family best. If you have enough people, divide into 2 teams and divide the toilet paper rolls between the 2 teams. Pick someone to be the mummy and the rest of the team wraps them in the toilet paper. The winning team is the one with the best looking mummy. (Remember to leave eyes and mouths uncovered for breathing and seeing where they are walking!) This could be extra fun if the mummies are mom and dad and the kids are doing the wrapping. Another version could be if all the kids become mummies. After they are all wrapped up, they could have fun walking around with their arms out in front of them, making spooky noises! 😉 (And probably chasing their siblings or parents!)
I included a little note to the grandkids that is on the top of everything when they open the box.
One little tip I have is if you are sending the Halloween-party-in-a-box to kids that you don’t see often or are young little munchkins, you might include a picture of yourself to help them know who sent them their box of fun. Grandma and Grandpa, this would be a great thing to do if mom or dad is feeling stressed out and out of time before Halloween…you could offer to take care of the Halloween party this year and show up with your Halloween-Party-in-a-Box all ready to go. 🙂 (Depending on your situation, of course.) I hope these suggestions will help you still have a great Halloween 2020!