Birdcage Fairy Garden

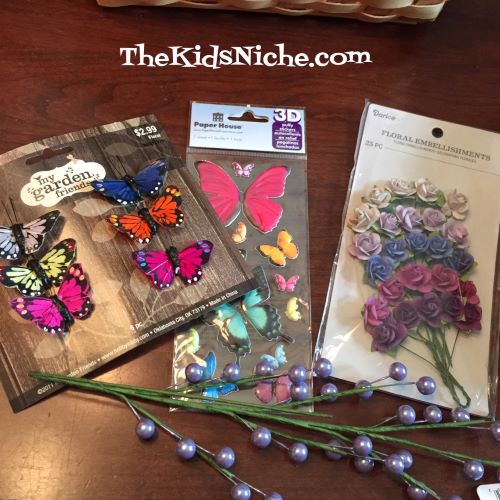
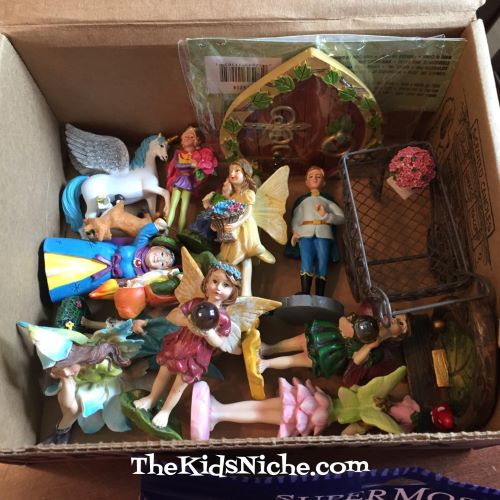
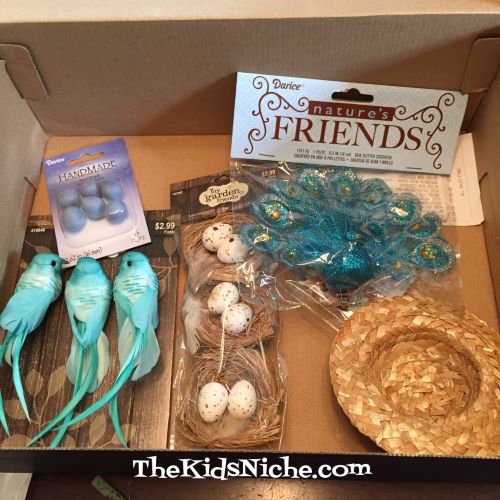
Here’s another dirt-free fairy garden idea for you and your kids. I used a lot of the same supplies that I had from the indoor fairy garden I posted about yesterday. If you missed that post, here’s a link to it: https://thekidsniche.com/2019/06/05/an-indoor-fairy-garden/

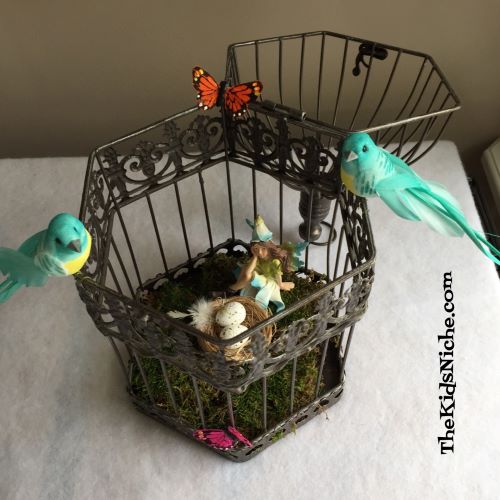
For today’s project, I had a birdcage that I hadn’t decided what to do with it. Having the fairy garden supplies handy got me to thinking that it would make a cute display using them.

I put a little of the sheet moss in the bottom, but didn’t glue it down so I will be able to change it out later if I decide I want to.

I sat a bird’s nest in the bottom of the cage. And then using the wire connected to the bottom of the birds, I fastened the birds to the cage.

Here is a closer up picture so you can see the wire wrapped around the cage holding the birds in place.

Next, I added a fairy, sitting beside the bird nest. She looks like she is waiting for the eggs to hatch!

A couple of butterflies added also by twisting the attached wire around the cage, and voila! It’s done!

Another very quick, easy and super fun project! Nothing is glued down, so this project can easily be changed later. Hope you’ll give it a try! 🙂

An Indoor Fairy Garden

Do you or your kids love Fairy Gardens but don’t want the mess of dirt and keeping plants alive? Here’s a fun project you can do with your kids while keeping your hands free from mud and dirt! I love getting my hands in the dirt to plant flowers but not everyone does. This craft might be more for kids that are a little older or for younger ones with lots of supervision because of using a hot glue gun. I have been slowly collecting Fairy Garden pieces as I have seen them on sale because they can be a bit pricey in the stores. Some stores are having sales now so keep your eyes open for good deals!

Let’s look at what you might need…a container of some kind. This is a wooden box but you can use almost any type of container.

I got all my supplies out so I could pick which pieces I wanted to use. These are artificial succulents. Any small artificial plants will work. I cut these into smaller pieces so they would fit.

Some butterflies and flowers…

I used this sheet moss for the bottom of my container. You will need something similar.

And, of course, Fairy Garden figures…fairy prince, fairy princess, fairies, gnome, animals, etc.

I used some birds and a bird nest and a little straw hat to put the bird nest in.

These are the figurines I decided to go with for this project.

Let’s begin! 🙂 The first thing to do is to line your container with the sheet moss or whatever similar product you are using. Trim it to fit your container. Lift each corner and put some hot glue underneath it and then push it back into place.

Place your items in the container without gluing them down so you can move things around until you have them just the way you want them.

Once you decide where each item will go, you are ready to glue them in place.

As I mentioned earlier, I used a hot glue gun to glue the bottom of each item in place.

Here’s my finished Indoor Fairy Garden! No watering needed! 😉 The view from above…

A front view…

Once you have all the items collected, putting the garden together goes fairly quickly. It’s so much fun! Now you and the kids can dream of stories about what is happening in your Fairy Garden!