Boing! Boing! Bouncing Characters!

Hello and welcome to The Kids Niche once again! 🙂 Today we’re going to put a little bounce in your step! Or maybe a little bounce into some fun characters that you make yourself. Ready, set…let’s go!

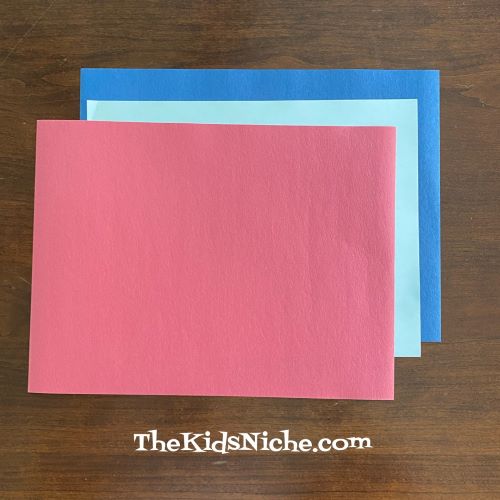
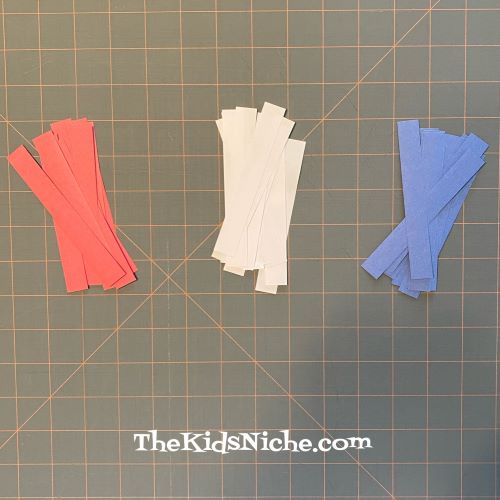
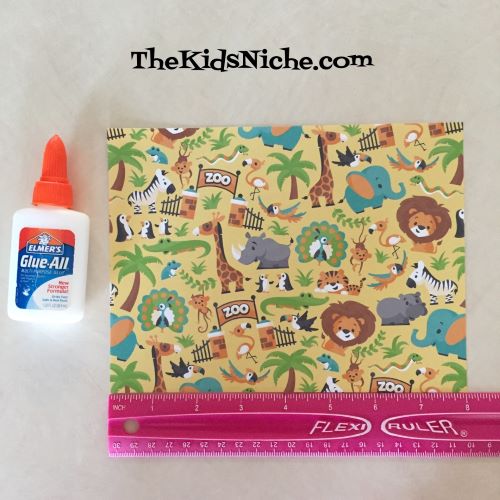
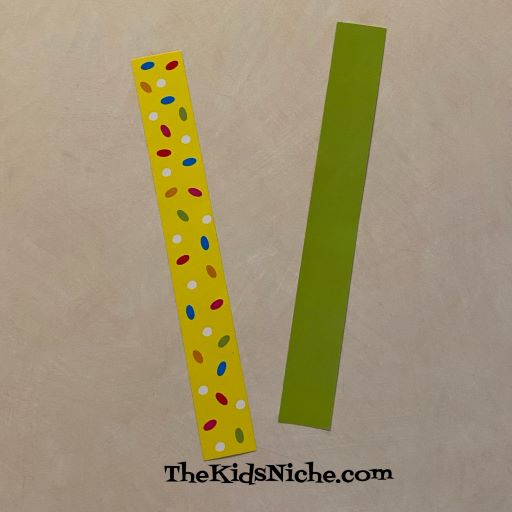
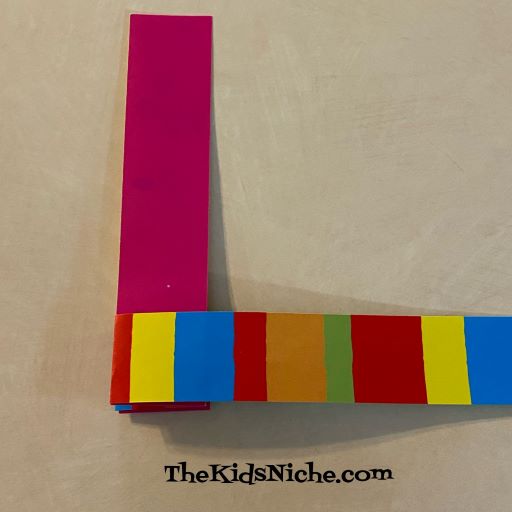
You will need some strips of paper…approximately 1″ wide and at least 7″ long, but they could be a little different from that and still work. Construction paper or scrapbook paper works great. I used some paper that was printed on both sides, but that isn’t necessary. Then you’ll need some scraps of paper, glue or double-sided tape, markers, scissors and a pencil.

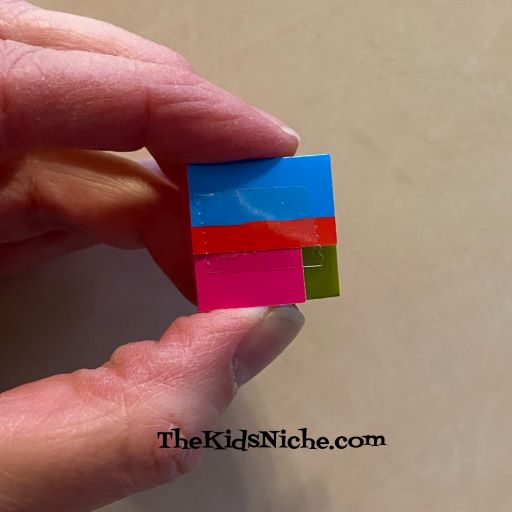
Begin with the 2 strips of paper.

Put a small amount of glue or double-sided tape on the bottom edge of one strip.

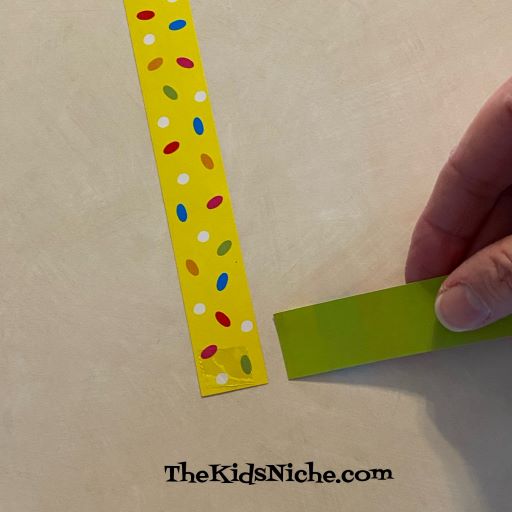
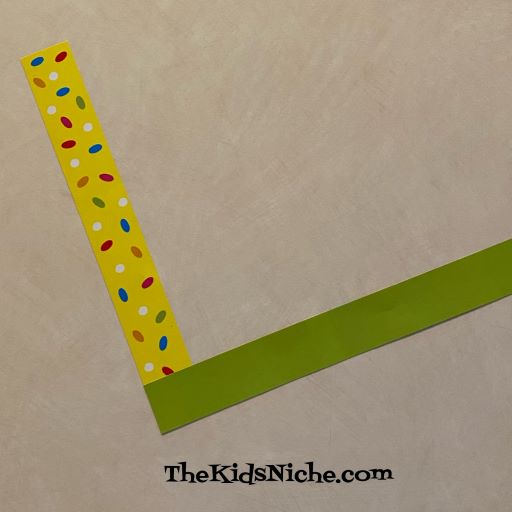
Place the second strip at a right angle to the first one on top of the tape or glue.

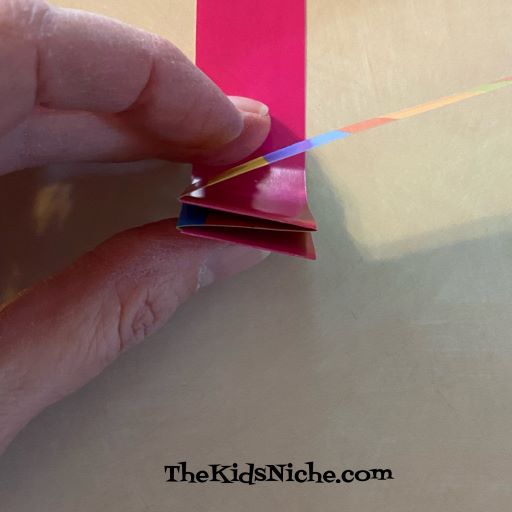
Now you will fold the strips of paper across each other…one at a time…keeping them straight to the corner.

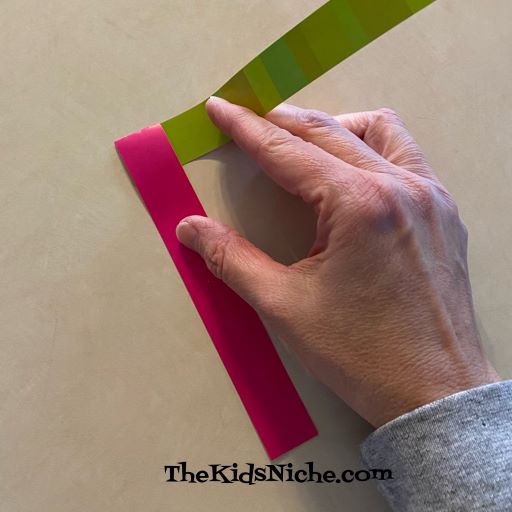
Continue folding the strips until you come to the end of the strips.

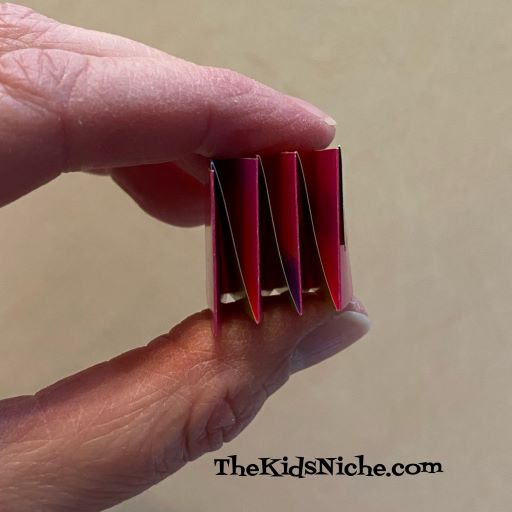
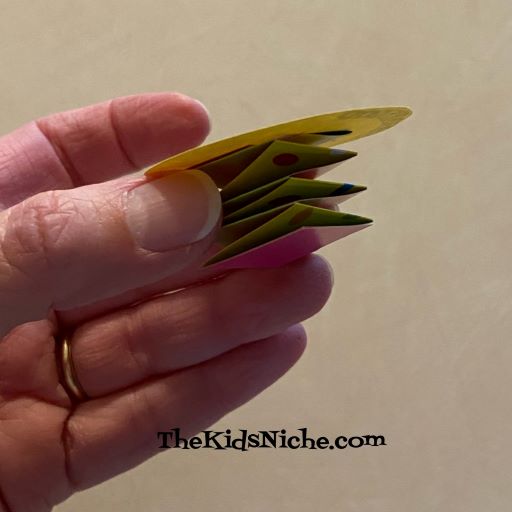
This is a side view of what it should look like.

Here we are at the end of the strips.

Fold the last bits over and glue or tape in place.

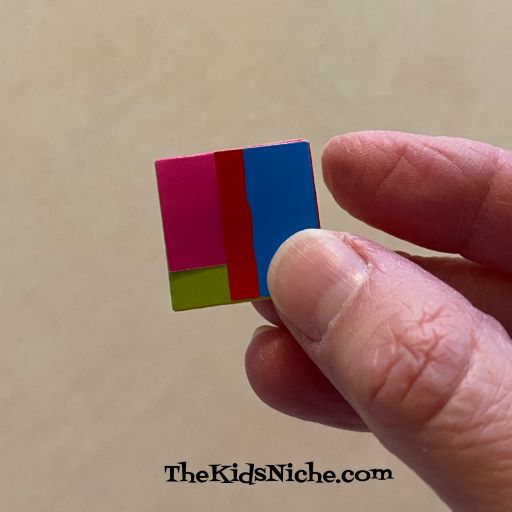
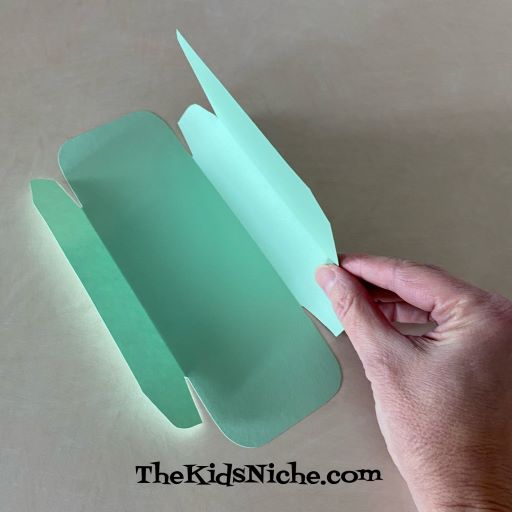
Another side view…this is the part that makes the bounce. It’s rather like an accordion.

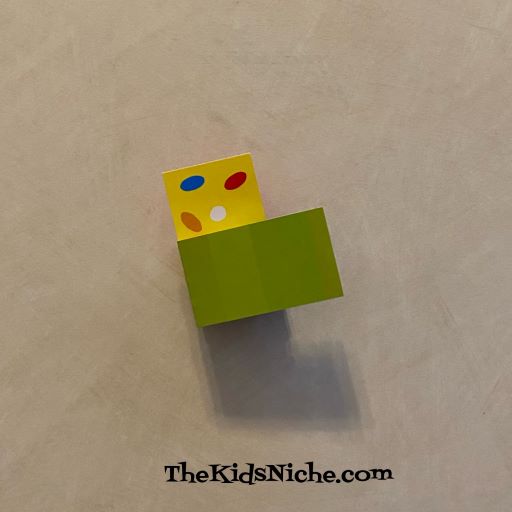
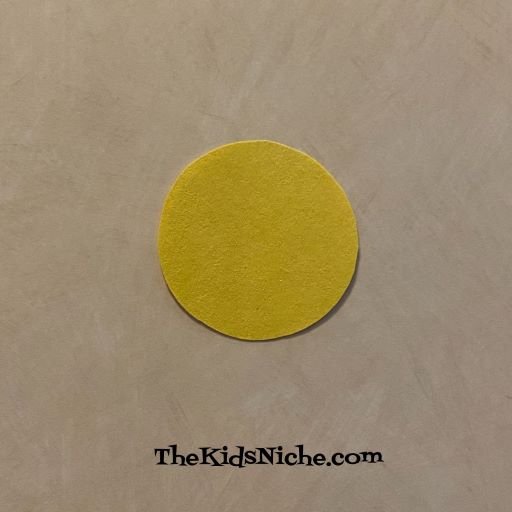
Now let’s make the character’s face. Start by cutting out a circle from your scraps of paper. I used a very small cup to trace around.

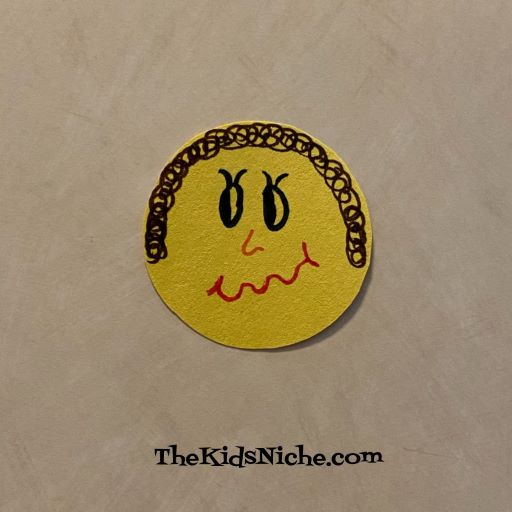
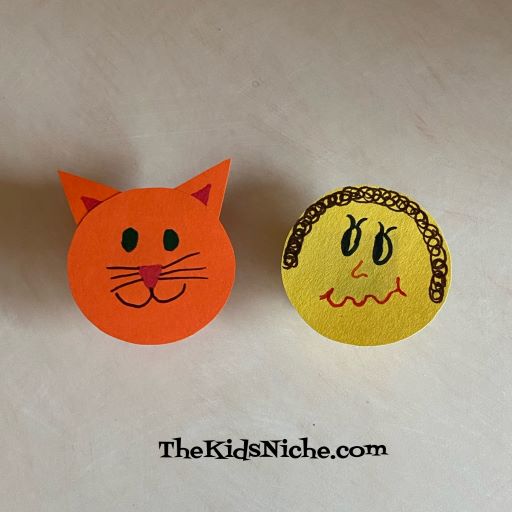
Draw a silly face on the circle.

Put some glue or double-sided tape on the top of the accordion piece.

And stick the circle on top.

Put your bouncing character on the tabletop and press it with your finger. It will bounce up and down. 🙂

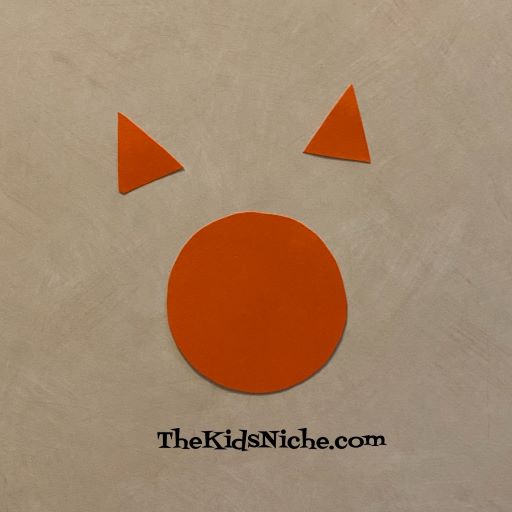
I also made a bouncing cat by folding 2 more strips of paper together. I cut out an orange circle and 2 orange triangles.

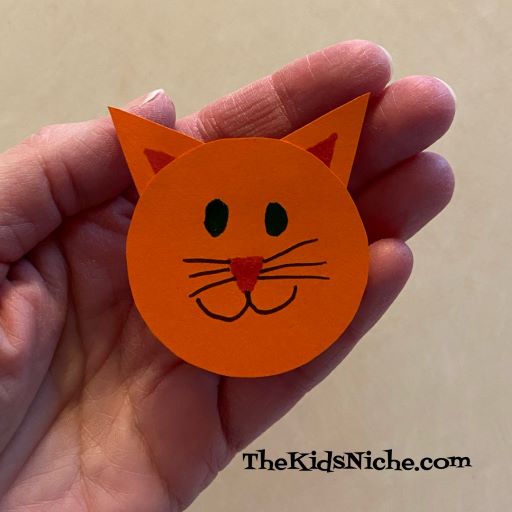
Draw a cat’s face on the circle, color in a bit of the ears and glue or tape it together.

Tape it onto the bouncing part you made and you’re ready to play with your bouncing friends!

I hope you’ll have fun bouncing these guys all over the house! 😉

Making Your Own Paper Surprise Boxes

The other day I opened up a box of cream cheese and I noticed that if I opened it up completely and laid it flat that I could use it for a pattern to make another paper box. 🙂 So that’s what I want to share with you today. The next time you buy cream cheese, save the box!

I used a piece of cardstock for making my box. Lay your pattern on the piece of cardstock. My pattern box fit just right in one direction on an 8 1/2″ x 11″ piece of cardstock.

Trace around the outside of the pattern box using a pencil.

Cut it out along the line you just drew. Erase any pencil marks that you can still see after you finish cutting.

Using the pattern box as a guide, make a fold on your box every place the pattern has a fold. It’s very helpful to lay a ruler across the paper in the place you want the fold to be. This will give you an edge to press against and keep the fold straight.

I made all my folds that go in the same directions first.

Then turn your box and make all the folds in the other direction. For a lot of the folds, you can see easily where the fold should be and use the edges for a guide for your ruler. One place that there wasn’t an easy mark was the part on the top of the box that folds down inside the box when it’s closed. I laid the pattern back on top of my box, bent the pattern up and made 2 small marks where the fold needed to be.

Now all the folds have been put in our box and it’s time to put it together!

Oops, I’m getting ahead of myself! 😉 Before you glue/tape the box together, turn the box over and decorate the outside.

Since St. Patrick’s Day is in March, you might like to make your box for that holiday.

NOW to put it together! 😉 Fold the box up and put a little glue or double sided tape on the small tabs that fold inside the front of the box.

Do the same for the back side…put glue or tape on the small tabs that fit inside the box.

Close the top of the box and stick the front tab inside. Great job! You’ve made your first paper box! 🙂

Don’t forget to hide something fun inside the box before you share it with that special person! These could be used for any holiday or special occasion that comes along. Just decorate your box to fit the occasion. And maybe even hide the box to be found at the end of a treasure hunt! 🙂

I hope you will have fun making your own surprise boxes! 🙂

A Patriotic Craft for the 4th of July

If you saw my blog post from yesterday, you might remember that I said we would be using the same red, white and blue strips of paper for another craft today. If you didn’t see that post, no problem! Here’s what you’ll need for today: 3 pieces of paper, (1 of each red, white and blue), scissors, ruler, pencil and glue.

Cut a bunch of strips from each color of paper. The strips can be anywhere from 1/2″ to 1″ wide and 4 1/2″ to 6″ long.

So what are we making, anyways?! We’re making a patriotic paper chain! 🙂 Take a red strip of paper and glue the 2 ends together to make a circle.

Next, take a white strip of paper and feed it through the red circle and then glue the ends of the white strip together into a circle too.

Now your paper chain has 2 links.

Take a blue strip of paper and feed it through the white circle…then glue the ends of the blue strip together into a circle too. Now we have 3 links!

Continue feeding a new strip of paper through the last link in the chain that you made and gluing the ends of that strip together into a circle. Keep your chain laying in the same direction so you can remember which link is the last one you did. You can make the color pattern in any way you like. For my chain, I made the whole chain in the red, white, and then blue pattern.

And there you are! That’s all there is to it! You can make your paper chain as long or as short as you like. A short one could be a bracelet or a crown, a little longer one could be a necklace to wear for the 4th of Jul or a really long one could be hung up as a garland to make your house look patriotic for the holiday. It’s up to you! Have fun making your patriotic paper chain!! 🙂

Crafting 4th of July Stars

Today is the first day of July! (Wow, the year is half over already!!) Just 3 days till we celebrate the 4th of July in the United States. It’s a day to celebrate our great country and our freedom. I wanted to share a simple craft for the kids so they can help celebrate the 4th by making some decorations for the house. 😉 You’ll need 1 piece each of red, white and blue paper, scissors and glue. Let’s get started!

First you need to get lots of strips of paper. A nice size for this project is 1/2 to 3/4″ wide by 4 1/2″ long. (I’ll be sharing another craft idea tomorrow that will also use the same size strips so you might want to cut a bunch while you’re cutting!)

Each star needs 4 strips of paper. Start with 4 strips of the same color. Lay one strip down and put a small dot of glue in the center.

Place a second piece of paper across the first one so it make a plus sign (+). Hold it in place with your finger for a few seconds.

Put another dot of glue in the center again and lay the third piece of paper on top at an angle. Look at the picture for reference.

Add another dot of glue to the center again and lay the 4th strip of paper across at the opposite angle to the last strip. And that’s all there is to it! You’ve made your first star! 🙂

We made a red one and now you can make a white one.

And you can make a blue one.

Or you can make some that are red, white and blue! Or just have 2 colors…it’s up to you.

You can even make a star using 6 strips of paper.

If you want to make the stars even more special, you could use some glitter glue on the strips or some dots or lines of glue and sprinkle on some glitter. Alas, I seem to be out of glitter so I couldn’t do this. Make as many as you like and hang them around your house by taping a piece of string to the back of each one. Have fun getting your house ready for the 4th of July! 🙂

Paper Packet Surprises

Are you looking for a little something to cheer up some kids that have been cooped up inside waaaaay too long? Here’s a fun idea for making packets out of paper and sticking a little surprise inside. Its a sure way to liven up an otherwise boring day. Or a way to send some little surprises to those grand kids you can’t be with right now…which is what I’m doing with the ones I’ve made. 🙂

Let’s start out with a piece of paper, scissors and glue. Your paper can have a design on it or just be plain or solid colored. You can draw pictures, make designs or add messages to them. I decided to use some white printer paper and some scrap booking paper I had on hand. Depending on the item you would like to hide inside, how big you need to make the starting piece of paper. This one I think started out at 6″ x 8″. If you cut a piece of 8 1/2″ x 11″ paper in half to make it 8 1/2″ x 5 1/2″, it makes a nice sized packet.

Put a line of glue across one of the shorter ends.

Bring the other shorter end around so your paper forms a tube and glue the two ends together. Press it flat with the glued line in the center of the side. Like this picture…

It doesn’t matter if it’s exactly in the middle or not. Next fold in both long edges approximately 1/4″ or a little more and crease. Again, no need to be exact. Side #1…

And side #2 is folded up too.

Working with one of the folded sides at a time, open the folded edge up.

You’ll see 3 creases…the 2 creases on the outside edges need to be folded “out” and the center crease needs to fold “in”. It’s a little hard to explain this way, but hopefully the next two pictures will help you see what I’m trying to explain.

Do that for both folded sides. This makes your packet able to hold something inside it. Next apply a thin line of glue to ONE of the open ends.

Press that end closed and hold for a few seconds while the glue starts to work.

Slide your surprise inside the open end. Here are a few ideas that I came up with to use for surprises. Stickers…

Granola bar…

Small candy bars…

Color with water pages and a few Q-tips to use for painting…

Just fold the color with water page and it will fit nicely inside your packet along with the Q-tips.

How about a package of hot chocolate mix? I folded the end in on them to make them fit inside better.

Maybe some pom poms or pipe cleaners…

For older kids you might use a Sudoku puzzle page or another type of puzzle sheet. Gift cards would be awesome! Once you have your surprise inside, glue the other end closed. If you like, you can cut the ends with scrap booking scissors to give it a more finished look.

I added one more twist to my packets by writing a message on the outside of something the kids need to do before they can open the packet. For instance…”Sing a song”, “Do a somersault”, “Clap your hands”, “Hop on one foot”, “Do 5 jumping jacks”, or “Run in slow motion”. You can tailor the message to fit the age of the child you’re making the paper packets for.

Hope this craft will brighten your day! Thanks for visiting! 🙂

Paper Caterpillar Racing Fun

Well, it’s Easter weekend and many things are different this year because of the Covid-19 pandemic and the “stay-at-home”and quarantine orders. We can choose to be miserable and dwell on what we can’t do or we can pick ourselves up and make our own fun things to do. Here is one suggestion that will bring giggles and smiles to the kids’ faces. Let’s race paper caterpillars! 🙂 All that’s needed is some construction paper, something to color with, a pair of scissors and a drinking straw. The Crayola company has beautiful directions for this project on their website and here is the link to get you there:

We tried this project at our house so I want to share our paper caterpillar fun with you. Here are our caterpillars…let’s see…they need names…how about Carl and Cathy?

Carl is the one on the left and Cathy has the dots and stripes. They are ready for the race! Let’s set up the Finish Line!

The way you make them race is to blow on their backs through the straw. It will make them hop up and down and move forward. Here we go! Ready….Set…GO!! And the caterpillars are off! They’re inching their way down the racetrack…steady there, guys…oh, my, this is going to be a close race! Who will cross the finish line first?! Aaaaaand the winner IS…….

Cathy Caterpillar!! YAAAAY!! But look at that! Carl was very close behind! I think he might win the next race, don’t you? Everyone in the family can make a caterpillar and you can have a competition. I hope you at least have fun making and racing your caterpillars! Happy Good Friday to you! 🙂