Do Pine Trees Have Seeds?

I accidentally discovered something cool about pine trees and I thought you might find it interesting too. We have a very large pine tree in our yard.

I really like the shape of the pine cones that grow on this tree. So the other day I picked 2 off the tree and brought them inside to dry. I planned to paint them and use them for decorations.

I noticed that the pine cones were starting to open up as they dried.

Here is a picture of a dried pine cone and one that I just pulled off the tree today. Can you tell the difference?

This morning when I picked up the 2 dried pine cones, guess what fell out?
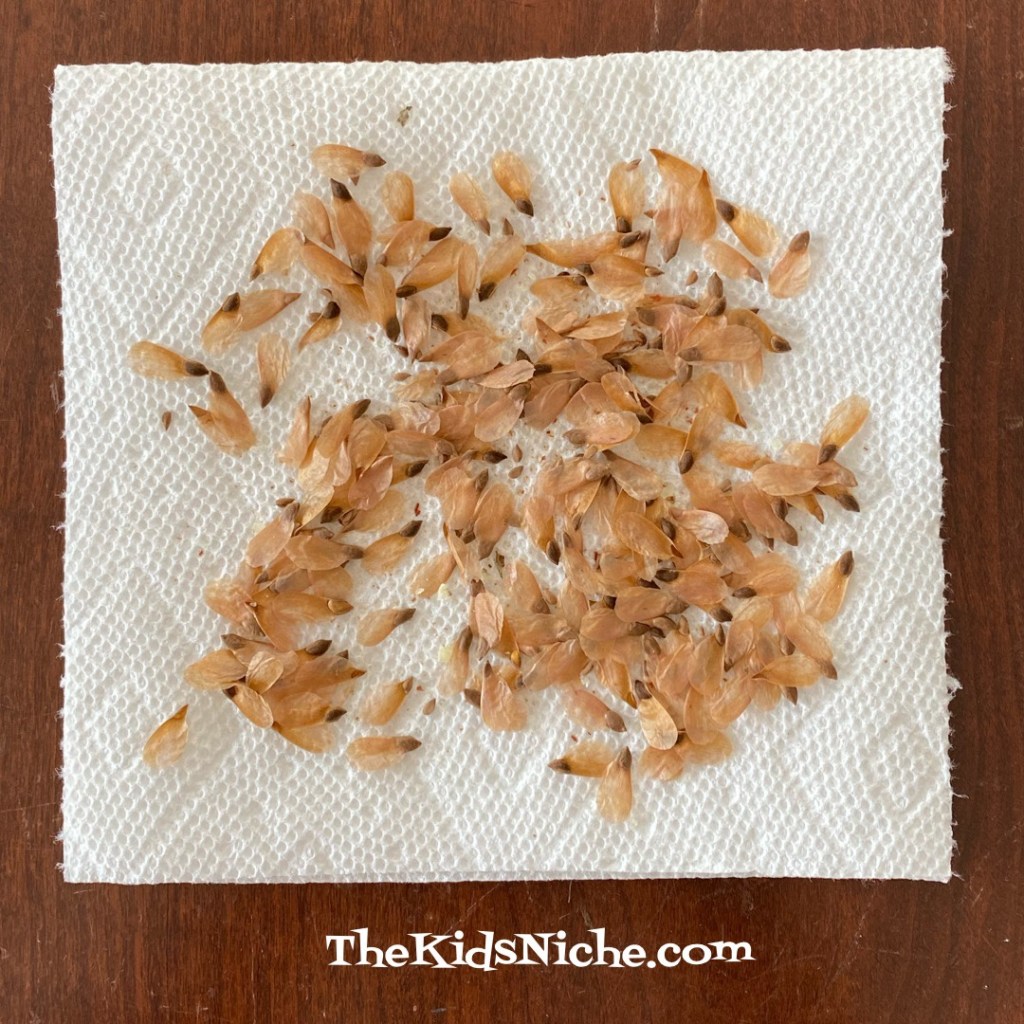
Yep, seeds! πŸ˜ƒ Pretty cool, isn’t it? If you are like me, you might be wondering if those seeds can be planted and grow into pine trees? Well, from what I read online the answer is maybe. The seeds have to go through a process of being frozen for about 3 months and then they can be planted. These seeds have been outside all winter so they might grow. I just might plant a few and see what happens! πŸ˜‰ Most of the time when you find a pine cone laying on the ground, it has already released its seeds. So now you know where pine tree seeds come from!

Painting Pine Cones Fun

Did you say “Whaaaat? Painting pine cones?!” Yea, it sounds a bit odd, doesn’t it? Well, if the cold weather and the long wait for Spring are getting you down, let’s paint some pine cones to look like gorgeous flowers to cheer you up! It will look like Spring has arrived inside your house! πŸ™‚ Let’s gather the needed supplies…bright colored paints (You need yellow for sure), cheap paint brushes, newspaper or something to keep the table clean, small cups or dishes to hold the paint and pine cones, of course. The pine cones that work for this project are the shorter round ones shown in the picture below.

For little containers to hold the paint, I used disposable plastic cups and cut them down to a shorter size. I made enough of them to hold the paint but also to rest the pine cones in while the paint dried after I painted them. Pick out your first color and completely paint the pine cone, making sure to cover both sides of each scale.

Here’s my first painted pine cone starting the drying process.

I chose pink, blue, red and white for my pine cone/flower colors.

It’s rather hard on the paint brushes since you are painting in between the scales. That’s why I said CHEAP paint brushes. πŸ˜‰ You can throw them away when your project is done.

Here are my 4 painted pine cones…one of each color…drying in the little cups.

Now watch the magic happen!! Get your yellow paint and paint just the center of the BOTTOM of each pine cone…and PRESTO! They now look like flowers!!

Very cool, isn’t it?! Place them in a little container and look how pretty they are! Doesn’t that brighten up the room?

I hope you found this project fun and surprising! The more you make the better they look together! πŸ™‚