Hairy Fun With Paper Rolls

Have you been saving up those paper towel and toilet paper rolls and wondering what crafts your kids can use them for? Here’s a fun one that girls will like maybe more than boys, but boys can have fun with it too. Let’s make some funny heads with hair you can fix into different hairstyles. 🙂 You will need a toilet paper roll, a single hole punch, yarn, some markers and a pair of scissors.

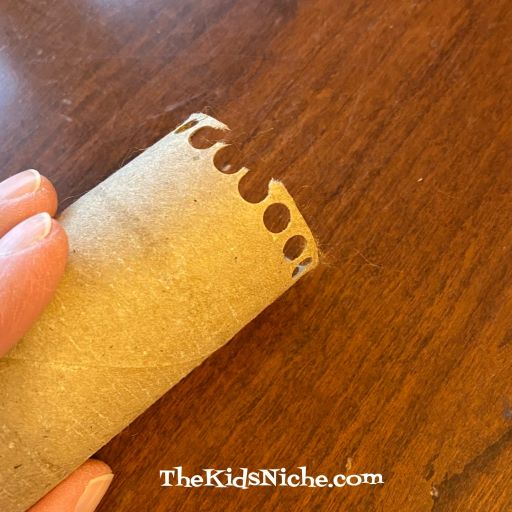
Start off using the hole punch to make holes all around one end of the paper tube.

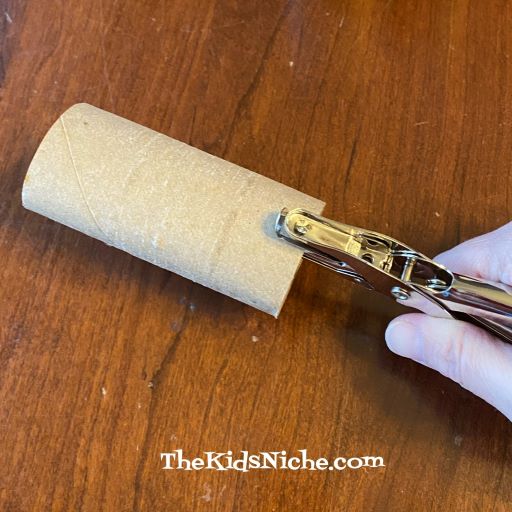
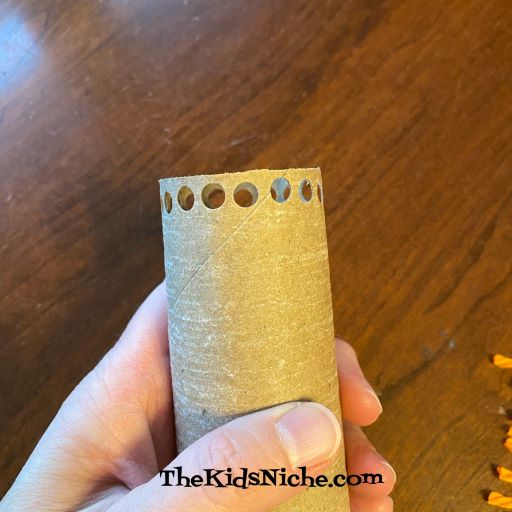
Leave a little space from the end of the tube. If you get the holes too close to the end, the holes will tear out easily. (I found out the hard way.)

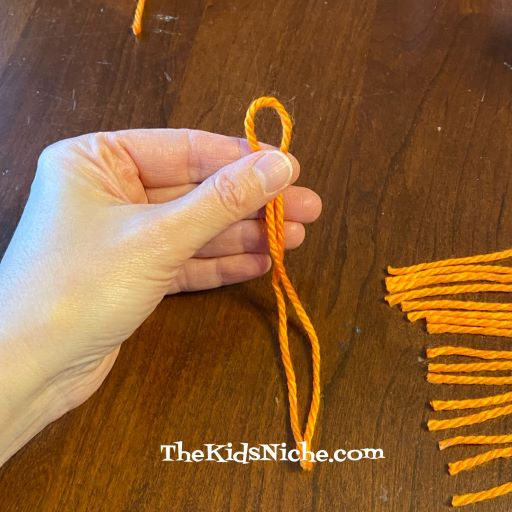
Cut 1 piece of yarn at least 12″ long for each hole. I had 17 holes on my tube. You can do just 1 piece of yarn per hole, which is how I started out, but I went back and put 2 pieces of yarn in each hole and I like it better with 2.

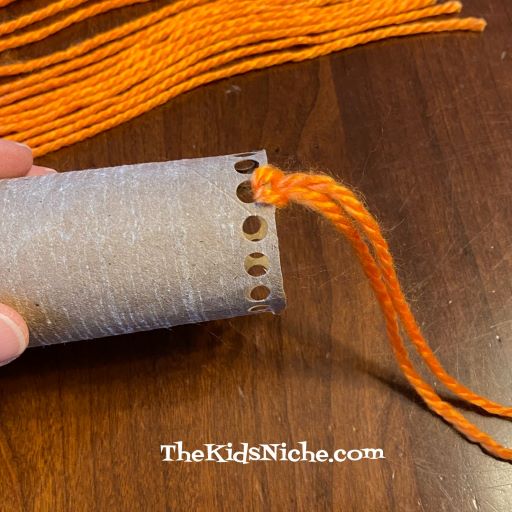
Take a piece of yarn and fold it in half.

Slide the loop through 1 hole. It doesn’t matter if you start on the inside or the outside of the tube. It will work fine either way.

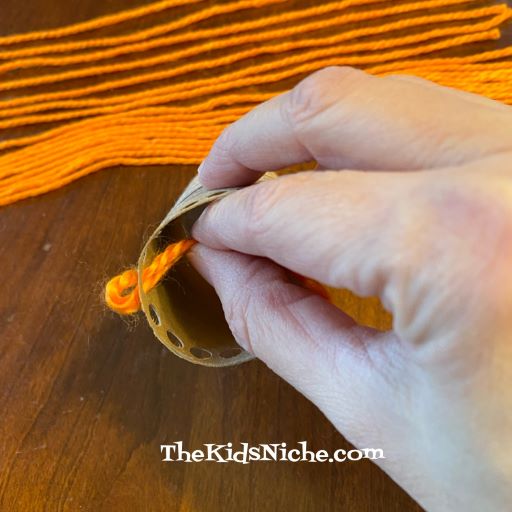
Pull the loop partway through the hole and then push the ends of the piece of yarn through the loop.

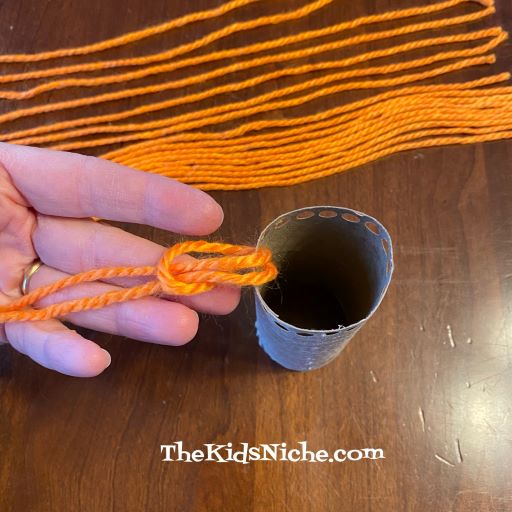
Pull on the ends until the loop part touches back to the paper tube. Pull it gently snug but not hard enough that the paper rips.

Continue adding 1 or 2 pieces of yarn in the same manner to each hole.

It will look something like this when you have put yarn in each hole.

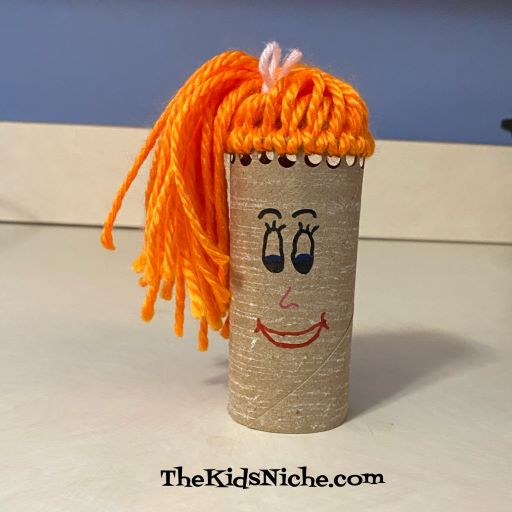
Draw a face on the side of the paper roll.

Now you are ready to start styling your character’s hair! Like tying another piece of yarn around the hair to make a ponytail.

Or a side ponytail…

Or maybe try a braid.

In the next 3 pictures, the character has 2 pieces of yarn per hole. I like it because there is more hair to work with.
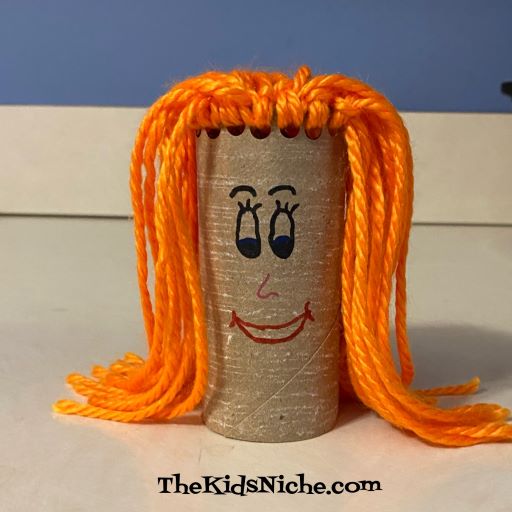
Swept to one side…

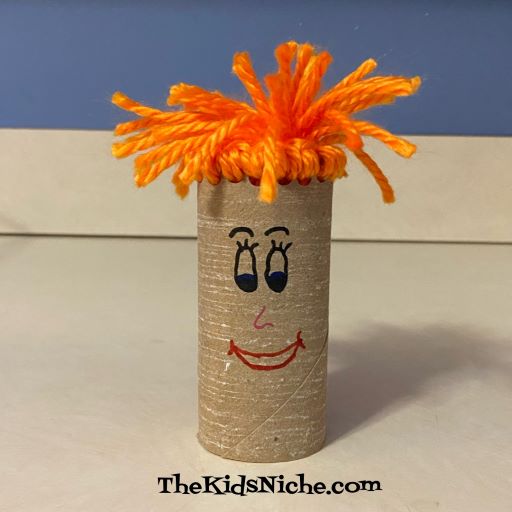
For this last picture, I twisted the hair together and stuffed some of it down inside the paper tube. 🙂

I’m sure your little hairdressers will come up with ideas of their own. 😉 Some barrettes or clips would add to the fun. I hope this will bring some fun to your day!

Fun With a Simple Magnifying Glass

Here’s another simple and inexpensive way for kids to have fun and learn something in the process! Yep, the title gave it away…I’m talking about a magnifying glass. I found one on Amazon for $6.99. And its pretty big.

I know…all it does is make things look bigger. But have you noticed how very COOL things look when they are huge?! Like….books.

Look at mom and dad’s coffee K-cups.

Or your dog’s nose…

Try looking at plants!

Flowers are cooler when you magnify them.

And grass! Check out what you’ve been walking on!

You might even find something cool that lives in the grass!

And dirt! Dirt looks pretty cool up close too!

The list goes on and on! Check out the carpet, your sister’s tongue, a comic book, look at your food…you could do this for HOURS!! Inexpensive, simple, safe and fun! What more could you want? 😉

Sand Art Makes a Day Fun!

Hi, everyone! Hope you are having a good day! Let’s talk about having fun with Sand Art! When some of our grandkids stayed with us a couple weeks ago, we had fun making Sand Art with a Sand Art kit. The kit contained 3 bottles, 3 corks, 5 different bags of differently colored sand, one tool and 2 tiny funnels. Each person chose a bottle for their project. It’s a good idea to spread some old newspaper on the table before you begin in order to make cleaning up afterwards easier. We poured the sand into paper cups that we had cut to make them shorter and easier to handle. Each color of sand was poured into a separate paper cup in order to keep all the colors apart.

The idea of the Sand Art kit is to place a small funnel in the opening of a bottle and slowly add a little bit of sand. You can add different colors of sand and make the bottle have different layers and make your own unique design.

The tool that was included in the kit can be used to move the sand around some after its inside the bottle or to help you make indentations in the sand.

The more layers of sand you use, the more colorful your bottle will be.

Or you can do it like our Little Miss did and use the tool to stir the sand together and you’ll have one bottle with a mixture of colors. 😉

We also had some “real” sand that we brought home from a beach vacation a few years ago and some of the kids added some of it to their bottle. It’s the top layer in this container.

After your bottle is filled up, you can place the cork in the opening to keep your sand from spilling out. If you fill your bottle all the way to the top, with just enough room left for the cork, the cork will also help preserve your design should your bottle get tipped over. Tapping your bottle gently on the table as you work adding layers of sand, will help it to settle nicely too.

Since we had some sand left over after filling the bottles, we got out some Elmer’s glue and some small flat wooden circles and we made some great designs with the sand. Just put a little bit of glue on the wood circle in the shape you desire, and sprinkle some sand over top. Gently pick up the wooden circle and let the pieces of sand that aren’t stuck in the glue to fall back onto the newspaper under your project. Or if you are using just one color of sand, you can let it fall back into the sand cup. Its a good idea to let the glue dry in between colors, if your kids have the patience to wait that long. Haha! Here are some designs we came up with:

(The circle of the left is from another craft that she did.)

The artist of the last design also used some colored markers to add to the details of his picture.

Sand Art makes a fun project and helped us have a good afternoon together. I hope you’ll give it a try too! 🙂 If you already have your own containers you would like to use, you can purchase colored sand on Amazon.com and maybe some other places too.