Welcome to 2023! I hope your year is starting off better than mine did. I welcomed the new year in by being sick. Yea, not so fun. But I think the worst of it is over (fingers crossed) so I wanted to share an idea with you today. It involves Lego! 😉
I got bored sitting/laying around while feeling crummy so I got a lid from a 9 x 13″ pan and a small Lego kit that I hadn’t had time to put together yet.
A cookie sheet would work well for this too. Any flat tray that has an edge to keep things from falling off would be great.
I was able to still recline (since my head was not happy sitting all the way upright) and enjoy putting this small set together. There’s the engine of the Winter Holiday Train!
Working on the 2 cars…
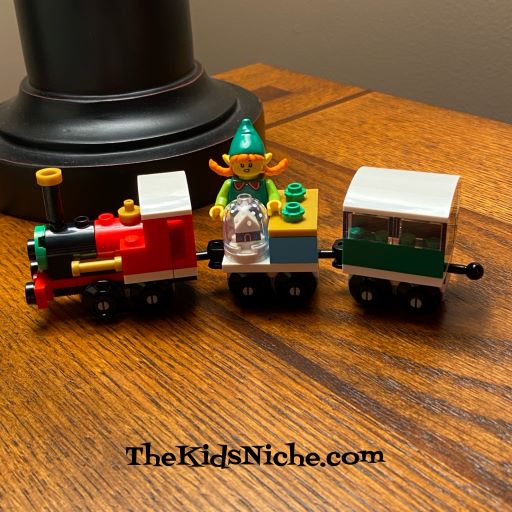
And it’s complete!
I added an elf I had gotten from the Lego Minifigures series 23 sets along with the little snow globe that came with her. I think it’s so cute! 🙂
I’ve added my little Lego train to my winter decor. 🙂 It was a nice little something to do to break up the monotony of laying around while sick. Hope this idea will help you the next time someone isn’t feeling so great at your house. Stay healthy! 🙂
Happy Columbus Day! How many times have you heard the saying, “In 1492, Columbus sailed the ocean blue”? 😉 I know, I know…now there is a lot of disagreement about what Christopher Columbus did or didn’t do, but one thing I think we can safely say is he was an explorer. So to celebrate Columbus Day today, let’s help the kids become explorers!
The first thing an explorer needs is a cool hat, right? 😉 I’m going to show you how to make a cool explorer’s hat out of paper. I am using a piece of construction paper so you can see more clearly how to make it, but you might want to use something bigger like newspaper. Just depends on how big the person’s head is that you are making it for.
To start, I got a piece of green construction paper.
Here’s how to make your hat. Fold it in half the long way.
Open it back up.
Now fold it in half the other way.
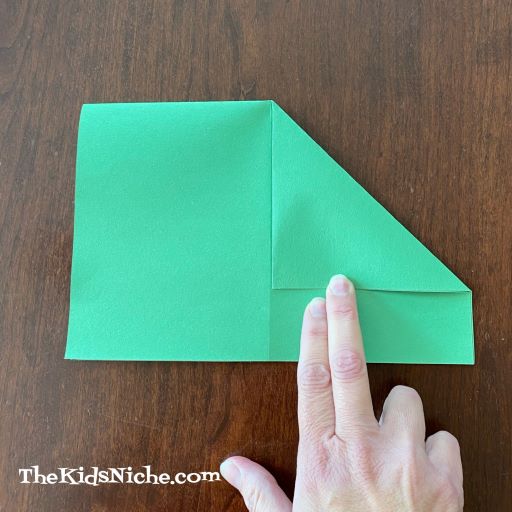
Leaving the paper folded, fold in one top corner of the paper to the middle line so it looks like a triangle.
Now do the same thing on the other side.
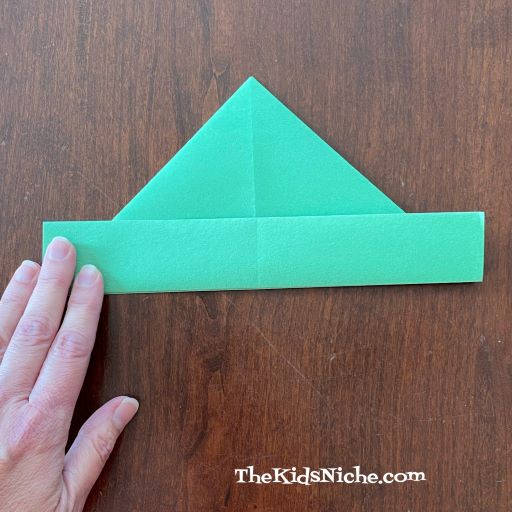
Fold one side of the paper’s straight edge up so the fold is at the bottom of the triangles.
Turn the paper over.
And fold the other side up the same way.
Your hat is done! Pull it open at the bottom folded edge.
This little guy was happy to be a model for your new explorer’s hat. 🙂
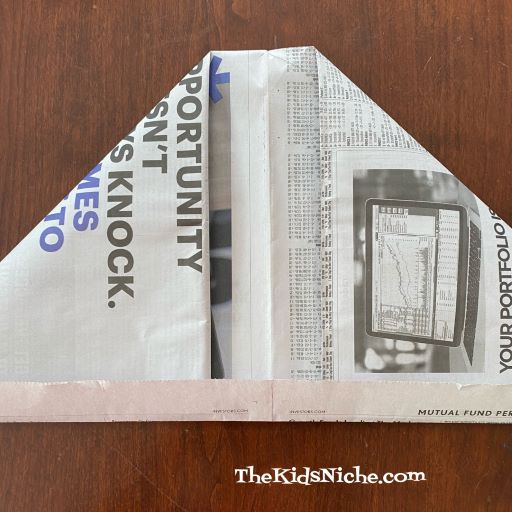
As I already mentioned, you can use different sizes of paper to make different sizes of hats. Here is the one I made with construction paper, one made with a single sheet of newspaper and one made with a full sheet of newspaper.
For the full sheet of newspaper size, you might need to let your triangles not meet in the middle so that you still have paper left over to fold the edges up.
Barbie and Ken thought it would be fun to be explorers too!
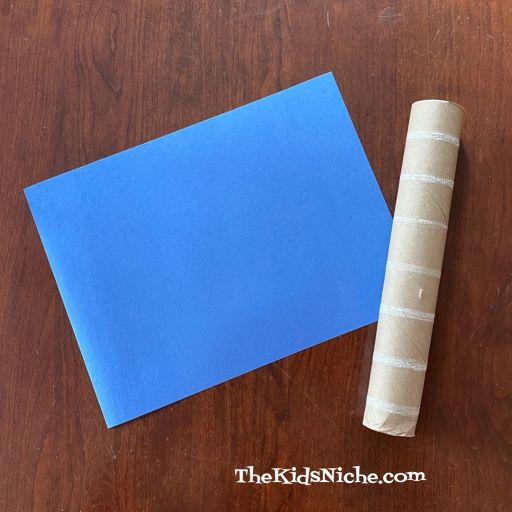
What else does an explorer need to go exploring? Maybe a spyglass? Let’s make one of those too! All you need is an empty paper towel or toilet paper roll, a piece of paper and markers or crayons.
Cover the tube with the construction paper if it has a lot of glue marks on it like this one does. Use glue or tape to hold it in place. (I used tape because it doesn’t need drying time.)
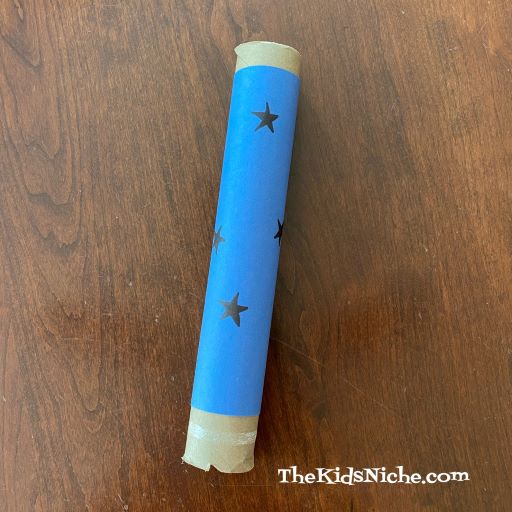
Let your kids decorate their spyglass with markers or crayons.
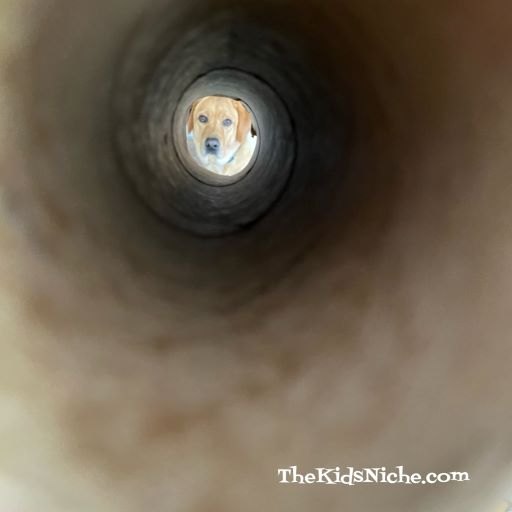
You are now ready to be an explorer!! What does an explorer do? Well, they put their explorer hats on and walk around the house or outside and they look through their spyglass to see what they can spy! They use their imagination to discover a new land. Be careful because you never know what kind of strange animals you might find!
Also watch out for things like carpet that might have quicksand or lava! You might need to jump from rug to rug in order to not get sucked in! 😉 I hope your new hat and spyglass will make exploring a ton of fun!
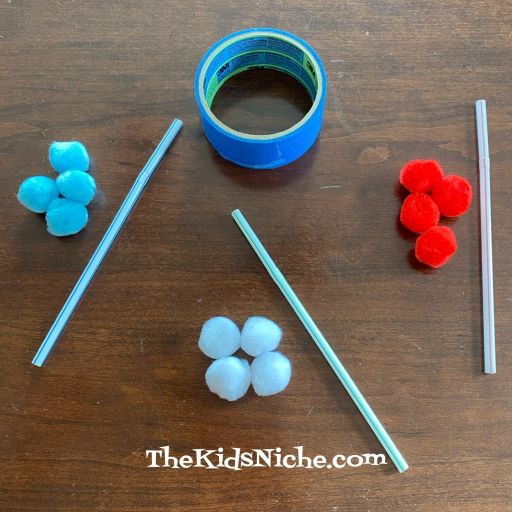
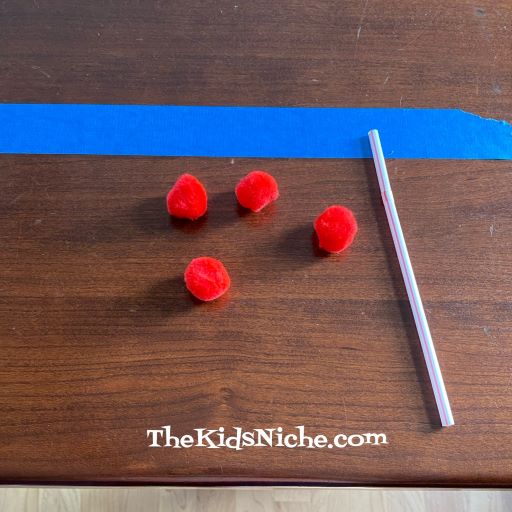
Do you ever wish you had something NEW the kids could do without going out and spending a ton of money? What if there was a game that takes some really simple supplies that you likely have on hand already? This game can be played with just some simple pom poms, drinking straws and either some painters tape or strips of paper and scotch tape. And a table or floor to play on. 😉
The basic idea of this game is to use a straw to blow the pom poms to a certain place. This game can easily be adapted for young kids to adults. I suggest each person has their own straw and 4 differently colored pom poms but the number of pom poms can vary. Let’s start out with the simplest way to play and then move on to harder ways.
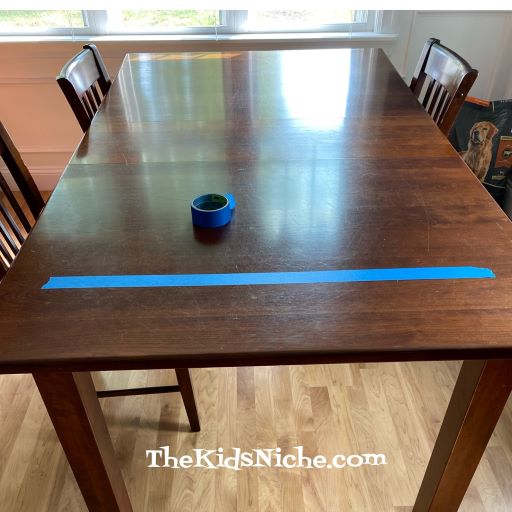
To set up the game, begin by placing a strip of painters tape across the table, close to one end but allowing 6″ or so of the table open on the very end. I suggest painter’s tape because it should come back up easily and not hurt the table. If you don’t have painters tape, you can use a strip of paper and tape it down with scotch tape.
Next place another strip further down the table…maybe 12″-15″ away.
Now you are ready to play the easiest version of the game. Player #1 takes his/her pom poms and puts them on the end of the table by the first piece of tape.
Using their straw, player #1 blows through the straw while aiming the straw at a pom pom.
See how the pom pom has moved past the first line?
Keep blowing each pom pom until all 4 pom poms have crossed the line further down the table. NO HANDS ALLOWED!! 😉
If you want, two players can go at the same time.
You can decide on what rules of the game you want to use. For instance, can the players help each others pom poms across the line or must each player do their own? If the pom pom is blown off the table, does it go back to the starting point or can it be placed back on the table close to where it fell off? The ages of the players can determine how hard you want this game to be.
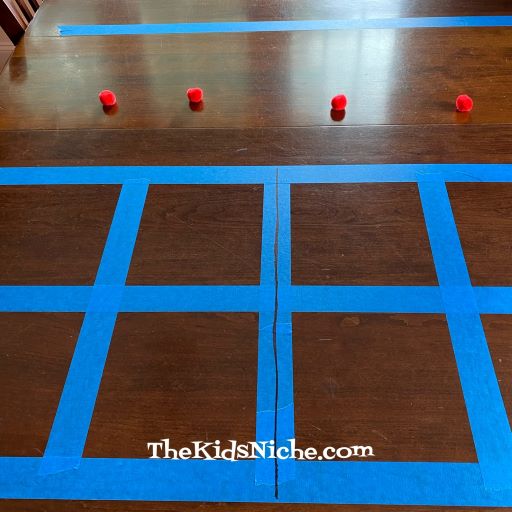
Now, let’s make it a little bit harder. Put a piece of painter’s tape down the center of the 2 strips already on the table. When each person takes their turn, they must keep all of their pom poms on their side of the tape. Add a third piece of tape even farther down the table for the finish line.
Now I added a piece of tape on the outside edges on both ends. (This is a side view.) At this level the players also cannot blow their pom poms outside the side edge or that pom pom must be placed back at the beginning. Players can race against each other or each player can be timed and the player with the fastest time is the winner. You can make this level be that all 4 pom poms must be together in the first “box” before they are blown on across the table past the finish line.
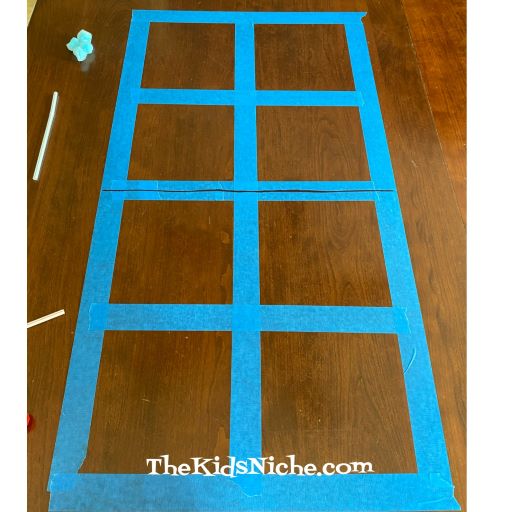
Ok, it’s getting harder now! Place more tape on the table so that each side has 4 small boxes. I drew a line down the center for a reminder to stay on your side. (Another side view)
This level can be that each player must have 1 pom pom in each of their 4 squares at the same time before they can move on toward the finish line. (Side view)
Or you can choose which squares the pom poms must be in to be able to move on. Like in this picture, 2 pom poms in the 2 squares that were picked.
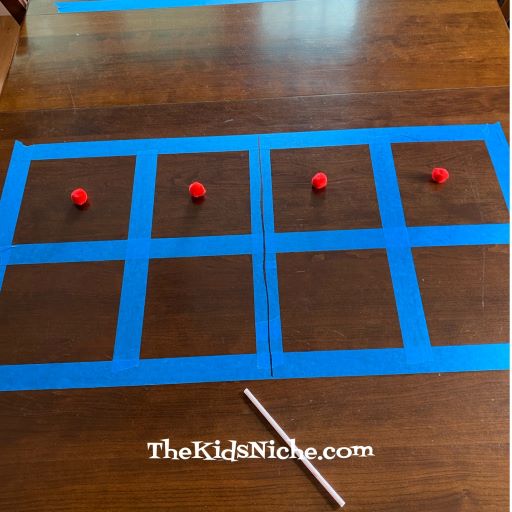
Here is another version where one player plays at a time and you time each player. One pom pom must be inside each square in the first row.
Then each pom pom must be blown into a separate square on the second row.
Next, all 4 pom poms must be in the space in front of the finish line before…
…all pom poms are blown past the finish line. An extra rule would be that pom poms cannot be left sitting ON the tape…they must be inside the appropriate area. Again, decide what happens if a pom pom is blown off the table…start over or put it back where it fell off? 😉
Here’s another angle to decide before you play…where do the balls start from? Do they all have to be together in a line?
Or can they be placed more strategically across the starting area?
One more idea for you…give each player 4 pom poms of 3 colors. And make them follow the last game I described but 1 pom pom of each color must be blown into each square before moving on to the next step!
I’m sure you can come up with even more ways to play this game! Start out easy and gradually increase the difficulty. You can also give players a set amount of time to finish. For example, they have 30 seconds to blow the pom poms across the finish line. I hope these ideas will spark some ideas of your own and you will have a ton of fun with just some pom poms and drinking straws! 🙂
Are you looking for an entertaining game to play with a group but you don’t have many supplies handy? All you need for these crazy drawing games is some paper and pencils. Give each participant a sheet of blank paper and a pencil. Let the fun begin!
For the first game one person gives out the directions for what to draw. The funny part is that everyone is given the same directions, but all the pictures look differently. These are the directions we used:
1.) Draw a tiny oval body.
2.) Add a giant head.
3.) Draw 2 short legs and 2 arms.
4.) Draw 2 little eyes and a mouth.
5.) Add 2 ears.
6.) Add a long tail.
Pretty simple, right? Now look at the 9 different pictures we ended up with:
We all had a good laugh when sharing our pictures. 🙂 I think you can easily find the one with the longest tail! Haha!
For our second game, each person thought of something simple to draw. It can be anything you want, but you will be drawing it 4 times so you probably want to make it fairly easy to repeat. For the first drawing, everyone draws with their dominant hand. In other words, whichever hand you write with is your dominant hand.
Drawing #2 is drawn using your non-dominant hand. If you are right handed, this one you draw with your left hand. You can compare the first picture with the second picture to see if you can notice any differences.
For the 3rd drawing, draw the same picture as before using your dominant hand again, BUT draw it with your eyes CLOSED! No peeking allowed! 😉 You can see that it was hard to keep things lined up!
For the last drawing, you must place your piece of paper on the bottom side of the table. Yes, under the table! Again, no peeking! Hopefully you can each find a smooth spot on the bottom side of the table to draw on. Look how crazy these pictures turned out!
Pretty funny! You can probably think of more goofy ways to draw if you want to make the game last longer. Like putting the pencil between your toes or placing your paper on the top of your head. You’ll all have a good laugh when you share your pictures with each other. 🙂 Have fun and happy drawing!
Sometimes we get caught up in thinking we need to buy TOYS for the kids when really they can be quite entertained with some simple things found in your own kitchen. (Yesterday I saw a 19-month-old boy happily playing with a tag cut off of something new. He was folding and unfolding it and sharing it with me and then taking it back when I offered him his “book” back.) 😉
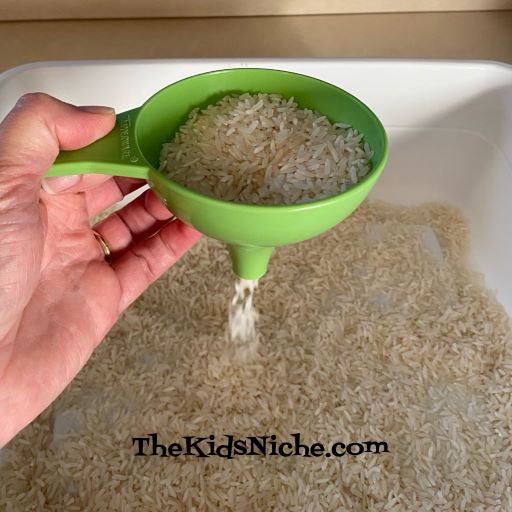
Today I’d like to talk about one of those things…a simple funnel.
Just the fact that you can pour something into the top of the funnel and watch it run out the bottom part can make for hours of fun for kids! Here are a few ideas of things to play while using a funnel:
#1.) Rice. White rice is very inexpensive but put some in a tub or bowl and hand your child a funnel and maybe a cup and the fun begins!
#2.) Small dried beans. Small dried beans are a similar idea to the rice. The beans I have are a little bit large for using with my funnel, but they still work, only they move through the funnel more slowly and sometimes you have to shake the funnel a bit to get them to go through.
#3.) Water. Yes, just plain ole water! If it’s a hot day, give the kids a funnel and a tub of water outside. Using some cups, they can pour the water into the funnel using one cup and letting the water fill another cup. Even better, give the kids some cups and a funnel while they’re in the bathtub. They’ll want to stay in the tub until their skin is wrinkled up like a prune! 😉
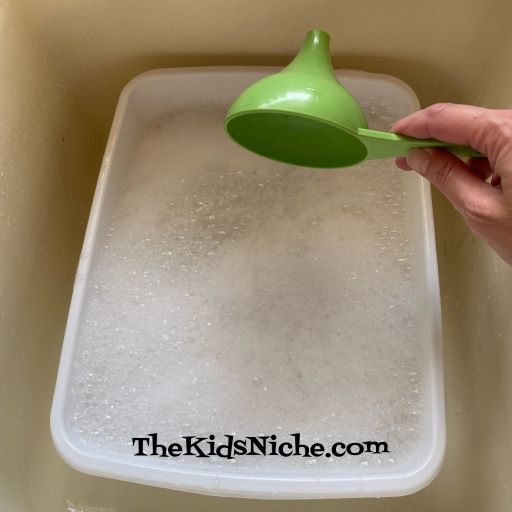
#4.) Speaking of water, add some dish soap and lather up some bubbles! Or if you want to play with this in the bathtub, add some bubble bath soap to the water.
Here’s a fun thing that a funnel is great for with bubbles…scoop up some bubbles with the funnel like this…
Then push the funnel upside down, down into the water and the bubbles will squirt out the top of the funnel! It’s really quite cool! 😉 It’s a little like having your own personal volcano! LOL
#5.) Sand. Yep, you can take a funnel to the beach or bring the beach to your house. Outside is good…lol! You can use a dishpan inside and it works rather well.
Matchbox cars and trucks are fun to bury in the sand. 😉 What truck?
And fun to dig them back out again, of course!
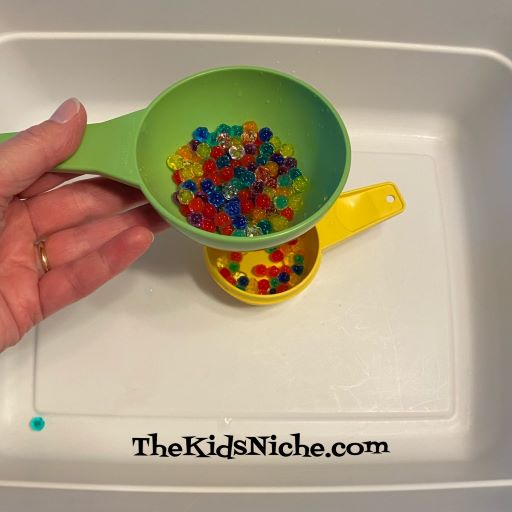
#6.) Water beads. Have your kids played with water beads? They start off very tiny, but as they sit in water they get bigger and bigger. Don’t let them get too big or they won’t fit through the opening in the funnel. This activity is also good for outside play or in the bathtub. 😉
There ya go! 6 ideas of things your kids can play with using a simple funnel found in your kitchen. Hope you all enjoy these ideas! 🙂
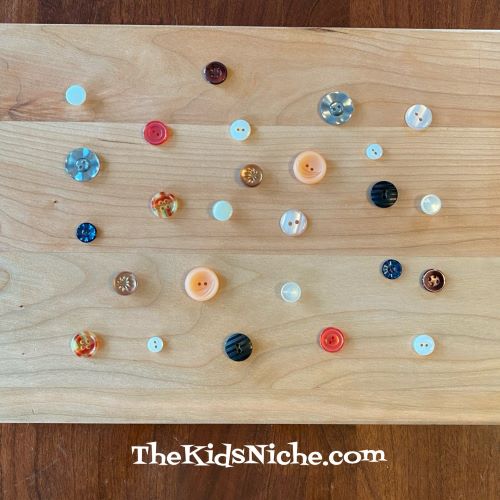
Hello and welcome to a new week at The Kids Niche! Today we’ll talk about a super easy and simple matching game. The first way we played it was using buttons we had around the house. (If you don’t have buttons, its ok…keep reading please.) Pick out several button pairs so you have 2 that match. Lay them out on the table or counter and mix them up.
The age or ability of the children playing can determine how many sets of two you use. Let the children match the button pairs up. If there is more than one child playing at a time, they can take turns finding matches. There isn’t really a winning person in this activity, but everyone wins when all the matches have been made!
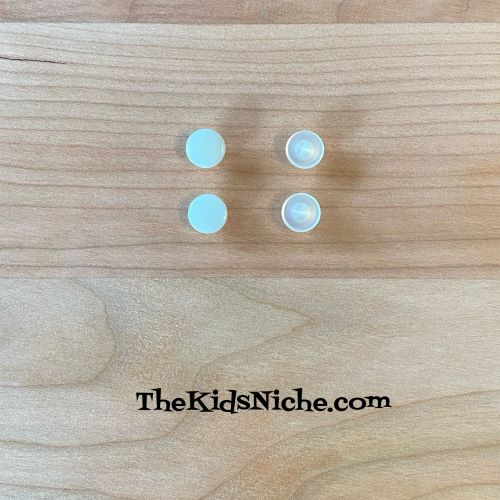
Also depending on the age of the kids playing, how hard you make the matches. For instance, these two sets of buttons look very similar. But one set is white and the other is shiny.
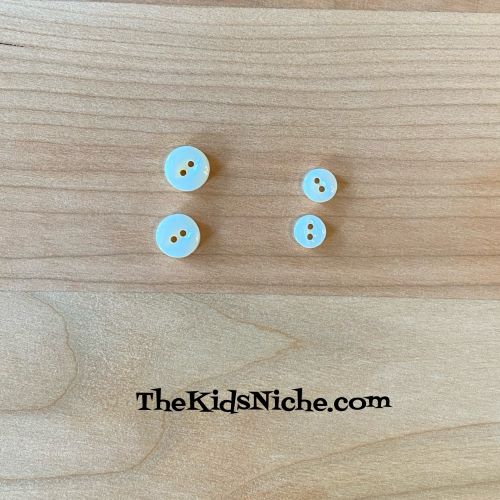
These two sets of buttons look the same except they are different sizes. Be careful of using too small of sizes for the younger kids because we don’t want anyone putting things in their mouth and choking on them!
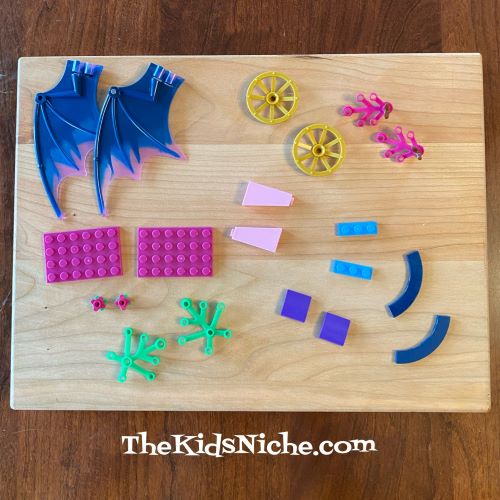
Maybe you don’t have buttons at your house? Lego pieces work great for this activity too. Follow the same instructions that we used for buttons.
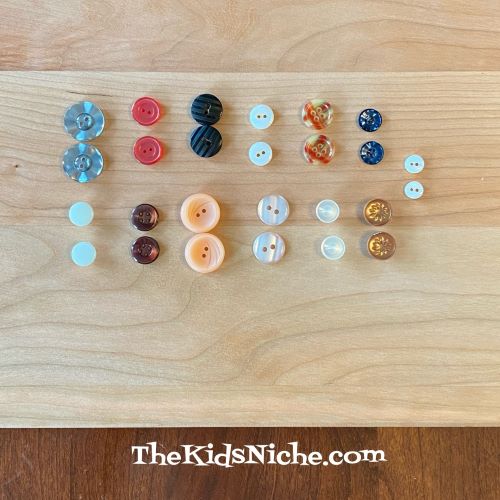
All matched up!! Good job!
You can use whatever items you might have around the house. Maybe crayons or blocks or hair barrettes. The idea is just to have things that you have two of for the kids to sort out the pairs. I hope you and the kids have fun trying out this game! 🙂