Mini Picket Fence Craft

The calendar says it’s officially Spring (even though it doesn’t feel like it outside where we live) so it’s time to do some Spring crafts for kids! Today we made a mini picket fence that is really so cute! This could be a great Mother’s Day gift for a child to make with some assistance from an adult.

You will need 7 craft sticks, some craft glue, some miniature flowers and a butterfly or bug puffy sticker or button.

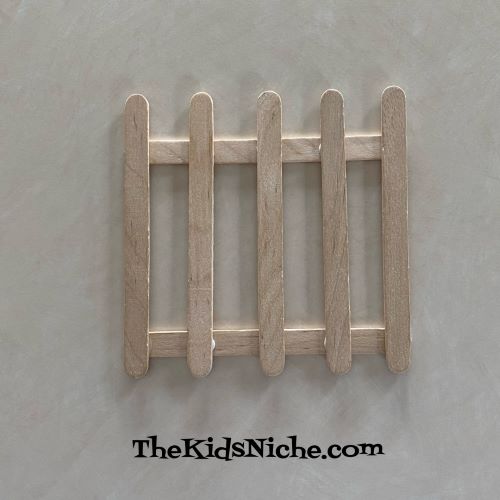
You can use the craft sticks as they are or they would look really cute painted white. Start with 2 sticks and place 2 dots of glue on each stick at the same place on the 2 sticks.

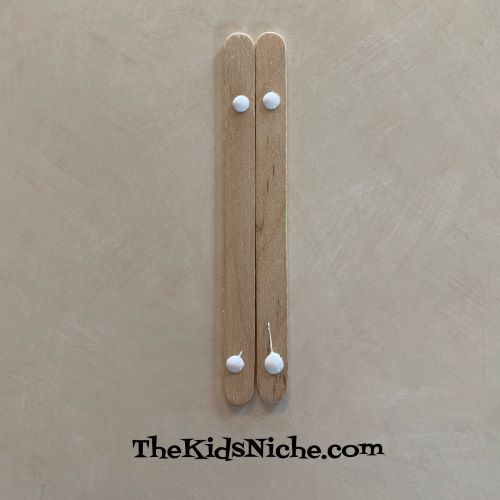
Slide the 2 sticks apart and place another craft stick horizontally across the top and one across the bottom onto the glue dots. Try to keep the sticks straight so they form an even rectangle.

Allow the glue time to dry before moving to the next step. Once the glue is dry and your fence can be moved without the sticks moving, turn it over. Place 3 dots of glue in even spots across the top and 3 dots across the bottom stick.

Lay 3 craft sticks vertically on the dots of glue, as shown in the following picture.

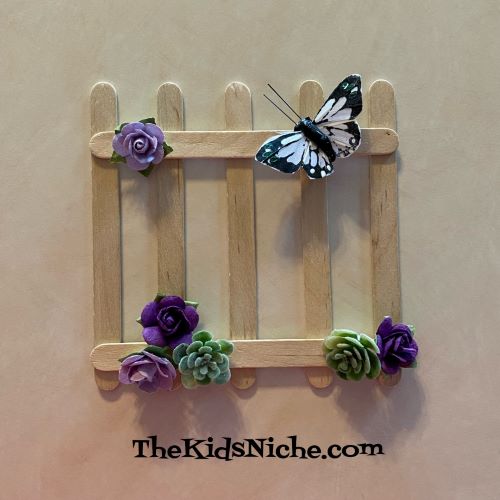
Allow the glue to dry again until all the sticks will stay in place. (For a quicker project, you could use a glue gun, but craft glue is safer for younger children.) Once the fence is dry, turn in back over so the front side is up and decorate it by gluing on miniature flowers and a butterfly.

You can add a magnet to the back for hanging. Or add a piece of twine by gluing each end of the twine to the top sides of the back of the fence.

Or glue both ends of the twine to the backside of the middle vertical stick.

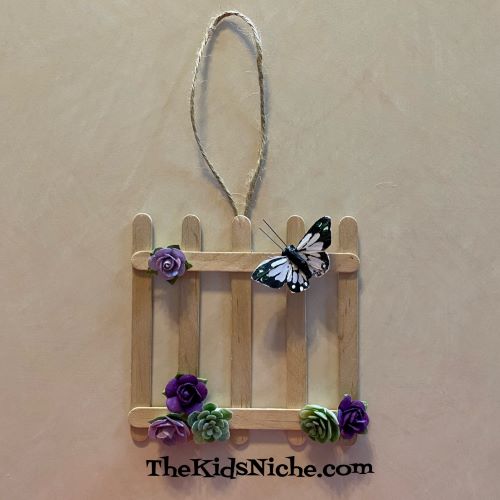
That’s it! Now you have a cute mini picket fence to display around your house and make you think of warm Spring days! 🙂

Simple Spring Chicks Craft

I don’t know how the weather is where you live, but we just had an ice storm last night into this morning. It’s rather pretty but it makes the sidewalks and roads quite slippery and almost impossible to stand up even on the grass! I’m getting a bit “winter weary” and am dreaming of warmer temperatures.

I decided we needed a craft today that will help us think about Spring coming! Let’s make a Spring Chick or two! 🙂

You’ll need a toilet paper roll, some paint, a paint brush, some craft feathers, glue, wiggly eyes, a small piece of orange paper and a pair of scissors. Oh and some newspaper to protect the table or countertop from the painting process. 😉

The first step is to paint the toilet paper roll in a bright cheery color. It’s up to you if you do 1 or 2 coats of paint.

I decided to paint a second toilet paper roll while I waited on the first one to dry. 😉 (I love this blue color!)

You can also cut out the chick’s beak while you wait for the paint to dry. Take your orange piece of paper…

Make a fold and cut out a triangle shape with the bottom of the triangle being on the fold.

The beak will open up like a real chick’s beak.

When your chick is dry, glue on 2 wiggly eyes.

Next, to glue on the beak, put glue only on one side of the beak.

Then stick the glued side on the chick under the wiggly eyes.

Glue on a few feathers inside the toilet paper roll on the front side.

If you want to, you can add a piece of a feather on each side for the chick’s wings.

And your Spring Chick is done! 🙂 For my blue chick, I added 3 feathers to his head but didn’t use any for wings.

Use your imagination and make your chick special!

I hope making some Spring Chicks will cheer you up and make your house brighter! Stay warm! 🙂