Have you ever made a sun catcher? They are fun and simple to make and look so pretty hanging in the sun! I found these supplies for the project at our local Walmart store: you will need sun catcher paint pens, suction cups with a hook and, of course, an unpainted sun catcher.
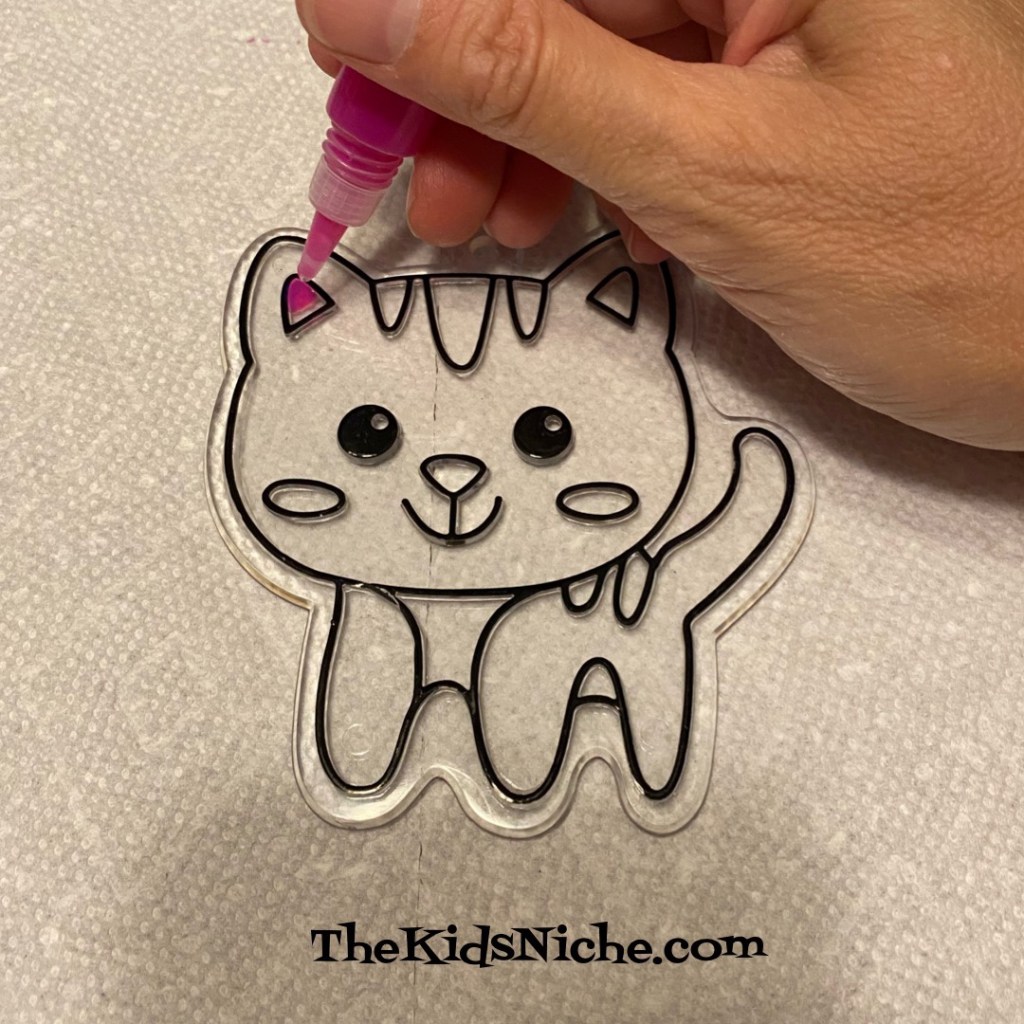
Open the pack of sun catcher paint pens and select your first color. I began with pink for the kitten’s nose and the inside of her ears. Squeeze a very small amount of pain onto the sun catcher.
Use a toothpick to pop any bubbles you see in the paint and to help spread the paint around.
Keep adding paint in your desired colors to your sun catcher.
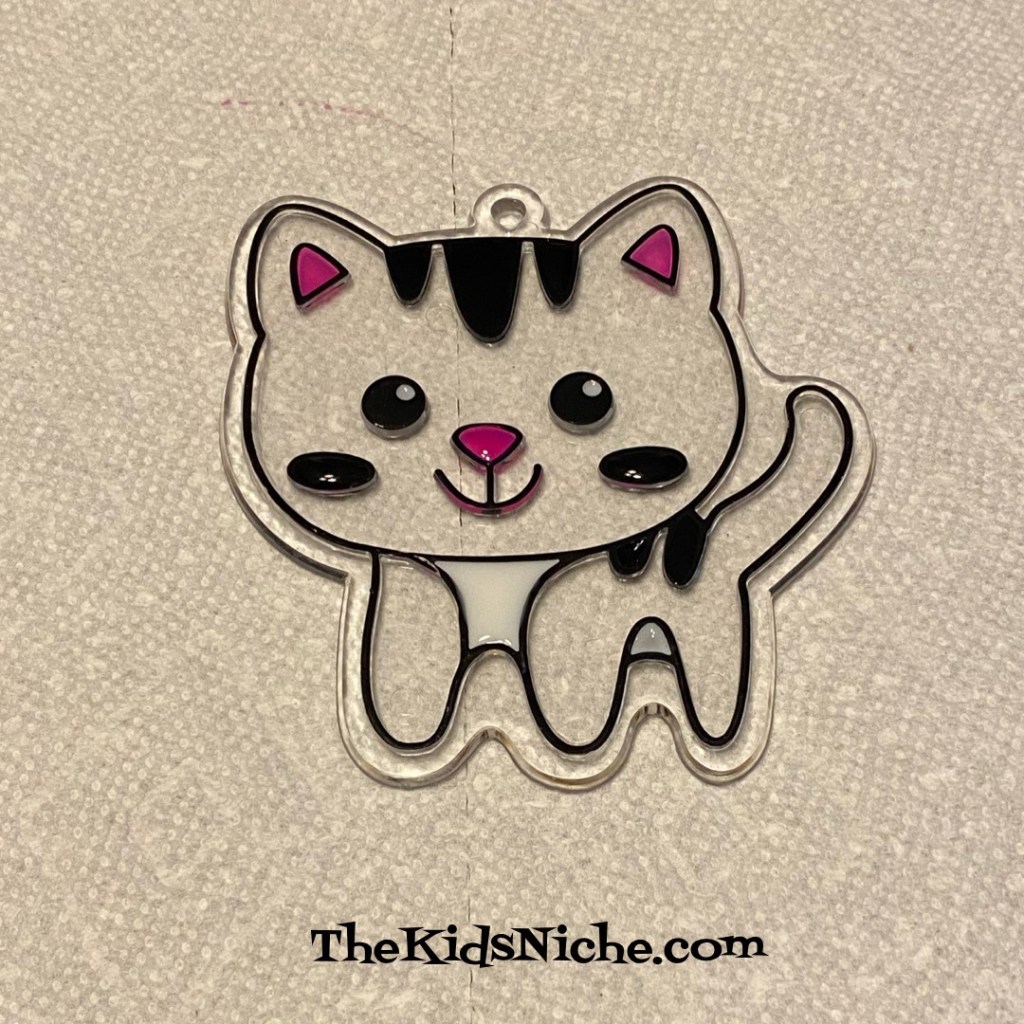
I wanted my kitten to have a white face but the sun catcher wasn’t divided into a section there, so I painted in the gray area of the face first and then let the sun catcher dry overnight.
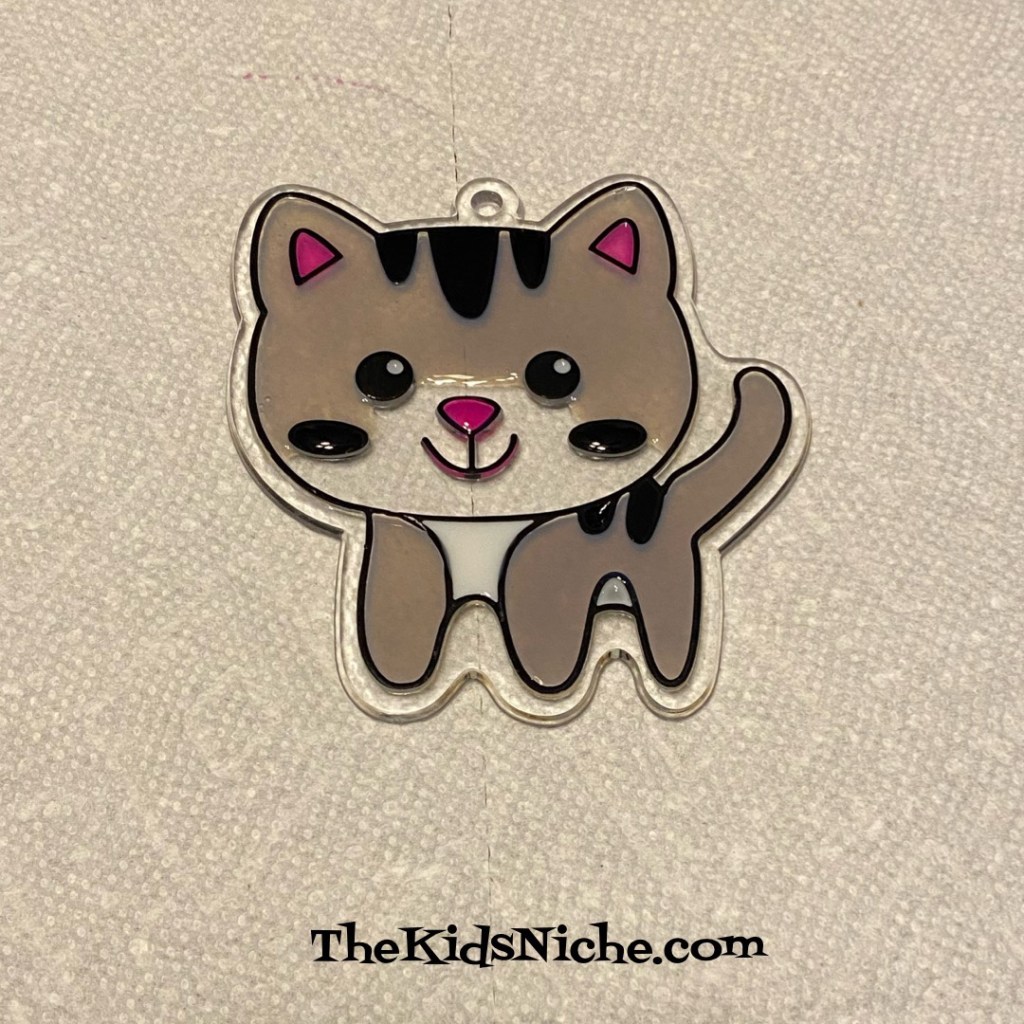
The next morning, I added white paint into the section I left open. And after drying for a few hours, this kitten was ready to be given to our grandson as part of his birthday present. The sun catcher was painted to look like his cat, Chloe. 😊
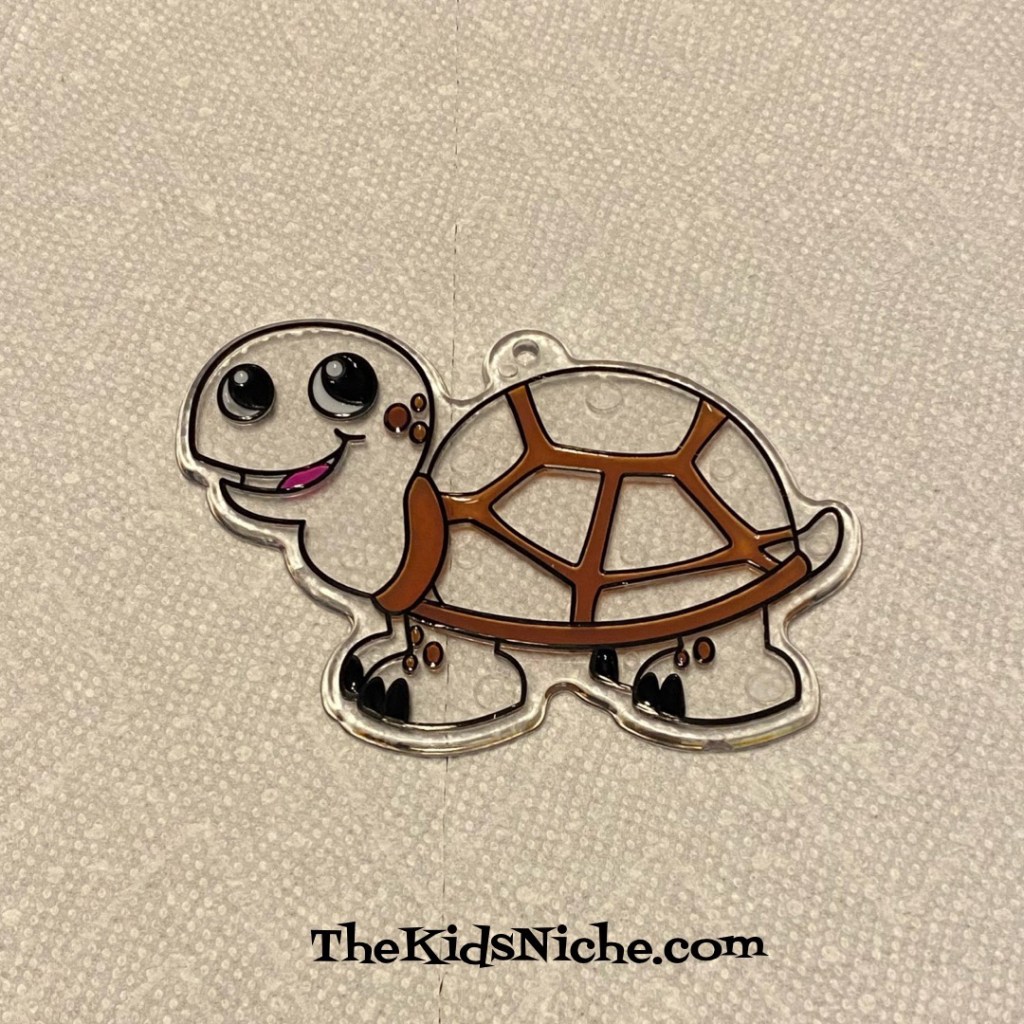
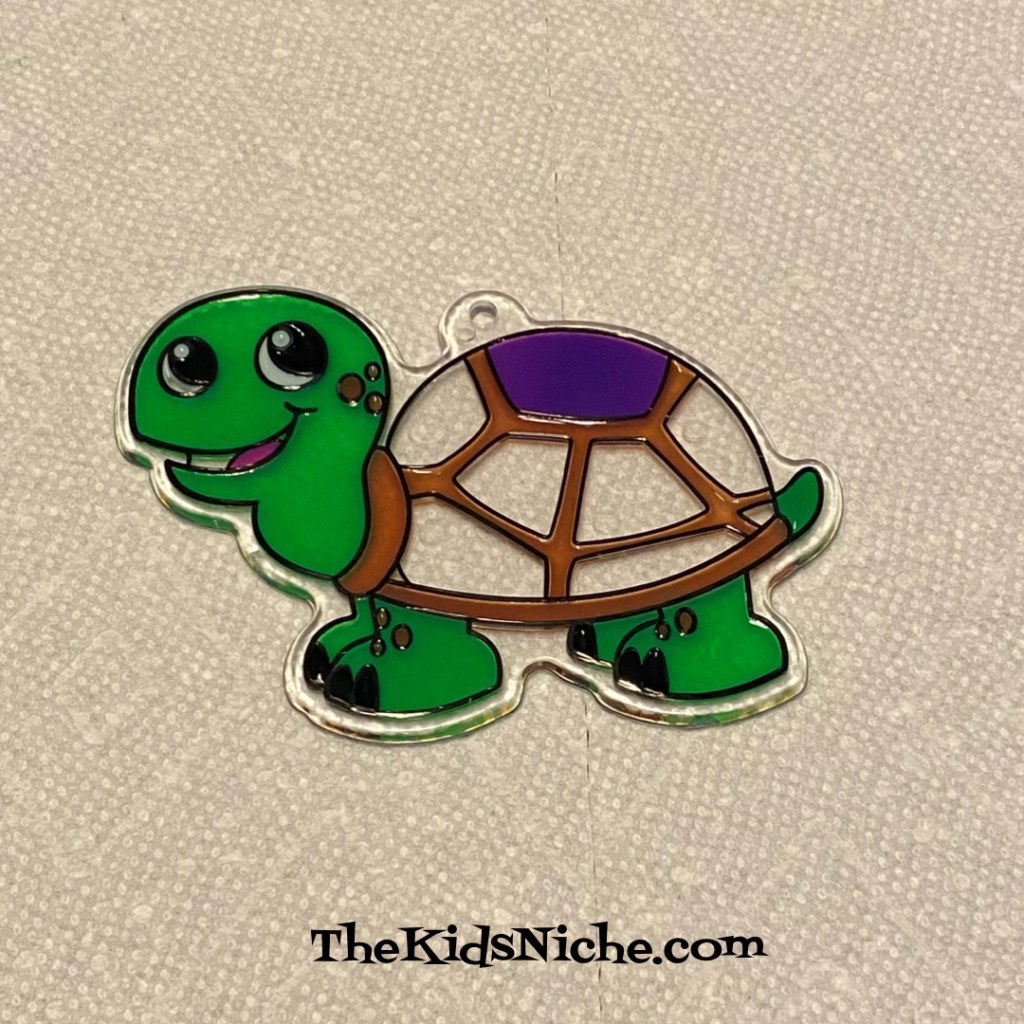
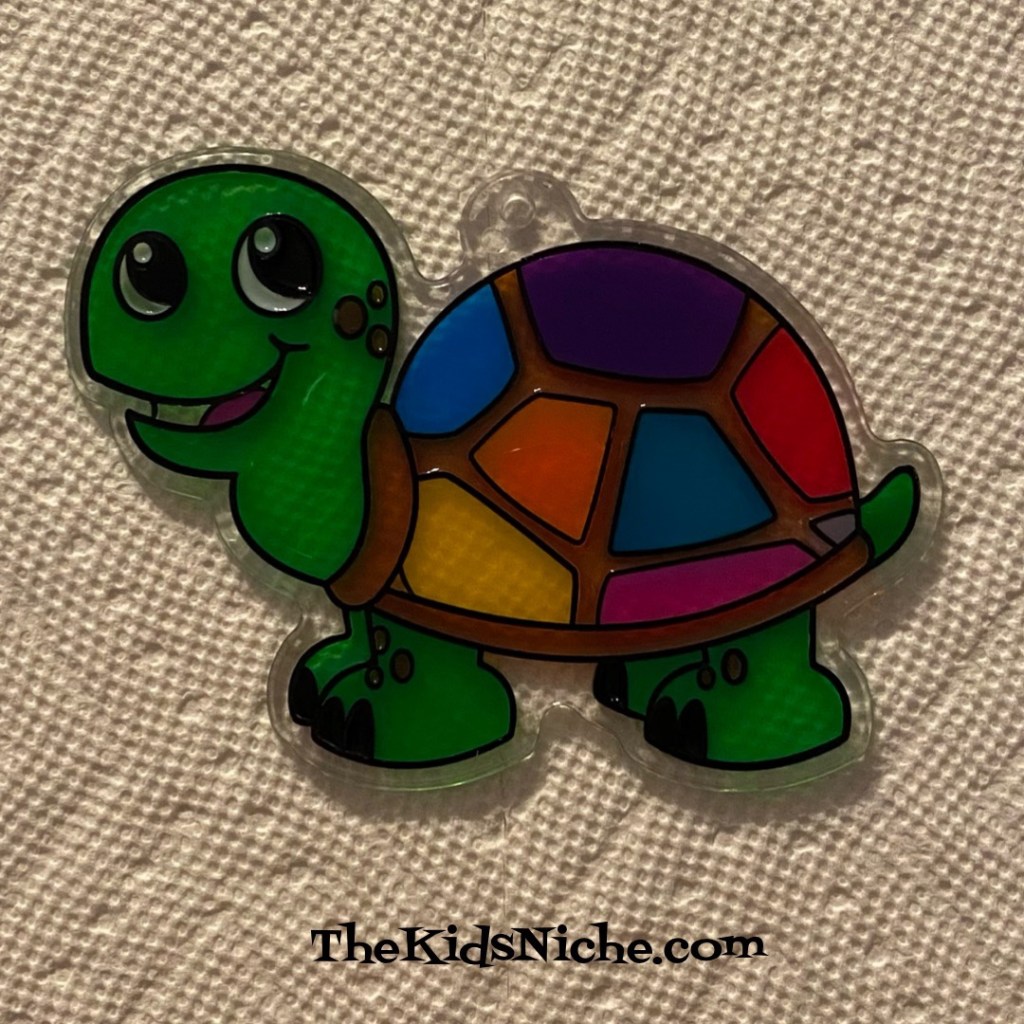
I also enjoyed painting a turtle sun catcher to give to our son who has a turtle for a pet.
Added green and purple paint…
And several more colors to finish her! I think she turned out pretty cute! Put the hook through the hole in the top of the sun catcher and use the suction cup to attach it to any window. (Or a turtle’s aquarium!) Watch the sun shine through! 😃
There are lots of different sun catcher shapes at Walmart and they are probably also sold at craft stores. Have fun making some sun catchers of your own and catching some sunshine with them! 😃
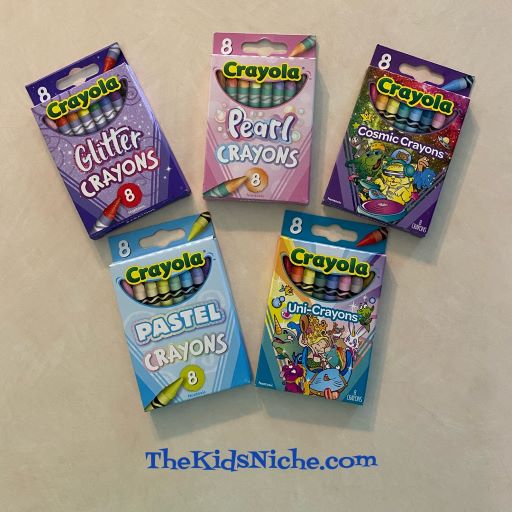
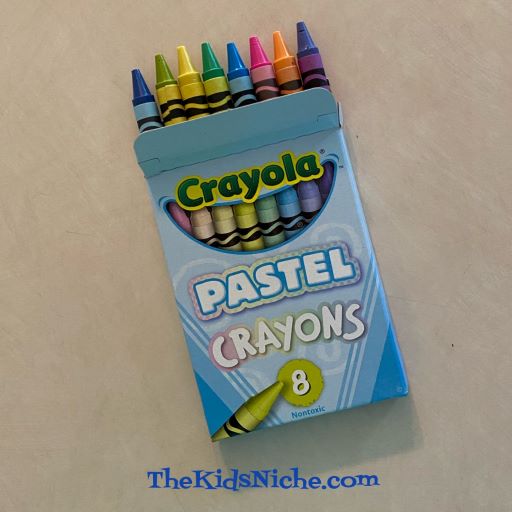
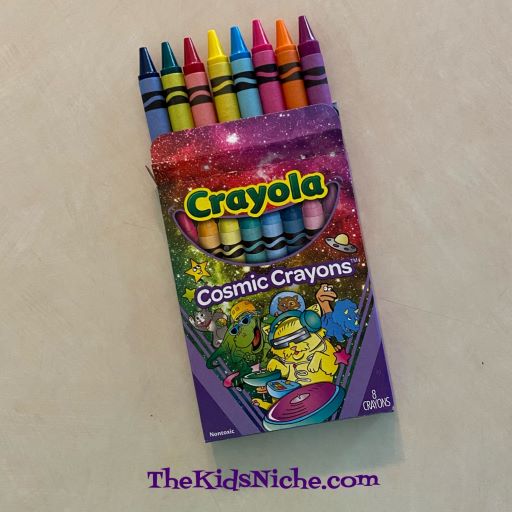
When I was a kid, one of my favorite things to receive was a new box of crayons! I felt that excited sensation again the other day when I came across some new collections of Crayola crayons! I found these at the Dollar Tree store and some of them I haven’t seen any place else so far.
Let’s take a minute and look at what is inside each box. 🙂 Each box contains 8 crayons.
#1.) Glitter Crayons. Colors included in this box are: berry blast, crimson clash, campfire flicker, sun shower, gritty green, blue blazes, poppin’ purple and black gold. The crayons are sparkly.
#2.) Pastel Crayons. The colors included in this box are: carnation pink, canary, spring green, sea green, apricot, sky blue, periwinkle and purple mountains’ majesty.
#3.) Pearl Crayons. The crayons in this box have some cool names too: hot cocoa, orange peel, apple orchard, shooting star, caribbean sea, cloudy sky, lavender silk and black pearl. Just listening to the color names makes me want to start coloring! 😉
#4.) Uni-crayons. These must be for coloring unicorns? Here are the colors in this box: maroon, red-orange, yellow, pine green, blue, carnation pink, silver and gold. Gotta have silver and gold for unicorn horns, right?
#5.) Cosmic Crayons. This kind I did see at Walmart in a box of 24 crayons. Colors in this box include: wild strawberry, yellow orange, yellow, jungle green, sky blue, pacific blue, hot magenta and orchid.
These crayons are so much fun! They would make a great addition to a craft bag for traveling or a goodie bag after a birthday party. Or maybe send some to those grandkids that live far away. Whatever you do with them, I hope they will bring lots of fun to someone! 🙂
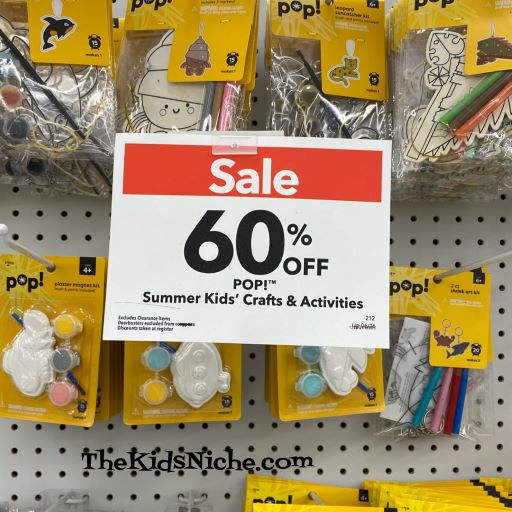
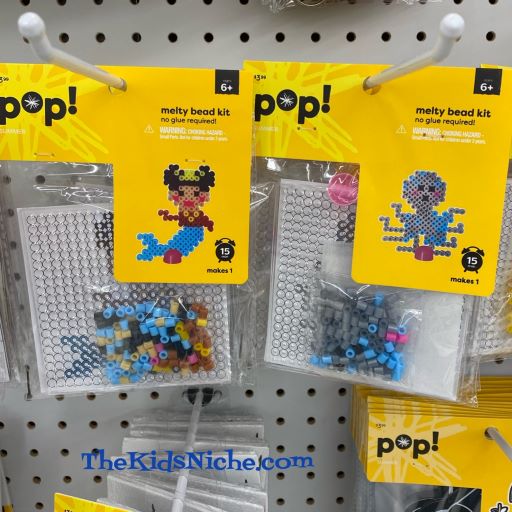
If you are looking for some small craft kits for your kids to do this summer, stop in at your nearest Joann craft store! They have some great prices on some fun looking kits!
These are a few items included in the 60% off sale:
#1.) Melty Bead Kits. There were at least 3 designs to choose from. (Yep, they look very similar to the Perler beads.)
#2.) Scratch Art Kits. There are 6 in this package and it includes the utensil used to do the scratching.
#3.) Color-in Puzzle Kit. There are 2 sets in the package plus some markers for coloring.
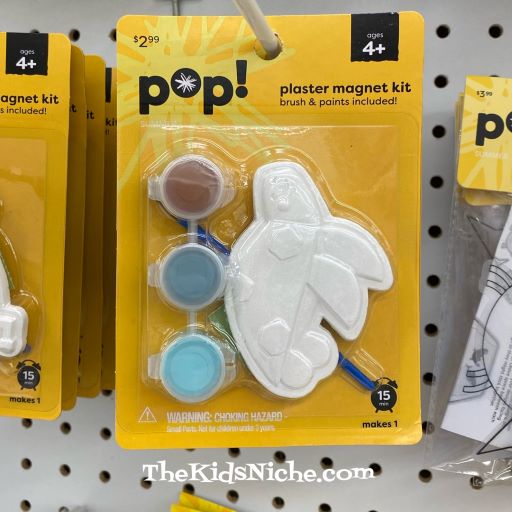
#4.) Plaster Magnet Kit which includes a brush and paints. There were a few designs to choose from.
#5.) Wood Coloring Kit. These sets includes 3 markers and a few little gems.
I also saw a couple different types of terrarium grow kits that were 70% off! Normally they would sell for $29.99, but are on sale for $8.99! Wow!
If you like the Makit & Bakit kits, they have some cute ones on clearance for $2.47.
Hop on over to your nearest Joann’s for some great summer bargains that will keep your kids entertained! 🙂
Summer has officially arrived today! And it’s come in with very warm temperatures here! One way to cool off might be to have a paper fan handy to wave in front of your face.
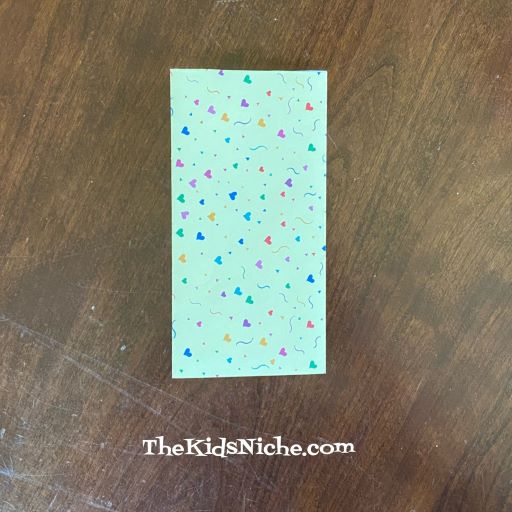
No electricity required so it’s good for wherever you might be. You will need a piece of paper, (I used a 12 inch square piece of scrapbook paper) scissors, glue, a piece of thin string or thread and 2 craft sticks or popsicle sticks.
If your paper has writing along the edge, trim that off first.
Fold your paper in half and crease it firmly.
Use your scissors to cut along the crease. Or if you want to, use a ruler and pencil to make a line on the crease on the backside of the paper that makes it easier to see where to cut.
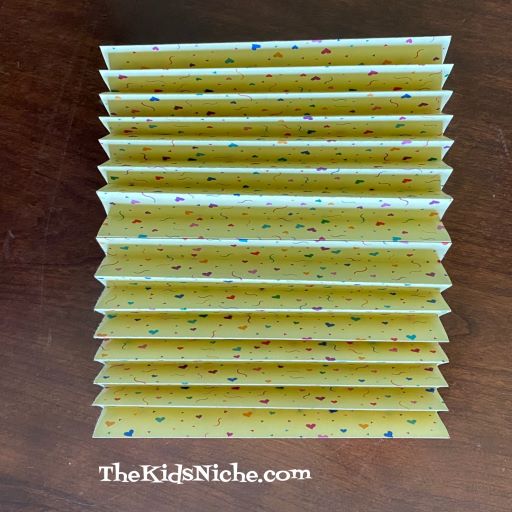
Now you will make several creases in the paper that will help you fold it like an accordion. Using one piece of the cut paper at a time, fold the paper in half by bringing to 2 short ends together.
Fold it in half again in the same direction. It will look like a rectangle now. Crease firmly.
Open the paper back up one fold so you can see the middle fold.
Now fold each side in so the ends meet on the middle fold.
Open the paper all the way open now.
Next, turn the paper over. Beginning at one end, fold the front side of the paper in to meet the first crease. You will be making one fold in between each crease you already made.
Turn the paper right side up and make another fold in the other direction. This is the “accordion” part. Continue folding the paper back and forth until the entire paper has been folded into an accordion.
Repeat the folding steps with the second piece of paper.
We want to make the accordion part longer, so now you’ll need to glue the 2 pieces together.
You will have 1 piece of accordion folded paper.
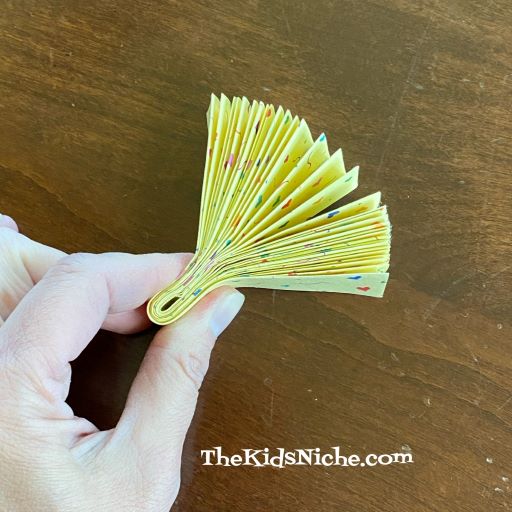
Pinch it all together to firm up the folds.
Bend your fan in half to get an estimate of where the middle of the fan is.
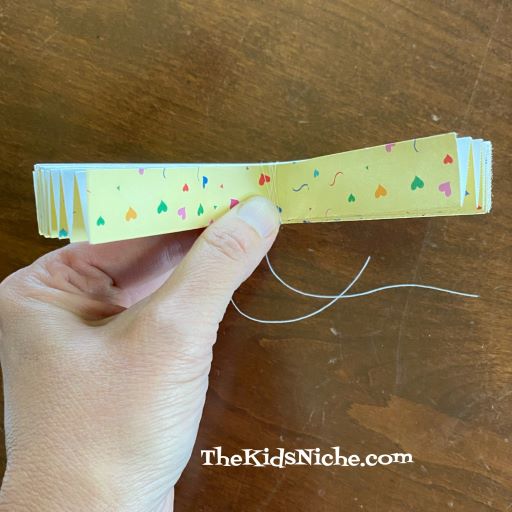
Open the fan up again and wrap a piece of string or thread several times around the middle.
Tie a good knot and trim off the ends of the string.
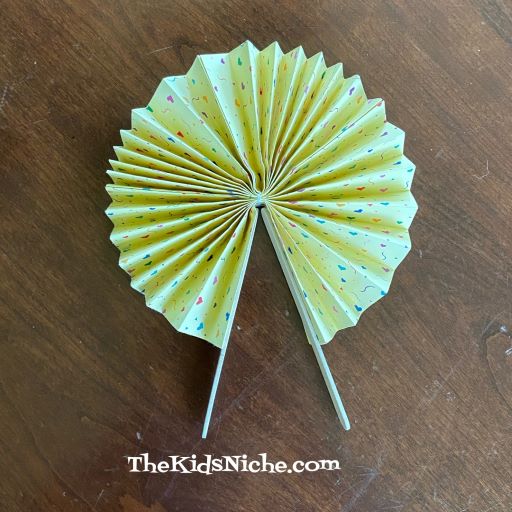
Fan out the paper and glue the 2 sides together to form half of the fan.
Glue 1 craft stick to each side of the straight edges of the fan. Leave enough of the stick hanging out past the end of the paper so you have some stick to hold onto as you wave the fan.
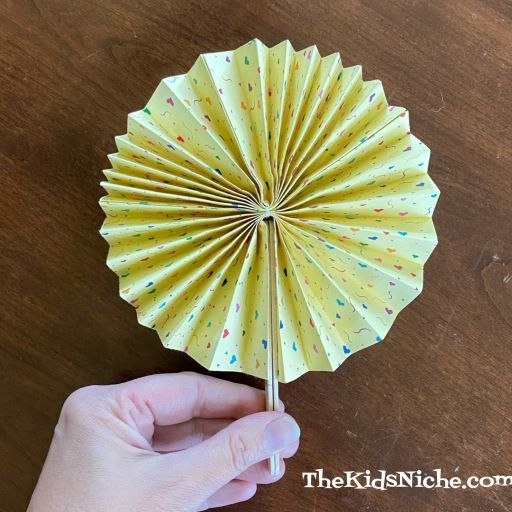
And your fan is now ready to be used to keep you cool in the summer heat!
You can make one for yourself or make more for your friends and relatives. I hope you’ll have fun making fans and that you’ll have a wonderful summer! 🙂
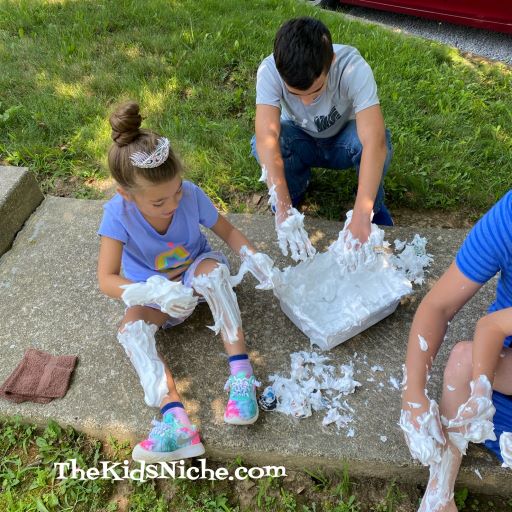
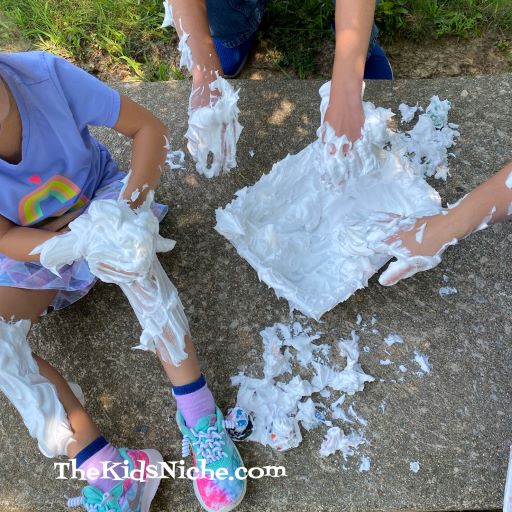
Ok, that title sounds rather crazy, doesn’t it? Well, it just might be! Lol I saw this idea in a magazine a while back, but we just tried it out today. The most important thing I can tell you about this activity is…#1.) Do it outside and #2.) Put swimming suits on the kids first! Ok, now that we have that out of the way, here’s how it works:
Grab a dishpan, some little washable toys and a can of shaving cream.
Put a little shaving cream in the bottom of the dishpan, then add some of the toys.
Add more shaving cream, then more toys until all the toys have been added. Make sure to end up with shaving cream on the top.
Now comes the part where you go outside! Have your water hose handy! Haha! Tell the kids how many toys are in the tub and let them go digging for them. (This will be the shortest time of the whole activity!) 😉 Let them wash the toys off with the hose.
The next part is where it can get a little crazy so it’s your call just how far you let this proceed. Kids and shaving cream just kinda automatically lead to shaving cream finding its way to a lot of other places besides the dishpan.
Haha! If we had thought of the swim suits earlier, we could have just hosed them down when they were done playing. 😉 But that’s part of summer fun, right? Making messes outside and playing in the water when you’re done! A special thanks to this sweet, tolerant mama for letting her kids try my crazy ideas! I hope you’ll give this a try! Your kids will be glad you did! 🙂