Taste Testing Tuesday #76 Ice Cream Cones

A summertime favorite (ok, year-found favorite!) of mine is an ice cream cone with chocolate and vanilla ice cream twisted together in it! OOOOoooo! Drool!

Yes, I know, it’s HUGE!! And that’s only a medium! Wow! But for this Taste Testing Tuesday, let’s think of OTHER things that could be eaten from an ice cream cone! Put on your thinking caps…here we go!!

#1.) Trail mix. Whatever your favorite trail mix ingredients are, I’m pretty sure they would taste great from an ice cream cone.

#2.) Vanilla yogurt and a cut-up banana. Yep, pretty tasty!

#3.) Miniature Marshmallows

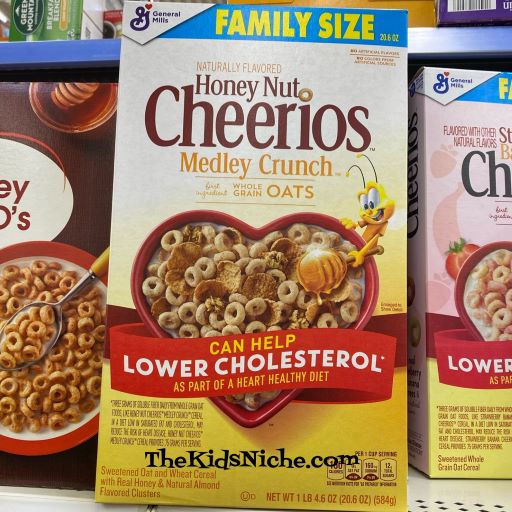
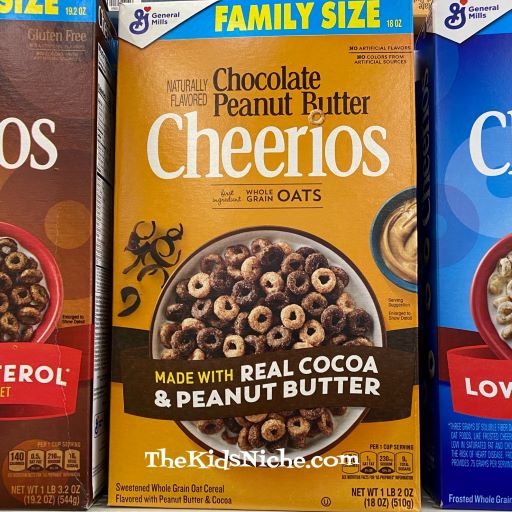
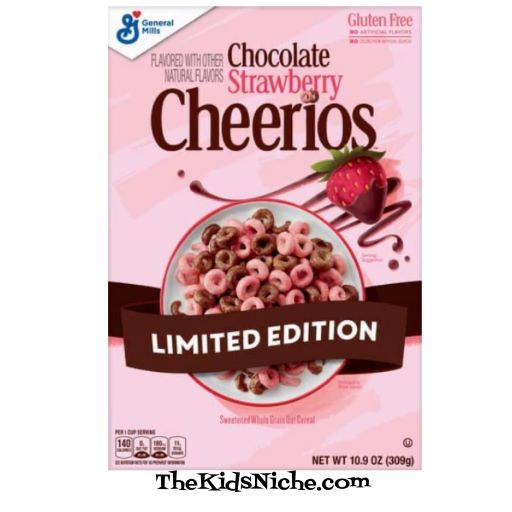
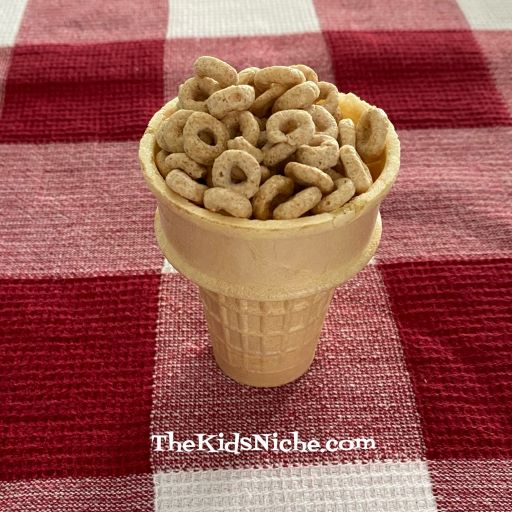
#4.) Cereal. Have a bowl handy and you could even try adding some milk. 😉

#5.) Pudding! This is one of my favorite ideas! Chocolate or vanilla or any flavor of pudding is delicious in an ice cream cone. Sprinkles make it beautiful too. 😉

#6.) Crackers. Eat the snack inside the cone and then eat the cone!

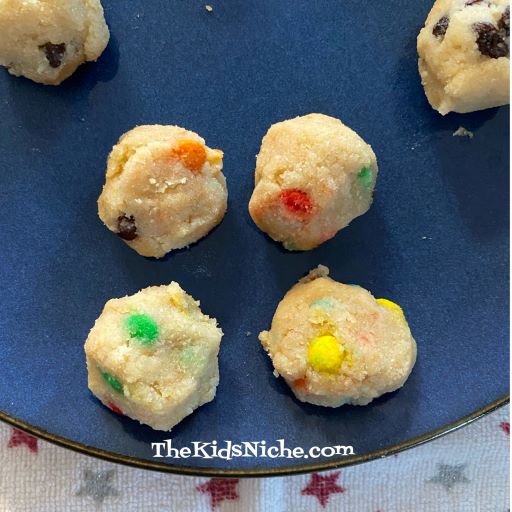
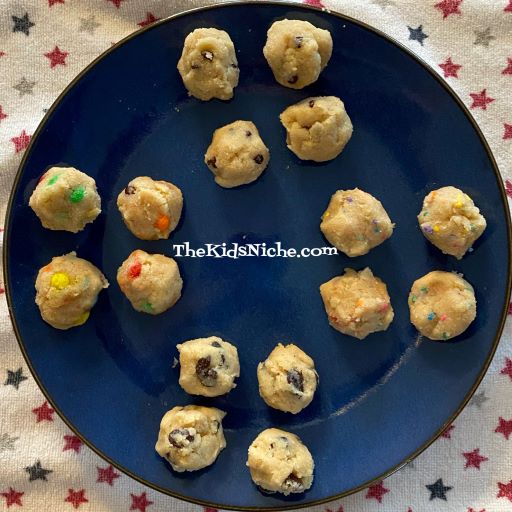
#7.) Miniature cookies. These happen to be miniature Oreos but any mini cookies will work great.

#8.) Strawberries or other fresh fruit. This is another YUM! I’m imagining a little whip cream on top would be awesome!

So there are a few ideas to get you started! What can you think of that might work great in an ice cream cone? I’d love to hear your ideas and also hear about what you tried in your ice cream cone! 🙂

Taste Testing Tuesday #75 Blueberries

Warm weather brings on lots of yummy foods! One of my favorites is blueberries! In Ohio, it’s still a little early for fresh from the bush Ohio blueberries, but they are showing up in our grocery stores now from other places in the U.S. What do you like to do with blueberries? Here are a few suggestions you might like to try:

#1.) Just plain blueberries! I love them just like they are with nothing else added. 🙂

#2.) With milk and honey. Mmmm!

#3.) Blueberry muffins, of course! 😉

#4.) In a fruit salad

#5.) Blueberry cobbler. Oohh, yummy!

The list goes on and on! Blueberry smoothies, blueberry sauce, lemon and blueberry scones, blueberry pancakes or waffles, blueberry pie, blueberry jam, blueberries in salads, blueberries on ice cream…you get the idea! Blueberries are wonderful and so versatile! I hope you’ll taste test a new blueberry recipe today! 🙂

Taste Testing Tuesday #74 – Chocolate Dipped Oranges

Sorry to be posting this so late on our Taste Testing Tuesday, but it’s been a long day! Today we tried dipping orange pieces into melted chocolate or melted candy melts and sprinkling on some extra goodies. Don’t they look delicious?

You will need an orange, chocolate chips and/or candy melts and a few things to sprinkle onto the chocolate. Oh, and a piece of wax paper or foil or parchment paper.

You can use lots of things for the yummies you sprinkle on the chocolate. I used candy sprinkles, chopped nuts (cashews), mini M&M’s and mini chocolate chips. You could use coconut flakes, crushed graham crackers, crushed cereal, chopped peanuts, small pieces of freeze-dried fruit, etc.

Peel the orange and separate it into the sections.

Melt some chocolate chips in a microwave safe cup. Microwave for 30 seconds and try to stir the chocolate chips. Microwave for additional 15 second periods until the chocolate is all melted and smooth. Depending on what type of chocolate chips you use, you may also need to add a small amount of coconut oil or Crisco to get the chocolate melted and thin enough for dipping the oranges in.

Dip an orange section about halfway into the chocolate. You may want to use a spoon to help spread the chocolate all around the orange section.

Before the chocolate hardens, sprinkle some of the extra goodies onto the chocolate dipped part of the orange.

Lay each finished orange section on the wax paper and let the chocolate harden. Continue dipping and sprinkling each orange section.

I used white candy melts for half of my orange sections and that is very tasty too!

All that’s left to do is to eat and enjoy! 🙂 It probably works best to eat these right away. I had to leave home as soon as I finished making these, so I put my dipped orange pieces into the refrigerator. They tasted delicious when I returned home, but the white candy melt broke into pieces and fell off the orange section when I bit into it. It tasted the same, but it made more of a mess. 😉 For me, the mini M&M’s and mini chocolate chips were a bit too much sweetness at one time. I preferred the sprinkles and chopped nuts. I hope you will give these a try and see which kind you like best! 🙂

Taste Testing Tuesday #73 – Cauliflower Crust Pizza

Are you looking for a healthier way to make pizza? Maybe someone in your family needs to be gluten-free? Here’s a tasty way to make a delicious pizza while using cauliflower for the crust. If you haven’t tried cauliflower pizza crust yet, this may sound rather weird to you. But I think it’s really quite tasty so I hope you’ll give it a try!

You will need 2 Cups of riced cauliflower (can be fresh or you can use the frozen riced cauliflower), 2 Cups of grated mozzarella cheese and 2 eggs…plus your sauce and pizza toppings. I started out following Dr. Eric Berg’s recipe but I have made a couple of changes. Dr. Berg uses fresh riced cauliflower, but I mostly use the Green Giant frozen Riced Cauliflower because its a big time saver.

One of these bags is enough to make 1 pizza. If you use this kind of cauliflower, let it thaw and place it on paper towels to absorb any extra fluid that shows up in the thawing process.

Next, place the cauliflower, 2 Cups of cheese and 2 eggs into a large bowl. (We have used 1 Cup of mozzarella and 1 cup of parmesan cheese and that works fine too.)

I like to add in some Italian seasoning to give the crust a little extra flavor.

Mix together.

Line a baking sheet with parchment paper and put the dough mixture onto the baking sheet.

Spread the pizza dough into a thin layer.

Bake the pizza crust in a 450 degree oven for approximately 15 minutes. Do this step BEFORE adding your sauce and toppings. Bake until the crust has turned slightly brown. I’m sorry, but I forgot to take a picture at this step. Remove the pizza crust from the oven and add your favorite pizza sauce, toppings and a little more cheese if desired. Return to the oven and bake again until the cheese on top melts and the pizza is golden. The pizza in the following picture was topped with pizza sauce, mushrooms, cooked bacon and mozzarella cheese. It was delicious!

I hope you will give this cauliflower crust pizza a try! If you would like to watch a video by Dr. Berg, go to YouTube and look up “Healthy Pizza Recipe – How to Make a Keto-Friendly Pizza (Part 2) – Dr. Berg”. Happy eating!! 🙂

Taste Testing Tuesday #72 – Cheerios

Wow! Have you ever stopped to consider how many flavors of Cheerios cereal there are?! There are a LOT of them!! I’ll show you all the flavors I was able to discover and maybe you’ve even seen others. It could be a fun activity to buy a new flavor of Cheerios each time you buy groceries and do a taste test on all the flavors! Draw a chart and keep track of which kind each family member likes, or dislikes. 🙂 These are all the flavors I saw in our grocery store and in my search online.

#1.) Just plain Cheerios. I loved eating these when I was a kid and adding a little sugar to the top or some fresh strawberries or banana.

#2.) Multi Grain Cheerios

#3.) Strawberry Banana Cheerios

#4.) Honey Nut Cheerios Medley Crunch

#5.) Cheerios Oat Crunch Oats ‘N Honey

#6.) Cheerios Oat Crunch Cinnamon

#7.) Cheerios Oat Crunch Almond

#8.) Apple Cinnamon Cheerios

#9.) Very Berry Cheerios

#10.) Honey Nut Cheerios

#11.) Frosted Cheerios

#12.) Chocolate Peanut Butter Cheerios

#13.) Chocolate Cheerios

#14.) Blueberry Cheerios

#15.) Cinnamon Cheerios

#16.) Multi Grain Cheerios with Real Strawberries

#17.) Maple Cheerios

#18.) Chocolate Strawberry Cheerios

#19.) Team Cheerios Frosted Berry

#20.) Fruity Cheerios

#21.) Pumpkin Spice Cheerios

Whew!! So there are at least 21 flavors of Cheerios!! Do you know of any other flavor that I didn’t list here? How many of these flavors have you tried? There are quite a few we haven’t tried so we have some fun ahead of us! 🙂 Which one is your favorite flavor? If you buy 1 box of a different flavor every other week, you could take almost a year taste testing Cheerios! LOL Have fun! 🙂

Taste Testing Tuesday #70 – Stir Fried Veggies

I’m back with another round of Taste Testing Tuesday! This could be the trick to getting your kids to eat more veggies! It’s at least worth of try, right?! 😉 I’m talking about stir frying some vegetables.

There are many vegetables you can use in your stir fry or make a combination of them. You can stir fry some meat too or just go for the veggies. For this post, I used a little bacon to add some flavor but kept it mostly to the veggies. Here’s how I cooked ours: I started out frying a few pieces of bacon in a large skillet. I made a large batch so I needed to use our large electric skillet.

Remove the bacon after it has cooked till its nicely browned and crunchy. Place it on some paper towels to let the grease drain away. When it’s cool enough to handle, crumble it into small pieces. We’ll add it in at the end.

Here are some suggestions of veggies you might like to try but the list is almost endless!

Onions, chopped

Garlic, chopped

Raw broccoli and/or cauliflower.

Raw cabbage and/or raw carrots, chopped into small pieces

Raw mushrooms, sliced, and sugar snap peas. I broke the peas into 2 pieces for a nicer size.

A package of broccoli slaw.

I used the bacon grease that was in the skillet after cooking the bacon and then I added a large chunk of butter. Once the butter was melted, I added the onions and garlic and cooked them for a few minutes before adding the other veggies.

I added the broccoli, cauliflower, carrots, cabbage and broccoli slaw next.

I cooked that for a little while and then added the mushrooms and sugar snap peas. We like the peas to still have some crunch to them and the mushrooms don’t take as long to cook up.

We like to add some soy sauce to our stir fried veggies. There are other sauces you might want to try like teriyaki sauce. I would like to add some pineapple tidbits too the next time we make some. Kids might like the pineapple too as it will add a bit of sweetness to the mixture. Remember to stir in your bacon pieces when the rest has finished cooking.

Yum!

I hope you’ll try stir frying some veggies for your kids and you will find another successful way of getting them to eat something healthy! The struggle is real, isn’t it?? LOL Been there, struggled through it too! You’ve got this! 🙂 Hugs!

Taste Testing Tuesday #69-Healthy (Mostly) No Bake Cookies

For today’s taste test, we’re bringing you some Healthy No Bake Cookies! It says “Mostly” healthy because the cookies themselves are pretty healthy, but then it depends on what you add to them how healthy they end up. 😉 For instance, if you add raisins, you’re all good. If you add mini M&M’s, well, not quite so good. Lol My daughter shared this recipe with me after her kids gobbled up a batch in record time. (Thanks, Megan!) Their batch of cookies looks awesome!

Here is the ingredient list:

In order to make this a taste test and to have some different types of cookies to choose from I made 4 kinds. But I’m getting ahead of myself! First, let’s gather up the ingredients.

Add everything to a medium sized bowl. Remember to melt the coconut oil.

Mix the ingredients together with a spoon. I didn’t add the “goodies” to begin with, but just mixed up the cookie dough.

I divided the dough into 4 small bowls and then added a different special ingredient to each bowl.

Mix the dough in each bowl and then make 3 or 4 cookies from each bowl by using a teaspoon to scoop out the dough onto a plate.

#1.) I added raisins.

#2.) I added mini M&M’s.

#3.) I added mini chocolate chips.

#4.) I added candy sprinkles.

Put the cookies into the fridge for a little while to help the cookies set up. I wonder what things you will add to your cookies? You could try some chopped nuts, peanut butter chips, butterscotch chips or maybe some tiny candies that match the season or holiday.

What type of cookie is your favorite? How about which one is your least favorite? I hope this will spark some ideas and fun for your family! 🙂 Happy Taste Testing Tuesday to you!

Taste Testing Tuesday #68 Sausage and Cabbage Soup

Hello, again! Last week for Taste Testing Tuesday we talked about ways to try eating cabbage. For this week, I wanted to share a recipe with you that I’ve eaten ever since I was a little girl. It’s original name was a bit off putting, so we will simply call it Sausage and Cabbage Soup. Now that the weather has turned colder again, it’s a great time to try some hot soup to warm your family up! Let’s start with the cabbage. Cut up about half of a large head of cabbage into small to medium sized pieces.

Place half of the cut-up cabbage into the bottom of a crockpot.

You will need about 1 pound of your favorite ground sausage. You can use rope sausage too and just remove the casing. You can use whichever level of spiciness in your sausage as your family likes.

Peel around 6 or 7 nice sized white potatoes. I used a few more than that because some of our potatoes were pretty small.

Chop the potatoes into small pieces.

Layer half of the cut up potatoes on top of the layer of cabbage.

Break half of the uncooked sausage into small pieces on top of the potato layer.

Make a second layer of each thing…cabbage, potatoes and sausage pieces. Now my crockpot is full.

Add salt and pepper or other spices to suit your family’s tastes. Pour water over all until the water comes up about halfway in the crockpot. Cook on high 4-5 hours. Stir once or twice while it’s cooking. When the cooking time is done, you will have a warm hearty soup! The ingredients will cook down and will look like less than you started with.

Each person can add more salt or pepper or other spices to their individual bowl of soup. I hope you will make this soup and your family will give it a taste test! 🙂

Taste Testing Tuesday #67 – Ways to Make Cabbage Yummy

Cabbage may not be on your child’s list of favorite foods, but let’s talk about a couple of ideas that might change their minds. Yep, it’s Taste Testing Tuesday once again! 🙂

Cabbage is a super food which means it’s super good for you. When we have a head of cabbage, I like to use half of it in a recipe where the cabbage is cooked and the other half I use the cabbage raw. Let’s start with a cooked cabbage recipe…

Do your kids like bacon? (Yes, this recipe uses bacon! Yum, right?!) Start by frying several pieces of bacon in a skillet. For half a head of cabbage, use at least 6 pieces of bacon.

While the bacon is frying, cut the cabbage into small to medium-sized pieces.

When the bacon is done cooking, drain it on some paper towels and then crumble it into small pieces.

Leave the bacon grease in the skillet and add the cut up cabbage.

Add a couple slices of butter and cook on a medium heat.

Allow the cabbage to begin to brown some as this will add a scrumptious flavor to it.

Cook the cabbage until it is a soft as you like it. Then sprinkle the bacon pieces on top and stir to mix. Eat it while its nice and warm.

Now let’s look at some ways to eat cabbage raw. Fixing cabbage this way is often called Coleslaw, BUT Coleslaw has gotten a rather bad name over the years. There are different ways you can adjust the ingredients for Coleslaw that is more to your family’s liking. First chop or grate the cabbage into very small pieces.

One way to make Coleslaw is to mix in a little mayonnaise, a tiny bit of milk, a pinch of sugar and some dried fruit like raisins.

My husband likes it best with just some Italian dressing mixed into the raw cabbage.

Try grating or chopping some raw apple in with the cabbage and mixing in your favorite salad dressing, like Ranch. Top it with a little cinnamon.

If Coleslaw has a bad name in your family try calling it something else…like maybe Apple Salad. 😉 There are many many cabbage recipes online that you could test out on your family. Good luck! I hope you find some ways to eat cabbage that makes your kids grin and ask for more! 🙂

Taste Testing Tuesday #66 – Poor Man’s Steak

Today’s Taste Testing Tuesday is a little different than some of the other ones we’ve shared here. Do you ever get tired of fixing plain hamburger and listening to your kids whine about “Hamburgers again?!” or that the burgers are too dry? Let me introduce you to Poor Man’s Steak or as we called it at home when I was little, Budget Steak. One thing I love about this recipe is that it cooks up so soft and tender and makes it’s own gravy when you cook it in a crockpot. 🙂

You will need 3 lbs. of hamburger, 1 Cup of cracker or bread crumbs, 1 Cup of water, some flour, oil for frying and 3 cans of Campbell’s Cream of Mushroom soup. Break up the hamburger into a large bowl and add the cracker or bread crumbs and the water. Mix with a wooden spoon or use your hands. Spread into a large cookie sheet. Slap and pound the meat into the cookie sheet to compress it together. Put it in the refrigerator for a few hours or even overnight. After the meat has been in the refrigerator, take it out and cut it into equal pieces. I usually cut mine into 24 square pieces.

Place some flour in a flat bowl. No need to measure. As you take a piece of meat from the cookie sheet, place it in the flour bowl and turn to coat both sides in flour.

As each piece is floured, place it in a skillet with some oil in the bottom and brown each side of the meat.

If you would like to make your Poor Man’s Steak a little spicier, you can sprinkle your favorite spices on the meat while it is in the skillet browning. Sometimes I use some onion powder and garlic powder, but it tastes great without any spices added too.

After you have browned both sides of each piece of meat, it’s ready to go into the crockpot.

Have your Cream of Mushroom soup handy for the next step.

I like to make a layer of the browned meat in the crockpot and then add a layer of the Cream of Mushroom soup.

Continue layering the meat and soup until all the meat has been placed in the crockpot. It’s best to have some soup on top of the batch. Put the lid on your crockpot and let it cook on low for approximately 4 hours. When my mom used to make this dish, she used 2 cans of the soup but I prefer to use 3 so there is some extra soup that makes great gravy for on top of some mashed potatoes! Add a veggie and your meal is ready! 🙂

Poor Man’s Steak or Budget Steak is a great way to stretch some hamburger into something that seems like more than just burger! It’s always been a hit when I’ve taken it to potlucks or served it to guests in our home. I hope your family will give it a thumbs up too! 🙂