Tomorrow is the day for hearts and love and flowers and fun! 😉 Here’s a quick idea for a super simple game you might play with the kids on Valentine’s Day. Let’s call it Valentine Tic Tac Toe.
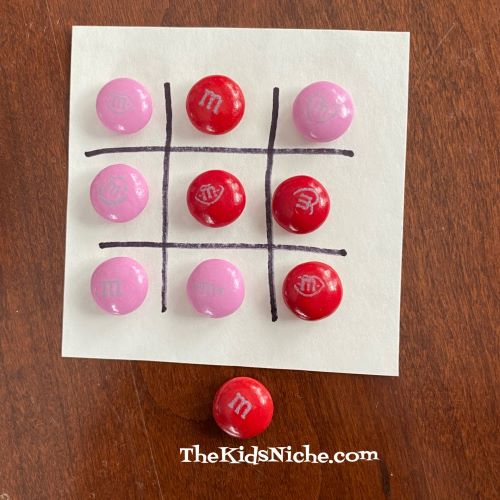
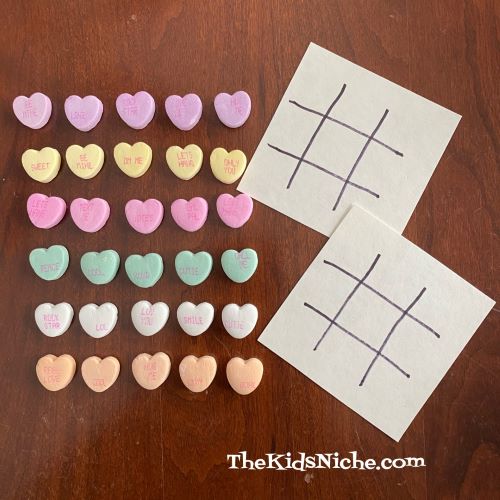
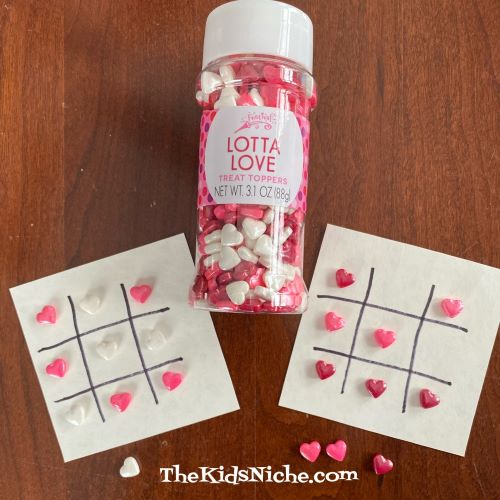
All you need is a piece of paper and a pen and some Valentine’s Day candy. Pick out 5 pieces of 2 different colors of candy…1 color for X and a different color for O. Draw a Tic Tac Toe board on your paper and you’re ready to play! There are lots of candy pieces that would work for Valentine Tic Tac Toe. Here’s enough colors of candy conversation hearts for 3 different games.
I love M&M’s candy so that’s the one I would choose to play with! 😉
You can even find candy hearts in the food decorating aisle of your favorite grocery store.
Depending on the size of your family or group, you could play separate games and the winners advance to the next round. The final winner could get a special prize and everyone could enjoy some Valentine’s Day candy! ;) Have fun!
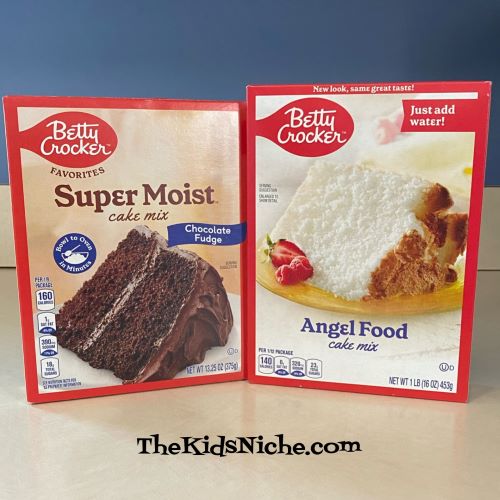
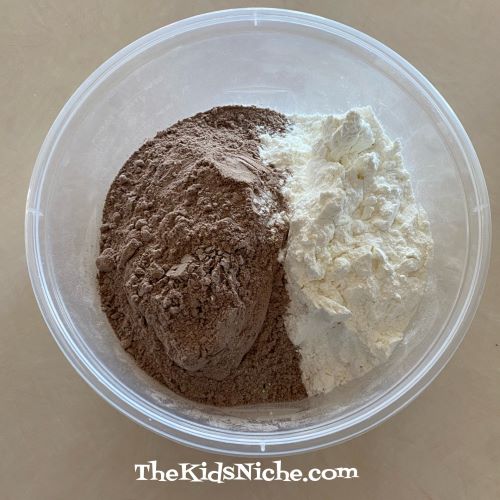
Here’s a great super fast dessert for this Valentine’s Day! So fun and easy you won’t believe it and your kids will love it! It’s a Mug Cake, which means you mix it and cook it all in a coffee mug. You will need 2 cake mixes. 1 must be an angel food cake mix and the second one can be your favorite cake flavor. I chose Chocolate Fudge. The brand of cake mixes I used was Betty Crocker but others will work just fine too.
Pour both dry cake mixes into a bowl that you can store the ingredients in.
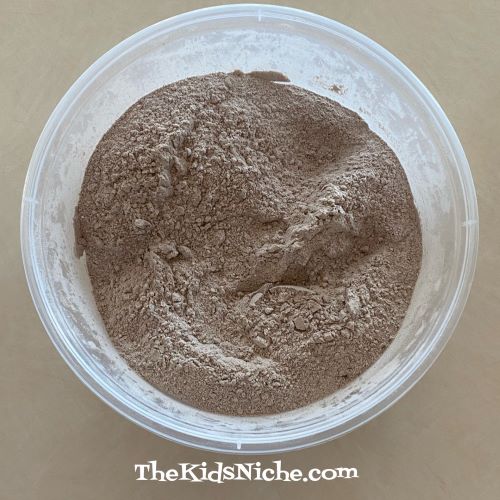
Stir together carefully as the powder will “poof” easily. 😉 Be sure its mixed together well.
Now comes the fun part! Put 3 tablespoons of the cake mix into a microwave safe mug.
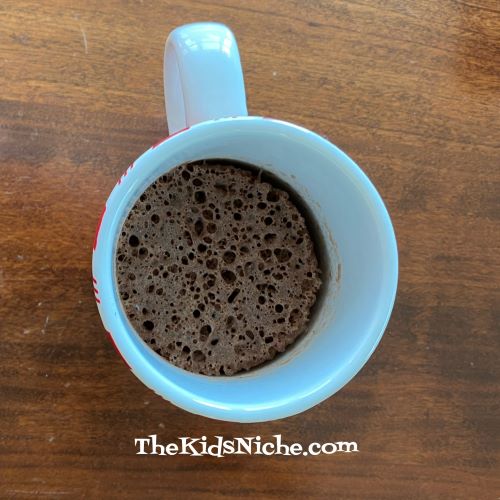
Add 2 tablespoons of water and stir together. Make sure all the dry powder on the bottom and sides of the mug are mixed in well. It will look a little foamy.
Put the mug in your microwave oven and microwave for 1 minute and presto! You have a little individual cake! 🙂
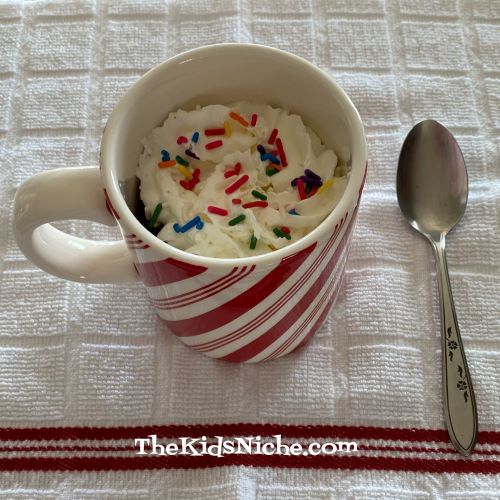
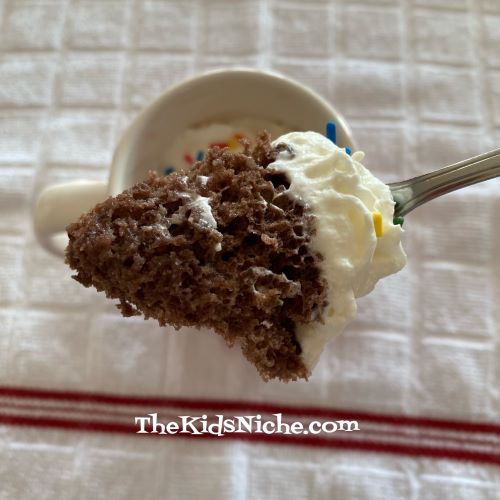
Let it cool to your desired temperature. Top with a dollop of frosting or some whipped cream or ice cream. I used whipped cream and it was quite yummy! 🙂
Doesn’t it look delicious?!
Mmmm! Super simple and super tasty! A great way to have something sweet and it’s already a controlled portion. 😉
Enjoy your Mug Cake! 🙂 You can be sure I’m enjoying mine! 😉
Tomorrow is the day for hearts and love and flowers and fun! 😉 Here’s a quick idea for a super simple game you might play with the kids on Valentine’s Day. Let’s call it Valentine Tic Tac Toe.
All you need is a piece of paper and a pen and some Valentine’s Day candy. Pick out 5 pieces of 2 different colors of candy…1 color for X and a different color for O. Draw a Tic Tac Toe board on your paper and you’re ready to play! There are lots of candy pieces that would work for Valentine Tic Tac Toe. Here’s enough colors of candy conversation hearts for 3 different games.
I love M&M’s candy so that’s the one I would choose to play with! 😉
You can even find candy hearts in the food decorating aisle of your favorite grocery store.
Depending on the size of your family or group, you could play separate games and the winners advance to the next round. The final winner could get a special prize and everyone could enjoy some Valentine’s Day candy! ;) Have fun!
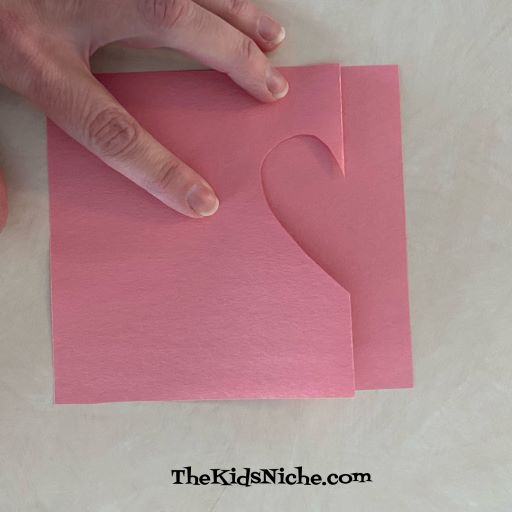
This is a fun card to open because there is a little heart inside that will twirl around when the card is opened. Sound fun? Let’s get started! You will need a piece of construction paper approximately 5 inches by 9 inches. (The size can vary.) Some scissors, glue, 2 small hearts cut from another color of construction paper, markers and some thread.
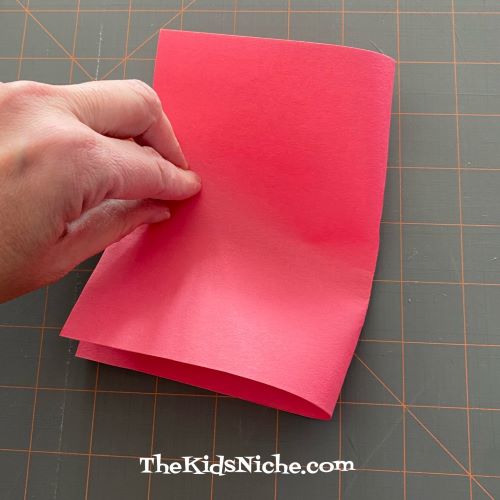
Begin by folding the piece of paper in half.
Using your scissors, cut a half of a heart shape on the fold.
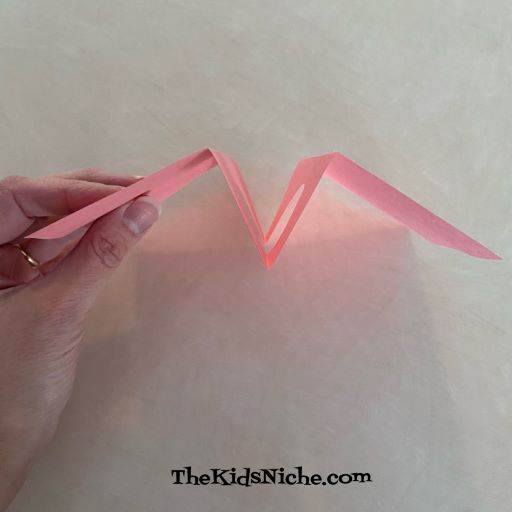
Fold one side of the paper end up past the heart shaped cut.
Do the same with the second side.
When you open the card up, it should look like this from the end view.
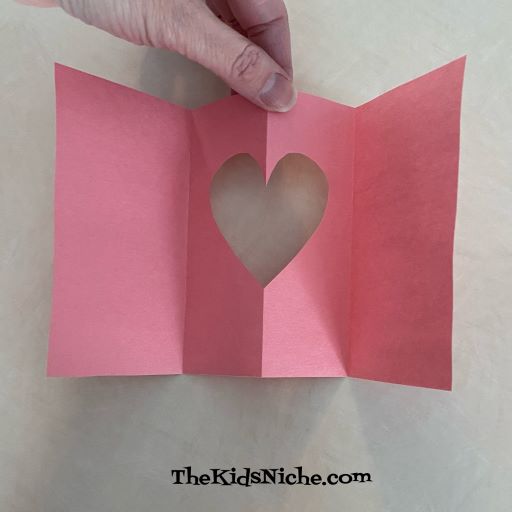
And it should look like this from the front.
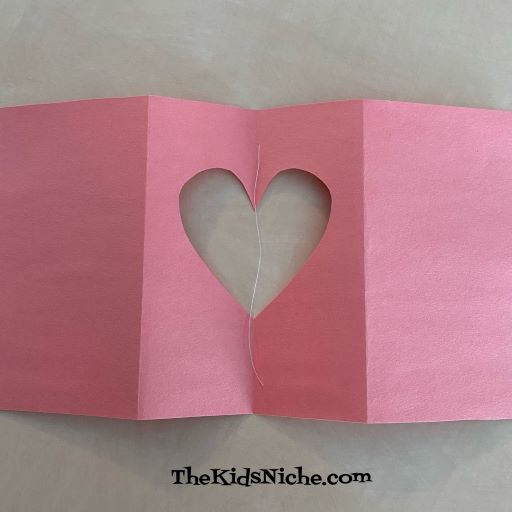
Now turn the card over so the back side is facing up. The fold in the middle of the heart cut out should be going “down” with the folds on each side going “up”. Cut a piece of thread that is just long enough to cross the heart cut-out and have a little room on each side of the top and bottom of the heart.
Make sure your little hearts are small enough to fit in the heart cut-out with room all around it so it will be able to spin.
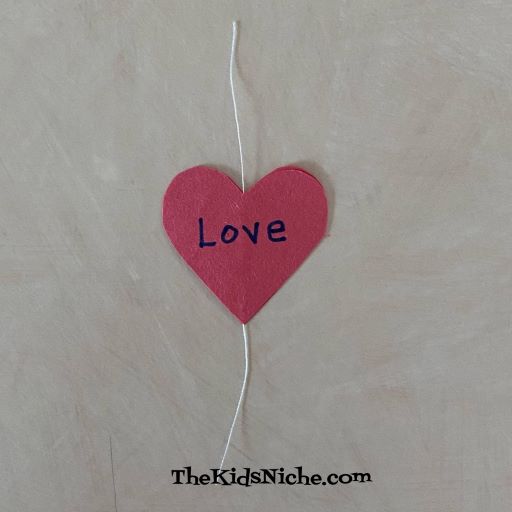
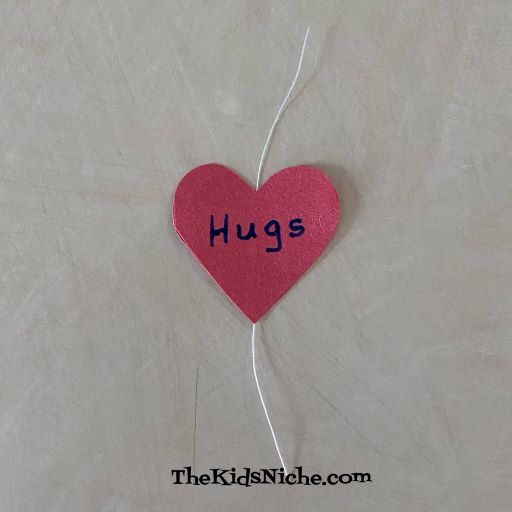
It’s time to make the twirling heart part. Put some glue on 1 small heart, making sure there is glue down the center of the heart.
Lay your piece of thread on the heart with the glue and make sure it is in the center of the heart.
Lay the second heart on top and press the 2 hearts together so they stick together completely.
Decorate the small heart in any way you like. I wrote a word on each side.
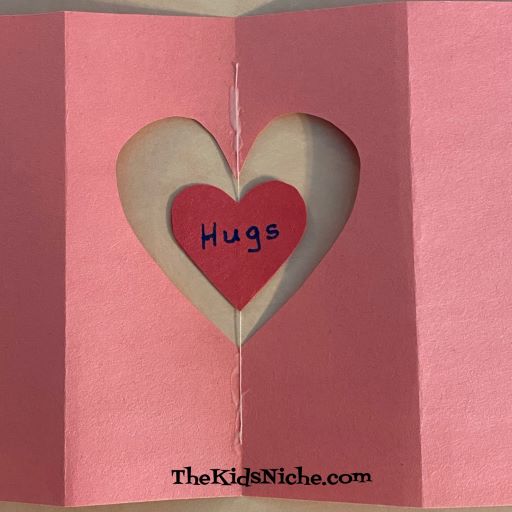
Double check that the fold in the center of your card is down or the back side of the card is facing up.
Run a line of glue right in the center of the fold crease.
Place your small heart in the center of the heart cut-out with the strings laying on the lines of glue on each side.
Give the glue time to dry before moving on. The next step is to decorate your card by writing or drawing whatever you like on your card. The right side panel will be the front of your card when it is folded up.
This is what my card looks like when its folded.
Before closing your card, gently turn the small heart several times like you are winding it up. Carefully close the card, checking to make sure the small heart is laying flat.
When the card is opened, the small heart inside will spin! 🙂 You might want to hold the card closed with a paper clip or place it inside an envelope.
I hope you will enjoy making this Twirling Heart card! 🙂
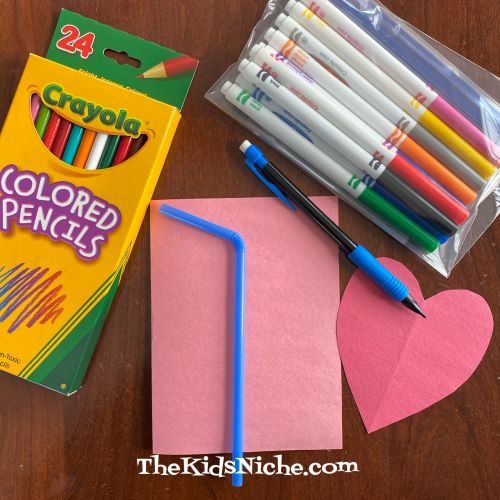
Are you still looking for Valentine cards that are simple enough for your kids to make? Here’s another suggestion for you! We’ll call this one the Soda Pop Valentine card. 😉 You’ll need a piece of paper, glue, a black marker, colored pencils or crayons, a pencil, scissors, a cut out paper heart and a straw.
I used half a sheet of pink construction paper for my card. I folded it in half to make a nice size for a card. On the front, using a pencil, draw a soda pop bottle.
With a thin line marker or black pen, trace over the bottle you just drew so that it stands out more plainly.
Color in the bottom 2/3 of the bottle whatever color you’d like your pop (soda) to be. I used brown for Root Beer. I wrote the words Root Beer on my bottle but you can write whatever kind of pop you like to drink and color it the same color as the drink you chose.
(Sorry I’m not sure why this picture looks purple!) Now imagine that the straw you have is inside this bottle of pop. (soda) Cut your straw to fit the bottle. Have the bottom of the straw just touching the top of the pop (soda) in your bottle. The top of the straw should stick out above the bottle opening.
Add a line of glue down the length of the straw and hold it in place on your card for just a little bit till the glue can start to set up.
If you have a permanent black marker, you can draw the rim of the bottle on your straw too so it looks more like it is inside the bottle.
Now with a pen or marker write the words, “I “soda” love you!” (I sorta love you!)
Next, you should write on the cut out heart these words…”I love you so much I think my heart might “pop”! 😉
Then glue the heart to the inside right hand side of your card.
If you like, you can add some little lines around the outside of the heart to help make the heart look like it’s ready to pop!
And there you are! All finished! Great job! Who will you share your Valentine card with? Remember to sign your name so the person will know you are the one that made this great card for them. 🙂
We’re back with another idea for a Valentine card kids can make. This one involves strawberries and blueberries. Ready? Grab a piece of paper or a blank card, a pencil and colored pencils or crayons and some markers. Start with a half a sheet of paper, cardstock or construction paper.
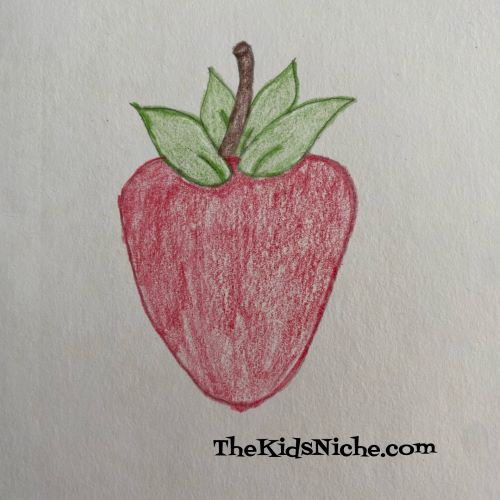
Fold it in half to make it card-sized. On the front of the card, we’re going to draw a strawberry. Start out by drawing this shape.
Next, add some leaves and a stem.
Use your colored pencils, markers or crayons and color the strawberry. I used colored pencils.
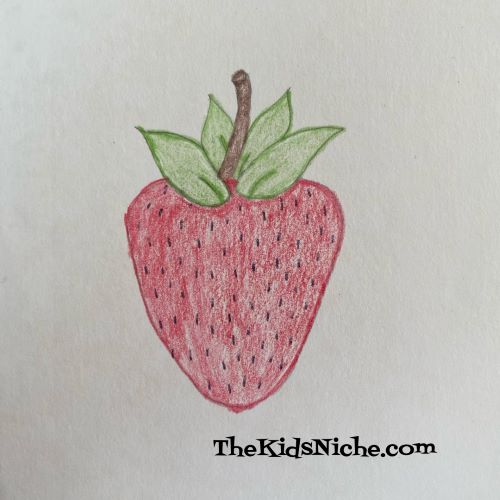
Looking good! Now make some tiny little lines for the seeds on a strawberry. I used a black pen to draw mine.
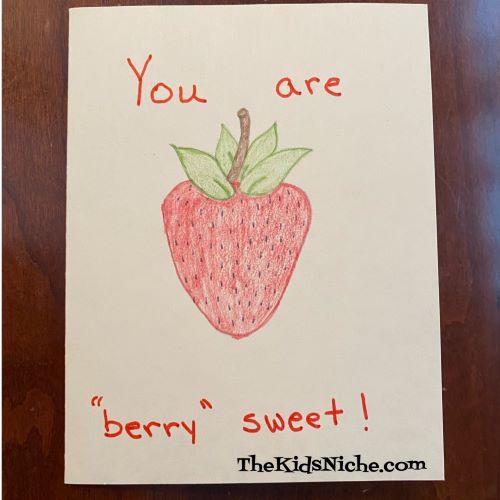
Your strawberry is finished! Now add the words, “You are “berry” sweet!” to the front of the card.
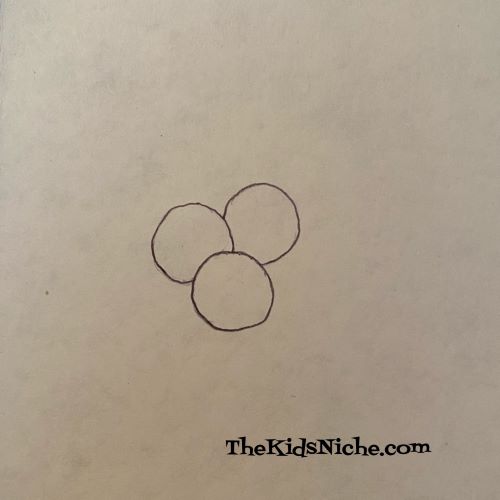
Open the card and on the inside right hand side, let’s draw some blueberries. I drew 3 but you can draw however many you like. Start with a circle and then add 2 more circles that are partially hidden behind the first one.
Add one small circle inside each of these circles. Then add 5-6 almost triangles to the little circle.
Color the blueberries. You’re almost done! Add the words, “Have a “berry” Happy Valentine’s Day!”
Great job! Who will you give your handmade Valentine to? Remember to sign your name. I hope you’ve had fun making this “berry” nice Valentine’s Day card! 🙂
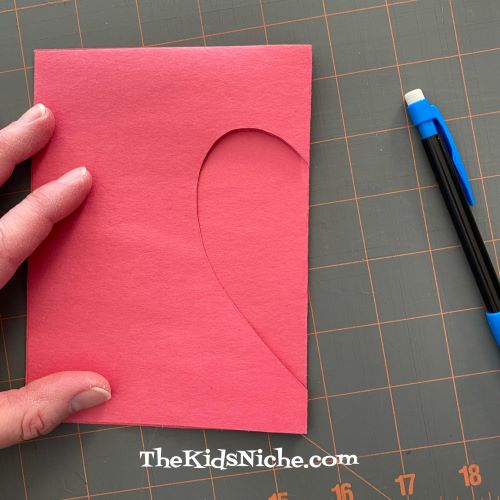
We’re back with another great Valentine’s Day craft project! If you saw yesterday’s post about a tissue paper heart activity and you saw that I suggested you save the stencil looking part of that project for another project, this is it!
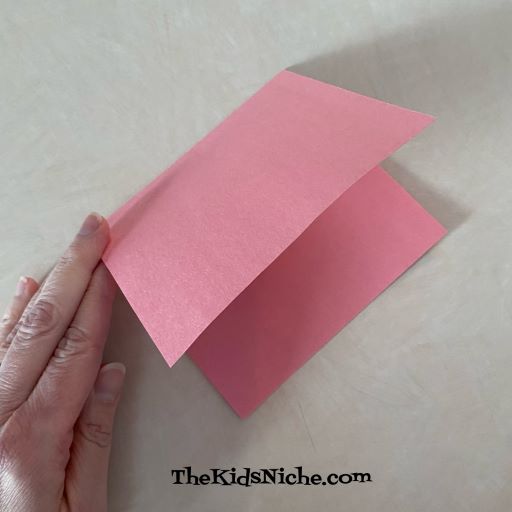
If you didn’t see that post, what you need to do is cut a piece of construction paper in half. Then taking one of those pieces and fold it in half.
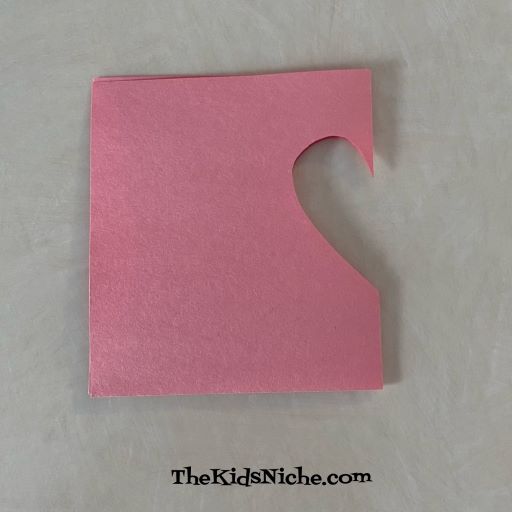
Draw half of a heart shape on the folded edge of your paper. Then cut along the line you drew. When you open it, you will have a heart. 🙂 For this project, we will be using the piece with the heart cut out, but you might want to save the heart to use it for something else.
For today’s project, you will need another half sheet of construction paper, a pencil, scissors, glue and several different colors of tissue paper. First cut a 1″ wide strip from each color of tissue paper. You will need only a short piece of each color. (I had a lot left over!)
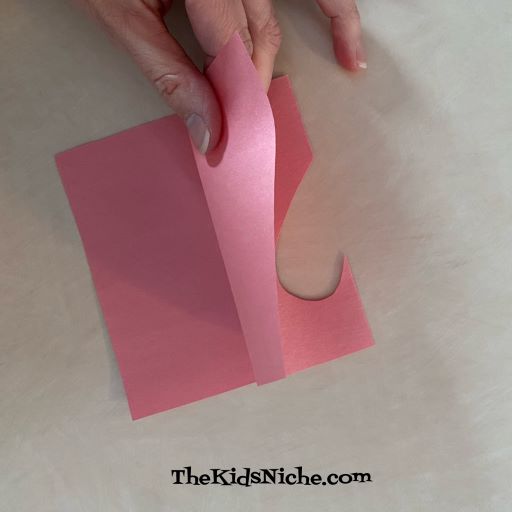
Now, take the half piece of construction paper and fold it in half. Lay the first stencil on top and trace the half of a heart on the fold like you did for the first one.
Cut out the second heart so you have 2 matching pieces.
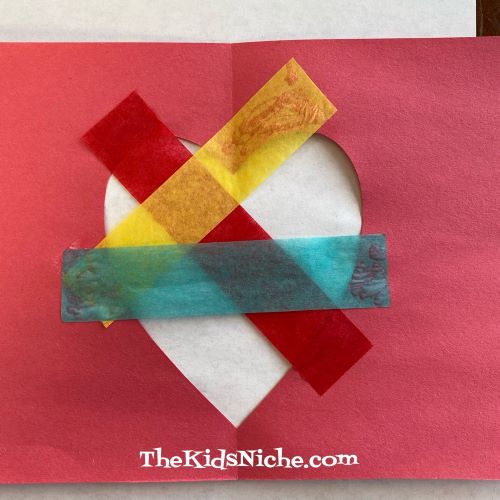
Unfold the 2 pieces. Place the side that you drew on facing up. This will become the backside of the stained “glass” heart. Using the strips of tissue paper, lay one across the heart opening and glue the ends down.
Take additional pieces of the tissue paper strips and place them, one at a time, in different directions over the heart opening…and glue the ends down.
Add a few more strips…
Keep adding strips until all the open spaces of the heart have been covered with tissue paper.
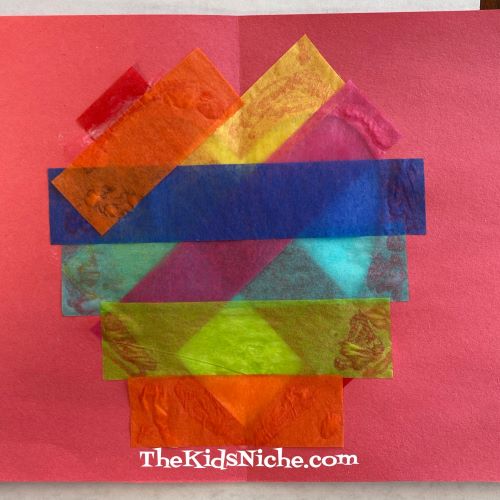
Take the other piece of construction paper you cut the heart out of and apply glue as it is shown in this picture.
Place it on the paper you have been gluing the strips to so that the edges meet and the 2 hearts match up. This will cover up all the ends that you glued down and allow the light to shine through the heart cutout. And there you have it! You’ve made a stained “glass” Valentine heart! Put it up to a window and look how pretty it is when the sun shines through the heart!
Doesn’t that look nice? Make as many as you like (Or as many as your parents will allow!) and put them close to your windows to make your house look festive. 🙂 You could also make a hole at the top and put a piece of string through so you can hang up your stained “glass” art. I hope you had fun today! Check back for more Valentine’s Day ideas soon!
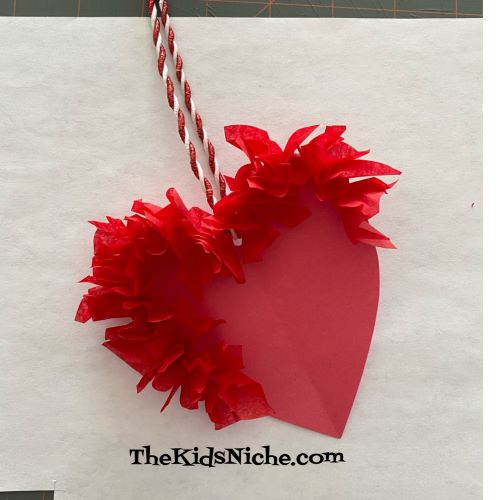
Are you ready for another fun Valentine’s Day project? Let’s make a really pretty 3-D heart!
You will need some construction paper, red tissue paper (or the color of your choice), scissors, glue, a piece of string and a pencil with an eraser.
You will need to cut approximately 75 little squares of the red tissue paper. I cut mine about 1 1/2″ square. They don’t need to be perfect because the paper will be “scrunched up”. Any smaller than that could be difficult to work with. If you have a cutting mat and a rotary cutter, this part will go much quicker, but scissors work fine. 🙂
Take HALF of a sheet of construction paper and fold it in half.
Drawing on the folded edge, draw half of a heart shape.
Sorry, that’s rather hard to see. Cut out the half -heart shape and you will have a whole heart when you unfold it.
Set aside but save the piece that looks like a heart stencil for a project we will do another day. 🙂
Your finished heart can be added to a card, have a magnet attached to the back or be made to hang up like an ornament. If you would like your heart to hang as an ornament, now is the time to add a hole at the top. Go ahead and put your string through the hole because it will be harder to do later. (I found that out the hard way!)
You are now ready to start using the tissue paper squares. Take 1 square and your pencil with an eraser.
Place the pencil eraser in the middle of the square of tissue paper.
Wrap the tissue paper down around the pencil end.
Apply a very small amount of glue to the tissue paper at the end of the pencil eraser.
While holding the tissue paper onto the pencil end, place the tissue paper onto the heart you cut out. Start out close to the outside edge of the heart.
Hold in place for a few seconds, then carefully pull the pencil out leaving the tissue paper on the heart. Continue adding more pieces of tissue paper in the same way.
Keep adding…you’ve got the hang of it now!
The closer together you put the tissue paper pieces, the fuller your heart will look. Try to get the pieces right up against each other where they attach to the heart. If you like, you can just make an outline of the heart with the tissue paper.
I like it better when the entire heart is filled up. It will take a little more time but it will be worth the effort.
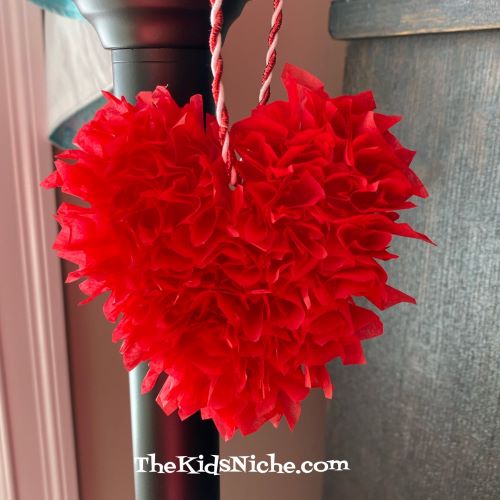
You did it! Isn’t that a pretty ornament to decorate your house for Valentine’s Day? I think it would be really pretty to use more than one color of tissue paper. If you used red, white and pink, wouldn’t that look nice? I hope you’ve enjoyed this Valentine activity! I’d love to see your hearts, if you care to share them!