
Let’s do an activity today to make some cute little buddies that the kids can sit in their bedroom to keep them company. 🙂 We’ll call them Yarn Buddies.

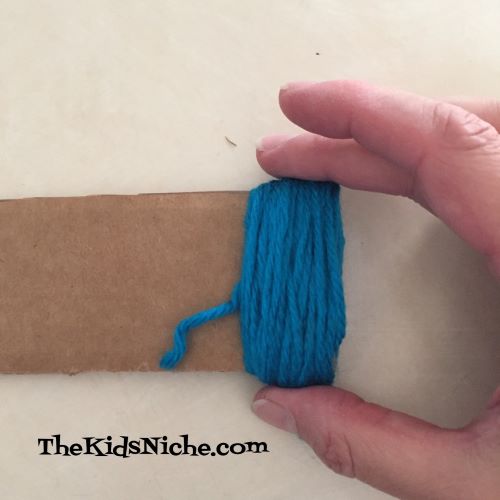
You will need some yarn (or pre-made pom poms), scissors, a small piece of cardboard, some construction paper, a marker, wiggly eyes, glue and a pencil. To begin, cut a piece of cardboard approximately 2 inches wide and 3-4 inches long.

Wrap yarn around the piece of cardboard on the 2″ side.

The more times you wrap it, the nicer and thicker your buddy will be. Wrap at least 50 times, but 100 times or more is great. Don’t wrap it too tightly or the next step will be hard to do.

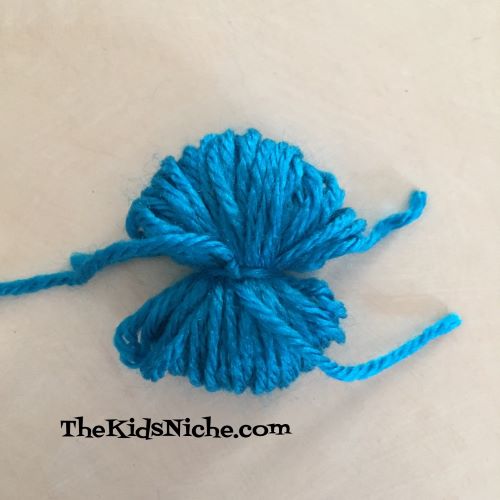
After you have finished wrapping, cut the yarn and slide the yarn off one end of the cardboard, being careful to keep it all close together.

Now cut a piece of yarn around 8″ long. Lay it down and place the wrapped yarn on top of it.

Make a knot with that piece of yarn, tying it very tight in the middle of the wrapped yarn.
Are we making sense so far? Ok, next take your scissors and cut the loops of yarn on one side of the knot.
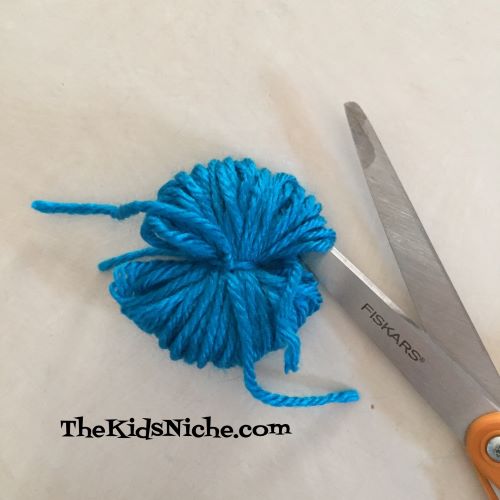

Once there are no more loops on that side, go to the second side of loops and cut them too.
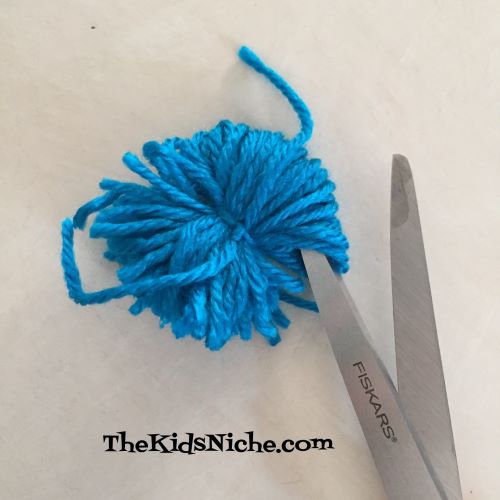
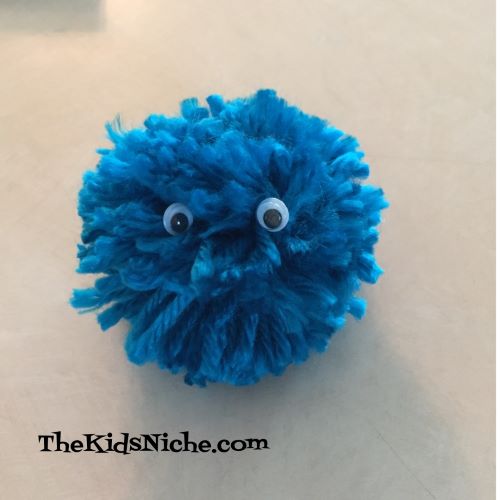
Now fluff the cut yarn up so it begins to look like a ball or a pom pom.

You can keep the pom pom looking a bit raggedy or you can trim it nicely into a smoother ball.

It’s time to turn your pom pom into a buddy! Let’s start with some eyes…you can add whatever size of eyes you like. There’s small…
Medium…

Or extra-large!

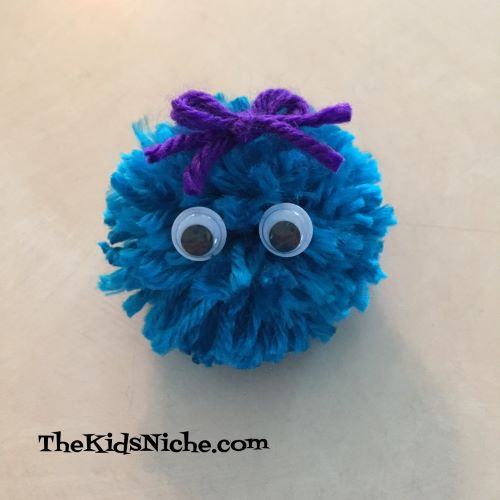
I added a yarn bow to the top of mine and I decided to use the medium sized eyes.
You can stop here but perhaps you would like to give your buddy some feet or some shoes. To make some shoes, I took a small piece of construction paper and folded it in half.
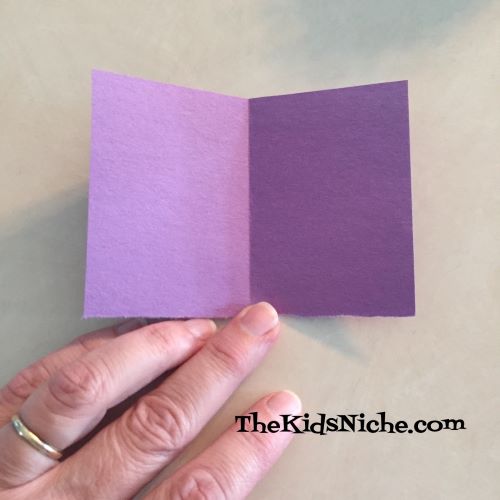
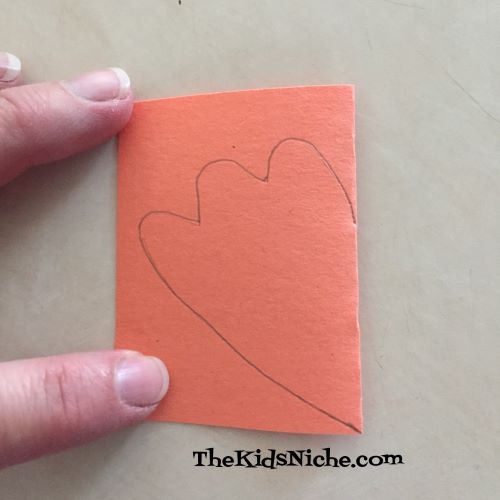
Draw half of a heart shape on the paper, putting the middle of the heart on the fold.

Cut the shape out with your scissors and open it up to find you cut out a heart! Neat trick, huh?

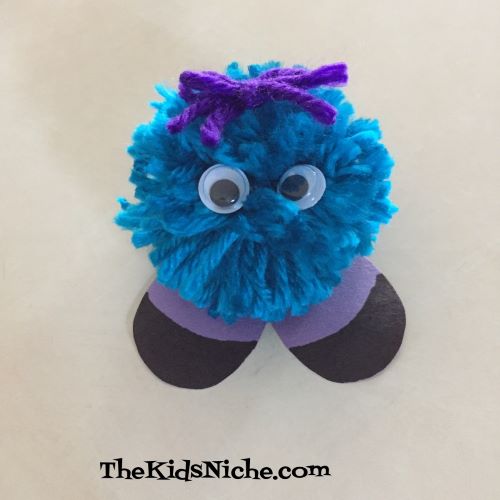
You can leave the feet plain…

Or color some of it in to look like shoes. Put glue on the shoes and sit your yarn buddy on top. Hold it in place for a little bit.

And there you have yarn buddy #1 finished!
For yarn buddy #2, I decided to make a one-eyed monster. To make his feet, I used an orange piece of paper and I made it very similar to the first yarn buddy’s feet. Fold a piece of paper in half and draw on what you want one foot to look like. Cut it out with your scissors. But be careful to leave a big enough piece of the fold to hold the feet together.
Unfold the feet and put glue on them and sit your buddy on top. Remember to hold it in place for a little bit while the glue starts to set up.

I drew on some toenails for this yarn buddy.

And then I colored the toenails in. Yarn buddy #2 is done!

The last yarn buddy for today is made a bit differently, but is still very similar to the other two. Begin by wrapping yarn around the piece of cardboard like before. Slide the wrapped yarn off the end and tie a piece of yarn in the middle like we already did for the other buddies.

This time cut only one side of the yarn loops to make some hair and leave one side of loops uncut to be his head.

Glue 2 eyes on the head side.

Make another set of feet and glue your yarn buddy to the feet like before.

You can decorate him in whatever way you want to. 🙂 And now you’ve made 3 yarn buddies! Will they all be your buddies or will you share them with someone else who might need a buddy? (They are very good at keeping secrets!) 😉

I hope you had fun making yarn buddies with me! Thanks for stopping by!
