If Pets Could Talk

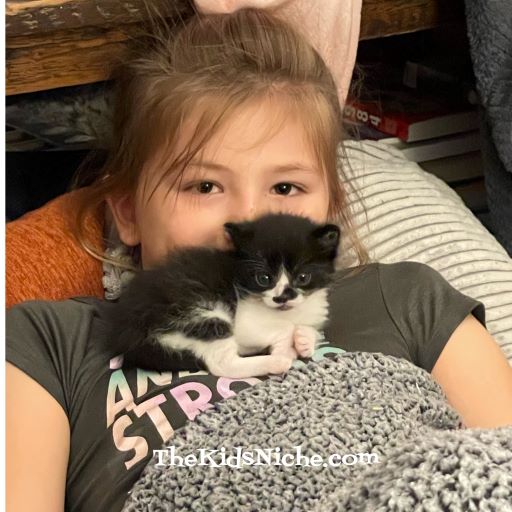
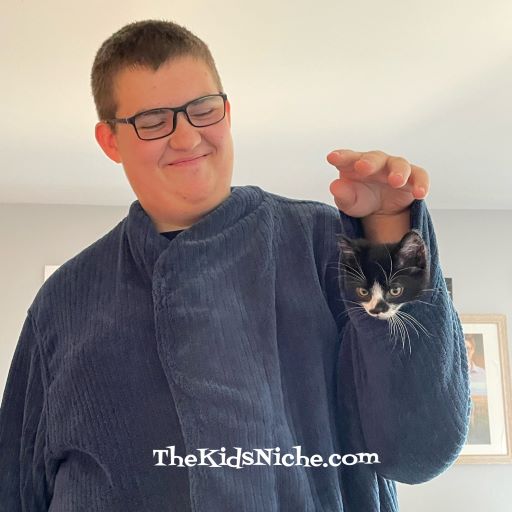
Have you ever wondered what your pet would say if he or she could talk? Just for some fun today, here are some funny pictures of more of our family’s pets. Look at these pictures and see what you think they might be saying. 😉 I’ll give you a suggestion for each picture.

“Is it time to mow the grass again, Dad?”

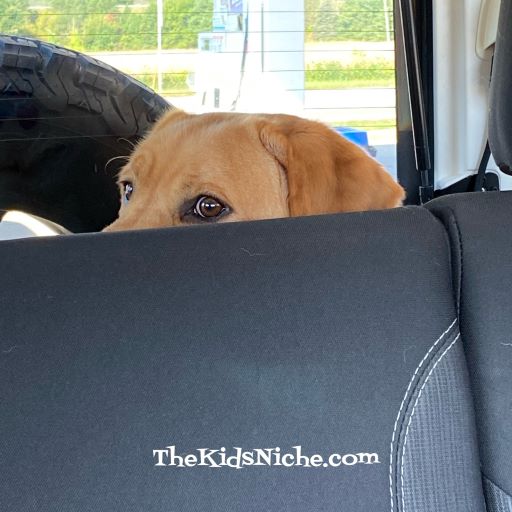
“Turn right at the next street and then turn into Starbucks…I need a pup cup!”

“We aren’t crowding you, are we?”

“Can I have the keys please?”

“The name’s Bond…James Bond.”

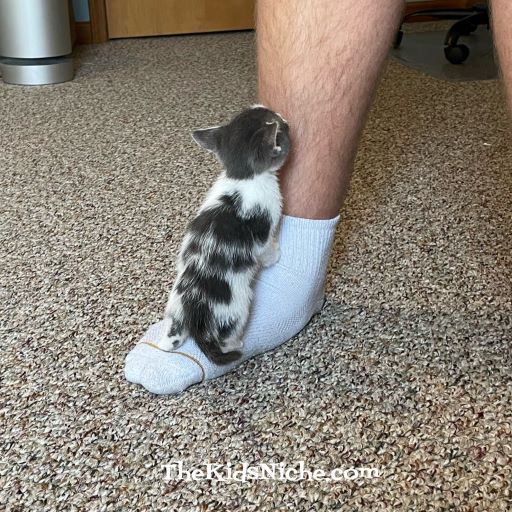
“Need any help with your computer work, Mom? Or with your snacks?”

“Time to exercise! Now where are the weights?”

“Hi there! Do you wanna play with me?? Pretty pleeeeeeeeease??”

“Could you turn the lights down? We’re trying to sleep here.”

“Did you bring me crickets? No?? OFF WITH HIS HEAD!”

“You go ahead and clean the bathroom, Mom. I won’t let these rugs get away.”

“Is this Grand Central Station? Could you take your party somewhere else? It’s my naptime.”

“Birdseed??! I thought it sounded like the dog food bag.”

“How do you like my hat? I’m looking pretty handsome, wouldn’t you say?”

Haha! I’d love to hear your comments! I hope these made you smile! 🙂

Taste Testing Tuesday #71 – Super Quick Snack

Here we go again with Taste Testing Tuesday! I hope your Tuesday is going well! We’re getting close to the end of the school year and things are getting crazy busy, aren’t they? Today’s post can help you whip up a yummy snack in just a couple of minutes! Really? Yes, really! 🙂 This is a super quick snack and you’ll wonder why you never tried it before! (We had this for a snack occasionally when I was a kid back in the dark ages.) 😉

Yes, those are graham crackers. All you need for this snack is graham crackers and frosting! Homemade frosting is great but if you don’t have time to make frosting, the kind in a tub from the grocery store works perfectly.

All you do is break a graham cracker into the size you’d like them to be and spread frosting on one side of one piece.

Add a second piece of the same sized graham cracker to the frosting side, making a little sandwich. And that’s it! You have a snack for those hungry kiddos! Any flavor of frosting should work great!

Now, if you want to fancy things up and you have the time to do so, put the frosting on one side of a piece of graham cracker and then sprinkle on your favorite topping. Like…

Chocolate drink mix like Ovaltine…

Colored sprinkles…

Colored sugar…

Or chocolate sprinkles…just to name a few things you can use.

Even if you choose to go the “fancy way”, preparing this snack is sooo quick! What if you don’t have graham crackers on hand? This snack also works with other crackers. For example, Ritz crackers work fine too!

Feel free to experiment with whatever similar items you have on hand. I’m betting vanilla wafer cookies would be great too! Have a great Taste Testing Tuesday making super quick snacks! 🙂

Cute Kitty Overload

Sorry I was MIA for most of last week! It was a very nice, but super busy week having company and seeing family. 🙂 Hopefully we’re back on track here for this week!

I’ve been accumulating some super cute animal pictures from some of the pets in our family for a while now. If you love animals, you will love these furry guys and girls! For today I wanted to share some adorable kitty pictures with you. I bet you can’t look at all of them without saying “Awww!” at least a time or two! 😉

I think this picture might just win the “cutest ever” award! What could be sweeter than a sleeping kitten?

Look at these 2 snuggle bugs! The kitty looks like he has paint on his nose.

This picture gives new meaning to the term “pocket pets”.

Hmm…how about a “sleeve pet”? 😉

“What do you mean this is a chicken house? I have decided it shall be my castle.”

Hello, my friend…

We’re having a pet party…care to join us? (Yes, 1 dog snuck in on the cute kitty post! LOL)

Meanwhile under the bed…a new batch of kittens! 🙂

I found a tree to climb! Why does this tree keep yelling “Ow! Ow! Ow!”

Remove. This. Thing. Right. Now. Or. Else.

The Kitten Whisperer…

Well, how many times did you say “Awww!”? 😉 I hope these cute kitty pictures brought a smile to your face and brightened your day! 🙂

Taste Testing Tuesday #70 – Stir Fried Veggies

I’m back with another round of Taste Testing Tuesday! This could be the trick to getting your kids to eat more veggies! It’s at least worth of try, right?! 😉 I’m talking about stir frying some vegetables.

There are many vegetables you can use in your stir fry or make a combination of them. You can stir fry some meat too or just go for the veggies. For this post, I used a little bacon to add some flavor but kept it mostly to the veggies. Here’s how I cooked ours: I started out frying a few pieces of bacon in a large skillet. I made a large batch so I needed to use our large electric skillet.

Remove the bacon after it has cooked till its nicely browned and crunchy. Place it on some paper towels to let the grease drain away. When it’s cool enough to handle, crumble it into small pieces. We’ll add it in at the end.

Here are some suggestions of veggies you might like to try but the list is almost endless!

Onions, chopped

Garlic, chopped

Raw broccoli and/or cauliflower.

Raw cabbage and/or raw carrots, chopped into small pieces

Raw mushrooms, sliced, and sugar snap peas. I broke the peas into 2 pieces for a nicer size.

A package of broccoli slaw.

I used the bacon grease that was in the skillet after cooking the bacon and then I added a large chunk of butter. Once the butter was melted, I added the onions and garlic and cooked them for a few minutes before adding the other veggies.

I added the broccoli, cauliflower, carrots, cabbage and broccoli slaw next.

I cooked that for a little while and then added the mushrooms and sugar snap peas. We like the peas to still have some crunch to them and the mushrooms don’t take as long to cook up.

We like to add some soy sauce to our stir fried veggies. There are other sauces you might want to try like teriyaki sauce. I would like to add some pineapple tidbits too the next time we make some. Kids might like the pineapple too as it will add a bit of sweetness to the mixture. Remember to stir in your bacon pieces when the rest has finished cooking.

Yum!

I hope you’ll try stir frying some veggies for your kids and you will find another successful way of getting them to eat something healthy! The struggle is real, isn’t it?? LOL Been there, struggled through it too! You’ve got this! 🙂 Hugs!

Painting Little Spring Pots

I hope you had a wonderful Easter weekend! If you look out the window here today, you would think it was April 1st instead of April 18th because it looks like we got an April Fool’s joke played on us outside! We have snow! Ok, yes, snow is pretty and all that, but we are ready for Spring now! 😉 So let’s do a cute Spring project painting little clay pots and pretend we don’t see the snow.

I found a pack of 3 small clay pots at the Dollar Tree store and decided they would be cute painted for Spring with some succulents planted in them. So go grab some little pots, some paint, sponge brushes and some newspaper to protect your surfaces.

I chose yellow, pink and blue for the main colors for my pots.

I painted the outside of the pots plus I painted part of the way down inside the pot.

Using the eraser end of a pencil, I painted dots on the outside of each pot in contrasting colors.

I painted 1 coat on 2 of my pots but I painted a second coat on the yellow pot. I think I didn’t need to do that.

A word of caution – allow your pots plenty of drying time before adding plants! I didn’t let my yellow pot (that had 2 coats of paint) dry long enough before I added my succulent and the paint bubbled up because of the moisture in the dirt.

Check your local Lowe’s or Home Depot stores or a greenhouse for some little plants to add to your beautiful little pots.

And there you have it! Bright and colorful painted pots to cheer you or someone else up! Spring is just around the corner! 🙂

Flower Candy Pretzel Bites

Happy Good Friday to you! In today’s post, I’ll be sharing a fun food craft that would be really great to share for your Easter celebration! These little “flowers” are so cute and taste so yummy with the combination of sweet and salty.

You need only 3 ingredients…square mini pretzels, white candy melts and a bag of spring colored M&M’s candy.

Line a cookie sheet with wax paper or parchment paper. Place some pretzels on the cookie sheet. (I started out with a lot of pretzels at one time, but now I think it’s better to do a few at a time so you can keep up with the decorating while the candy is soft.)

The directions I read suggested laying 1 candy melt wafer on each pretzel.

I think it works better if you put 1 1/2 candy wafers on each pretzel.

Preheat your oven to 250 degrees F. While you wait for the oven to heat up, you can sort your M&M’s into like color piles. This will make it easier to find the same color faster.

Once the oven is warm enough, place the cookie sheet in the oven for about 3 minutes. The candy just needs to soften so you can put the M&M’s on the pretzels. I found it helpful to use a small spatula to spread the warm candy on the pretzel.

When the candy is softened, place 1 yellow M&M in the center of the pretzel. Then apply 6 more of the same color M&M’s around the yellow one, pressing down into the candy.

That’s all there is to it! Continue making as many flowers as you’d like to make.

Aren’t they so cute?! Spring flower candy bites are bound to bring a smile to everyone that sees them. Especially to those who TASTE them! Haha!

Maybe set a few out on a plate for the Easter Bunny! 😉 Happy Easter, everyone! 🙂

Pretty Easter Egg Craft for Kids

Easter is only a few days away now! Are you looking for another simple craft to do with the kids? Here’s a great one that I shared last year, but it’s so pretty it’s bears repeating! 🙂

You’ll need a few colors of tissue paper, a piece of white paper, a pencil and glue. A computer and a printer will make it easier but isn’t necessary. To begin…draw the shape of an egg on the piece of white paper. Or do like I did and go to:

https://www.firstpalette.com/printable/easter-eggs.html

You can print out an egg for free. How nice is that?! (Thank you, http://www.firstpalette.com !)

Draw some light lines on your egg to divide it into sections. Begin with your first color of tissue paper and tear it into strips. They DON’T need to be perfect or the exact same size.

Next tear the strips into smallish pieces. Again, no need for perfection here!

Apply some glue to a small area of the first section of your egg.

Take one of the ripped pieces of tissue paper and wad it up into a little ball. Yep, squish it up! Then press it down into the glue. This picture is 3 balls.

Continue making paper balls and gluing them onto the egg shape. Press them close together so there isn’t much of the white paper showing through. I changed colors for each section but you can make your design however you like. Here is the first section done in red.

Then I did a section in yellow.

Next was light green.

Orange…

Light blue…

Pink…

Darker blue and yellow…

And finally red again to finish. 🙂

Doesn’t it look great? You can make lots of different colors and designs for as many eggs as you want to make. Have fun! 🙂

Making Candy Pretzel Rods

Here’s a fun quick project you can do with the kids to welcome Spring! Or for some extra fun for Easter…pretzel rods dipped in candy and coated in sprinkles!

You will need a bag of Wilton Candy Melts (I used yellow but there are other colors available), some wax paper or parchment paper, pretzel rods, a microwave safe mug and some candy sprinkles.

Put some candy melts in a microwave safe mug or cup.

Melt in the microwave according to the package directions.

Dip the pretzel rod into the melted candy. Tipping the cup sideways some can help to get the candy farther up on the pretzel.

Let the excess candy drip back into the cup. While holding the dipped pretzel over a clean bowl, drop/pour the candy sprinkles over the melted candy part of the pretzel.

After you have added the sprinkles, lay the pretzel on a piece of wax paper or parchment paper. The candy will gradually harden again or you can place the dipped pretzels in the refrigerator for 5-10 minutes.

And that’s all there is to it! 🙂 You can arrange the pretzels on a plate or in a cup or vase and share them with your family and friends. Sweet and salty mixed together is a great combination! Yummy!