2 Cute Craft Kits on Sale at Hobby Lobby

I found these 2 craft kits for kids at a Hobby Lobby store the other day and wanted to share them with you. While I haven’t made these kits yet, they look like a ton of fun for a really great price! These are normally priced at $2.99 (which seemed like a good price already) but were on sale for 40% off which brought their price down to only $1.79 each! πŸ™‚

The first kit I want to share is a sand art kit. This kit comes with 6 pictures and you use sand to color them. You pull off a bit of the paper and it’s sticky underneath. You pour a little sand over the sticky part and then shake off the excess. Then you’ll move on to the next section.

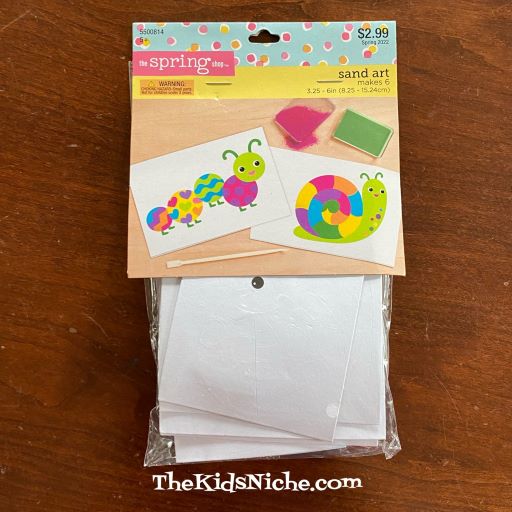
On the back of the package, you can see the 6 cute designs that are included. (I’m ready to start!) πŸ˜‰

The second kit is for making key chains with beads.

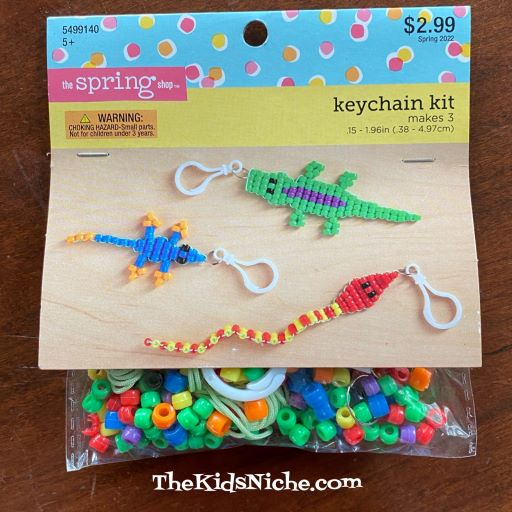
Each keychain kit makes 3 keychains….1 alligator, 1 snake and 1 lizard. This looks like a fun activity to me! πŸ˜‰

Hobby Lobby has lots of items on sale this week that are great for Spring! Hurry on in and see what goodies you can find! πŸ™‚

Taste Testing Tuesday #67 – Ways to Make Cabbage Yummy

Cabbage may not be on your child’s list of favorite foods, but let’s talk about a couple of ideas that might change their minds. Yep, it’s Taste Testing Tuesday once again! πŸ™‚

Cabbage is a super food which means it’s super good for you. When we have a head of cabbage, I like to use half of it in a recipe where the cabbage is cooked and the other half I use the cabbage raw. Let’s start with a cooked cabbage recipe…

Do your kids like bacon? (Yes, this recipe uses bacon! Yum, right?!) Start by frying several pieces of bacon in a skillet. For half a head of cabbage, use at least 6 pieces of bacon.

While the bacon is frying, cut the cabbage into small to medium-sized pieces.

When the bacon is done cooking, drain it on some paper towels and then crumble it into small pieces.

Leave the bacon grease in the skillet and add the cut up cabbage.

Add a couple slices of butter and cook on a medium heat.

Allow the cabbage to begin to brown some as this will add a scrumptious flavor to it.

Cook the cabbage until it is a soft as you like it. Then sprinkle the bacon pieces on top and stir to mix. Eat it while its nice and warm.

Now let’s look at some ways to eat cabbage raw. Fixing cabbage this way is often called Coleslaw, BUT Coleslaw has gotten a rather bad name over the years. There are different ways you can adjust the ingredients for Coleslaw that is more to your family’s liking. First chop or grate the cabbage into very small pieces.

One way to make Coleslaw is to mix in a little mayonnaise, a tiny bit of milk, a pinch of sugar and some dried fruit like raisins.

My husband likes it best with just some Italian dressing mixed into the raw cabbage.

Try grating or chopping some raw apple in with the cabbage and mixing in your favorite salad dressing, like Ranch. Top it with a little cinnamon.

If Coleslaw has a bad name in your family try calling it something else…like maybe Apple Salad. πŸ˜‰ There are many many cabbage recipes online that you could test out on your family. Good luck! I hope you find some ways to eat cabbage that makes your kids grin and ask for more! πŸ™‚

Simple Spring Chicks Craft

I don’t know how the weather is where you live, but we just had an ice storm last night into this morning. It’s rather pretty but it makes the sidewalks and roads quite slippery and almost impossible to stand up even on the grass! I’m getting a bit “winter weary” and am dreaming of warmer temperatures.

I decided we needed a craft today that will help us think about Spring coming! Let’s make a Spring Chick or two! πŸ™‚

You’ll need a toilet paper roll, some paint, a paint brush, some craft feathers, glue, wiggly eyes, a small piece of orange paper and a pair of scissors. Oh and some newspaper to protect the table or countertop from the painting process. πŸ˜‰

The first step is to paint the toilet paper roll in a bright cheery color. It’s up to you if you do 1 or 2 coats of paint.

I decided to paint a second toilet paper roll while I waited on the first one to dry. πŸ˜‰ (I love this blue color!)

You can also cut out the chick’s beak while you wait for the paint to dry. Take your orange piece of paper…

Make a fold and cut out a triangle shape with the bottom of the triangle being on the fold.

The beak will open up like a real chick’s beak.

When your chick is dry, glue on 2 wiggly eyes.

Next, to glue on the beak, put glue only on one side of the beak.

Then stick the glued side on the chick under the wiggly eyes.

Glue on a few feathers inside the toilet paper roll on the front side.

If you want to, you can add a piece of a feather on each side for the chick’s wings.

And your Spring Chick is done! πŸ™‚ For my blue chick, I added 3 feathers to his head but didn’t use any for wings.

Use your imagination and make your chick special!

I hope making some Spring Chicks will cheer you up and make your house brighter! Stay warm! πŸ™‚

Another Pipe Cleaner Flower

How about an easy, super quick pipe cleaner flower to cheer us up on this gloomy day? This little project takes 2 pipe cleaners the color you would like your flower to be and half of a green pipe cleaner for the flower stem. I chose pink for my flower.

Cross the 2 pink pipe cleaners in an “X” and use one end of the green pipe cleaner to wrap tightly around the spot where the 2 pink pipe cleaners meet.

Starting at the end of one of the pink pieces, roll up the pipe cleaner to the center where they all meet. It kind of reminds me of the way a snail’s body might look.

Do the same rolling with the second pink piece…

And then again with the 3rd and 4th pink pieces.

Finally you can bend each flower “petal” that you just rolled up to make it look more like a 3 dimensional flower.

You can make several flowers like this and have a bouquet of flowers or you can wrap the stem part around your wrist for a fun flower bracelet. I used one to hold the 2 handles of a bag together.

It’s a quick, easy, fun and looks great when you are done project! πŸ™‚ Have fun making flowers!

Taste Testing Tuesday #66 – Poor Man’s Steak

Today’s Taste Testing Tuesday is a little different than some of the other ones we’ve shared here. Do you ever get tired of fixing plain hamburger and listening to your kids whine about “Hamburgers again?!” or that the burgers are too dry? Let me introduce you to Poor Man’s Steak or as we called it at home when I was little, Budget Steak. One thing I love about this recipe is that it cooks up so soft and tender and makes it’s own gravy when you cook it in a crockpot. πŸ™‚

You will need 3 lbs. of hamburger, 1 Cup of cracker or bread crumbs, 1 Cup of water, some flour, oil for frying and 3 cans of Campbell’s Cream of Mushroom soup. Break up the hamburger into a large bowl and add the cracker or bread crumbs and the water. Mix with a wooden spoon or use your hands. Spread into a large cookie sheet. Slap and pound the meat into the cookie sheet to compress it together. Put it in the refrigerator for a few hours or even overnight. After the meat has been in the refrigerator, take it out and cut it into equal pieces. I usually cut mine into 24 square pieces.

Place some flour in a flat bowl. No need to measure. As you take a piece of meat from the cookie sheet, place it in the flour bowl and turn to coat both sides in flour.

As each piece is floured, place it in a skillet with some oil in the bottom and brown each side of the meat.

If you would like to make your Poor Man’s Steak a little spicier, you can sprinkle your favorite spices on the meat while it is in the skillet browning. Sometimes I use some onion powder and garlic powder, but it tastes great without any spices added too.

After you have browned both sides of each piece of meat, it’s ready to go into the crockpot.

Have your Cream of Mushroom soup handy for the next step.

I like to make a layer of the browned meat in the crockpot and then add a layer of the Cream of Mushroom soup.

Continue layering the meat and soup until all the meat has been placed in the crockpot. It’s best to have some soup on top of the batch. Put the lid on your crockpot and let it cook on low for approximately 4 hours. When my mom used to make this dish, she used 2 cans of the soup but I prefer to use 3 so there is some extra soup that makes great gravy for on top of some mashed potatoes! Add a veggie and your meal is ready! πŸ™‚

Poor Man’s Steak or Budget Steak is a great way to stretch some hamburger into something that seems like more than just burger! It’s always been a hit when I’ve taken it to potlucks or served it to guests in our home. I hope your family will give it a thumbs up too! πŸ™‚

Easter Finds at Dollar Tree

I know that the Easter holiday isn’t until April, but I saw some fun Easter items at a Dollar Tree store today. If any of these look good to you, don’t wait too long to head to your local Dollar Tree store because they tend to sell out of items fairly quickly! The Dollar Tree stores close to us have increased their prices to $1.25 for each item. But that is still much cheaper than other stores.

Let’s start with this adorable Easter box. They had 2 sizes of boxes at our Dollar Tree store, but items can differ from one store to another. This is a square box that is open on the top.

They also have a TON of plastic Easter eggs!! The packages go from as few as 6 large eggs to as many as 18 smaller eggs.

Here are some cute bunny treat bags! There are 4 in a package.

This is what they look like. They are made from cloth and I plan to put Easter treats inside a plastic bag before I put them inside of the bunny bags.

I found some adorable stuffed animals! πŸ™‚

Colorforms Sticker Story Adventure boards make for some great quiet time play!

And, of course, there is a LOT of candy! SweetTarts Jelly Beans looked pretty yummy to me.

Don’t forget chocolate bunnies!

I hope this will be some help for you as you plan your Easter shopping list of things to get for the kiddos’ Easter baskets! πŸ™‚

More Alphabet Fun

Learning the alphabet with 26 letters can be a bit daunting for some kids. Finding ways to make it fun can help to ease the stress or anxiety they might be feeling. Here are 2 quick ways to make it seem more like a game or a craft and help you sneak in some learning when they aren’t looking! πŸ˜‰

The first way is to use some magnetic letters. I found this batch at Walmart. Your kids can play with the letters on the side of your refrigerator or try using a metal cookie sheet. The cookie sheet keeps the letter all in one easy place and means it can be taken to a chair or comfy spot for playing.

The second idea is to use some beads with letters printed on them. These come in several shapes, sizes and colors. With some string, your kids can make a bracelet while putting the letters on the string in order. Wearing the bracelet can make it fun to sing the alphabet song while moving each letter bead as that letter is sung.

Or make a slip knot in each end of the string after the letter beads have been strung and now the letters can be hung up. πŸ™‚ Hope these 2 quick and easy ideas will bring some fun to your house while learning letters. 😊

Taste Testing Tuesday #66 Sugar Wafer Cookies

Greetings on another Taste Testing Tuesday! Today we’re taking some vanilla sugar wafer cookies and dipping them in some yumminess and adding a few sprinkles on top for good measure! You will need some vanilla sugar wafer cookies, some different kinds of candy chips and some toppings.

I used peanut butter chips, milk chocolate chips and butterscotch chips. For the topping I used assorted sprinkles, chocolate sprinkles and some colored sugar.

We will be melting each kind of chips to dip the cookies in. If your candy chips seem too thick after melting, you can add a small amount of coconut oil to help thin it to a better consistency.

I chose to do 3 cookies in each type of candy but you can choose however many you want to use. Lay them out in a piece of wax paper to make the clean up easier.

I started out by melting a few peanut butter chips in a small bowl in the microwave.

Dip your cookies in the melted candy to coat the bottom half and immediately before it can harden, add some sprinkles or toppings.

Lay the cookies on another piece of waxed paper on a cookie sheet.

I bet it’s starting to smell good at your house! πŸ˜ƒ Do the same with each type of candy chips you are using. Melt the candy, dip the cookie in it and then lay the cookie on waxed paper and add your toppings. When you have finished making your fancy cookies, place them in the refrigerator for 10-15 minutes so the candy can harden.

Here we have 3 peanut butter dipped cookies.

And 3 milk chocolate dipped sugar wafers…

And 3 butterscotch dipped cookies.

Do a taste test by sampling a cookie with each kind of candy on it. Which one is your favorite? Is there any you didn’t like? They do look pretty on a plate together, don’t you think? 😊

Have fun with your taste test of candy dipped sugar wafer cookies! πŸ˜ƒ

Do Pine Trees Have Seeds?

I accidentally discovered something cool about pine trees and I thought you might find it interesting too. We have a very large pine tree in our yard.

I really like the shape of the pine cones that grow on this tree. So the other day I picked 2 off the tree and brought them inside to dry. I planned to paint them and use them for decorations.

I noticed that the pine cones were starting to open up as they dried.

Here is a picture of a dried pine cone and one that I just pulled off the tree today. Can you tell the difference?

This morning when I picked up the 2 dried pine cones, guess what fell out?

Yep, seeds! πŸ˜ƒ Pretty cool, isn’t it? If you are like me, you might be wondering if those seeds can be planted and grow into pine trees? Well, from what I read online the answer is maybe. The seeds have to go through a process of being frozen for about 3 months and then they can be planted. These seeds have been outside all winter so they might grow. I just might plant a few and see what happens! πŸ˜‰ Most of the time when you find a pine cone laying on the ground, it has already released its seeds. So now you know where pine tree seeds come from!