Hi, everyone! It’s time to loosen up your tongues for these crazy tongue twisters! All together now, take your tongue to the left…take your tongue to the right…now up high….and now down low! Ok, let’s see if we can manage to say all these tongue twisters!!
#1.) The happy hippo hopped as he hiccupped.
#2.) A synonym for cinnamon is a cinnamon synonym.
#3.) Each Easter Eddie eats eighty Easter eggs.
#4.) A skunk sat on a stump and thunk the stump stunk, but the stump thunk the skunk stunk.
#5.) Green glass globes glow greenly.
#6.) She sees cheese. (Ok, that one is short, but it’s still hard to repeat it!)
#7.) Double bubble gum, bubbles double.
#8.) Kids and kittens knit in the kitchen.
#9.) Bouncing bed bugs borrowed blankets.
#10.) Addie asked for apples.
Whew! How did that go for you? My tongue is tied up in knots! I hope you found that fun! Have your family and friends try them too! 🙂
Hello and welcome to another round of Taste Testing Tuesday! Hope you are having a great week! Today we’re tasting different kinds of jelly or jam. We tested 4 different kinds. Of course, you can taste test different flavors than we did. We used bread but you could also use your favorite cracker instead. Let’s get started!
#1.) Strawberry Jam. I like the Smucker’s Simply Fruit brand.
#2.) Grape Jelly. Here’s an interesting tidbit…Baltimore Oriole birds like to eat grape jelly. 🙂
#3.) Red Raspberry Jam
#4.) Apricot Jam. This one is also Smucker’s Simply Fruit.
What flavors of jam or jelly are you using for your taste test? Which is your favorite? My favorite is the strawberry jam with the apricot jam coming in a close second. My husband likes the red raspberry the best. (I like the flavor but not all the seeds.) Great things to add to your jelly or jam are peanut butter or cream cheese. I hope you enjoy doing a jelly/jam taste test! 🙂
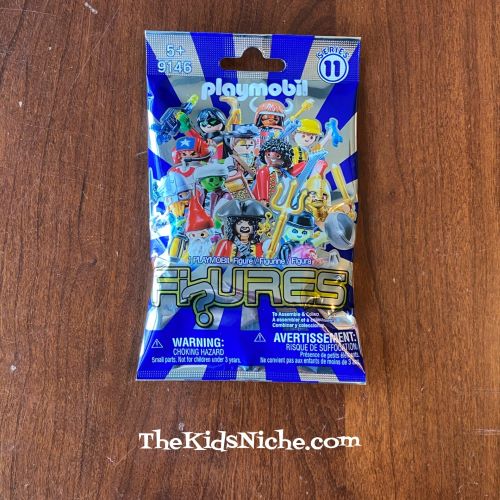
The Dollar Tree store near us always seems to have something fun in the way of toys and crafts. I love going there are finding neat things for only $1.00 each! I was happy with some things I found the other day and wanted to share them with you.
Playmobil individual figures.
Playmobil is a great toy, but they aren’t the cheapest thing around, so I thought it was great to find these surprise packages with a Playmobil figure inside for just $1.00!
They come with some directions but you might have to figure out some of it by looking at the picture on the package. This is the surprise that was in my package. Pretty cool dude!
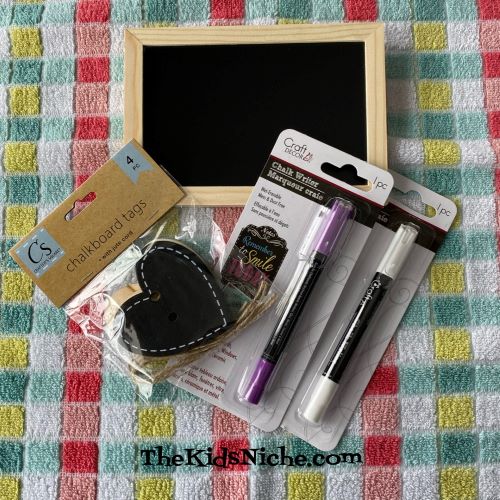
I also found a chalkboard with an easel back on it ($1) and a pack of 4 chalkboard heart tags ($1). And there were several colors of chalk writer pens ($1 each). I bought purple and white. Next time I’m there, I’m hoping to buy some more colors. 🙂
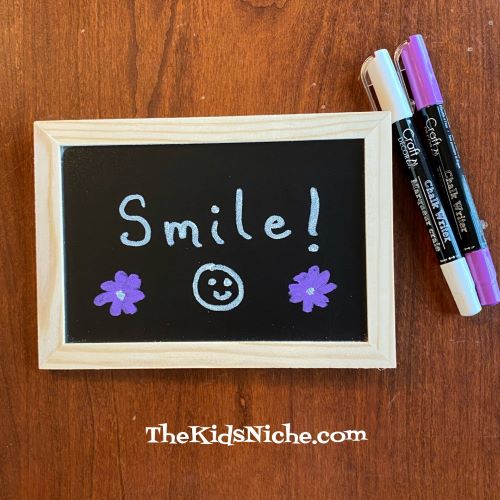
Just for fun, here’s an idea of what you can do with the chalkboard and chalk writer pens. The pens do write a fairly wide line.
Because it has the easel backing on it, you can stand it up anywhere.
When you’re ready for a new sign, simply wipe the chalkboard clean with a damp paper towel.
Do you like to shop at Dollar Tree? What are some of your favorite finds there? Let me know in the comments! Thanks for stopping by! 🙂
Do you have trouble getting your kids to drink milk? Are they tired of drinking the “same old plain milk”? Well, this time around, Taste Testing Tuesday is centered on milk! There are some quick and easy ways to change up a glass of milk and we’re going to look at 5 ideas. If your kind of milk is rice milk or almond milk or a similar non-dairy milk, these ideas will still work! Here we go!
#1.) Blueberry Milk. Blend together a cup of milk and a handful of blueberries in your blender. If your blueberries are on the tart side, add a little sweetener.
The milk turns a very cool blue/purple color!
#2.) Peanut Butter and Honey Milk. Mmmm! This one is quite tasty! Take a cup of milk and a spoonful of peanut butter and a nice squeeze of honey and blend it together.
Some people like to add a piece of banana with peanut butter.
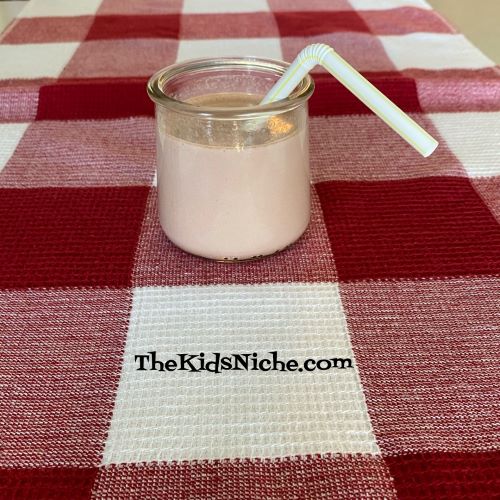
#3.) Strawberry Milk. If you have actual strawberries, you can blend them in with the milk. Or add a spoonful of strawberry jam.
The milk changes to a pretty light pink color.
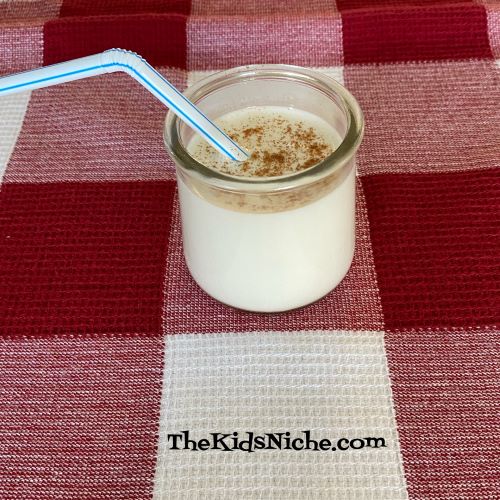
#4.) Vanilla and Cinnamon Milk. I can remember my mom making Vanilla Milk for us when I was a kid. Top it off with a little cinnamon and it will look nice as well as taste great.
Good stuff!
#5.) Chocolate Milk. But, of course!! It’s not a new idea to put chocolate in milk, but it sure is a GOOD idea!
Yum! Yum!
So what flavors of milk will you try for your Taste Testing Tuesday? I’d love to hear what you do and which flavor is your favorite! I have to say, even though they all tasted pretty good, chocolate milk wins hands down for me! 🙂
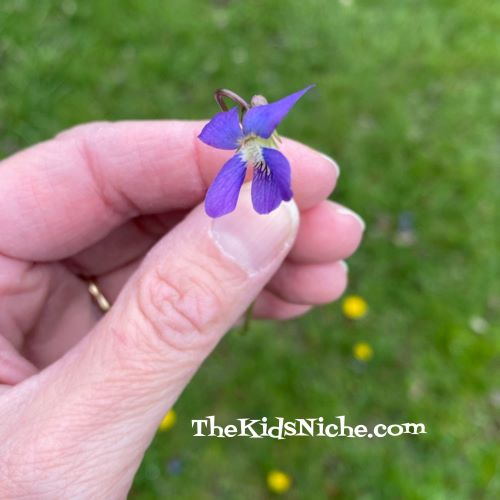
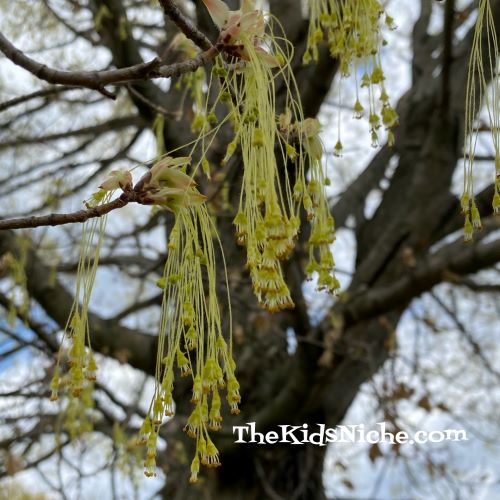
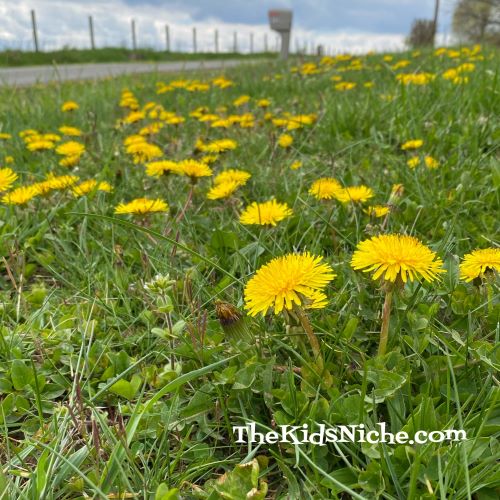
Do you celebrate Earth Day? I hope that each of us is doing our part to protect Mother Earth every day! Here’s a fun activity to do with your kids to help them learn to appreciate the earth a little better. Take a walk together with your camera and see how many interesting things you can find in nature to photograph. Look especially for flowers that are just growing wild. Here are a few things I found on my walk:
A dainty little purple flower…
A bush blooming with beautiful pink flowers…
Tiny, tiny purple flowers growing in the grass…
New growth on a tree…
A beautiful bunch of dandelions…
Tiny white flowers also growing in the grass…
Pinkish-purple flowers, growing up on stalks, even in stones…
New growth starting on a large pine tree…
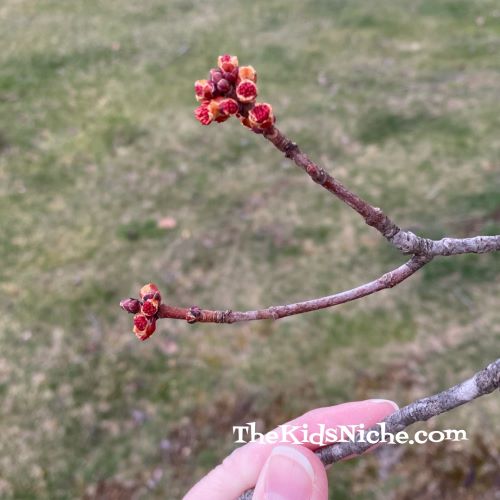
Buds coming out on another tree…
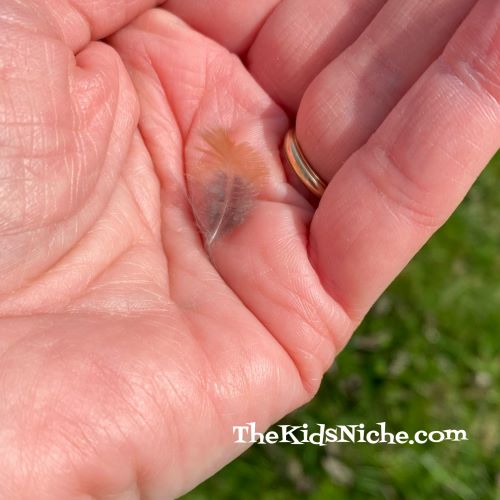
Teeny, tiny bird feather…
A beautiful blue sky with the newly budding tree…
There are so many beautiful things outside that we walk past every day without noticing. My hope for this Earth Day is for each of us to take a little time and truly look around and see some of the amazing things our wonderful earth offers us. Enjoy! 🙂
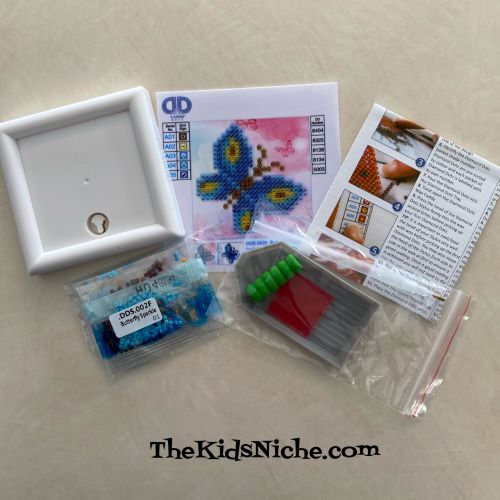
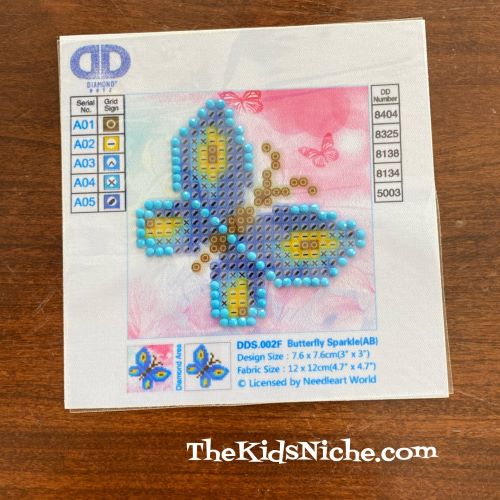
I have seen the Diamond Dotz craft kits around for a while, but I finally sat down and made one today. It was fun! (My old eyes could have used the help of a magnifying glass though! Lol) This craft is not for really young children, but maybe starting around 8 years old, depending on the child. Here is the kit that I made:
Here’s what came in the package: The special pre-printed fabric, a plastic frame, an applicator stylus, soft gripper for the stylus, a sorting tray, some wax and printed instructions.
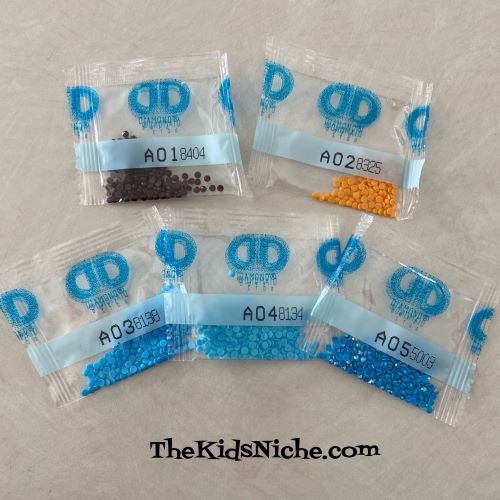
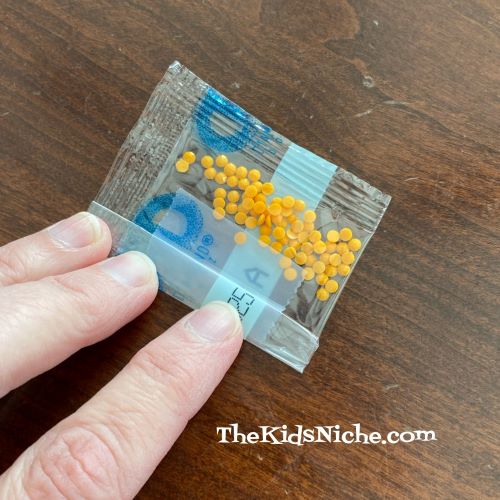
5 colors of Diamond Dotz
After laying all the supplies out on the table, the first thing to do is push the stylus down into the wax a few times until the bottom of the stylus is full. Once this is done the first time, you will only need to get more wax occasionally.
The wax makes it so you can pick up an individual dot with the stylus and place it on the picture. Make sure the dot is curved side up against the stylus and the flat side is down when placing it on the picture. Most of the dotz in this picture are facing upside down. You can gently turn them over using the stylus.
You pick out a certain symbol on the fabric, then find which color of dotz it represents by looking at the little chart. You will place the correct color of dot on each symbol like that on the fabric. As you can see, I have just placed the 4th dot on the fabric. The fabric is sticky where the dotz are to be placed.
This picture has all of the first color of dotz in place.
All of the second color (brown) is done.
Now the yellow dotz…
Now the second color of blue.
And last, the sparkly blue ones.
Isn’t it pretty? One suggestion I’d like to make is after you are finished with one color of dotz, roll the open end of the little bag closed and put a piece of scotch tape across it to hold it closed. That way you’ll have the leftover dotz for a future project.
The instructions say you should roll a rolling pin or other round object like a glass, over the dotz to make sure they are all stuck firmly to the fabric.
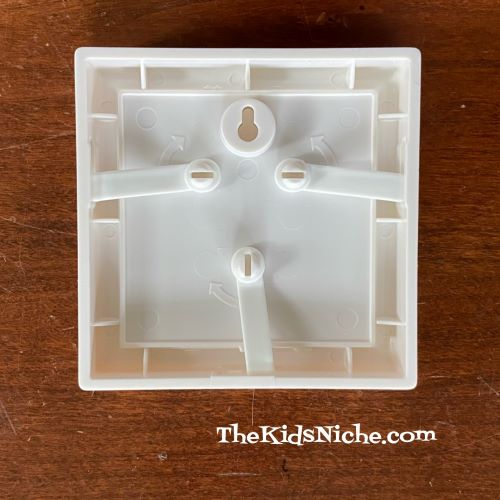
Now for the framing…there actually isn’t any instructions for using the frame but here is what I did. Cut the picture part out of the fabric following the outside of the square.
Take the outside of the frame and lay it face down.
Place the cut out picture face down into the frame.
Put the back piece of the frame into the opening and move the 3 tabs so they lock into place.
And your beautiful butterfly is finished and ready to hang!
The Diamond Dotz come in different sizes of pictures and you can even make greeting cards, stickers and bracelets. I hope you’ll give them a try because I think you’ll find them fun to do! 🙂
It’s that time again – Taste Testing Tuesday! Today I thought we would check out some awesome pudding flavors. Before we get started, what do you THINK your favorite pudding flavor is? Let’s see if you change your mind after you do this taste test today! I’ll show you 3 flavors that are favorites at our house.
Can you guess what flavors of pudding are in each cup? The colors are orange, dark brown and yellow. Did you make your guesses? Ok, here’s what flavors they are:
#1.) Chocolate
#2.) Vanilla
#3.) Butterscotch
Did you guess the right flavors? I bet you got at least some of them right! Now it’s your turn! What flavors of pudding will you taste test? There are many more flavors available in the store. Like lemon, cheesecake, banana cream, pistachio, cookies ‘n cream, white chocolate and French vanilla. And maybe even more! I think I like vanilla the best, then chocolate and then butterscotch. (Or as my dad used to call it “sutterbotch”. That’s rather fun to say, isn’t it?) 😉 Leave me a comment and tell me what your favorite pudding flavor is and if doing this taste test made you decide you have a new favorite flavor!
Do your kids love helping out in the kitchen? Or would you like to encourage them to help make food more often? Here’s a super easy but very tasty recipe for a chocolate pie that kids can make! And it looks very nice when you are done. It only takes a few ingredients to make. You’ll start with a graham cracker crust…either one you make yourself or one you purchased.
Then you’ll need some milk, 2 small boxes of instant chocolate pudding, a container of Cool Whip and a few tiny chocolate chips. (You could use the regular size chocolate chips too.)
Start by pouring 4 Cups of cold milk into a large bowl.
Add the 2 small boxes of chocolate pudding mix into the bowl.
Stir with a whisk for 2 minutes.
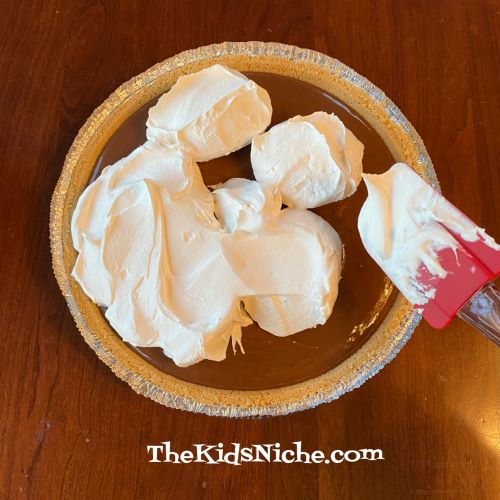
Immediately pour the chocolate pudding into the graham cracker crust.
Place the pie in the refrigerator for 10-15 minutes until it is soft-set. Then take the pie out and add some Cool Whip to completely cover the top of the pie.
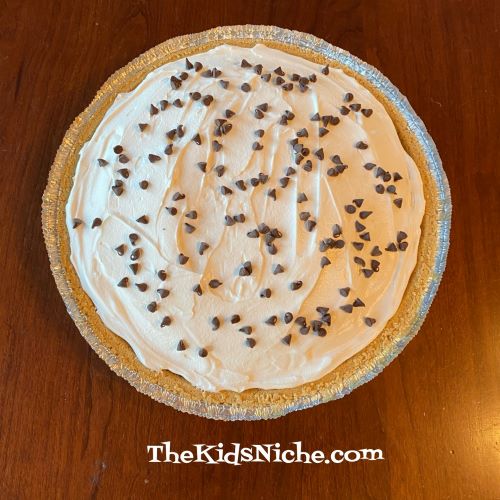
Sprinkle some chocolate chips on top and your beautiful pie is finished!
Store the pie in the refrigerator until it’s time to serve it. This is a great recipe for the kids to make and they will feel so proud when you serve it to guests or family and they can say, “I made this pie!” 🙂 It tastes great too! (I should know…I just ate a piece!)
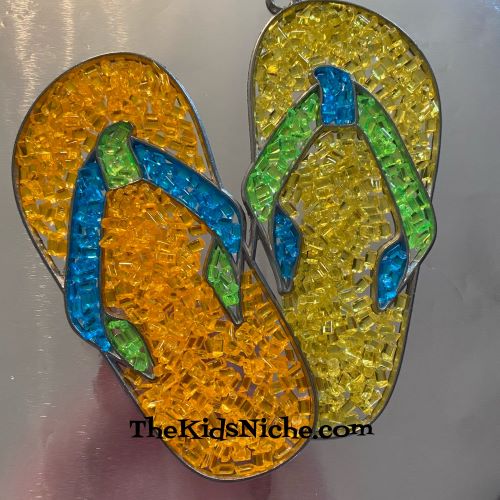
The other day I mentioned we would be making a suncatcher with a Makit & Bakit kit that I bought at a Joann Fabrics store. Today’s the day! I have seen this type of kit before but I had never done one. So time to teach an old dog a new trick! 😉 Here’s how they are done:
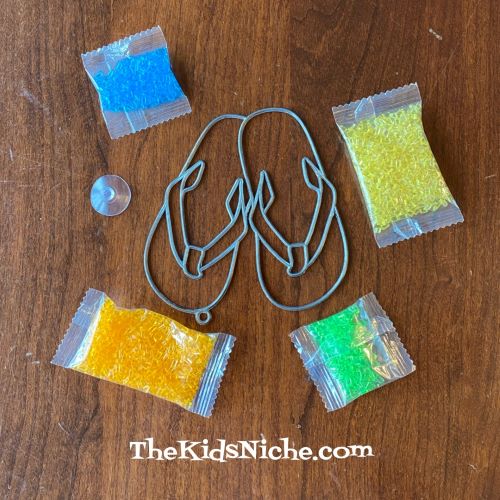
This is what was included in the kit. The instructions were printed on the back of the cardboard.
The idea of making them is simple. First line a cookie sheet with aluminum foil.
Place the frame, flat side down, onto the foil lined cookie sheet.
Start with one color and fill an area of the frame with that color of the little plastic pieces. First I did orange.
Then the yellow…
Next came green…
And finally the blue.
The trick is getting and keeping the colors in the places you want them. It’s good to have a toothpick and a pair of tweezers handy for moving the little pieces around. And tweezers are nice for filling in the little spaces. Here’s a closer view so you can see what they look like when they are ready for the oven.
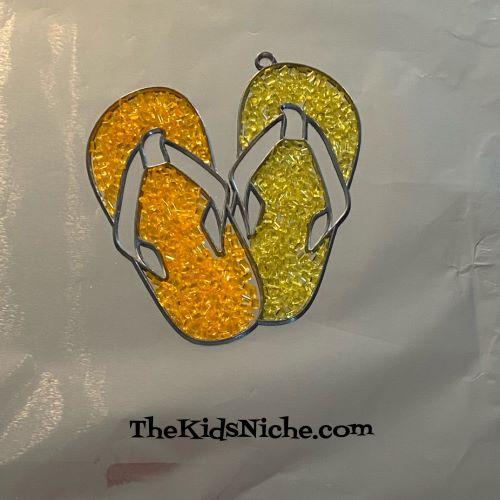
Now you preheat the oven according to the package directions. Do NOT use a microwave!! Place the cookie sheet with your suncatcher in the heated oven and follow the package directions for how long to let it bake. Mine took about 15 minutes. A word of caution: Open your windows while your suncatcher is in the oven. It will give off a plastic smell. The package says it is not harmful, but if you are sensitive to odors, you might not like this part of the process. After the plastic pieces have melted, remove the cookie sheet and let the suncatcher cool before handling. Then it should peel off the foil easily. Because of the odor, I sat my cookie sheet outside to cool and that helped a lot to dispel the odor.
And there is your suncatcher! Add a bit of string if you like to hang it up. It was a fun project but a little tedious getting the little pieces in just the right place, so this might be good for kids that are a bit older. (I accidentally dropped my tweezers on my suncatcher which made the tiny pieces go flying all over…and then I had to clean them up!) And of course, adult supervision is needed when using the oven. Let me know if you give this a try! 🙂