Do you ever have days like this? 😄 I know I did when our kids were little! Sending hugs your way if this is you today! Hang in there!! 🤗🤗
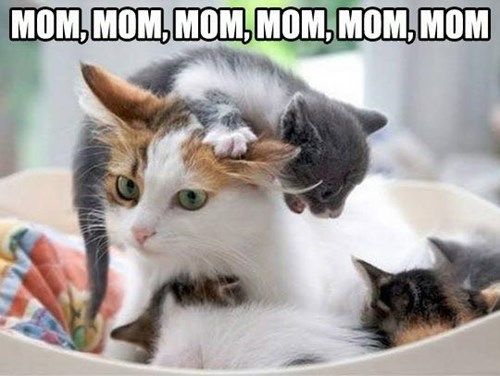
Do you ever have days like this? 😄 I know I did when our kids were little! Sending hugs your way if this is you today! Hang in there!! 🤗🤗
Do you love pancakes? Then RUN to your nearest iHop restaurant for some free ones! Free? Yes! Free short stack today because it’s National Pancake Day!
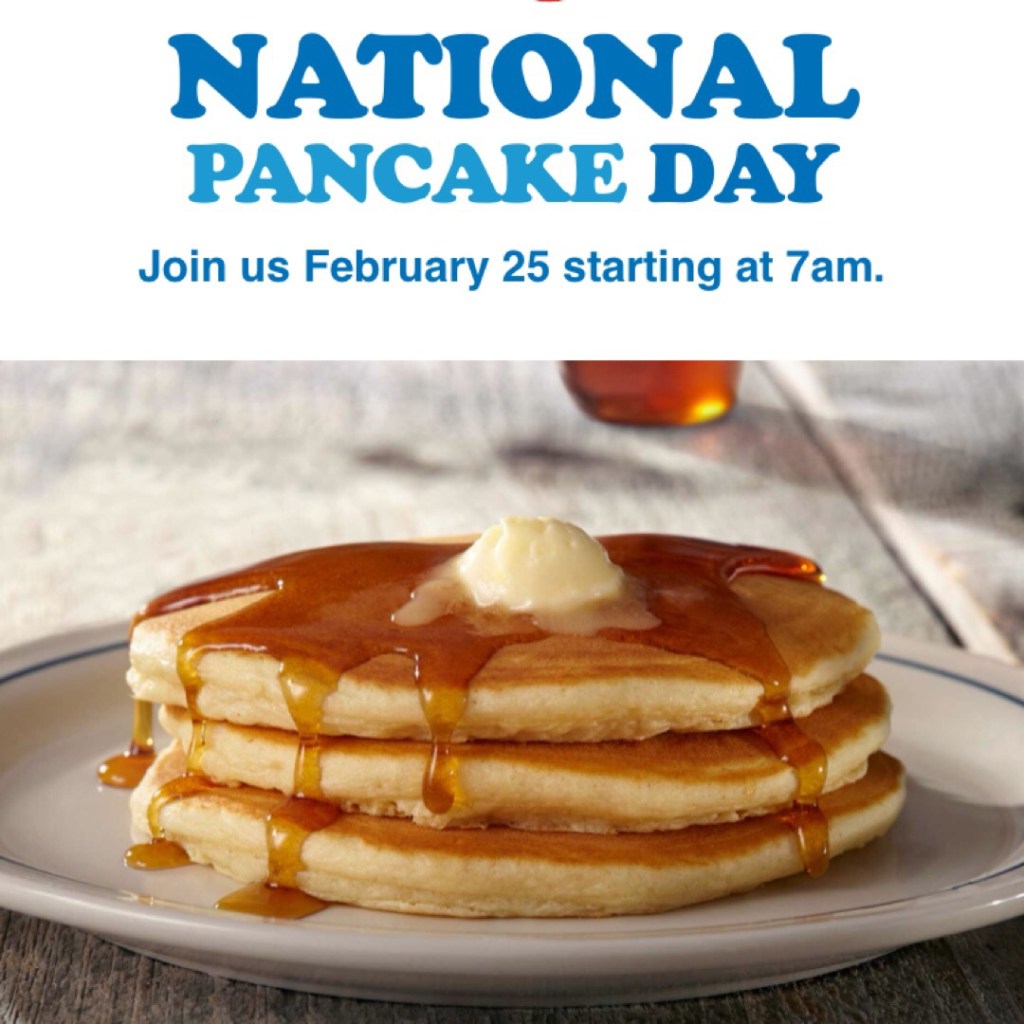

Check with your nearest restaurant and see if they are participating. If they are, then put some yummy in your tummy! 😁
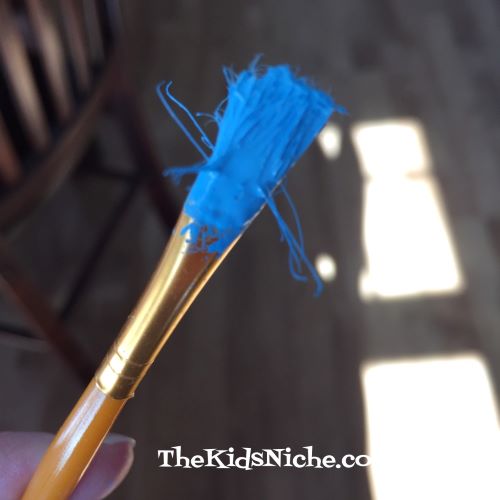
Did you say “Whaaaat? Painting pine cones?!” Yea, it sounds a bit odd, doesn’t it? Well, if the cold weather and the long wait for Spring are getting you down, let’s paint some pine cones to look like gorgeous flowers to cheer you up! It will look like Spring has arrived inside your house! 🙂 Let’s gather the needed supplies…bright colored paints (You need yellow for sure), cheap paint brushes, newspaper or something to keep the table clean, small cups or dishes to hold the paint and pine cones, of course. The pine cones that work for this project are the shorter round ones shown in the picture below.
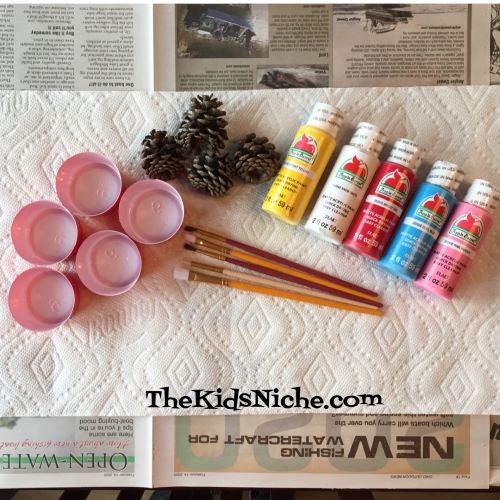
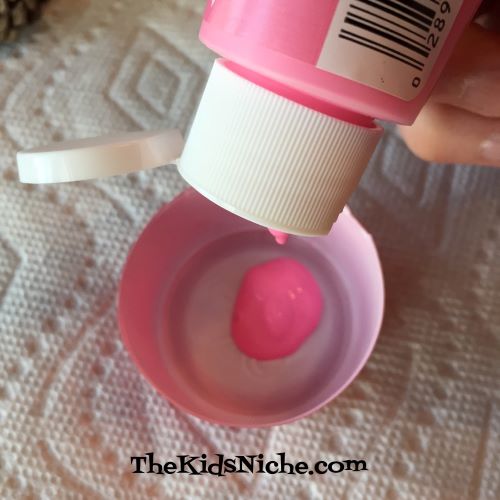
For little containers to hold the paint, I used disposable plastic cups and cut them down to a shorter size. I made enough of them to hold the paint but also to rest the pine cones in while the paint dried after I painted them. Pick out your first color and completely paint the pine cone, making sure to cover both sides of each scale.
Here’s my first painted pine cone starting the drying process.

I chose pink, blue, red and white for my pine cone/flower colors.

It’s rather hard on the paint brushes since you are painting in between the scales. That’s why I said CHEAP paint brushes. 😉 You can throw them away when your project is done.
Here are my 4 painted pine cones…one of each color…drying in the little cups.
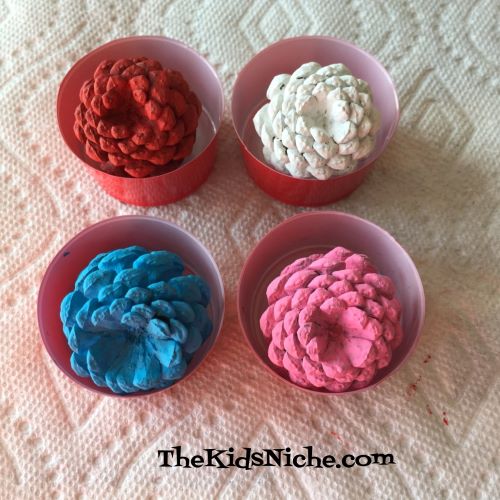
Now watch the magic happen!! Get your yellow paint and paint just the center of the BOTTOM of each pine cone…and PRESTO! They now look like flowers!!

Very cool, isn’t it?! Place them in a little container and look how pretty they are! Doesn’t that brighten up the room?

I hope you found this project fun and surprising! The more you make the better they look together! 🙂
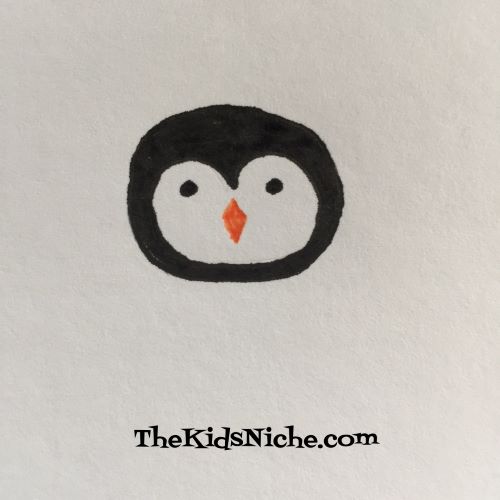
Think you aren’t the world’s greatest artist? Yea, me too, but you can draw this penguin! We’ll take it step by step and you will be impressed with your artistic abilities when you’re done! Grab a piece of white paper, a pencil if you are a little uneasy, a black marker if you’ve “got this” and an orange or yellow marker or pen. If you are feeling rather unsure, draw with the pencil first and then trace over it with the marker. First draw an oval on its side.

Next draw this shape inside the oval. It’s almost a heart but not pointed on the bottom like a heart.

Now let’s add 2 eyes and 2 little triangles for the penguin’s beak.

Color in the black part of the head and the orange or yellow beak.
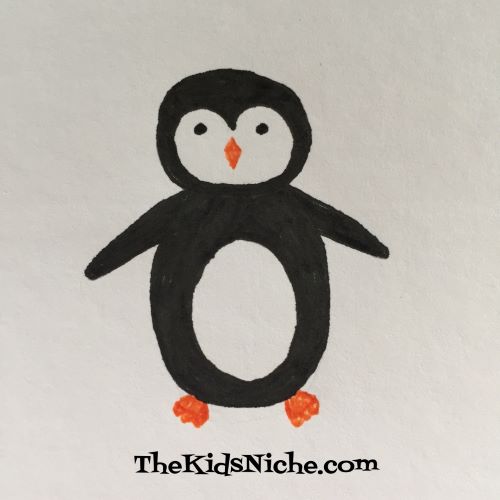
Our penguin needs a body so let’s add an oval now for that. Add a second oval inside the first oval.

Next, color in the black part of the body.

How about giving your penguin 2 wings so he’ll be able to swim? And 2 feet are important for walking!

Color his wings in black and his feet in orange or yellow. And tah dah!! You’ve drawn your first adorable penguin! Great job! 🙂
If you enjoyed drawing one penguin, go ahead and draw a colony of them! 🙂
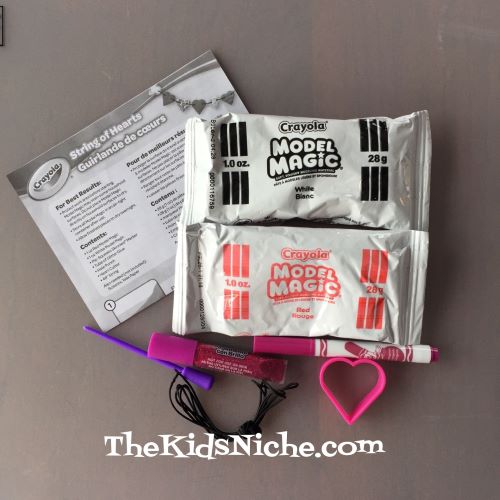
Happy Valentine’s Day!! 🙂 Today I want to share a cute little craft kit that I found at Walmart that is a perfect project for Valentine’s Day. It’s Crayola’s String of Hearts kit using their Model Magic. It cost around $5.00.

Here’s what you’ll find inside the box: 1 pouch of red model magic, 1 pouch of white model magic, directions, 1 marker, 1 tube of glitter glue, 1 string, 1 tool for poking holes and 1 heart shaped cutter.
Remove 1 chunk of model magic from the pouch and roll it out to about 1/8″ thick. You can use a rolling pin, the side of a glass or just your hands. Use the heart shaped cutter to cut out as many hearts as you can. I found through trial and error that it’s best to leave a little bit of room between the hearts. It makes it easier when trying to pick them up. (I cut the red batch a little too close together and they tended to stick back together when I tried to lift them.)

I found it helpful to use a small spatula to slide under the hearts to help release them from my cutting board.

Using the little tool for poking holes, poke 2 holes in each heart. Don’t be afraid to make them too big as they seem to close up some as the hearts dry. The holes are where the string will go through them.

You can also make tiny marks on the edge of a heart using the tip of the heart shaped cutter.

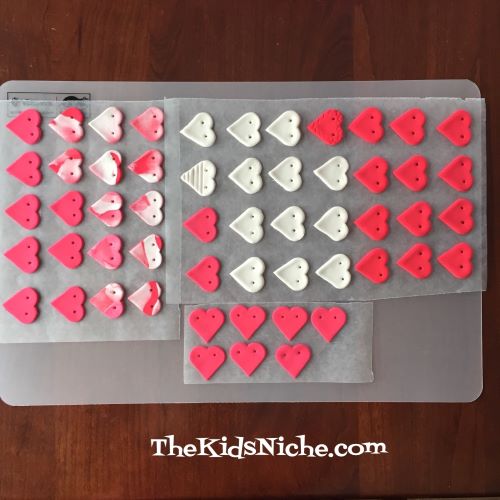
As you cut out the hearts, you will have leftover scraps. Save them for now. Flatten and cut hearts out of the other color of model magic. Again, save your scraps.

You can use your leftover scraps to simply squish them back together and re-roll them to cut more hearts out. But if you take a bit of each color and squish them together just a little, you can cut out hearts that look like this:

I just LOVE these! If you mix some red and white together, but squish them together for a longer amount of time, you can make pink hearts. 🙂

If you use a little less red and a little more white, the pink will come out an even lighter color. Now you need to allow your hearts to sit out over night to dry. I kinda helped mine along a bit by heating my oven to its lowest setting, turning the oven off and letting the tray of hearts sit in the oven for an hour. Some of my hearts might have been rolled out a bit too thin, but I made 55 hearts with this kit!
After your hearts have dried, you can use the included marker and tube of glitter glue for decorating your hearts. Allow the glitter glue time to dry before proceeding.

Now you can string some of your hearts together to make a decoration to hang up. Put the string into the right hole from the right side, cross over the back of the heart and bring the string up through the heart going back to front. Continue in the same way to string as many hearts together as you would like. If your holes seem to be too small, gently use the poking tool to open them up more.

Here’s a closer view so you can see how to string the hearts together.

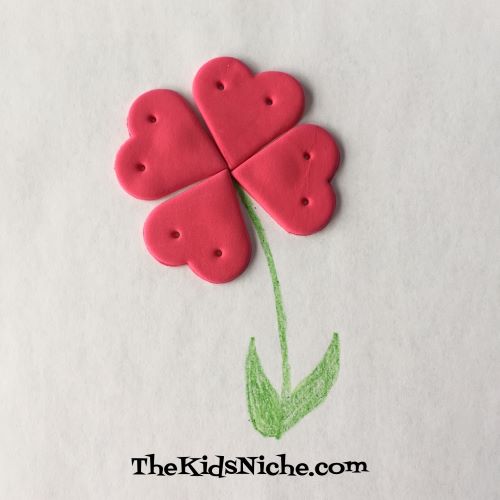
Do you have leftover hearts? You can glue them onto paper to make a picture or even a card for Valentine’s Day.
Hope your Valentine’s Day is special! Thanks for reading my blog! 🙂
Ready for Valentine’s Day tomorrow? If you are still looking for an easy way to make some Valentines, here’s my blog post from last year with a fun idea! Enjoy!
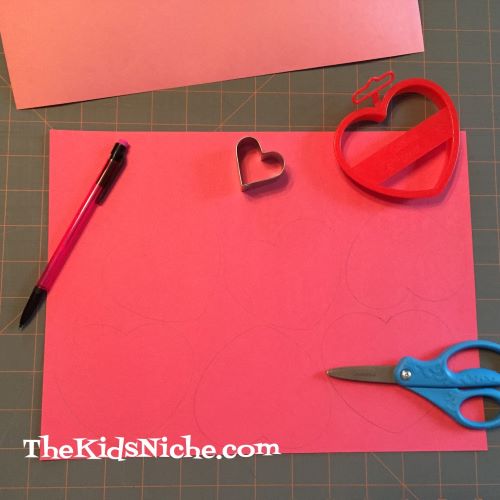
Tomorrow is the day of love and hearts, candy and flowers – Valentine’s Day! Are you looking for some inexpensive fun for the kids? Today I’m sharing one simple way to make some homemade Valentines. I used 3 colors of construction paper (red, pink & purple), 2 different sized cookie cutters, a pencil, scissors, glue and a marker. First I traced around the larger heart shaped cookie cutter 3 times on each piece of paper using a pencil. Then I discovered if I turned my cookie cutter over, I could trace around that side and get a slightly smaller heart shape. I filled up the space that was left on each color of paper by tracing around a much smaller heart shaped cookie cutter.
If the kids are big enough to help cut out the hearts, I suggest cutting them apart first to make them easier to handle. More than…
View original post 104 more words
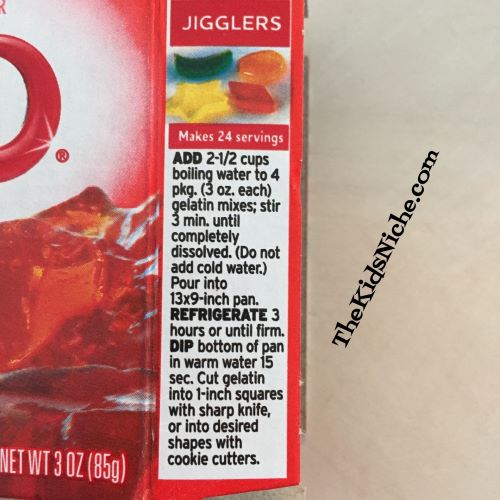
Are you looking for a fun treat for the kids for Valentine’s Day? Remember Jello Jigglers? Wow, I haven’t thought of them in ages! Kids love them! To make them special for Valentine’s Day, use heart shaped cookie cutters to cut them out. 🙂 It all starts with Jello…preferably a red flavor for Valentine’s Day.

The recipe is on the Jello boxes. You only need Jello and water to make them. The recipe on the box calls for 4 small boxes of Jello to make a 9 x 13″ pan, but I made half that amount and used an 8 x 8″ pan.
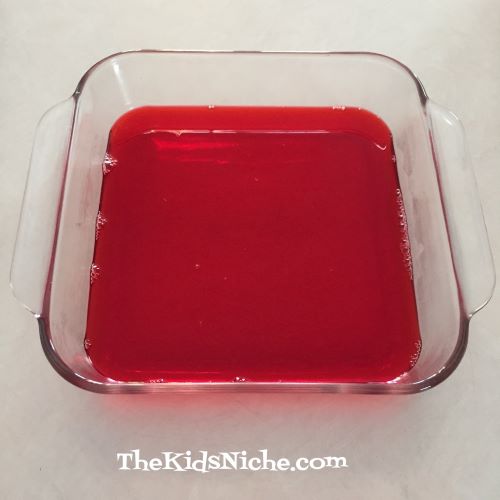
Bring the water to a boil and stir it into the Jello.

Pour the Jello into the pan and put it in the refrigerator for 3 hours to set up.
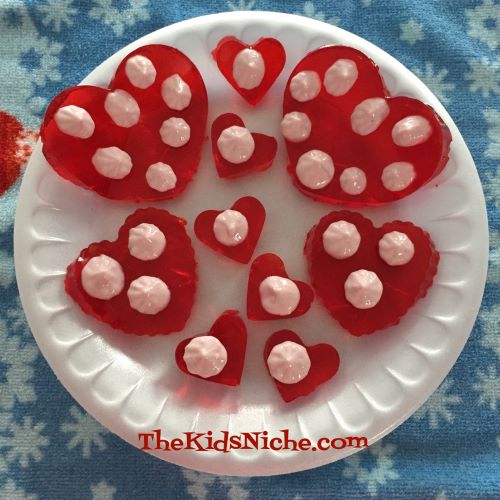
After the Jello has set up firmly, take it out of the refrigerator and gather your heart shaped cookie cutters.

Press your cookie cutters down into the Jello. A word of caution…I found it more difficult to remove the larger hearts so you might want to stick to using smaller sized cookie cutters. Also dip the bottom of the pan into hot water for a bit to help the bottom of the Jiggler to come free. Remove the Jigglers carefully, using a small spatula to help get them loose. Arrange on a dish.

For an added flair, you can top them with whip cream or pink colored yogurt.
I don’t recommend feeding these to children that don’t have a mouth full of teeth yet. They take a bit of chewing! 😉 Hug your Valentines close and enjoy your treat together! 🙂
Valentine’s Day is almost here! How about making some heart-shaped crayons for a fun Valentine’s project? Old broken crayon bits or even a brand new set of crayons will both work for this fun craft. You’ll need a mold to put the crayons in and it must be oven proof. I found this silicone heart shaped mold at Walmart for less than $2 and it worked great! This project can be done using a muffin pan but the silicone type is great for getting the new crayons out as the silicone is flexible.

Place your mold or muffin tin on a cookie sheet covered with a piece of foil or parchment paper.

Start by removing all the paper from your crayons or crayon pieces. If the children doing this project are fairly young, you might want to remove the paper before getting them involved as it can be a bit tedious getting it all off. Break the crayons into small pieces. Depending on the size of your mold, you might find it helpful to use a sharp knife to cut the crayons into very small pieces.

Fill your mold sections with the small pieces of crayons. You can keep them as one color or mix and match as you please. The crayon pieces will melt so its good to let some pieces of the crayons stick up just a bit higher than the top of the mold section. They will settle down in as they melt together.

Set your oven on a low temperature setting. I used 170 degrees F because that is as low as my oven will go. Place the cookie sheet with the mold on it into the oven and leave it there for 20-25 minutes. Each oven is a little different so keep a close eye on how the crayons are doing and adjust the time accordingly. The outside heart sections melted quicker than the middle ones did.

After all the crayon pieces have melted, remove the cookie sheet from the oven and let the mold cool. The shapes will set up and harden as the melted crayons cool. Once everything is cool to the touch, remove the newly shaped crayons from the mold.

I love how these turned out! Its a great project for Valentine’s Day or any day of the year! 🙂
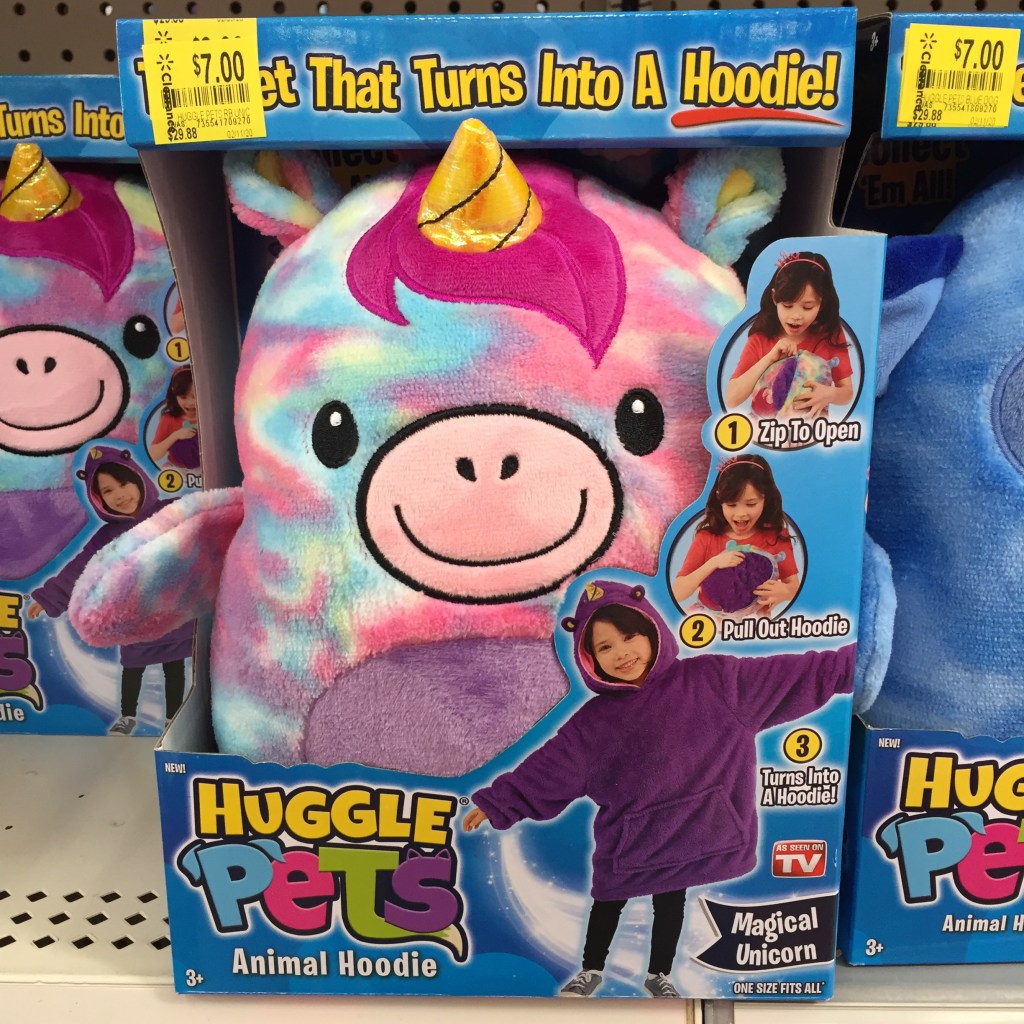
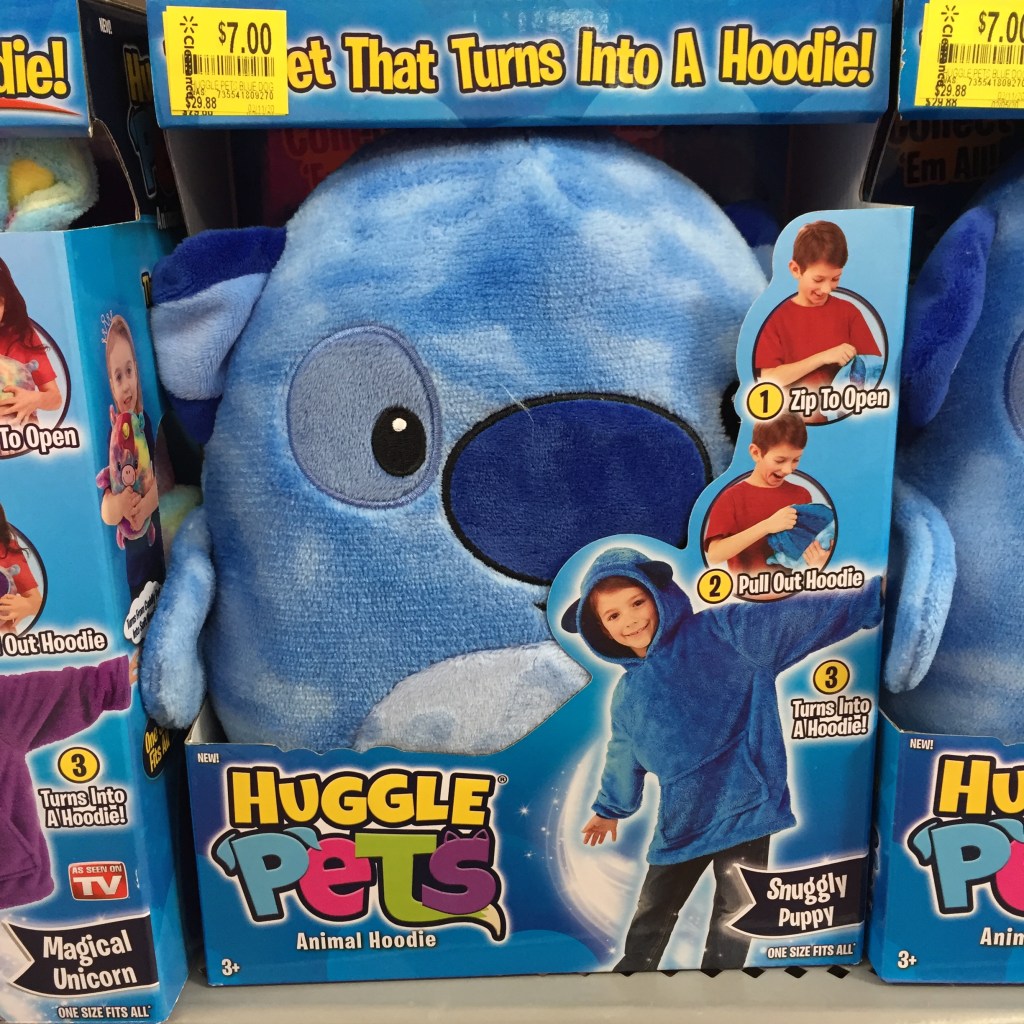
Wow, here is a really discounted clearance deal I saw at Walmart! Huggle Pets! And these little buddies are adorable! It’s a combo of a soft furry friend but opens up into a hoodie! How cute is that?! Our Walmart has them in 3 choices…Magical Unicorn…
A Snuggly Puppy…
And an Awesome Dinosaur.
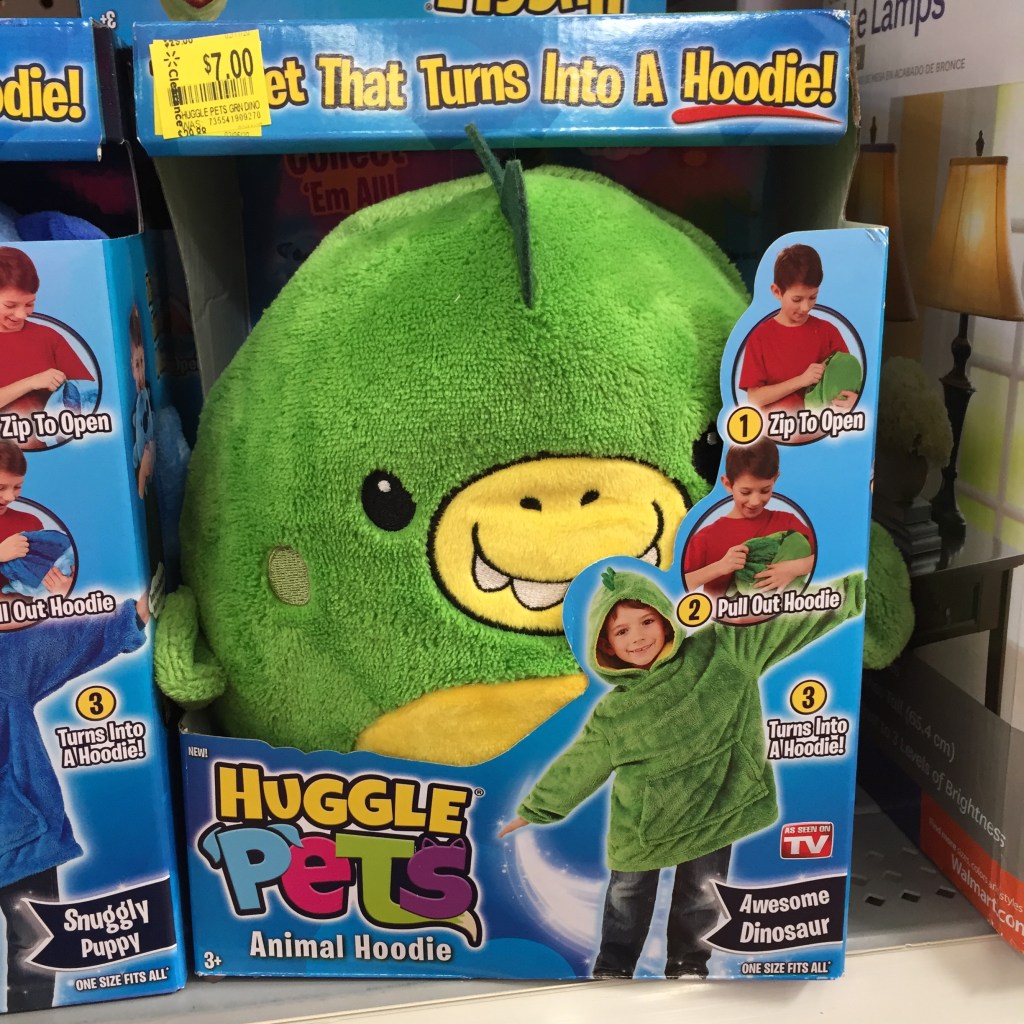
These cuties are normally priced at $29.88 but are on sale for $7.00!!! Wow!! If you want one, RUN to your nearest Walmart! Or call and ask if they have them in stock. Good luck!
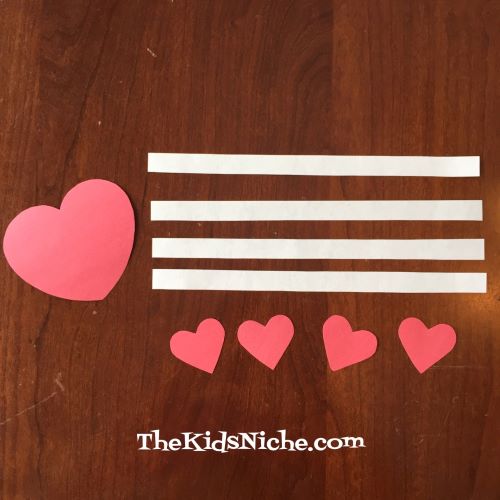
Wow, I can hardly believe that Valentine’s Day is a week from today!! Are you looking for a fun craft for the kids to do for Valentine’s Day? Here’s a cute little guy that I used to make when I was a little whippersnapper. It doesn’t take much to make it…red or pink paper, white paper, scissors, glue or tape, a marker and, if you have them, heart shaped cookie cutters. If you don’t have the cookie cutters, no problem! You can draw hearts to cut out.

First thing to do is to make 1 large heart and 4 small hearts out of the red or pink paper. I traced around cookie cutters.


I used a piece of printer paper for my white paper. Make 4 strips of paper approximately 1/2″ wide by the width of the paper. (8 1/2″)

You should have 1 large heart, 4 small hearts and 4 strips of white paper.
Draw a face on the large heart with a marker or crayon or pen. Make it as silly or as sweet looking as you like.

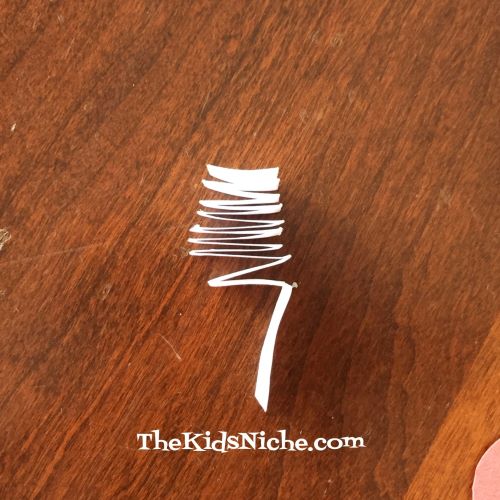
Take one strip of paper and beginning at one end, fold it back and forth in accordion style. Then repeat that with each of the other 3 strips.
Glue 1 small heart to one end of each of the 4 strips.
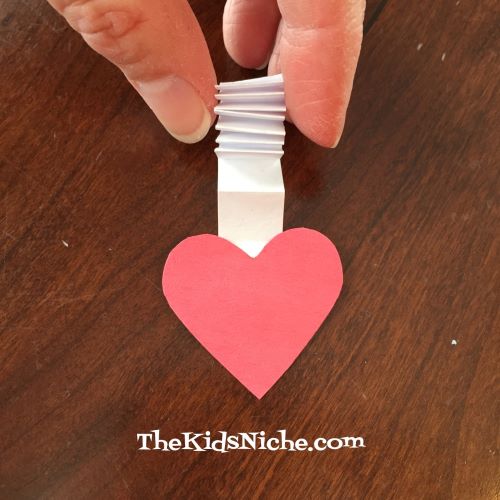

The 4 accordion strips with hearts become this little guy’s arms and legs. Glue them in place like in the following photograph and you’re finished!

You can add a Valentine wish to the back of the large heart and use it for a Valentine’s card to give to your favorite Valentine! Have fun! 🙂
