Make a Picture With Dandelions

Spring seems to have arrived in Ohio and along with it comes the dandelions! Every year we have hundreds of dandelions and even though they are considered a weed, their bright yellow color sure perks things up. 🙂

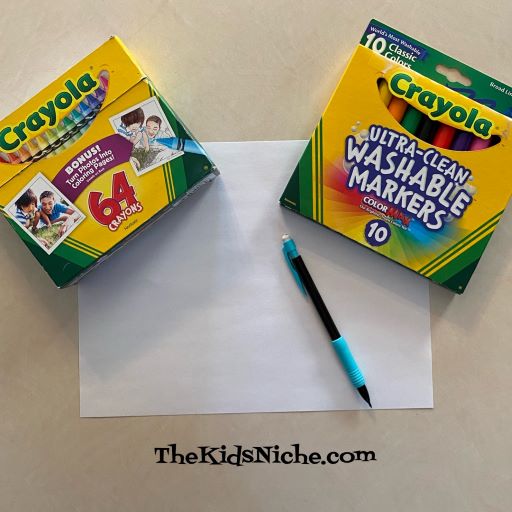
Today I wanted to share a fun way to make a picture using dandelions. All you need is a piece of cardboard, some markers and dandelions. Oh, and an adult to poke some holes in the cardboard.

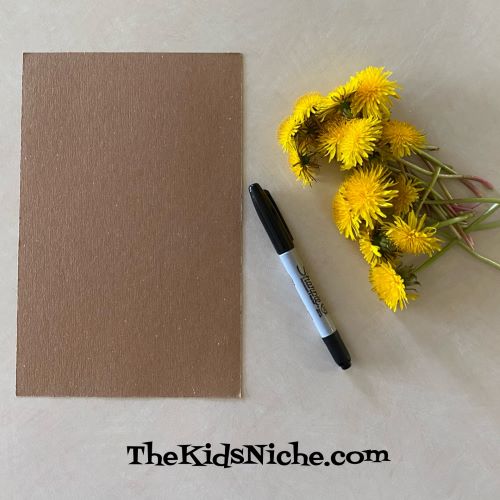
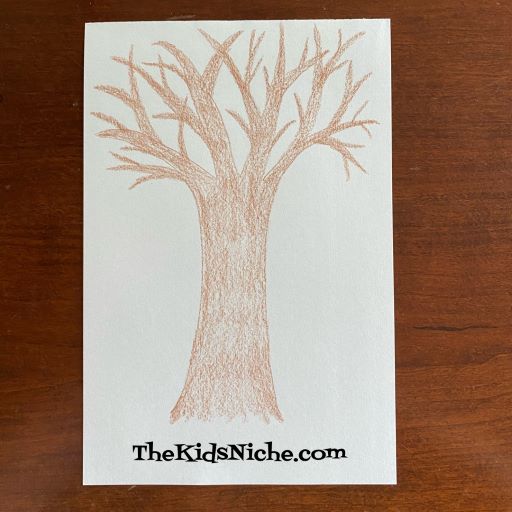
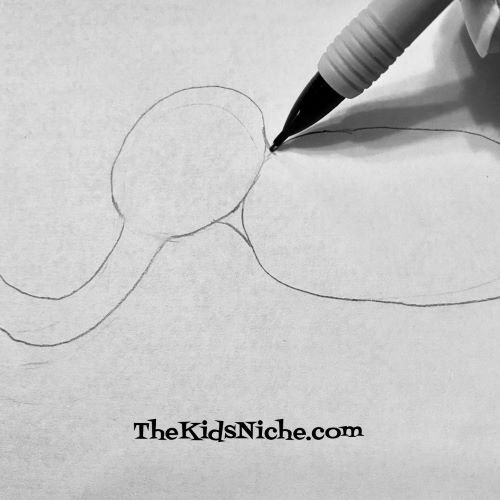
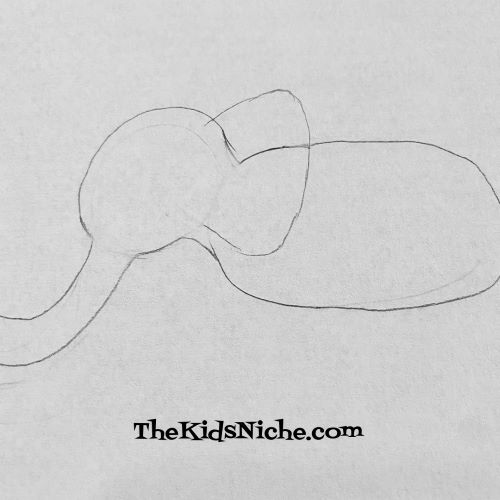
I show some dandelions in that picture, but it’s better to wait to pick your flowers until you are ready to use them. They wilt rather quickly. Let’s start by drawing a vase on the cardboard. It doesn’t need to be perfect. (As you can see mine is crooked. LOL)

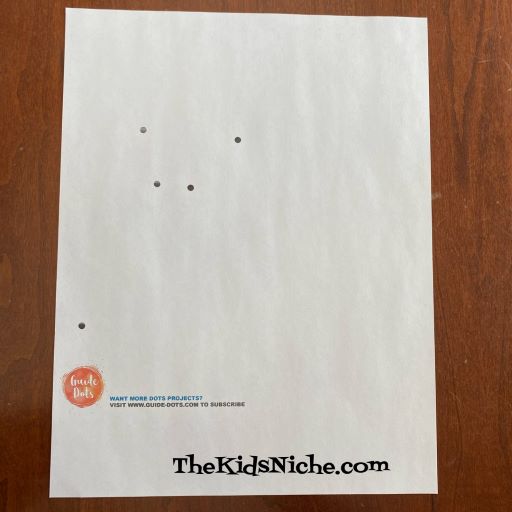
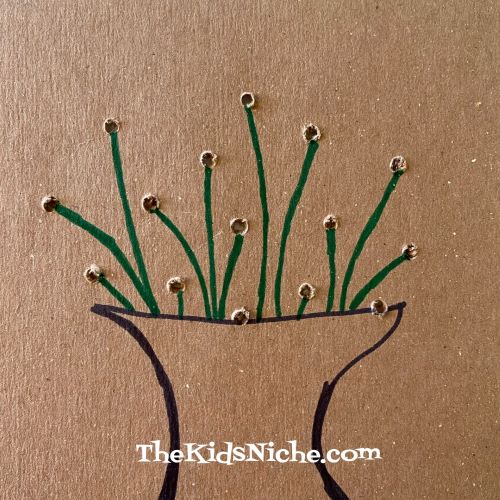
Have an adult poke several holes in the cardboard above the vase. Your dandelions are going to go here so make the holes big enough for the stems of the dandelions to fit through.

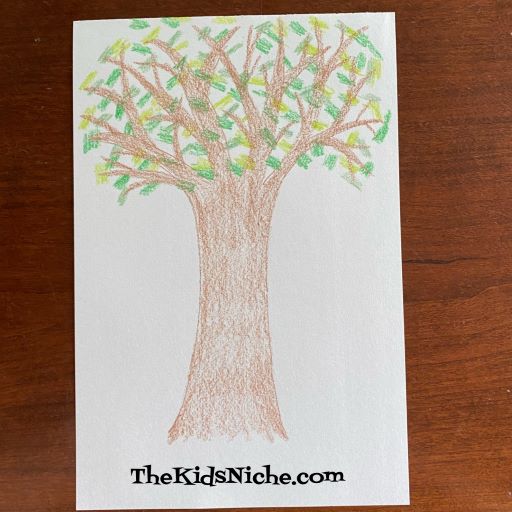
I drew stems from each hole down to the top of the vase, but I used enough dandelions that the stems were covered up. So it’s up to you if you want to draw stems or not. 😉

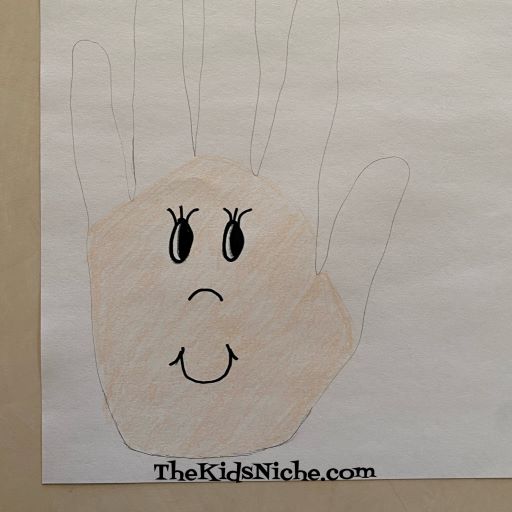
You can color your vase to add some more color to your project.

Now you are ready to head outside and pick some dandelions! Pick one flower for each hole you have. Slide the stem of the dandelion in from the front to the back. And voila! 🙂 You have a vase of flowers!

I hope you are having some sunshine and warm temperatures wherever you are! 🙂 Till next time…

Draw Your Own Squishmallows

Do you own a Squishmallow? They seem to be very popular now and I’m kinda behind the times on learning about them. Our granddaughter got a BUNCH of them for Christmas and now I know why everyone likes them! They are sooo cute and sooo soft and well, squishable! 🙂 (I’m thinking I might need one…or a few!)

And then there were mini squishmallows too! 😉

Our granddaughter has been tracing characters and coloring them and that gave me the idea that it would be fun to draw Squishmallows. There are a couple of ways you can do that. One way is to find a picture of a Squishmallow online and save the picture to your tablet.

Lay a piece of thin white paper over the picture and trace the outline of the Squishmallow.

Take the paper off the tablet and color the picture with your favorite crayons, markers or colored pencils. Use the picture as a guide for what colors to use.

Molina is actually white but the white part didn’t show up in a picture so I colored her a light color so you could see her better. Another way you can trace/draw a Squishmallow is to print an online picture first.

Hold the picture up to a window (or tape it on the window) and use a piece of thin white paper to trace it just like we did with the first one.

Color the picture and ta dah! You now have a drawing of Gorm too!

You can make a whole collection of Squishmallow drawings to decorate your bedroom or maybe you’d just like to do one or two. I hope you will have fun drawing your own Squishmallows! 🙂

A Simple Tree for Kids to Draw

Hi there! Welcome to a new week of fun things for kids to do! Today I want to show you a way for kids to draw a cool tree.

All you need is a piece of paper and a brown crayon and several different shades of green crayons. You might want to start out with a smallish sized piece of paper, say, around 6″ x 9″. A full sheet of paper for this tree could take quite a while to finish and therefore lose your child’s attention.

Grab your paper and your brown crayon and here we go! Start by drawing the outline of a tree with a few main branches.

Color the tree trunk and branches with your brown crayon.

Add a few branches to each of the main large branches on your tree.

Then add a few more smaller branches to the medium sized branches you just drew. It’s fine if your branches overlap each other.

Switch to a green crayon. Color small little patches all over the tree branches. Don’t cover the entire tree because you will switch and use a few more shades of green to fill up your tree with leaves.

Switch to the second shade of green crayon and make some more small patches of green.

Continue adding small patches using as many shades of green crayons you have. Green color number 3…

Green color number 4…

And number 5… If you don’t have 5 different colors of green, just use as many different greens as you have. Continue making leaves until your tree is as full as you would like it to be.

Your tree can be finished now or you can add a few more details. Maybe you would like to lightly add some different shades of brown to your tree trunk and branches. Or maybe you would like a hole in your tree trunk for some animals to nest in. Some green grass around the bottom of the tree would be great.

Using a red crayon, you could add some tiny little red circles to your tree for apples. 🙂

And your tree looks wonderful! Great job! Remember, all the gazillions of trees in the world and none of them look exactly like another. 😉 Your tree is unique and is as wonderful as you are! 🙂 Have fun and maybe draw a whole forest of trees! 😉

Draw a Very Cool Dragon with Guide-Dots

I came across a Facebook ad today that I think is worth telling you parents/grandparents about. It’s called Guide-Dots. I am NOT affiliated with them in anyway, but they offer a free trial of their product and I found it quite fun to do. Yes, they are trying to sell you something (which looks pretty cool) but you can just do the freebie if that is all you are interested in. If you give them your name and email address, you can participate in the free trial. I think most kids will find it quite fun and entertaining. Here’s a link to the free trial:

You’ll start out with a pdf to download and print the page out.

Yes, there are 5 dots printed on the page. These are used as starting points for the dragon drawing. There are instructional videos that you follow to learn how to draw and color the dragon. Ms. Cindra leads you through each step and then you have time to do your drawing or coloring step before moving on to the next step. Here we have 2 dragon eyes! 😉

Part of his head…and look at those teeth!

And now we’ve made the dragon, though just a pencil drawing so far.

Using some markers to begin coloring the dragon.

And finally finished up with some crayons.

It’s a fun project that will keep the kids busy for a little while. And if you are so inclined, you can sign up to purchase more projects from the company. Enjoy! 🙂

“Hand” Drawings for Kids

Have you ever traced around your hand with a pencil and paper and turned that hand into a picture? One popular way is to make a turkey at Thanksgiving time. But today we’re making some new friends by tracing around our hands and coloring them in with crayons or markers.

All you need is a piece of paper, a pencil, crayons or markers and your hand. 😉

Start by placing one hand on the paper and using your other hand to trace around your entire hand and in between each finger with the pencil.

This will be a girl so draw a sweet girl’s face.

I used a Peach crayon to color her face.

I chose blond hair for my girl and colored her hair…or the fingers…with a yellow marker. (The marker did make the paper bump up for some reason.)

Add a couple of bows to her hair and a little pink color to her cheeks and you’re finished. I’d like you to meet Hannah. 🙂

Hannah would like to have a friend, so let’s make a boy too. Trace around your hand again on the other side of the paper. Or on a new sheet of paper if the first one is out of space.

Draw an ornery face…boys are rather ornery, aren’t they? 😉

Color his face in with a crayon…I used Peach again.

Color in his hair. I decided to give my boy brown hair. And ta dah, he is finished too! Now I would like you to meet Hans. 😉

And there you have 2 new friends…Hannah and Hans. (Get it? Hannah and Hans made from hands? Haha!) 😉

I hope you will have fun drawing some Hand Friends! 🙂

Let’s Draw Monsters!

October is the month for witches and goblins and ghosts aaaand….MONSTERS! So let’s look at one easy way to draw funny or scary monsters! There is no right or wrong way when drawing a monster because, well, monsters come in every shape and size and design, right?! They can be any color you want them to be and have as many (or few) eyes and arms and legs. This is YOUR monster! You’ll need just a few things…a piece of paper and some markers. Oh, and some wiggly eyes make them even cooler!

First, draw some shapes or blobs with your markers. Remember, any shape is A-OK! Yep, even a flower is great.

Next place some wiggly eyes on your monster shapes. You don’t need to glue them down yet unless you want to, then that’s ok. I didn’t glue mine down yet, just in case I wanted to move them as I continued designing my monsters.

Now add more details like noses, mouths, arms, legs, hair, etc.

When you’re finished adding details, glue the wiggly eyes down, if you haven’t already done so. And you did it! You are a MONSTER MAKER!! Great job! I’ll show you my monsters in closer detail to give you some ideas.

This one looks like a person…maybe he or she is making friends with the monsters?

This monster has 3 eyes, 4 arms and 3 legs. Wow!

This orange guy has short arms and legs, funny hair and 3 eyes.

Here’s a one-eyed flower monster running away from something.

Whoa, this monster’s eyes go up and down instead of across! And look how big his ears are!

This guy might have been scared by someone…is it YOU? Maybe the monsters are scared of people?

I hope this will give you some fun ideas about how you can draw some monsters. You can even make up a story about your monster. Or draw them a house…or a pet…some trees…you get the idea! Have fun! 🙂

Fun Pencil and Paper Games

Are you looking for an entertaining game to play with a group but you don’t have many supplies handy? All you need for these crazy drawing games is some paper and pencils. Give each participant a sheet of blank paper and a pencil. Let the fun begin!

For the first game one person gives out the directions for what to draw. The funny part is that everyone is given the same directions, but all the pictures look differently. These are the directions we used:

1.) Draw a tiny oval body.

2.) Add a giant head.

3.) Draw 2 short legs and 2 arms.

4.) Draw 2 little eyes and a mouth.

5.) Add 2 ears.

6.) Add a long tail.

Pretty simple, right? Now look at the 9 different pictures we ended up with:

We all had a good laugh when sharing our pictures. 🙂 I think you can easily find the one with the longest tail! Haha!

For our second game, each person thought of something simple to draw. It can be anything you want, but you will be drawing it 4 times so you probably want to make it fairly easy to repeat. For the first drawing, everyone draws with their dominant hand. In other words, whichever hand you write with is your dominant hand.

Drawing #2 is drawn using your non-dominant hand. If you are right handed, this one you draw with your left hand. You can compare the first picture with the second picture to see if you can notice any differences.

For the 3rd drawing, draw the same picture as before using your dominant hand again, BUT draw it with your eyes CLOSED! No peeking allowed! 😉 You can see that it was hard to keep things lined up!

For the last drawing, you must place your piece of paper on the bottom side of the table. Yes, under the table! Again, no peeking! Hopefully you can each find a smooth spot on the bottom side of the table to draw on. Look how crazy these pictures turned out!

Pretty funny! You can probably think of more goofy ways to draw if you want to make the game last longer. Like putting the pencil between your toes or placing your paper on the top of your head. You’ll all have a good laugh when you share your pictures with each other. 🙂 Have fun and happy drawing!

Drawing Owlvin Owl for Kids

How about some drawing fun today? Owls are such awesome animals that I think it would be great fun to draw one. As the title of this blog post tells you, I named my owl Owlvin. (Of course, you can name your owl something totally different.) Grab a piece of paper and a pencil and let’s start with a nice plump oval shape which will be the owl’s body.

Next we’ll add a wing on each side of the body.

Add 2 circles towards the top of the oval for eyes. And put a little black dot inside each circle.

Draw a triangle for a nose and add a little mouth.

Let’s add a couple of little tufts at the top of his head.

Now you can add a little tummy.

Draw 3 toes on each side for his feet.

A few lines can be added to make him look more like he has feathers.

Once you have the drawing just the way you want it, you can go over all the lines with a black pen or fine line black marker.

After the ink is completely dry, you can very lightly use an eraser to remove any leftover pencil marks that you can see. Last but not least, give your owl some color.

All finished! Great job! What color is your owl? And what did you decide to name him or her? I hope you’ve had fun learning to draw owls! 🙂

Drawing Eloise the Elephant

We haven’t drawn anything in a while so let’s do another drawing activity today! We’ll start with some simple shapes and we’ll end up with Eloise the Elephant! 😉

Grab a pencil and eraser, a piece of plain paper, a black pen or thin writing marker and something to color with. Here we go! Start by drawing a nice fat oval laying on it’s side.

Add another smaller oval which will be the elephant’s head.

Elephants are known for their trunks so let’s draw a trunk for Eloise next.

Add 2 small curved lines to better connect the head and body and make a neck area.

Now you can erase the lines of the 2 ovals that are between the 2 little curved lines you just drew.

Draw an ear. Then erase the lines that are inside the ear area.

Add just the top part of the second ear…it’s behind the elephant from our viewpoint so we can only see a small portion of it. Also draw in an eye, the bottom part of the mouth and 3-4 lines on the trunk.

Let’s move down and draw in 4 legs. Only 2 legs are seen completely from this viewpoint so draw in 2 legs using a rectangular shape. Then add 2 more legs that you can only see part of. Make the 2 legs that are on the other side of the elephant’s body a little shorter than the 2 on our side.

Erase the lines of the body that are on the 2 legs we can see from this side of the elephant.

It’s time for her tail!

Add some toes on her feet and some lines on her legs to show her wrinkly knees.

If you would like the outline of your elephant to be darker and more permanent, you can use a black pen or a marker that draws a fine line and trace back over what you’ve drawn.

After you are very sure that your ink is dry, you can gently erase any leftover pencil markings that are showing up. Test a very small spot first to make sure the ink won’t smear. That’s what I did, but you might not be able to tell the difference in these pictures.

Get out your coloring supplies and give Eloise some color! 🙂 And you’ve done it! Eloise is now ready for any adventure you can dream up!

I hope you’ve had fun drawing an elephant with me! Of course, you can name your elephant something different from Eloise. 😉 If you really enjoyed today’s activity, you can draw a whole herd or parade of elephants!

Sidewalk Chalk Art Fun

Last week we had 4 of our 6 grandchildren staying with us. It was sooooo nice and we had a good time! Their mom had her birthday on one of the days the kids were staying here, so we made some sidewalk chalk drawings for her for her birthday. Have you tried sidewalk chalk? It’s great fun and the next rain will wash it away for you. Sidewalk chalk is available at stores like Walmart, Target, etc. Here is our granddaughter getting started on her design.

Can you guess what she is drawing? If you said, a unicorn, you are exactly right! She LOVES unicorns! And she drew a pretty nice one!

The kids had a lot of fun making their sidewalk chalk art. There really isn’t anything you need to know ahead of time for this project. Just buy some sidewalk chalk and start drawing! Here are some more pictures they made:

Did you notice the beach theme? Their mama likes to go to the beach so they were trying to make her happy for her birthday. 😉 They took pictures of their artwork and sent them by a text message to their mama. Even Grandma and Grandpa got in on the action!

Playing with sidewalk chalk is cheap and good for the imagination and helps work on using those fine motor skills. Did I mention fun? Yep, it’s a lot of fun to draw outside and to watch your picture take shape and the pictures of others too. I hope you’ll take some time soon to make some sidewalk chalk art! 🙂