We’re coming at you today with another fun card that kids can make for Valentine’s Day. All you need is a piece of paper, colored pencils or crayons and a black marker.
My paper is construction paper so I cut it in half.
Take 1 of the pieces and fold it in half to make a nice size for a card.
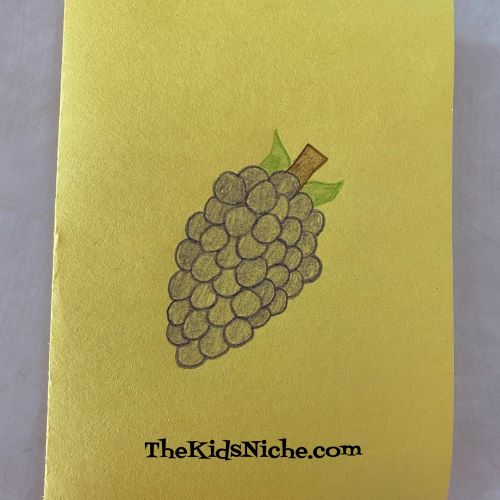
Now draw a bunch of grapes on the front of the card. Draw circles and partial circles to make the grapes. I used a purple colored pencil but grapes can be other colors too.
Keep drawing and coloring in the grapes until you like how big your bunch is.
Add a brown stem at the top of the grapes.
Use green to draw in a couple of leaves.
Now add a simple face. I used a black marker to draw 2 dots for eyes and a curved line for a mouth.
Add the words “I love you a “bunch”! ” at the bottom of the card.
Open the card and on the right hand side, draw another bunch of grapes like you did on the front of the card. Write the words at the bottom…”Have a “grape” Valentine’s Day!”
Remember to sign your name. Give it to someone special on Valentine’s Day! I hope you enjoyed today’s craft! Have a “grape” weekend! 😉
We’re back with another great Valentine’s Day craft project! If you saw yesterday’s post about a tissue paper heart activity and you saw that I suggested you save the stencil looking part of that project for another project, this is it!
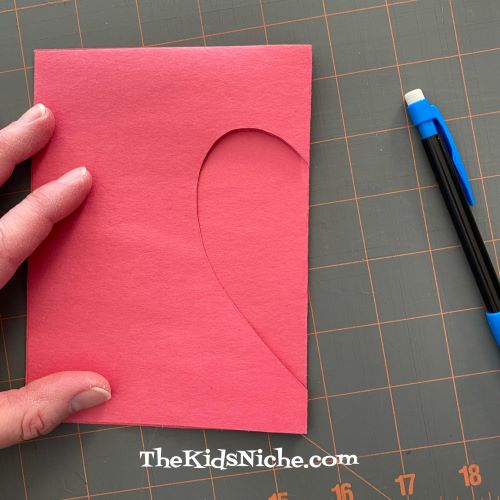
If you didn’t see that post, what you need to do is cut a piece of construction paper in half. Then taking one of those pieces and fold it in half.
Draw half of a heart shape on the folded edge of your paper. Then cut along the line you drew. When you open it, you will have a heart. 🙂 For this project, we will be using the piece with the heart cut out, but you might want to save the heart to use it for something else.
For today’s project, you will need another half sheet of construction paper, a pencil, scissors, glue and several different colors of tissue paper. First cut a 1″ wide strip from each color of tissue paper. You will need only a short piece of each color. (I had a lot left over!)
Now, take the half piece of construction paper and fold it in half. Lay the first stencil on top and trace the half of a heart on the fold like you did for the first one.
Cut out the second heart so you have 2 matching pieces.
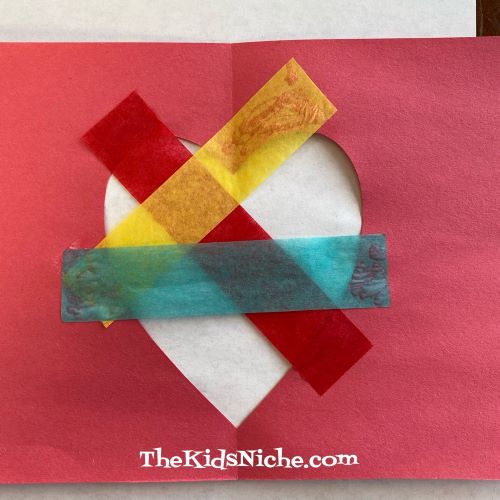
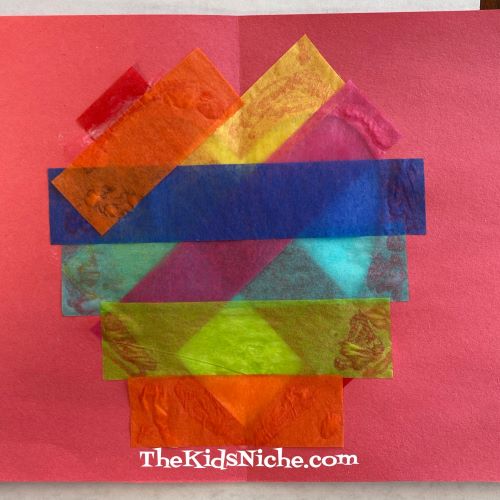
Unfold the 2 pieces. Place the side that you drew on facing up. This will become the backside of the stained “glass” heart. Using the strips of tissue paper, lay one across the heart opening and glue the ends down.
Take additional pieces of the tissue paper strips and place them, one at a time, in different directions over the heart opening…and glue the ends down.
Add a few more strips…
Keep adding strips until all the open spaces of the heart have been covered with tissue paper.
Take the other piece of construction paper you cut the heart out of and apply glue as it is shown in this picture.
Place it on the paper you have been gluing the strips to so that the edges meet and the 2 hearts match up. This will cover up all the ends that you glued down and allow the light to shine through the heart cutout. And there you have it! You’ve made a stained “glass” Valentine heart! Put it up to a window and look how pretty it is when the sun shines through the heart!
Doesn’t that look nice? Make as many as you like (Or as many as your parents will allow!) and put them close to your windows to make your house look festive. 🙂 You could also make a hole at the top and put a piece of string through so you can hang up your stained “glass” art. I hope you had fun today! Check back for more Valentine’s Day ideas soon!
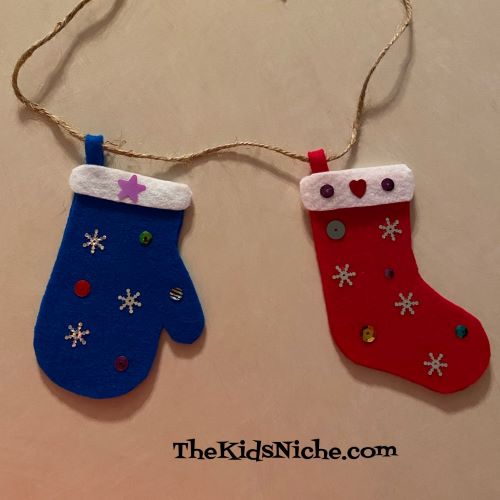
Are you looking for a craft to occupy your kids? May I suggest this easy and fun garland made from felt mittens and stockings? You’ll need some paper to draw a pattern on, a couple colors of felt, craft glue, scissors, some string or twine and a few small decorative snowflakes, buttons or winter items (optional). Here’s what my finished project looks like:
You can make your garland as long as you like using as many mittens and stockings that you want to make. Let’s get started!
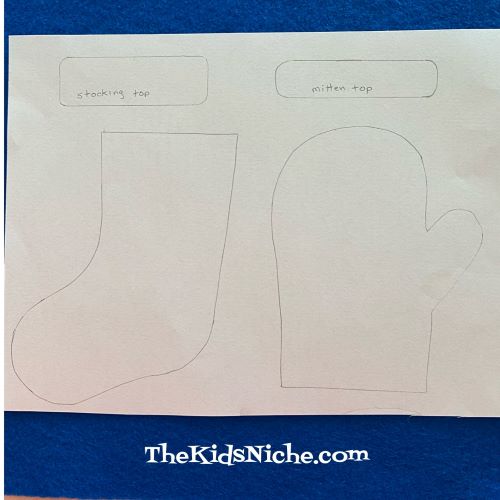
First, draw a pattern for your mitten and stocking. Mine are around 4 1/2″ to 5″ long and around 3 1/2″ wide. I also made a pattern for the top white part for both the mitten and stocking.
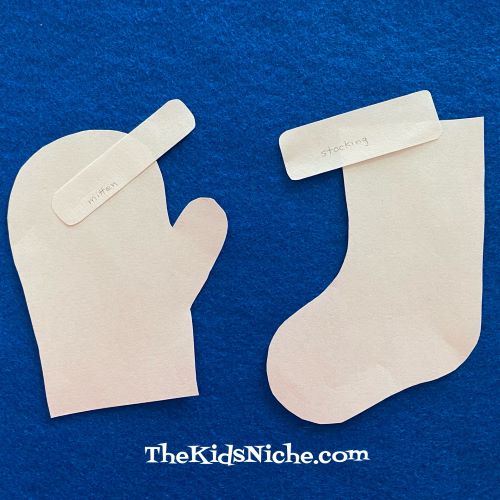
Cut the pattern pieces out.
Gather your felt pieces. You can use whatever colors you like. I used only red, white and blue for this example. If you are making a lot of mittens or stockings, you might like to have more colors available.
If your felt is a thick type, you could use just one thickness of felt for each mitten or stocking. The felt I have is the thinner variety and rather see-through so I cut out 2 pieces for each mitten and stocking. Cutting 2 of each also makes the stocking able to have something small and light inserted inside it. (Like maybe a candy cane.) I cut 2 topper pieces for each mitten and stocking too.
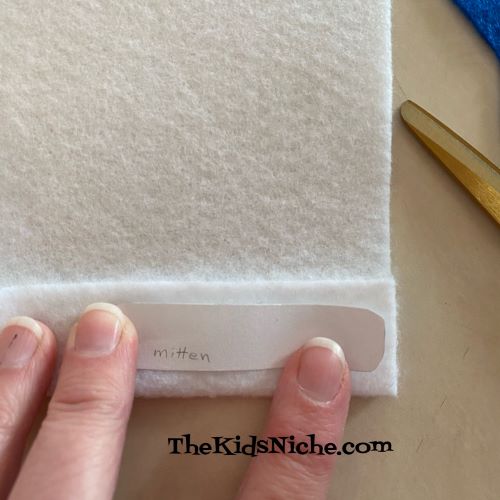
I folded my felt over and just held the pattern piece in place while I cut around the outside edge of the pattern. You could trace around the pattern or cut each piece separately, depending on what works best for your kids and for the thickness of the felt you have.
It will be easier to cut the topper pieces if you cut a little section of felt away from the rest of the piece of felt first.
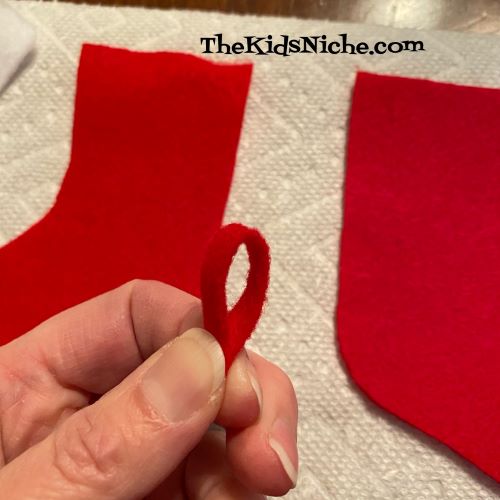
Cut a little strip of felt for the loop to hang your mitten or stocking from. You will fold it in half and glue the end pieces together.
If you are using just one layer of felt for your mitten or stocking, you can skip ahead and just glue the white topper part to the colored part of the stocking or mitten. If you are using 2 pieces, grab your glue and let’s put these together now.
Spread a line of glue along the outside edge of your stocking but not across the top edge. And put a dot of glue on each side in the place where the loop goes.
Add the second piece on top of the glued one and press firmly together, holding for a few seconds while the glue starts to set up.
Spread another line of glue and put the first white piece of topper at the top of the stocking. Turn the stocking over and spread another line of glue for the second piece of topper. Hold for a few seconds again.
Now for the best part, decorate your stocking! Glue on any little snowflakes or stars or buttons you might have. Or spread a little glue and sprinkle on some glitter. Gently shake off any extra glitter.
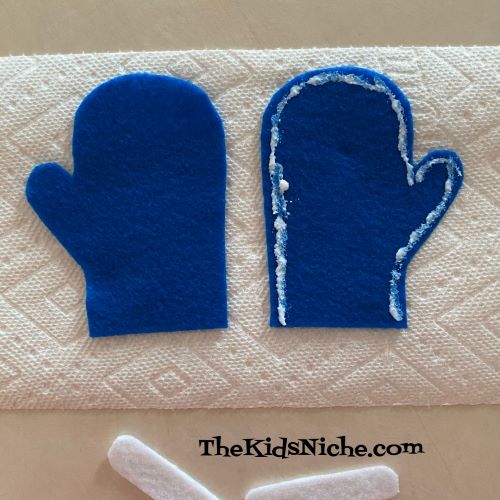
Follow the same directions for the mitten. Glue around the outside edge but not on the opening side of the mitten. Add your loop in now. (I forgot to add my loop now and I had to add it in later. Oops!)
Add the second layer and press together. Spread a line of glue for the first topper piece and add it on.
Flip the mitten over and spread glue for the second topper piece and add it. Press together for a few seconds.
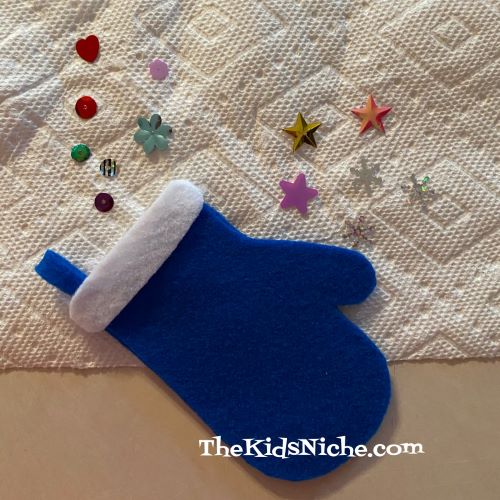
Decorating time!
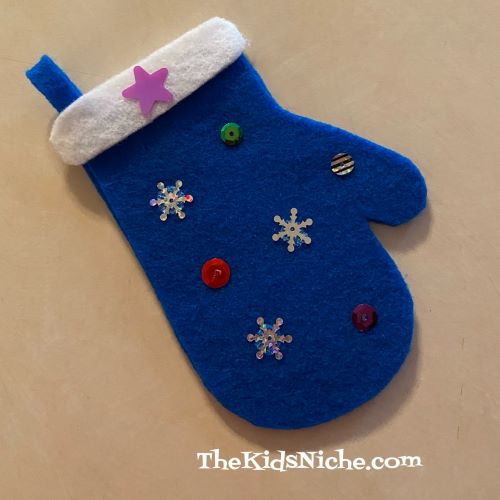
Ta dah! My mitten is complete!
Make as many mittens and stockings as you would like to get the length of garland you want to hang up. The last step is to thread your string through the loops of the stockings and mittens…and have an adult help you hang it up for all to enjoy!
I hope you have enjoyed our craft project and you will have lots of fun making stockings and mittens to give your house a warm, holiday feeling! 🙂 Happy holidays!
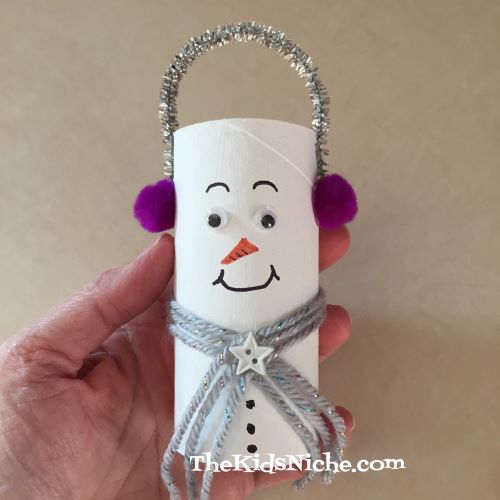
How do you feel about snowmen? I love them!! Especially the crafty kind that you can make in your house and they never melt! 😉 We had some cold days recently that felt like winter and we even had a light dusting of snow, so I got to thinking about snowmen and decided to make some. (Now it’s warmed back up and the temperature has been in the 60’s.) This is an easy craft for kids and takes just some “normal” kind of things you might have around your house. Let’s take a look at my snowmen…
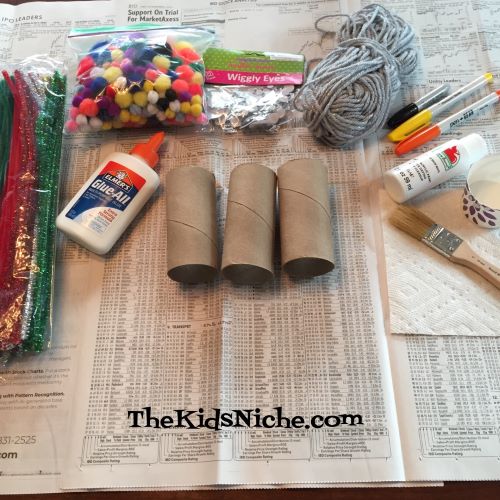
I thought they turned out to be pretty cute! Some things that you’ll need to make these snowmen are empty toilet paper rolls, white paint, paint brush, pipe cleaners, small pom poms, ribbon or yarn or felt, maybe a button or two, wiggly eyes, orange and black markers and either a bottle of glue or a glue gun. (I used the glue gun.)
The first step is to paint the empty toilet paper rolls with white paint. Let them dry however long your type of paint requires.
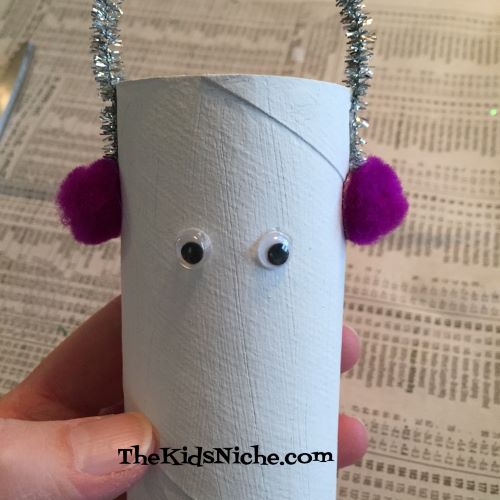
Glue on 2 wiggly eyes. It doesn’t really matter what size the wiggly eyes are. I used 3 different sizes for my snowmen.
Cut a pipe cleaner in half…or even smaller…to use for the top part of the snowman’s ear muffs. Glue the 2 ends to opposite sides of the toilet paper roll. Place the ends on either side of the eyes in a place where the snowman’s ears might be if he had some. 😉
Next glue a pom pom over each end of the pipe cleaner to finish making the ear muffs.
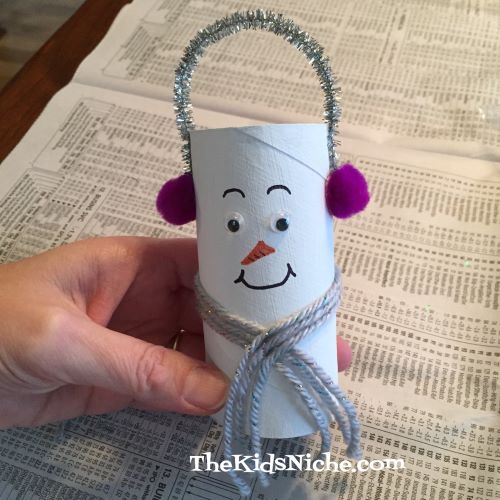
Use the orange marker to draw a triangle below the wiggly eyes to be the snowman’s carrot nose. Use the black marker to draw on a mouth and eyebrows. (I drew the eyebrows on after I took the next picture. Oops!)
For the snowman’s scarf you can use pieces of yarn or ribbon or felt or fabric…you get the idea. 😉 For this snowman, I put 3 pieces of yarn together. Glue the scarf in one spot on the back of the snowman. Then wrap each side around to the front and cross one side over the other and glue in place.
I glued a little star button on top of where the 2 sides cross in the front. You can add 3 black dots for the stones or buttons on the snowman’s tummy, if you like.
And there you are! Great job! You’ve made a snowman! 🙂
For my second snowman, I followed the same steps, but for his/her scarf I took 3 pieces of yarn and braided them together. I tucked one end around the other in front, like you do when you are beginning to tie your shoes. Then I glued it in place.
For my third snowman, I again followed the same steps, except this time I made his/her scarf out of a piece of ribbon. And I glued on a matching button.
You can make your snowman look however you like. He/she might look different because you have different materials to use than what I had. You can shape his/her mouth in different ways to make him/her look happy or sad or silly. I’m sure he or she will look great! The important thing is to have fun making your snowmen! 🙂
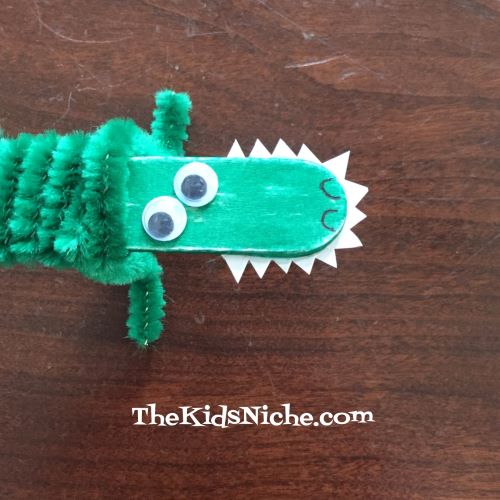
Here are a few hints about what project we will be making today – it’s green, has 4 legs and lots of sharp teeth! Can you guess what it is? An alligator!! Whoa! Alligators are scary, aren’t they? Well, the REAL ones are, but this alligator is cute and fun to make! Take a look at him…
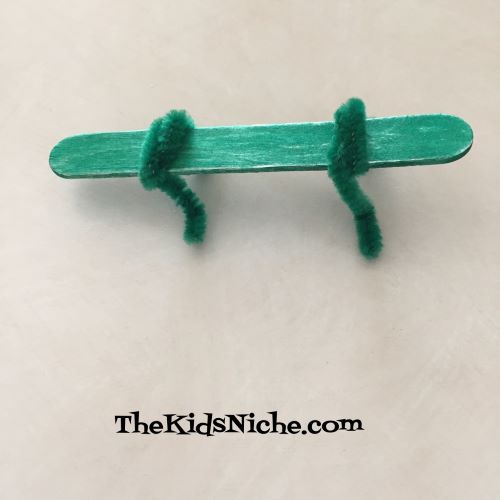
He’s pretty cool, isn’t he? Let’s get started making him! 🙂 You will need 1 flat wide craft stick, 2 green pipe cleaners, 2 wiggly eyes, a small piece of white paper and markers or paint. First you need to color/paint the craft stick green. I used a green marker for mine as it dries much faster than paint.
Take 1 green pipe cleaner and cut it in half. Use each piece to make the alligator’s legs by wrapping it around the stick and bending the ends a little to look like his feet.
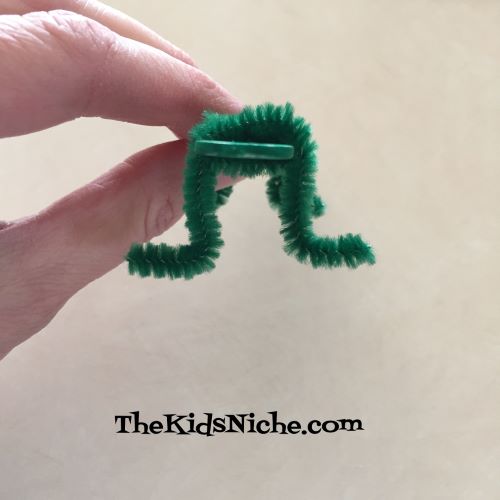
Here’s another view…
Take the second green pipe cleaner and wrap it around the stick between the 2 sets of legs. Slide the legs in to meet the wrapped pipe cleaner so the alligator’s “tummy” is covered by the pipe cleaner.
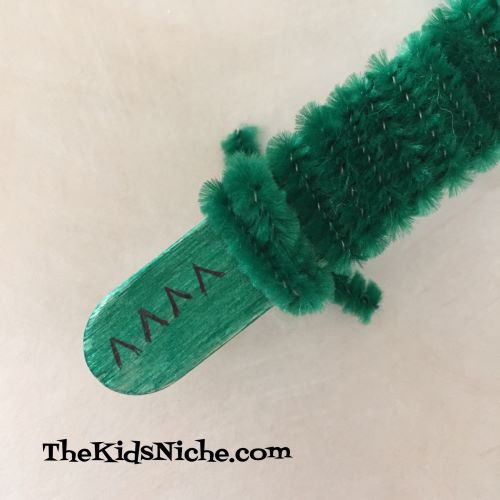
Glue 2 wiggly eyes on. I placed mine close to his front legs so that he has a long nose. I made them a little crooked just to make him look funny. 😉 Draw 2 half circles on for his nose holes.
Next add some “V” shapes to his tail area.
All he needs now is some sharp, pointy teeth! Lay a craft stick on the edge of the white piece of paper and draw some jagged teeth around it.
Cut the teeth out with your scissors and glue them to the underside of your alligator.
And there you have it! All done and ready for some play time adventures!
Great job! Are you going to name your alligator? I’m thinking that Fitzgerald is a good name for my alligator. 🙂 Thanks for stopping by!