Taste Testing Tuesday #40 – Raisins

It’s Taste Testing Tuesday time once again! Gather ’round for another exciting tasting adventure! 😉 Let’s checkout raisins today and some delicious ways to eat them. So what is a raisin? A raisin is just a dried grape. They can be used raw or in cooking and baking. Raisins come in a variety of sizes and colors, but the most common are the brown raisins and the golden raisins. You can buy the general type of raisins or you can buy organic raisins. So how do people like to eat raisins? Straight from the box is a great way!

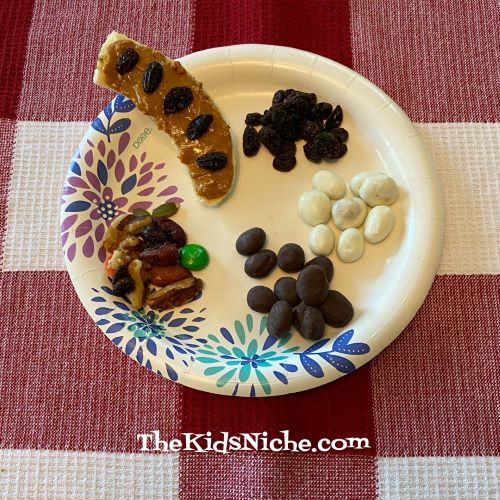
There are vanilla yogurt covered raisins.

And even Chocolate yogurt covered raisins.

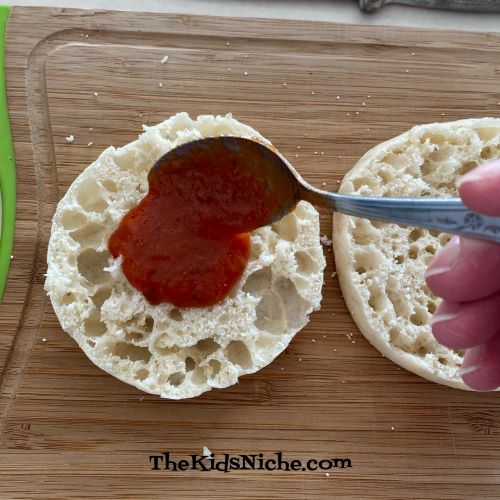
Have you ever tried “Ants on a Log”? It’s simply a banana sliced in half lengthwise, topped with peanut butter and then a few raisins added on top for the “ants”. 😉

Trail mix is a popular way people like to eat raisins. You can pretty much mix together whatever nuts and dried fruit and candies that you like and call it Trail Mix. The one I made has walnuts, pepitas (pumpkin seeds), almonds, pecans, dried cranberries, raisins and M&M candies. It’s a nice mixture of sweet and salty, crunchy and chewy, and (minus the M&M candies) fairly healthy.

Here are a few other ways to use raisins…my mom used to bake them in cookies; some dry cereal has raisins in it, like Raisin Bran; oatmeal is really good with raisins; they are great in salads, especially in a broccoli salad; and cinnamon raisin bread is a favorite of mine! A funny story my husband tells from when he was a little boy is that he used to stuff his cheek full of raisins and then spit the juice on the ground like he was chewing tobacco. Haha! (Ok, so that’s kinda yucky, isn’t it?!)

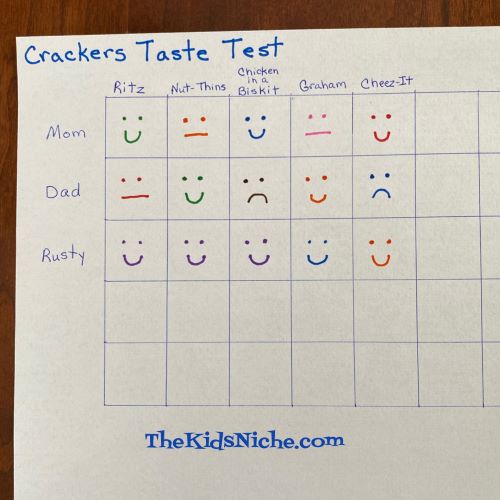
Here’s our little plate, ready for taste testing!

I hope you’ll have fun doing a taste test with raisins and maybe you’ll find a new fun way to eat them! Leave a comment and tell me what is your favorite way to eat raisins! 🙂

Taste Testing Tuesday #37 Pudding

It’s that time again – Taste Testing Tuesday! Today I thought we would check out some awesome pudding flavors. Before we get started, what do you THINK your favorite pudding flavor is? Let’s see if you change your mind after you do this taste test today! I’ll show you 3 flavors that are favorites at our house.

Can you guess what flavors of pudding are in each cup? The colors are orange, dark brown and yellow. Did you make your guesses? Ok, here’s what flavors they are:

#1.) Chocolate

#2.) Vanilla

#3.) Butterscotch

Did you guess the right flavors? I bet you got at least some of them right! Now it’s your turn! What flavors of pudding will you taste test? There are many more flavors available in the store. Like lemon, cheesecake, banana cream, pistachio, cookies ‘n cream, white chocolate and French vanilla. And maybe even more! I think I like vanilla the best, then chocolate and then butterscotch. (Or as my dad used to call it “sutterbotch”. That’s rather fun to say, isn’t it?) 😉 Leave me a comment and tell me what your favorite pudding flavor is and if doing this taste test made you decide you have a new favorite flavor!

Easy as Pie Chocolate Pie

Do your kids love helping out in the kitchen? Or would you like to encourage them to help make food more often? Here’s a super easy but very tasty recipe for a chocolate pie that kids can make! And it looks very nice when you are done. It only takes a few ingredients to make. You’ll start with a graham cracker crust…either one you make yourself or one you purchased.

Then you’ll need some milk, 2 small boxes of instant chocolate pudding, a container of Cool Whip and a few tiny chocolate chips. (You could use the regular size chocolate chips too.)

Start by pouring 4 Cups of cold milk into a large bowl.

Add the 2 small boxes of chocolate pudding mix into the bowl.

Stir with a whisk for 2 minutes.

Immediately pour the chocolate pudding into the graham cracker crust.

Place the pie in the refrigerator for 10-15 minutes until it is soft-set. Then take the pie out and add some Cool Whip to completely cover the top of the pie.

Sprinkle some chocolate chips on top and your beautiful pie is finished!

Store the pie in the refrigerator until it’s time to serve it. This is a great recipe for the kids to make and they will feel so proud when you serve it to guests or family and they can say, “I made this pie!” 🙂 It tastes great too! (I should know…I just ate a piece!)

Taste Testing Tuesday #33 Muffins

We’re baaaaaaack with another Taste Testing Tuesday! Are your taste buds ready to go? What is your favorite kind of muffin? Maybe we can help you find a new favorite flavor or at least expand your horizons a little! We’re going to look at 4 kinds of muffins that I made today.

Don’t forget to make yourself some kind of a chart so you can keep track of what you think of each kind of muffin. Something like this will work but you can make a simpler one, if you like.

Here’s how we did a chart for carrots, in case you want to follow this example for muffins.

Ok, here we go! Drum roll, please!

#1.) Cinnamon Streusel Muffin.

This one came from a Betty Crocker muffin mix. A prepackaged muffin mix is a great way to help your kiddos learn how to bake muffins.

#2.) Wild Blueberry Muffin

This kind is also from a Betty Crocker muffin mix. Yummy!!

#3.) Banana Streusel Muffin

This one is made from scratch and they are really tasty! Just look at them…mmm!

#4.) Cornbread Muffin

Ooo! Bring on the butter and maple syrup! I tend to make cornbread in a square pan most of the time, but baking them as muffins really makes them quick and easy to eat!

So there you have our muffin taste test. I would have a really hard time picking my favorite! There are so many kinds of muffins you can make! There’s chocolate chip, pumpkin, apple-cranberry, chocolate, coffee cake, applesauce, lemon poppy seed and the list goes on and on! Which kinds will you try for your Taste Testing Tuesday? 🙂 Make your taste buds happy!

Taste Testing Tuesday #32 Shamrocks for Breakfast

It’s Tuesday again and here comes another round of taste testing! (Sorry to post so late, but it’s been one of those days!) Today’s taste test is a bit different. In honor of St. Patrick’s Day tomorrow, the test today is to see if you like shamrocks for breakfast or not! 😉 You’ll need a slice of bread, an egg, some green food coloring, butter, some green sugar, cinnamon and a skillet and spatula for cooking.

First, cut the center out of the slice of bread in the shape of a shamrock. If you have a shamrock shaped cookie cutter, that’s a great help.

Keep both pieces of the bread. We’ll use both of them.

Butter the top side of both pieces of bread.

Lay the “outside frame” piece of bread in a skillet, buttered side down. Then spread some butter on the top side too.

Crack open the egg into a small bowl and beat the egg with a fork.

Add a small amount of green food coloring to the egg. Start with a very small amount of food coloring! You can always add more. 😉

Mix the food coloring into the egg.

Turn the skillet on to a medium heat. When the skillet is warmed up, add a little bit of butter into the opening of the shamrock shape.

Slowly pour the green egg mixture into the shamrock opening in the bread.

Turn the heat to low and cover the skillet with a lid. For best results, I would suggest you keep the egg & bread in this position while it cooks. I turned mine over to finish cooking it and the shamrock shape isn’t quite as clear as it might have been if I hadn’t turned it over.

When the egg is cooked through, remove it from the skillet to a plate to serve it. Now for the other piece of bread in the shape of a shamrock. I placed it in the skillet on a medium-low heat and toasted it on both sides.

I removed the shamrock from the skillet and with the butter side facing up, sprinkled it with some green sugar and a little bit of cinnamon.

And there you are! A breakfast fit for any leprechaun! 😉

I hope you’ll enjoy trying this out for St. Patrick’s Day! 🙂

Taste Testing Tuesday #31 – Juices

Here we go with Taste Testing Tuesday #31! (Can you believe we’ve done that many taste tests?!) Today we’re looking at JUICE! To make this a little more fun, I used little tiny cups. The package doesn’t say how big they are but I’m going to say they are 1-2 ounces. (They are actually little shot cups but we don’t use them for that.) I found them at our local Dollar Tree store.

I used 5 different kinds of juice for my taste test. You can use however many you like, of course. Using juices that are different colors makes it more appealing to the kiddos. I bought a couple of small bottles of juice to go with some juice I already had on hand. Pour a little sample of each kind of juice into tiny cups for each person doing the taste test.

These are the juices I used:

#1.) Raspberry Lemonade.

#2.) Apple Juice

#3.) Grape Juice

#4.) Cranberry Juice

#5.) Pineapple Orange Banana Juice

Now for a couple quick suggestions for some added fun. 🙂 Have a piece of paper handy and for each kind of juice, have the kids draw a face representing what they thought of the juice they tasted. They could draw a smiley face if they liked it, a face with a straight mouth for “It’s ok, but not amazing.” and a frowning face for “No, thank you!” A second fun suggestion is to mix some of the juices together and see what they think. For instance, grape and cranberry or grape and apple or cranberry and apple, etc.

Which juice is the absolute best tasting juice? I think grape juice or grape with cranberry was my favorite. I hope you’ll have loads of fun on this Taste Testing Tuesday! 🙂

A Rainbow From Donuts!

St. Patrick’s Day is coming! Will you be looking for gold at the end of the rainbow? Would your kids be happy to find a DONUT at the end of the rainbow? I found the cutest rainbow made from food that would be great for your St. Patrick’s Day celebration! Check this out!

Rainbow Cloud Donuts for St. Patrick's Day. These rainbow treats are perfect for a festive breakfast idea or a class party activity.

It’s just so cute I had to share! This came from Painted Confetti and here is the link to the great idea!

Thanks go to Brandy for this super cute idea! Have fun!

Taste Testing Tuesday #30 – Shredded Chicken

Do you ever feel super rushed at meal time and you need something really fast, but tasty enough for the pickiest eaters? (Does that sound like every day at your house?!) Today’s Taste Testing Tuesday can give you some mouthwatering quick ideas using shredded chicken. Sure, you can buy chicken and cook it up and then shred it yourself, but for some super easy ideas we’re going to use a can of cooked chicken. Easy peasy!

For today’s suggestions, just open the can, drain the broth and shred the chicken with a couple of forks.

We’re going to talk about some ideas where you are just adding a topping to the chicken, not adding it to a casserole or dish. Ready, set, GO!

#1.) Italian Dressing Chicken. This one is great with just Italian dressing drizzled over the top. It would be great to add to a salad too. Can use it cold or hot.

#2.) Gravy over Chicken. Open a premade jar of gravy for this one. You could also heat up some Bob Evans premade mashed potatoes to go under this kind of chicken. Or break up a piece of toast and top it with the chicken and gravy. Much better when heated.

#3.) Ranch Dressing Chicken. This one would also be great added to a salad or put it in a bun and add a slice of swiss cheese for a quick sandwich. You could also chop up some hard boiled eggs to add in and have some ranch chicken salad. Good warm or cold. (I prefer cold.)

#4.) Chicken with Marinara Sauce and Mozzarella Cheese. Open a jar of your favorite pasta sauce and sprinkle on some mozzarella or Italian blend cheese. You could also put this on top of spaghetti. Best when heated.

#5.) Chicken with Honey Mustard. Do your kids like dipping chicken nuggets in Honey Mustard sauce? This will taste similar to that. You could add this on top of half of a toasted English muffin. Can be eaten hot or cold.

#6.) BBQ Chicken. Top your chicken with your favorite barbeque sauce or stir the sauce into the chicken, heat and add it to a bun. It’s finger-lickin’ good! Can be used cold, but is scrumptious when heated!

There are lots of other ways to fix shredded chicken that I haven’t shown here. Like adding taco seasoning, salsa or sauce to the chicken and rolling it up in a soft tortilla with some cheese and lettuce. Or how about mixing it with some soy sauce or teriyaki sauce and using it to top some cooked rice? I hope you’ll make yourselves a chart and keep track of who likes which kind of shredded chicken the best. And I hope it’s sparked some ideas in your mind for some quick and simple meals. Enjoy! 🙂

Taste Testing Tuesday #27- Crackers

Hi everyone! How’s your Tuesday going? Kids going bonkers? Here’s a fun way to get them to sit still for a few minutes! Today’s Taste Testing Tuesday is all about crackers! So round the kids up for a quick silly snack and let’s get started! You can use whatever crackers you have on hand. Here are the 5 we taste tested.

#1.) Chicken in a Biskit

#2.) Almond Nut-Thins Cheddar Cheese

#3.) Honey Maid Graham

#4.) Cheez-It – there are many kinds of Cheez-It crackers but I love the Extra Toasty ones.

#5.) Ritz

For added fun, draw a quick chart…nothing fancy…with a place for each person’s name and across from their name a place to draw a face for each kind of cracker. Something like this maybe:

After they taste each cracker, let them draw in a face that describes what they think of it. A smile means yummy! A straight mouth means it’s ok, but not amazing. And a frown means no thank-you!

Did you notice that Rusty liked ALL of the crackers? Wow! Oh, yea, Rusty is a dog so that might explain it. Haha! 😉 I hope you have fun with our latest Taste Testing Tuesday and you find some crackers that you really like!

Taste Testing Tuesday #26 English Muffin Pizzas

Does your family love eating pizza but its hard to buy one because everyone likes different toppings? I hear you! Enter English Muffin Individual Pizzas! This is the fastest way you will ever make pizza at home and everyone can have the toppings they want! Let’s take a look at what you need for today’s Taste Testing Tuesday: some English muffins, pizza sauce, mozzarella cheese and your favorite pizza toppings like pepperoni, mushrooms, onions, peppers, ham, pineapple, black olives, etc.

Start by cutting an English muffin in half.

Spread each half with pizza sauce. (Or some people use spaghetti or pasta sauce.)

Top with mozzarella cheese.

And now for the toppings! Let each person add whatever toppings they like to their personal little pizza. Here’s one with mini pepperoni slices…

One with pineapple tidbits…

One with pepperoni and mushrooms…

And one with extra cheese.

Now your pizzas are ready for the oven. Special tip: cover your cookie sheet or pan with aluminum foil and cleanup afterwards will be a breeze! 😉

Bake at 375 degrees for 10-15 minutes until the cheese melts and begins to brown just a little. Remember, ovens differ so keep an eye on your pizzas.

Don’t they look scrumptious?! They are! 🙂

Except for cutting the English muffins in half, this meal is a great one for even really young kids to make. Even teenagers can have fun making their own pizzas. Have fun and I hope your bellies are smiling when you finish! 🙂