
Our latest project is drawing flowers using a compass. Not the kind of compass that tells you which way is north, but the kind you use in Geometry class to draw circles. 🙂

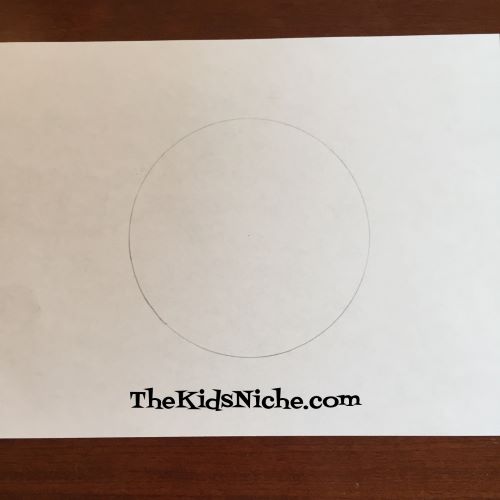
If you don’t own one, don’t worry. They are very inexpensive to purchase. If you have a choice, I recommend buying the all metal type as they stay in place better than this plastic type. Grab a piece of paper too and let’s get started! (I’m using printer paper.) First, decide how big you want your flower to be. You can go with any size you like as long as it fits on your sheet of paper. Using the compass, draw a circle on your paper. Once you draw your circle, make sure the compass stays in the same position while drawing the entire flower. It’s good to note where the compass is set just in case something moves and you need to set it back to where it was.
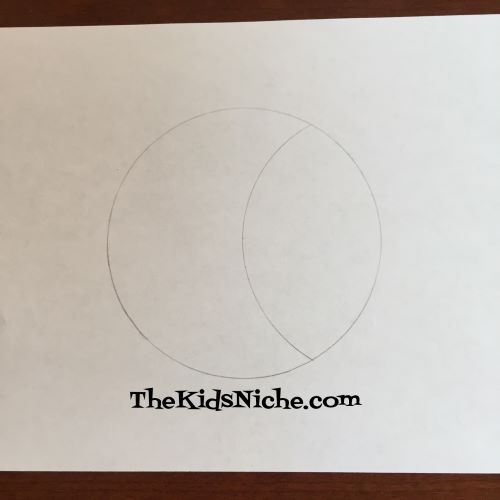
Now put the sharp point end of the compass anywhere on the circle you just drew.

Draw the curved line from inside one side of the circle to the other…as far INSIDE the circle as the compass will reach.
Next, set the point of the compass on one end of the line you just drew where it meets the circle.
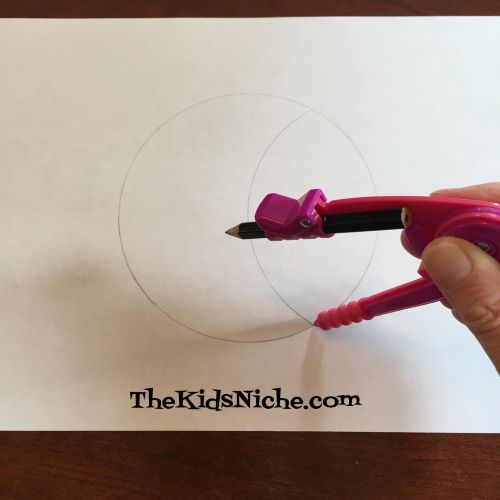
Draw another curved line like the first one…INSIDE the circle as far as the compass will reach.

Continue moving around the circle and placing the point of the compass on one end of the last curved line that you drew.


Do you see the petals of the flower starting to take shape? There are 2 so far.
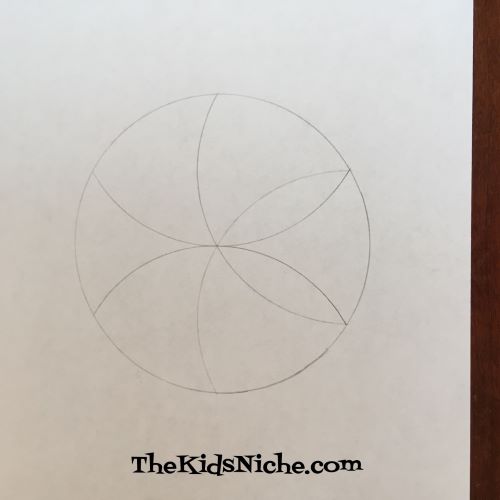
Now 4…
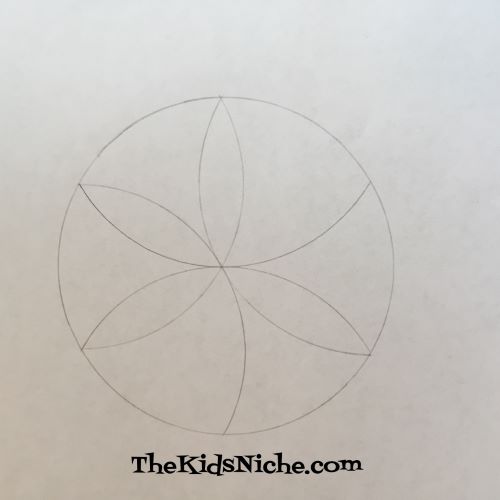
Aaaand voila! You’ve drawn your flower!

Now grab your favorite coloring utensils and color your flower!

To make a more detailed design, make another flower and then set the point of the compass half way between the “petals” and using the same process as before, make another flower.

You’ll have twice as many petals.

There are more sections to color with this version, so you can make it even more colorful.

Another way to use this type of design is to make a flower, then erase the line of the circle itself leaving only the petals.

As you can see, I added a simple stem and leaves. You can use your designs to make greeting cards or cut them out and hang them up. One nice way to display them is to make two of the same sized flowers, color both, cut them out and glue the backs together. Punch a hole, add a bit of string and hang it up for all to enjoy. 🙂 A fun but simple craft using a compass! Much more fun than using one for Geometry!! LOL 😉
