If you’ve been following along on this blog, you know about Taste Testing Tuesdays. I apologize that there wasn’t a taste test yesterday. I’m feeling a bit under the weather right now but I hope to be back with a craft yet this week. And we’ll get back to Taste Testing Tuesday next week! (Lord willing and the creek don’t rise, as the saying goes!) See you soon!
We’re into October already! Wow, did Fall sneak up on you like it did me?? One thing that we all seem to talk about in the Fall (or Autumn) is the beautiful colors of the leaves! This year it seems like the leaves have been slower to change colors, but here in Ohio they have finally gotten started and some of them are gorgeous colors! So let’s do a fun activity with the colorful leaves that are falling all around us. Fall leaves are only here for a little while before they vanish away for the season. But what if we drew and colored our own beautiful leaves that we can keep for as long as we like?
Go on a little treasure hunt outside and see if you can find 3 or 4 pretty colored leaves to bring inside with you. If you can find some that are different shapes and different colors, it will make your picture even more fun. Here are the ones I picked up:
Find a plain piece of paper and a pencil. Trace around each leaf. Just a rough tracing is fine. You can fix the lines a little if you want to after you trace it.
Depending on the age of the children doing this project how many details you will want to add to the drawing of each leaf. For young children, go ahead and let them color in the outline in the same colors as the leaf they picked. For older kids, you can add more details like the veins seen in the leaves and the stem.
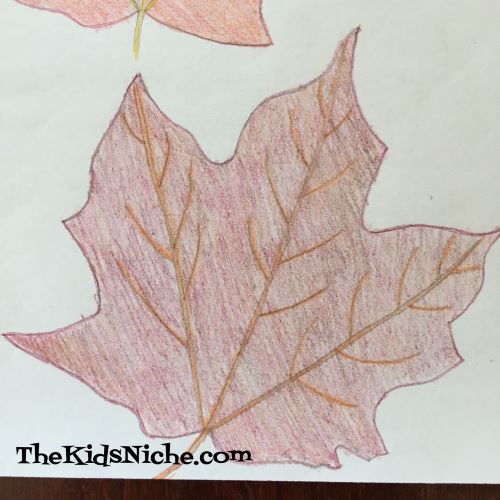
Now is the time to add your beautiful colors! One suggestion I have is that you can use more than one color to achieve just the right color you are looking for. I used colored pencils for mine. Older kids might also like to identify the tree that the leaf came from. These 2 leaves are from a Maple tree.
The leaf on the left is from our Apple tree and the leaf on the right is from a bush that I don’t actually know what kind it is. Haha!
And the last leaf is from an Oak tree. The leaves of the Oak tree haven’t changed colors yet, but I like that it has a different shape to it’s leaves, so I used a green leaf.
Don’t stress over it if the color of your leaves is a bit different from the real leaves. It doesn’t matter because leaves turn so many beautiful colors that somewhere there is probably a leaf that matches the one you made. 🙂
And there you are! You have a great drawing of some beautiful leaves you can keep to remind you of Fall. Maybe you could even share your picture with someone else to make their day happier. Someone that isn’t able to get outside much would probably love to see your beautiful Autumn leaves! Have fun!
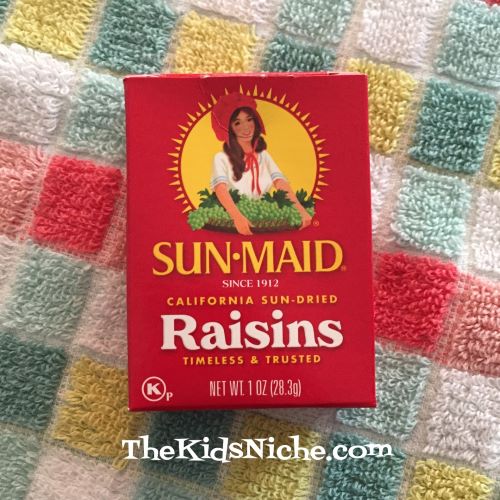
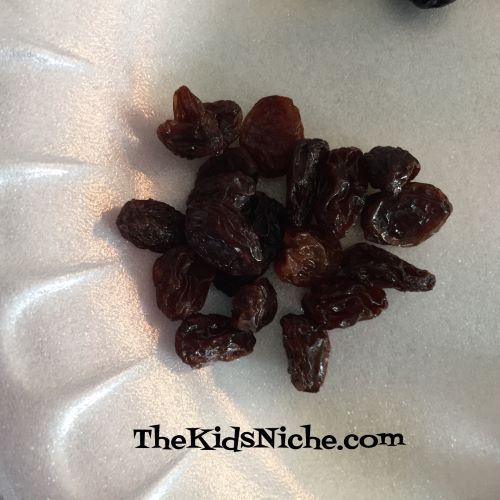
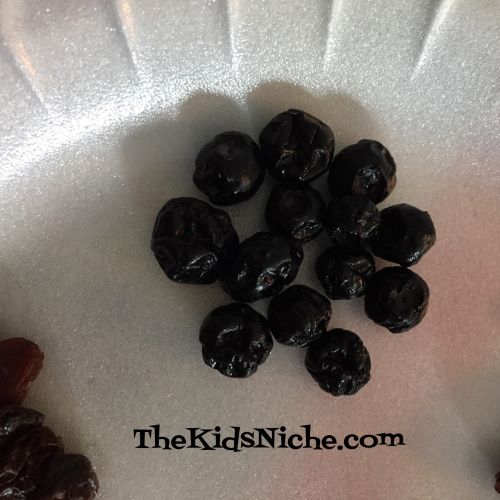
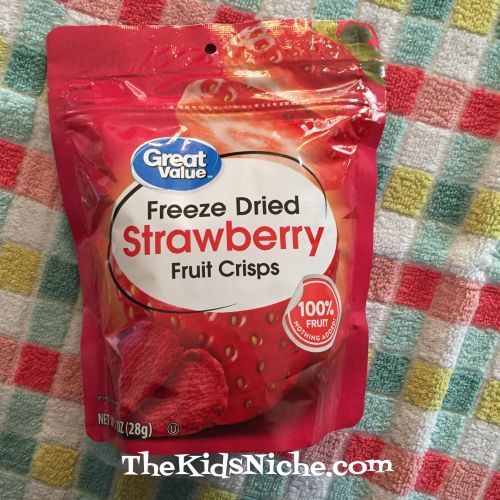
We’re back with another exciting adventure for your taste buds! Ready? Today we’re trying dried fruit! While you can use any kind of dried fruit for your taste test, here are the 5 kinds of dried fruit that we are using today….
#1.) Raisins
#2.) Blueberries
#3.) Cherries
#4.) Cranberries
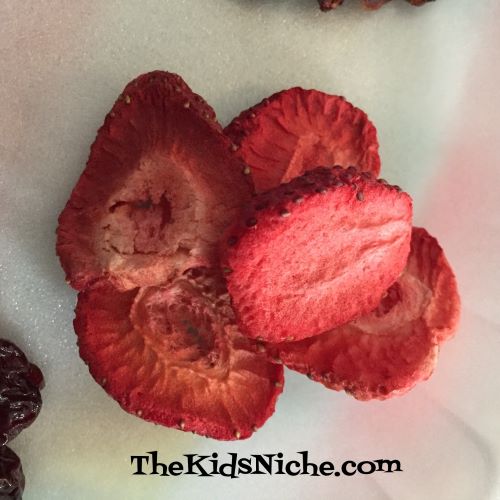
#5.) Strawberries
There are many more dried fruits to pick from like bananas, dates, figs, prunes, mango, pineapple, etc, etc. So if you use different fruit than the ones I used, that is absolutely fine!
Put a small bunch of each kind of dried fruit on a plate for each person doing the taste test.
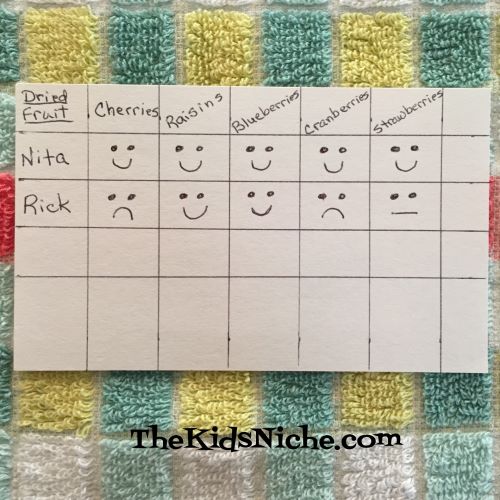
If you have been following along each week with our taste test, you know what to do! If you’re new to Taste Testing Tuesday, be sure to go back and check out our other 9 taste tests. If you aren’t familiar with our tasting adventures, grab a piece of paper and draw a quick chart for recording what you think of each type of fruit you will be tasting. Here’s what mine looks like today:
Taste one fruit, decide what you think of it and draw a face in the corresponding chart box. A happy smiling face means you like it. A face that has a straight mouth means it’s just ok. And a frowning face means, umm, no thank you! Which fruit turned out to be the one you will ask mom or dad to buy more of please? Did you say “no, thank you” to any or them? I liked all of the fruit I tested but as you can see, Rick had a few that didn’t rank too high for him. Remember, it’s ok if your likes and dislikes are different from other people. Not everyone likes the same foods, so there is no right or wrong answer.
Now let’s add just a little more fun to today’s Taste Testing Tuesday. Take 2 or 3 pieces of each kind of fruit you have and mix them together on your plate.
Then WITHOUT PEEKING, take a piece and put it in your mouth…can you tell what kind of fruit it is just by tasting it but not looking at it? You could also have someone else put a piece in your mouth (after they have washed their hands, of course!) and you can see how many bites you guess the correct fruit. 🙂 I hope you’ve had fun with us today and maybe found some new types of dried fruit that you like to eat! Happy hugs to each of you! 🙂
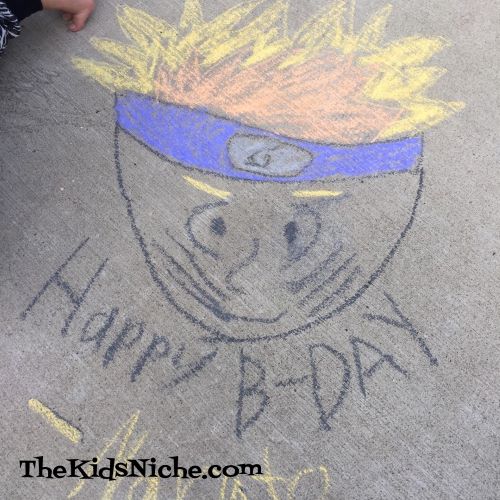
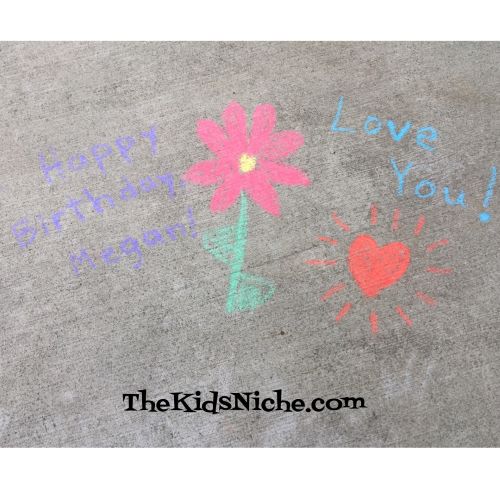
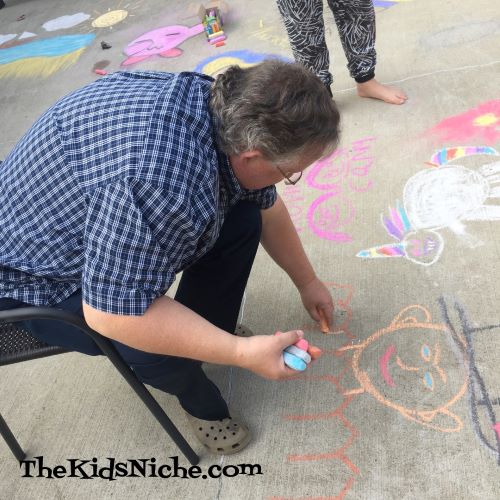
Last week we had 4 of our 6 grandchildren staying with us. It was sooooo nice and we had a good time! Their mom had her birthday on one of the days the kids were staying here, so we made some sidewalk chalk drawings for her for her birthday. Have you tried sidewalk chalk? It’s great fun and the next rain will wash it away for you. Sidewalk chalk is available at stores like Walmart, Target, etc. Here is our granddaughter getting started on her design.
Can you guess what she is drawing? If you said, a unicorn, you are exactly right! She LOVES unicorns! And she drew a pretty nice one!
The kids had a lot of fun making their sidewalk chalk art. There really isn’t anything you need to know ahead of time for this project. Just buy some sidewalk chalk and start drawing! Here are some more pictures they made:
Did you notice the beach theme? Their mama likes to go to the beach so they were trying to make her happy for her birthday. 😉 They took pictures of their artwork and sent them by a text message to their mama. Even Grandma and Grandpa got in on the action!
Playing with sidewalk chalk is cheap and good for the imagination and helps work on using those fine motor skills. Did I mention fun? Yep, it’s a lot of fun to draw outside and to watch your picture take shape and the pictures of others too. I hope you’ll take some time soon to make some sidewalk chalk art! 🙂
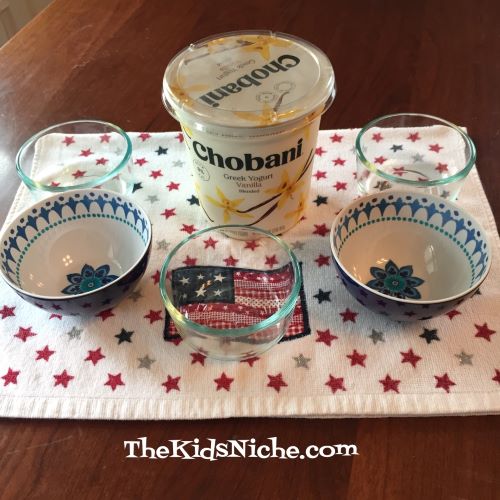
Hello again! We’re back with another round of Taste Testing Tuesday! Today’s main ingredient is vanilla greek yogurt. Or any kind of yogurt you would like to use. We will be using Chobani vanilla greek yogurt and trying it 5 different ways. Grab a piece of paper and a pencil to make a chart and draw a face for what you think of each taste test. Draw a smile if you like it, a straight face if it’s just ok and a frowny face if you don’t care for it. There is no wrong answer! (Don’t forget to try it plain to see if that is your favorite way.)
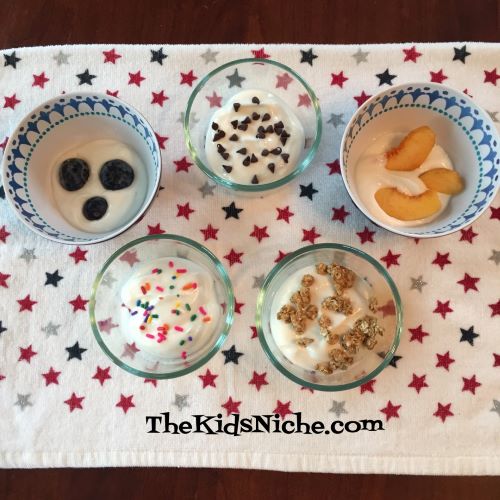
Put a couple of spoonful’s of yogurt into each little bowl. For our first taste test, let’s add some granola. Mmmm!
To the next bowl, let’s add a few blueberries.
In bowl #3, let’s add some miniature chocolate chips. (Oooo, did I see your eyes light up for chocolate chips?!)
In bowl #4, how about using some fresh or canned peach slices?
Just one more bowl to go! Let’s add cake sprinkles! That looks pretty cool! This bowl gets my vote for the best looking bowl!
Ok, so what did you think? Did you like them all? Which one is your favorite? Least favorite? What else can you think of to add to vanilla yogurt?
Not only are kids finding new things they like to eat through taste testing, but they are also learning that not everyone likes the same foods and that’s OKAY!! I saw this with our own grandkids last week. They looked at each other with more respect when they didn’t all like the same things but it was just fine that they didn’t. 😉 I hope you have fun testing out different ways to eat vanilla greek yogurt!
Until next week’s Taste Testing Tuesday, we’re saying so long! 🙂
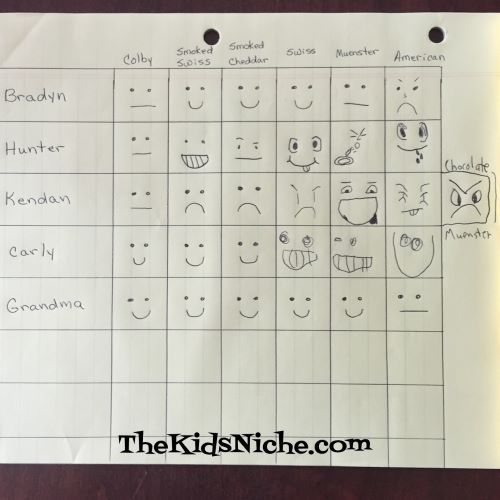
Hello and a happy Tuesday to you! It’s a GREAT Tuesday for us because 4 of our grandchildren are here staying with us and we are having a super-duper time being together! 🙂 They helped me with this Taste Testing Tuesday but we were having so much fun I forgot to take very many pictures. Oops! So Taste Testing Tuesday #8 is all about tasting different kinds of cheese. We have 6 kinds to try out…Colby, Smoked Swiss, Smoked Cheddar, Swiss, Muenster and American.
We started out with me drawing in the faces on the chart for what we each thought of each kind of cheese. Halfway through the kids took over drawing their own faces to express their thoughts so things got even funnier. 😉
Now for some cheesy grins! 😉 Little Miss said she liked ALL of the cheese.
This guy was not too impressed with smoked cheeses but Muenster was a definite YES! Although when his brother tried to give him Muenster with chocolate powder on it, that was a strong NO!
Middle brother liked some of the cheese, but some he could easily leave alone.
This guy was a good sport and let his Grandma talk him into participating. 😉 His favorite is Swiss.
We hope you’ll take a Taste Testing Tuesday Cheese test too! (Wow, that’s a mouthful!) Thanks for stopping by!
Here we are again with another Taste Testing Tuesday for you! (Wow, that week went by quickly!) We will be testing out ways to eat graham crackers!
I wonder what you think of when you think of eating a graham cracker? Do you like them plain or with something on them? When I was little, my mom would occasionally fix us a special treat by putting frosting on graham crackers. Yum! For our taste test today, I added a few sprinkles just for fun. 😉
What about adding peanut butter and jelly?
Dipping graham crackers into vanilla yogurt is pretty tasty!
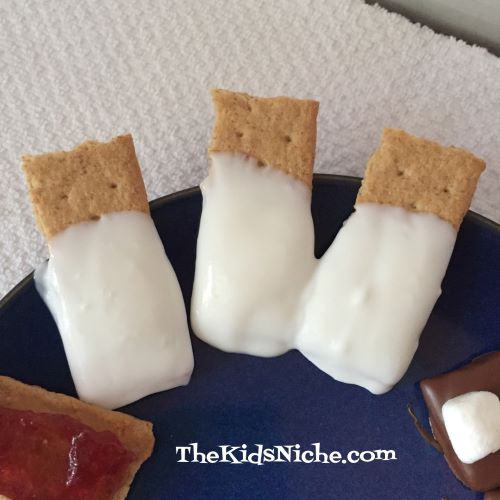
When you think of graham crackers, do you immediately think of making s’mores over a campfire? Mmmm! If you’ve never had a s’more before, it’s made with a piece of milk chocolate candy bar, graham crackers and a marshmallow that’s been roasted over the campfire. You make a sandwich with the chocolate and marshmallow in between 2 graham crackers. It’s ooey, gooey, messy and quite yummy! But if you don’t have a campfire going, you can try making s’mores in the house. Melt some chocolate candy bar in the microwave oven and add just a little coconut oil and stir until it’s a uniform consistency. Dip one end of the section of graham cracker into the chocolate and tilt the cracker to make the chocolate spread a little further. Add 2 miniature marshmallows on top of the chocolate. Place the coated cracker on a piece of wax paper on a plate and put it in the refrigerator so it will harden. Or eat it while it’s warm!
That’s 4 ways to taste test graham crackers! Are any of those ways new to you? Which one is your favorite? Do you have any other suggestions for a good way to eat a graham cracker? I hope you have enjoyed our latest taste test! Thanks for joining us! 🙂
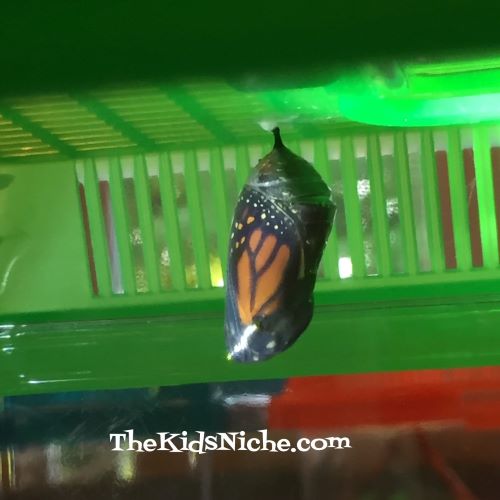
Hello and welcome to another adventure in the life cycle of the Monarch butterfly! Last week we looked at how the Monarch caterpillar changes into its chrysalis. Today we’ll see what happens when it’s time for the butterfly to emerge from the chrysalis. (Hang on until the end of this post for the video!) So just to remind you, here’s what the Monarch butterfly’s chrysalis looks like.
When the time for the butterfly to emerge is getting close, the chrysalis will start to turn a darker color and look black. Notice in this picture that one chrysalis looks green but the one in the background is black.
Here is a closer look.
Did you notice that you can see the butterfly’s wing inside the chrysalis? My pictures aren’t super clear because they are taken looking through the plastic container, but here is a picture taken with a flashlight shining on the chrysalis.
Whoa!! How cool is that?! The chrysalis is now very thin and you can see the butterfly! Next, the chrysalis starts to slowly open. Can you see along the left hand side that the chrysalis is splitting open?
Then the split becomes a little wider. The butterfly is hanging upside down right now and you can start to see its head coming out first.
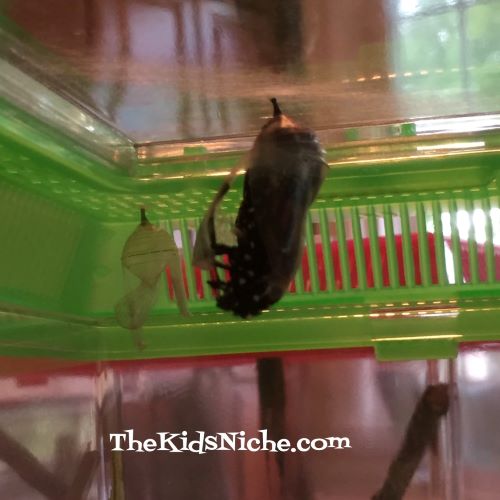
The butterfly is dropping down a little lower now. You can start to see its legs that are folded up close to its head.
It’s now beginning to slide out of the chrysalis!
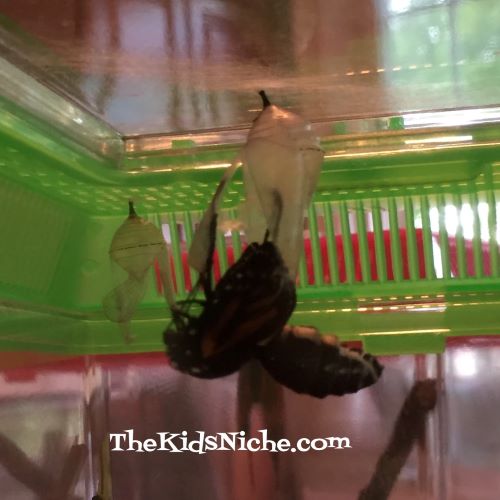
Sliding farther out…almost there! The chrysalis will stay attached to the top of the container as the butterfly slides down and out of it.
And it’s out! Look how big it’s body looks right now and how small and folded up it’s wings are.
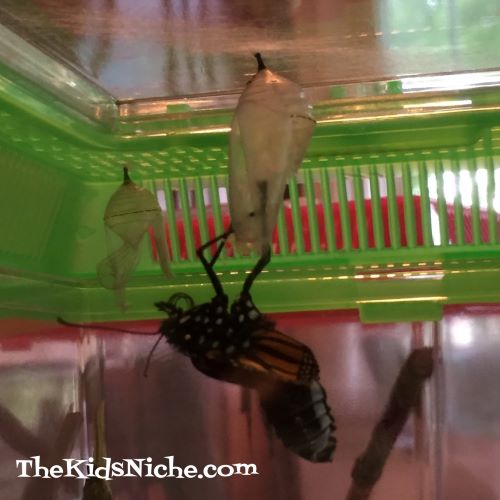
The butterfly grabs a hold of the empty chrysalis and it will hang right side up now.
As the butterfly hangs on the chrysalis, it will pump fluid into its wings and the wings will begin to expand and the body will become smaller. This next picture was taken 5 minutes after the butterfly emerged or eclosed. Its wings are still wrinkled looking.
Then 10 minutes…it’s wings are looking straighter.
And then here is 15 minutes after emerging.
It takes a couple of hours for the butterfly to finish this process and for it’s wings to expand and dry off. They don’t need to eat right away so it’s good to give them time to dry off and to begin to flex their wings. After a few hours have passed, I carefully open the container and put my hand close to the butterfly and they usually climb onto my finger. And then it’s time to set them free outside.
Here is a video I took of the process of the butterfly emerging from it’s chrysalis. It is so amazing to watch this happen!
It has been such a rewarding experience for me to help these beautiful creatures along in their transformation from a tiny little egg into an amazing gorgeous butterfly! This is my second year of raising and releasing Monarchs and I hope I can continue to do so for many years to come! I hope you have enjoyed coming along with me on this journey! 🙂
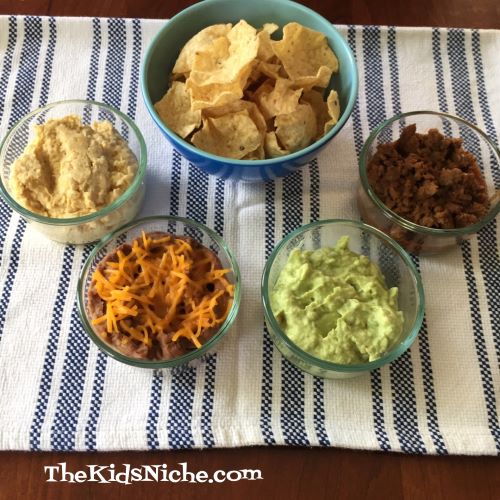
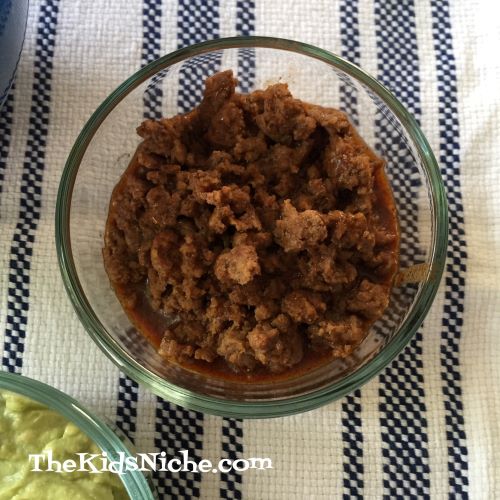
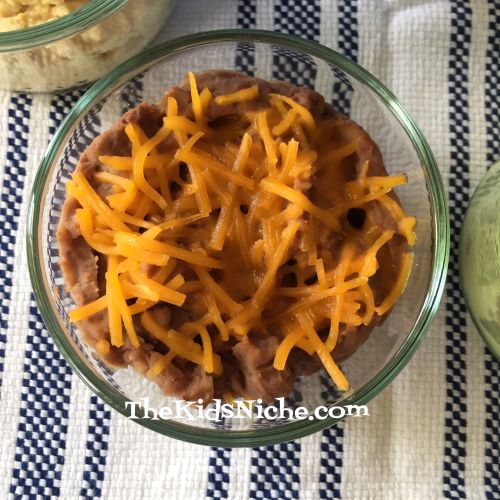
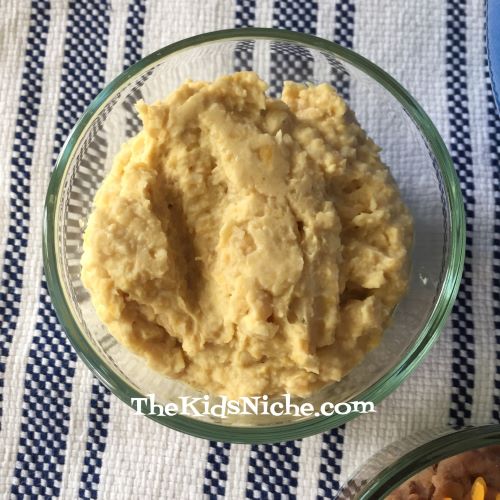
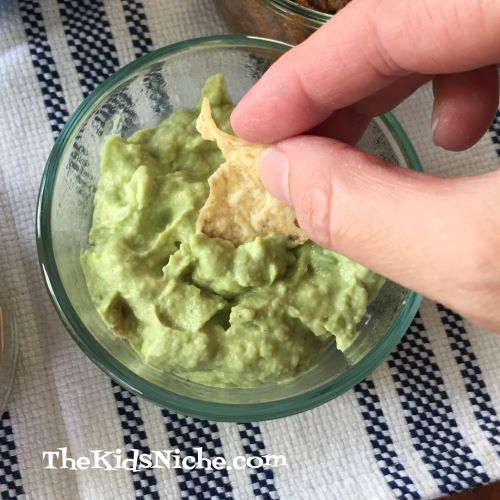
It’s Tuesday again and time for your favorite blog post – Taste Testing Tuesday! 🙂 Today we’re checking out some tasty foods that go great with tortilla chips. (Most kids like tortilla chips, right? Let’s sneak in getting them to try some new foods that go great with them.) Get a piece of paper ready with your chart to write down what each person thinks of each taste test. Here’s the goodies we used this time: Tortilla chips…
Taco flavored hamburger…
Guacamole…
Refried beans with some cheddar cheese…
And hummus.
Guacamole and Hummus can be bought or you can make your own. I found LOTS of recipes for each online. Make it a fun time with your Taste Test by having everyone try the new things at the same time. Dish some of each food out on each person’s plate and give them a handful of tortilla chips. Letting each one draw a smiley face on their chart adds to the fun.
Feel free to switch out any of the food items we used and add some of your own. Salsa and sour cream could also be fun foods to add. Even mixing some of the foods together might be a hit. Enjoy! I hope everyone finds something new that they like! 🙂
Hi there! Last week we ended our blog post about our Monarch caterpillars when they were starting to J-hang. They attach themselves firmly to the top of the cage or stick they are hanging from and then they hang like the letter J.
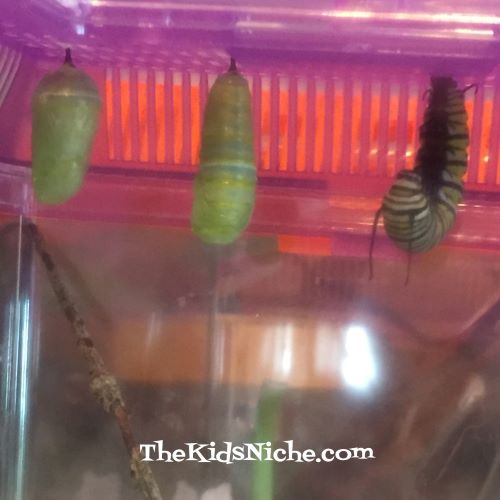
This week let’s talk about what happens when they go from J-hanging into their chrysalis. Here is a picture of 3 caterpillars in the different stages of going into a chrysalis.
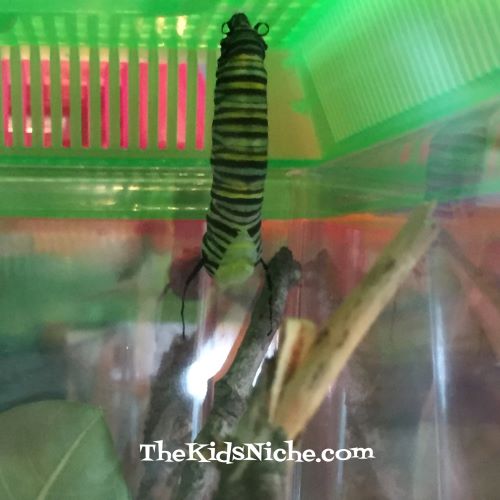
The caterpillars hang in the letter J form for a day or so and then something amazing starts happening. They straighten their bodies out just a little and if you watch very carefully at just the right time, you can see little ripples moving up across their body. They are getting ready to shed their outside layer of “skin”. The “skin” will start to split open down by their head. They are hanging upside down so their head is at the bottom.
The split will get bigger and bigger and you will see more and more of the light green part appear.
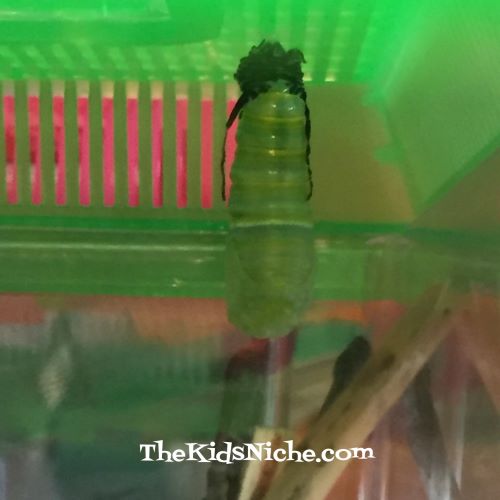
Notice how the “skin” is getting all wrinkled up at the top.
Then finally, the bunch of old “skin” they don’t need anymore falls off.
They will wiggle around inside for a little bit and they will get shorter and shorter.
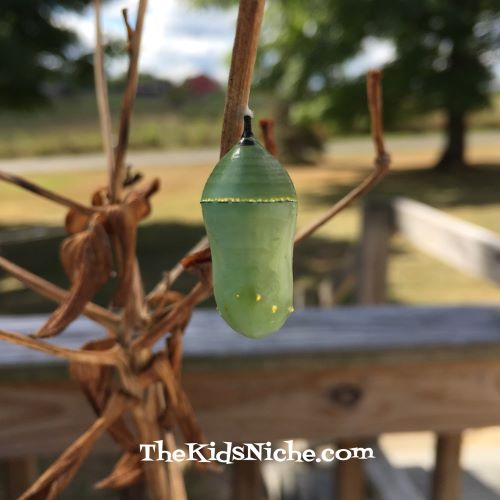
The outside of the chrysalis begins to look smooth.
Here is a chrysalis that is finished that we found outside.
Did you notice the gold colored dots and the gold ring around the chrysalis? Isn’t it beautiful?! The caterpillar is inside the chrysalis now and will be there for around 1 to 2 weeks. You won’t see much happening for a while but a wonderful, amazing transformation is taking place inside! Be sure to come back next week when we’ll talk about the process that happens next! That’s when the new butterfly emerges from the chrysalis! 🙂