Taste Testing Tuesday – #5

Hello! What day of the week is today? It’s Tuesday and that means….it’s time for another crazy adventure into Taste Testing! This time around we are doing things a little bit backwards from the previous times. We will be taste testing a yummy fruit dip and deciding which kind of fruit tastes best with it! Ready? Let’s go!

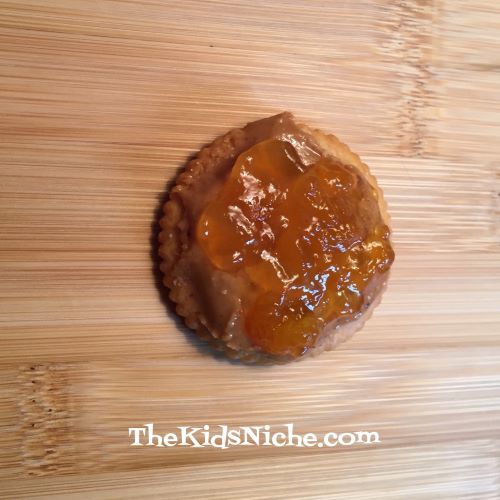
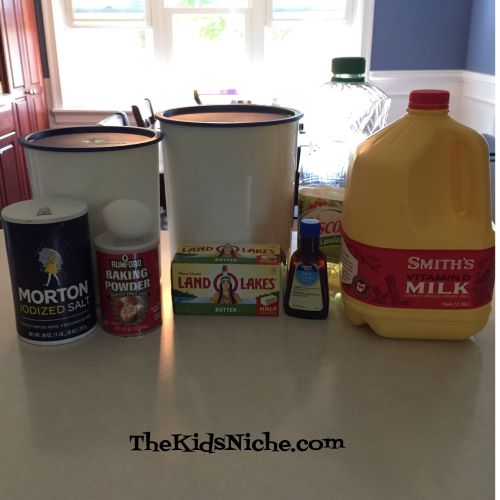
First the simple fruit dip recipe: 1 – 8 ounce package of cream cheese, 1/4 cup brown sugar, 1 teaspoon of vanilla and 1 tablespoon of milk.

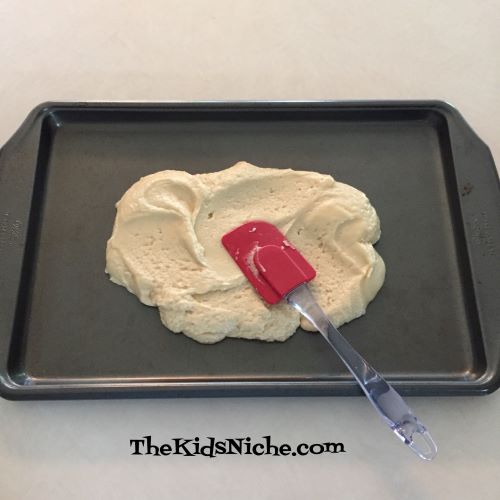
Place the ingredients into a medium-sized bowl.

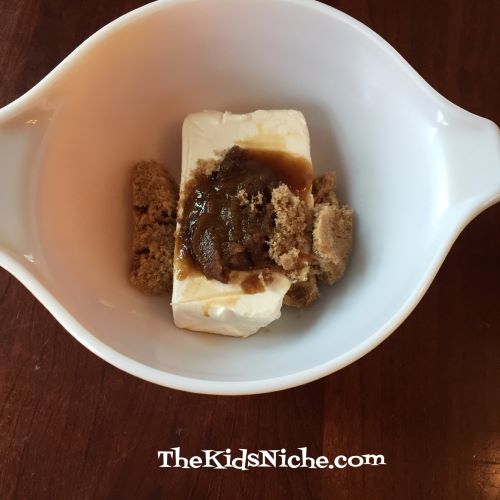
Beat the ingredients together until it is a smooth consistency. I used my small electric hand mixer and that worked great.

Scrape the fruit dip into a small bowl and place it in the center of a large plate. Gather and prepare fresh fruit and place it on the plate, arranged around the bowl of fruit dip. Can you name all 6 of the fruit in this picture?

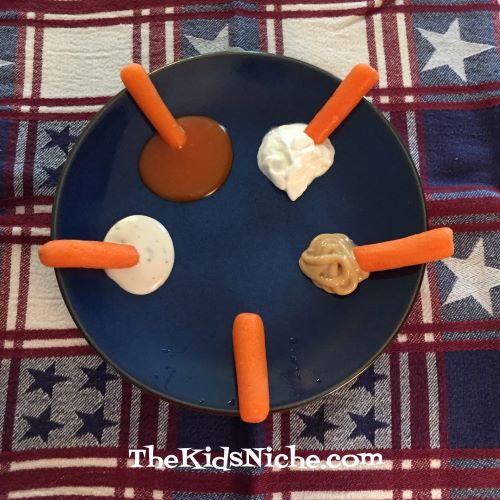
The correct answer is red apples, kiwi, peaches, bananas, green apple and mandarin oranges. Divide portions onto small individual plates for each person to sample. Give each person their own little mound of fruit dip so no one is “double dipping” and sticking the fork they have eaten off of back in the dip. Ewww!

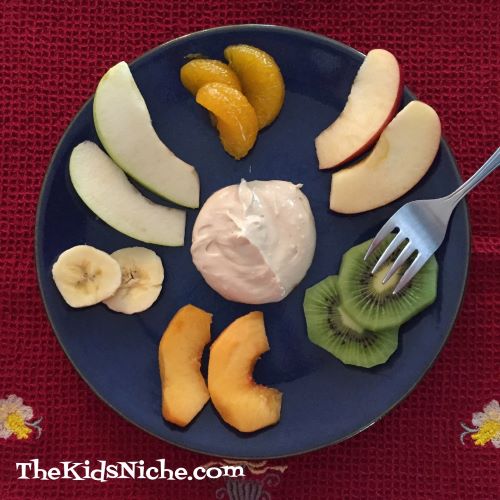
Do you like the fruit dip? Which fruit do you think goes best with the fruit dip? I think my favorites are the apples and the bananas. 🙂 Don’t forget you can make a chart of what you think of each kind of fruit with some fruit dip. Is it better with dip or better just plain? Have fun!

Tiny Monarch Caterpillars Grow FAST!

Remember these cute TINY little guys we looked at last week? There are 2 on the top left and 1 at the bottom. If you missed that blog post, you can find it here: https://thekidsniche.com/2020/08/21/monarch-caterpillar-babies-are-so-tiny/

You are not going to believe how fast they grow!! Check out this picture that was taken yesterday, August 27, 2020.

Can you say WHOA!! Now they look like fat little sausages! That’s because they eat a LOT of Milkweed leaves! If you find a Monarch caterpillar and you would like to raise it inside your house, just make sure that you have access to lots of Milkweed leaves for them to eat. They will only eat Milkweed leaves.

Would you like to see where we found a bunch of our caterpillars this year? Some were on this Swamp Milkweed plant. Swamp Milkweed plants grow pretty tall and they have pink flowers in the Spring. Can you find 3 caterpillars in this picture?

We found more caterpillars on this Butterfly Milkweed plant. Butterfly Milkweed plants don’t grow as tall as the Swamp Milkweed and they have pretty orange flowers in the Spring. Can you find 3 caterpillars in this picture too? One of them is hiding down low on the right side of the picture. 😉

Sometimes we have found caterpillars on the Common Milkweed plants. This is what it looks like. It’s leaves are much bigger than the other 2 Milkweed plants and it also has pink flowers in the Spring.

When we bring the caterpillars inside our house, they live in a cozy little apartment with a couple of sticks to climb on and Milkweed leaves to eat. We place a damp paper towel on the bottom of the apartment to make it easier to clean up after them every day. They also poop a lot!

We had 4 apartments but we kept finding more caterpillars and eggs so we added more apartments!

We house up to 3 caterpillars in each apartment. They eat and grow and poop to their hearts’ content until one day, it’s time for the next stage in their life cycle. They climb to the top of the apartment or on a stick and then they J-hang. Don’t they look like the letter J hanging there?

Usually about a day after they start to J-hang, they will go into their chrysalis. But that’s a topic for another day! Check back next week when we’ll explore the next phase in their transformation! 🙂

Taste Testing Tuesday – #4

It’s Tuesday again! Time for another fun adventure of letting our taste buds try something new! What shall we try today? It’s a light green color and comes in long thin stalks. Can you guess what it is? It’s celery! Wait, wait, wait! Don’t turn up your nose at celery until you’ve tried these 6 ways of eating it. You might just find that you like it! Ok, first we start with some cleaned stalks of celery. I cut each stalk into 3 pieces. You can try it plain first, if you like.

Remember to make a chart of what you think of each flavor. The first way we’ll try is with peanut butter. Yum! If you can’t have peanut butter, maybe you can have cashew butter or almond butter. Be sure to ask mom or dad if you have any food allergies. (I am actually allergic to celery which is kinda sad.)

Just fill the convenient little trough on the celery piece with peanut butter goodness.

Is your mouth watering yet? Eat the celery with peanut butter and mark on your chart what you think about it. Really yummy? Just ok? Not so great, no thanks?

For our second taste test, let’s try adding cream cheese to the celery.

Use a table knife to scoop some cream cheese into the celery.

The white cream cheese looks so pretty on the green celery. What do you think of this combination?

For our next test, let’s use some cheese. We tried a can of Easy Cheese. This one is rather fun because you get to make the cheese squirt out of the can into your celery. Try and keep it IN the celery, if you can! It’s a really warm day here so our Easy Cheese wanted to melt and run all over everything, so watch out for that!

So that’s 3 ways to taste test celery.

Are they still looking a little boring to you? Well, then let’s jazz them up a bit! Let’s go with the peanut butter ones first…we’ll add a few raisins. Looking better already and raisins will add some sweetness!

Let’s see…how can we jazz up the celery with the Easy Cheese? Let’s add some grated cheese on top. Yep, that looks better too!

And for the ones with the cream cheese…you’re going to like this idea…let’s add a few chocolate chips! Now that looks like dessert!

Yum! Now that’s a pretty appetizing looking plate of snacks!

Which one turned out to be your favorite? Leave a comment and tell me what you think of our celery snacks. Hope you and your taste buds had a good time today! 🙂

Monarch Caterpillar Babies Are So Tiny!

Hi everyone! Hope you are all doing great! We have hatched some Monarch caterpillars from their eggs for the first time and I just have to show you how cute they are! And TINY! You won’t believe how tiny! On Thursday, August 13th, I found my first ever Monarch Butterfly egg on my milkweed plant. I was so excited! I am trying to do my part in saving the Monarch butterflies, so I brought the egg inside to keep it safe from predators. Do you see the little round ball on this piece of a milkweed leaf? That’s the egg!

The next day I found 2 more eggs and brought them inside. Then on Saturday, August 15th, the first egg hatched! It was really hard for me to even find the tiny tiny little caterpillar. See if you can spot him in this picture. Look on the left side for the caterpillar…and on the right side and bottom for two more eggs.

Can you see him? His head is black and he is green right now, almost the same color as the leaf. The next picture I took was on Sunday, August 16th. What do you see? The caterpillar is already growing bigger and is a little easier to see. See all those teeny tiny little black dots on the white paper towel at the bottom of the picture? Can you guess what that is? It’s teeny tiny caterpillar poop!! Isn’t that funny? 😉

Now let’s look at the picture from two days later, Tuesday, August 18th. I put a dime in the picture so you can compare the caterpillar’s size to the size of the dime. Even though he is growing fast, he still looks very little beside the dime, doesn’t he? See the little hole in the leaf? That’s where he ate part of the leaf.

Guess what else happened on Tuesday? The other two eggs hatched! But wow, I had trouble finding them! See if you can spot one of them in this picture. If you found the “big” tiny caterpillar, then look straight up from him to find the brand new caterpillar.

The next two pictures are from today, Friday, August 21st. The new babies are just 3 days old. Aren’t they so cute?! 🙂

The “big” tiny caterpillar is just over one week old. See if you can find all three caterpillars in this next picture.

It is so fun and so interesting watching these Monarch caterpillars hatch and start to grow. I hope you’ve enjoyed seeing just how very very small these caterpillars are when they start out. Stay tuned for more Monarch caterpillar information next week! 🙂

Taste Testing Tuesday – #3

Welcome to another adventure with Taste Testing Tuesday! What’s your favorite food to pair with Ritz crackers? That’s where our taste test is taking us today. 🙂

Let’s give this a whirl and see what you like best with your Ritz! Gather up any ingredients you have on hand that you think might possibly work with a Ritz cracker…and even a few that sound kinda off the wall. I’m going to share a few with you that I taste tested today.

The first one is simply peanut butter and jelly. I used apricot jelly because that’s the kind of jelly I have open right now.

Or if you aren’t into peanut butter, try some cashew butter and honey. Watch out, the honey tends to run off the top.

Next I tried a small piece of honey roasted smoked turkey and some honey mustard.

I bet you’ll go for this one if you like pizza! I used pizza sauce and some grated mozzarella cheese on top. One word of caution, fix this kind right when you’re ready to eat it because the cracker will get soggy if it sits too long.

You’ve heard of cheese and crackers, haven’t you? I paired some cojack or colby-jack cheese with a Ritz cracker for this taste test.

Do you like tacos? Then try some salsa and some grated cheddar cheese on a Ritz. Again, this one will get soggy if it sits for too long before eating.

Here’s a fun one – melt a few chocolate chips and add just a bit of coconut oil to the melted chocolate. Dip your Ritz cracker halfway into the melted chocolate. You can let it sit on wax paper for a few minutes in the freezer to help the chocolate harden up again. Who can resist chocolate??

So now you have 7 suggestions for toppings to try on Ritz crackers! What toppings did you use in your test? Which one did you like the best? Which one did you like the least? Did you make a chart to record your thoughts?

Hey, it looks like someone has been taste testing at our house!

Have fun with your Taste Testing Tuesday for this week! I hope you find a new combination that you love! 🙂

Taste Testing Tuesday – #2

It’s time for another Taste Testing Tuesday! Today we will be trying ways to eat bell peppers or sweet peppers. In doing a little research on bell peppers, I found out that they are high in Vitamin A, Vitamin C and Vitamin E. They have lots of iron and anti-inflammatory properties. So not only do their vibrant colors of green, yellow, orange and red make them appealing to the eye, they are also healthy to eat.

Bell peppers are easy to prepare. Simply cut out the stem area at the top and discard. Cut the pepper in half and throw away the seeds that are inside. Rinse and just that easy, you are ready to try a yummy way of eating them!

One suggestion is to cut the pepper in quarters and then each quarter in half to make little “boats”. Fill each one with your favorite egg salad or a cheese mixture.

You can cut the peppers in slices and use your favorite dip for dipping. Try using sour cream and adding some spices like cilantro, parsley or dill. For some reason, kids love dipping their food in something…lol.

Another idea I came across was for bell pepper nachos. Slice the peppers in thin strips and sprinkle some grated cheese on top. Heat in the oven or microwave just until the cheese melts.

If your kiddos just don’t go for peppers but you’d really like to sneak some healthy goodness into their diet, try hiding finely chopped pieces of pepper in things like meatloaf or meatballs. Or run the peppers through the blender and add them to pasta or spaghetti sauce. However you try them, I hope you can use these ideas to get some awesome bell peppers into your kids’ bellies! 😉 Be sure to stop back next week for another Taste Testing Tuesday! (And for fun crafting ideas in between!)

It’s Butterfly Time Again!

It’s that time of year again when you might find those cool looking yellow and black striped Monarch butterfly caterpillars! We found our first one a couple weeks ago.

I brought the caterpillar inside and gave it it’s own cool apartment to live in. I gave it plenty of fresh milkweed leaves to munch on with a few drops of water on them and a stick for climbing to the top of its apartment . Within just a couple of days, it had gone into its chrysalis.

Then the waiting and watching began. Yesterday I noticed that the chrysalis was turning a darker color so I knew that the time for hatching was getting close. This morning when I got up, this is what I saw:

Hello, world! The new Monarch butterfly has arrived! 🙂

This Monarch butterfly is a girl. After giving her a few hours to plump up her wings and dry off, I took her outside. As soon as I walked outside, she started fluttering excitedly around in her apartment! She was ready to go! I took the lid off, let her crawl up onto my finger and she flew off before I could even get her completely out of the apartment. Good bye, beautiful lady! We wish you well! 🙂

The plight of the Monarch butterfly concerns all of us. Their population is really struggling. Their numbers are down 53% over last year for the ones that winter in Mexico. Those that overwintered in California this last year have decreased by 86%! So we need to try and help them as much as we can. Planting native nectar plants such as the common milkweed, swamp milkweed and butterfly milkweed. And avoid using pesticides. Let’s all help preserve these beautiful creatures!

Taste Testing Tuesdays – #1

Happy Tuesday, everyone! We are starting something new today that I hope to continue at least through the month of August and maybe longer. It is often hard to get kids (and adults) to try new foods thus my idea was born for Taste Testing Tuesdays. We will try some different foods with different dips, for example, in the hopes of finding some ways kids (and adults) will enjoy eating foods they might ordinarily avoid. We will make it a little more fun by letting the kids record what they think of each item which will also make it nice for mom and dad to have a way to remember who likes or doesn’t like what! So let’s start our first Taste Testing Tuesday!

Today we’ll try raw carrots with 4 different items to dip them in. And we’ll try them plain, just by themselves. Feel free to change out what items you use for your kids. For our taste test we used Ranch dressing, French dressing, Sour Cream and Honey Mustard.

Put 5 carrots (at least, more is great!) on each person’s plate and add a little bit of each dipping item too.

The first carrot should be eaten plain (if you can get away with that) to see if maybe that will be their favorite way to eat raw carrots.

Try each type of dip with a new carrot so the flavors don’t get mixed together. (Unless, of course, they LIKE mixing the dips together and they will eat the carrots that way! Then have at it! Lol) As they taste each item, have them record on a piece of paper what they think of that combination. A smiley face for “Yes, I like it!”, a face with a straight mouth for “It’s ok.” and a frowning face for “No thank you!” Here is one idea for how you can set up your chart:

I used an 8 1/2 x 11″ piece of printer paper. The squares are 1″ in size. Then I added “Carrots” at the top so you remember which item this chart is about. I put names down the left side and the name of each dip across the top.

This is what it looks like with the faces filled in.

Maybe the kids will think of more food that might be good for dipping carrots in and this chart has room for recording 3 more. My hope is you will find some combinations that will make your kids ask for more raw carrots! (Though there may be those that only like to lick the dips off the carrot and not actually eat the carrot. Ha!)

Rusty thought it looked like fun and that he should be involved too. Since raw carrots are actually good for dogs, I gave him one to try.

While he thought it was great fun to toss the carrot around and chase after it, he didn’t really like the idea of eating it. 😉 I enjoyed our first taste test and found some combinations that I might want to try again. Good luck and have fun! Tune in next Tuesday for more Taste Testing Tuesday fun!

Domino Cookies!

Let’s do one more post about fun things to do with dominoes. This time we’ll talk about making cookies to look like dominoes! Sound yummy?

I used a recipe that’s in an old Pillsbury cookbook. These cookies are simple to make and the kids could have fun helping you mix them up, bake them, decorate them…and then help eat them too, of course! Here’s a copy of the recipe:

First gather all the ingredients together. We use vanilla in place of the almond extract.

Here we are doing step #1 of the recipe.

Adding the dry ingredients…

Spreading the dough in the pan…

Spread the dough all the way to the edges of the pan. It will be a thin layer of dough. We also added sprinkles which the recipe doesn’t call for, but kids love sprinkles, right? (When decorating the cookies to look like dominoes, the sprinkles do rather take away from the domino effect, so you might not want to use them. But sprinkles are cool, so you decide. Ha!)

The recipe calls for 10-12 minutes of baking time, but our batch was getting a little too brown after just 10 minutes, so you might want to check your cookies at 8 minutes.

Allow the cookies to cool, then cut them into rectangular shaped pieces. I used a tube of purchased frosting for decorating. Just make a line across the middle of each rectangle cookie and add some dots to each side. Presto! You have dominoes!

Easy peasy! Domino cookies make a fun snack and go along with our other posts on learning with dominoes. Don’t forget to share your cookies! 😉

Domino Stacking Fun

Have you heard about domino stacking? This is an activity that we used to do when I was little but I never knew it was called domino stacking until just a few days ago. The idea is to stand the dominoes upright on the end edge and line them up in such a way that when the first one is pushed over, it starts a chain reaction that causes all of the dominoes to fall down without anyone touching them. It’s a simple concept but it does take some patience and a steady hand to line the dominoes up correctly without bumping into one and setting the whole thing off before you are ready! LOL

Begin by lining the dominoes up in a line, leaving a little space between them but only enough space so they will fall into the next domino and they will all fall down in order. Hint: the dominoes with square corners stand up better than the ones with rounded corners.

You can set them up in any design you like, just make sure they will fall into the next domino in line.

After you have them set up, push only the first domino in the line so that it falls over onto the second domino.

Here’s another setup I tried.

I could have spaced the dominoes a little farther apart and it would still have worked too. This one goes down fast! Watch closely!

This spiral setup was fun to try. 🙂

Just one more setup to show you and then you should try it for yourselves! I predict your kids will love it! This one kinda looks like an arrow. I was trying to make it go in 3 directions at the same time.

So dig out all your dominoes and have a family night of fun! Try out different setups and see what works. Get a little crazy and amaze yourselves at how awesome your setups are! 🙂