10 Ways to Learn With Dominoes

Remember the game of Dominoes? The small rectangular blocks that have dots (or pips) on them? Here are 2 boxes of them that we have, in case you need a reminder or you never heard of them before.

The game of Dominoes can be played several ways but for this post I want to concentrate on 10 ways to learn with dominoes while having fun. (They won’t know they’re learning!) 😉 First of all, dominoes sets come in different sizes so if you want to purchase a set, be aware of what you are buying. In the picture above, the set on the right is a double six set and has 28 dominoes. I found it for $5 at a Five and Below store. The set on the left is a double nine set and has 55 dominoes. They also come in sets of double twelve, fifteen or eighteen and of course, the bigger the set the more money it costs. And it depends on what the dominoes are made of…plastic or wood, for example. Dominoes may have all white pips or each number may use a different color for the pips.

So let’s get to the fun part of learning with dominoes!! 🙂 Let’s start with ideas for really young children and go up from there.

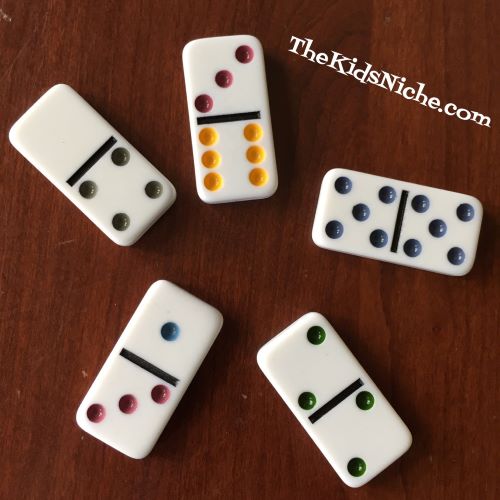
#1.) Colors – Have your child pick up a domino and see if they can tell you what colors the dots are. For each one they get right, let them keep the domino. After they have gone through the number of dominoes you think they should do for that time…maybe 10 or 15 to start with and build up from there till they can do all of them…let them play with the ones they’ve collected for knowing the right answer. Here you have pink and green.

#2.) Numbers – Using the same method as #1, have your child pick up a domino and this time, let them tell you how many dots are on each side. For each one they get right, they can add it to their stash to play with when they are done. In this picture, of course, the correct answer is 3 and 2.

#3.) Addition – Using the same picture, once your child can tell you how many dots are on each side, have them add the two number together. 3+2=5 Again, their reward is getting to keep the domino they get correct.

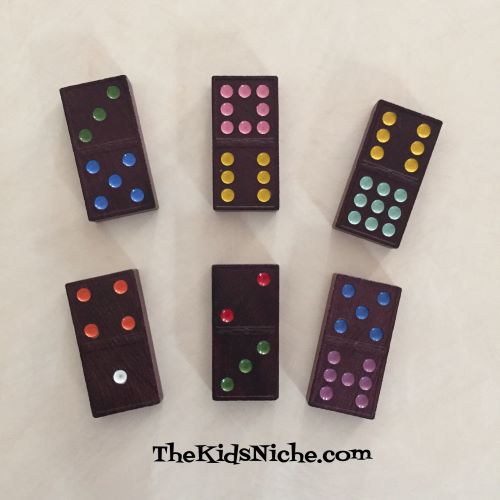
#4.) More addition – For more addition practice, try having your child pick 2 dominoes and add the top 2 numbers together and then the bottom 2 numbers. Get it correct, and they’re yours! In this instance, the answer is 2+3=5 and 3+1=4.

#5.) Which is number is larger? – This one is self-explanatory I think, but have your child tell you the number of dots on each side and then ask them which one is the bigger number. And, of course, you could also play this one by asking which number is smaller. Getting to keep the dominoes is, as you can see, the reward for learning the correct answers.

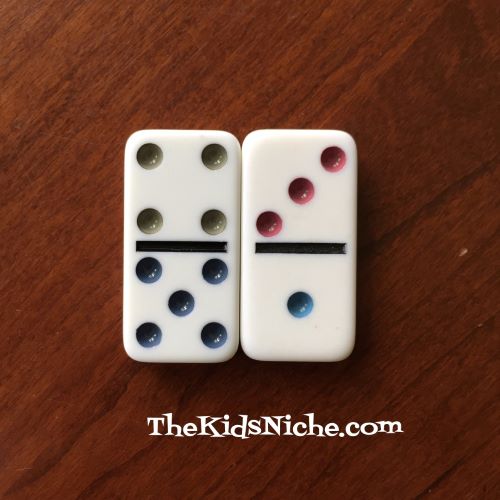
#6.) Double Digits – Ok, now we’re going to get a bit harder for kids that are a little older. Have them pick 2 dominoes and lay them side by side. Looking at the top 2 numbers of dots, have them tell you what double digit number they make. Using the dominoes in the following picture, the answer would be 43 and 51.

#7.) Building fun – Ok, so your kiddo has earned some dominoes by knowing the correct answers and it’s PLAY time! Here, their (and your) imagination is the limit! Maybe try building dominoes up to see how high you can make it go before it falls down. This will seem like fun but it’s also teaching them coordination and about constructing things.

Or let’s just sit the dominoes on their sides and make a cool shape. Or it could be a corral for your horses. 😉 Let them play and see what ideas they can come up with on their own.

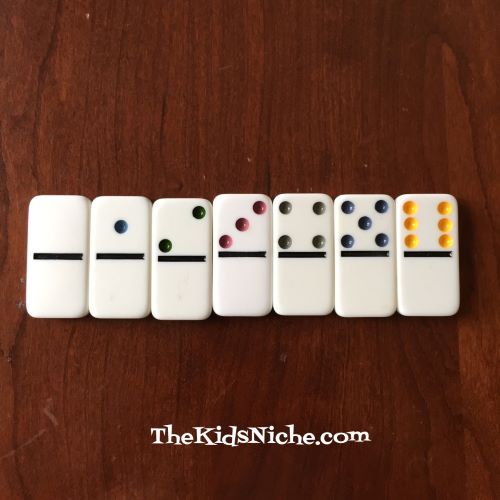
#8.) Line them up in order – Have your child line up a row of dominoes starting at the smallest number and building their way up to the highest number. Depending on their age, you might want to sort out the number of dominoes you want them to use. Or if they are a little older, let them dig through the dominoes to find the correct ones.

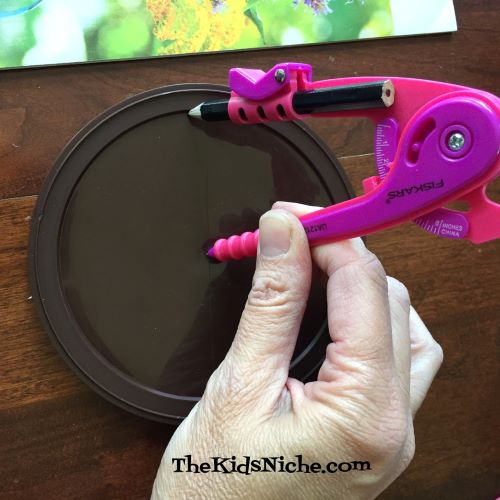
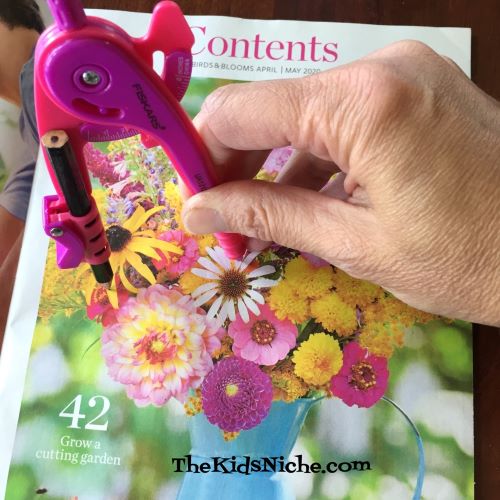
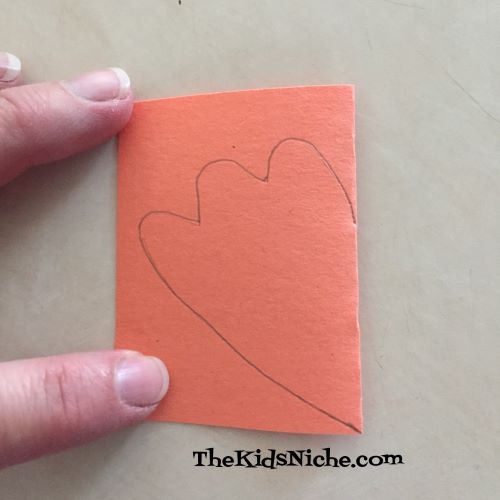
#9.) Drawing/tracing dominoes – Give your child a piece of paper and a pencil and markers/crayons and let them trace around a domino and color the dominoes however they would like them to look. For example, maybe they would like to use stars or squares instead of dots.

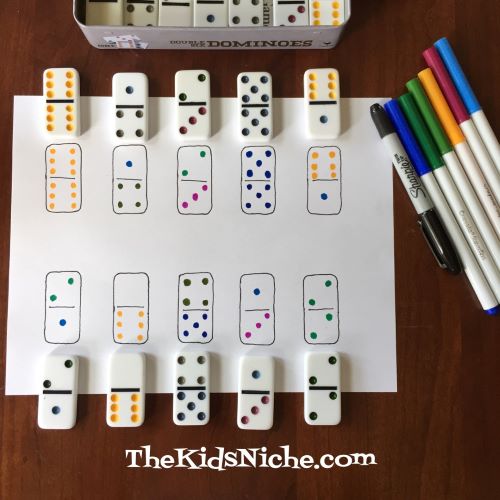
#10.) Matching the domino – For the last idea for today’s post, trace around several dominoes and color dots in to match some of the real dominoes. Depending on your child’s age, you can have the dominoes sorted out separately for those that match the ones you drew or for older kids, let them find the correct ones from the whole set. First trace the dominoes…

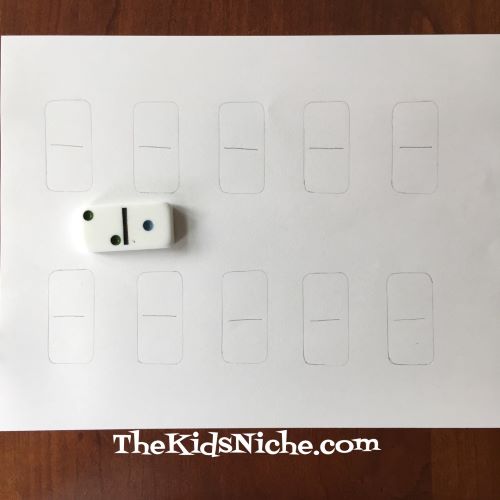
Then trace around the outline with a black marker and color in the dots. The kids can place the dominoes right on top of the drawn ones or directly beside them.

I hope you have enjoyed these suggestions and they will help your children learn while having a lot of fun with dominoes! 🙂

Make Penny Spinners With Crayola

I came across this fun DIY craft on the Crayola website. I am not an affiliate yet, but I do like their fun craft ideas and wanted to share this simple idea with you. 🙂 Penny spinners are something you can have fun making with your kiddos. Yes, they do use a penny to make them!

DIY Paper Penny Spinners Craft

Here’s a link to the website: https://www.crayola.com/crafts/penny-paper-spinners-craft/?j=187723&sfmc_sub=13461107&l=112_HTML&u=7110783&mid=7303527&jb=43&utm_source=Engaged_Subscribers_US_content&utm_medium=email&utm_campaign=20200715_ciyweekly_pennyspinners&utm_content=crafts-paperpennyspinners&EncodedEmail=bml0YWZlcm5AYW9sLmNvbQ==

Wow! That’s a long website address! LOL I’m hoping to make some of these with our grandkids when they (hopefully!) come visit us soon! Yes, they spin!

Penny Paper Spinners_Step 10

Have fun spinning! 🙂

Look For the Comet Neowise

I came across this article about Comet Neowise and discovered that it is visible to the naked eye this week and weekend! What a neat thing to share with your kids!

comet-dan_half_width.jpg

We want to try and see it. It doesn’t happen very often that you can actually see a comet! Give it a whirl yourself! Here’s the website address of the article: https://www.almanac.com/when-to-see-comet-neowise-visible-july-2020?fbclid=IwAR0Om74w3C_yy8bh1obY_b4SbYJbN5FybIrKr_YxrTxnzMQaOHTWDp6L3BE#

We have a lot of trees where we live so we might go for a drive in the late evening and see if we can spot it. Good luck to you! 🙂

comet-shot_0_full_width.png

Re-Purpose With Duck Tape

Here we go again with another re-purposing idea! Today we’re turning an empty Ovaltine container into a fun place to store something awesome. Never heard of Ovaltine? It’s an awesome chocolate powder that turns ordinary milk into yummy yummy chocolate milk! Mmmm! 🙂 It’s sad when the Ovaltine container is empty, so here’s a way to cheer you up even when the chocolate is gone. 😉

The Ovaltine container is made partially of cardboard so be careful cleaning it. You can wash the inside of the container but avoid getting the outside wet. Dry it quickly and completely and you’re ready to start decorating. There are many colors and prints available in Duck Tape, so find one you like.

I found this neat variegated blue with tiny stars.

Remove the lid of the container and set it aside for later. Wrap the first piece of duck tape around the top on the container, being careful to keep it as straight as possible. Following along the top edge will help.

For the next piece of tape, I chose to go along the bottom edge in the same way I did the top edge.

Add one more strip of duck tape around the middle of the container, overlapping on both the top and bottom strips of tape.

The can part is done! Now let’s make the lid look great too. If you have a compass, you can place the point of the compass in the center of the lid and extend the pencil to meet the inside edge of the lid.

Keeping the compass in this position, you can draw a circle that will fit the lid. A great place to find a cool picture for your lid is by using old magazine pages.

Draw the circle using the compass and cut the picture out with scissors. Using glue or double-sided tape, attach your picture to the lid. Here are a few pictures I found that I liked. Flowers…

More flowers…

A hummingbird with flowers…

Maybe you like animals better than flowers? How about this adorable kitten?

Or this beautiful foal?

There are so many things you could use to decorate the lid! You could color your own picture or use a circle of colored paper and decorate using stickers. Let your mind think up something fun to use from things you have around the house. If you don’t have an Ovaltine container, look around for something similar…duck tape works on just about any surface. If you use double-sided tape on the lid, you can change the picture later when you’re ready for something new.

I hope you enjoyed this project and you use your imagination when looking for containers to re-purpose using duck tape! Thanks for stopping by! 🙂

Yarn Buddies

Let’s do an activity today to make some cute little buddies that the kids can sit in their bedroom to keep them company. 🙂 We’ll call them Yarn Buddies.

You will need some yarn (or pre-made pom poms), scissors, a small piece of cardboard, some construction paper, a marker, wiggly eyes, glue and a pencil. To begin, cut a piece of cardboard approximately 2 inches wide and 3-4 inches long.

Wrap yarn around the piece of cardboard on the 2″ side.

The more times you wrap it, the nicer and thicker your buddy will be. Wrap at least 50 times, but 100 times or more is great. Don’t wrap it too tightly or the next step will be hard to do.

After you have finished wrapping, cut the yarn and slide the yarn off one end of the cardboard, being careful to keep it all close together.

Now cut a piece of yarn around 8″ long. Lay it down and place the wrapped yarn on top of it.

Make a knot with that piece of yarn, tying it very tight in the middle of the wrapped yarn.

Are we making sense so far? Ok, next take your scissors and cut the loops of yarn on one side of the knot.

Once there are no more loops on that side, go to the second side of loops and cut them too.

Now fluff the cut yarn up so it begins to look like a ball or a pom pom.

You can keep the pom pom looking a bit raggedy or you can trim it nicely into a smoother ball.

It’s time to turn your pom pom into a buddy! Let’s start with some eyes…you can add whatever size of eyes you like. There’s small…

Medium…

Or extra-large!

I added a yarn bow to the top of mine and I decided to use the medium sized eyes.

You can stop here but perhaps you would like to give your buddy some feet or some shoes. To make some shoes, I took a small piece of construction paper and folded it in half.

Draw half of a heart shape on the paper, putting the middle of the heart on the fold.

Cut the shape out with your scissors and open it up to find you cut out a heart! Neat trick, huh?

You can leave the feet plain…

Or color some of it in to look like shoes. Put glue on the shoes and sit your yarn buddy on top. Hold it in place for a little bit.

And there you have yarn buddy #1 finished!

For yarn buddy #2, I decided to make a one-eyed monster. To make his feet, I used an orange piece of paper and I made it very similar to the first yarn buddy’s feet. Fold a piece of paper in half and draw on what you want one foot to look like. Cut it out with your scissors. But be careful to leave a big enough piece of the fold to hold the feet together.

Unfold the feet and put glue on them and sit your buddy on top. Remember to hold it in place for a little bit while the glue starts to set up.

I drew on some toenails for this yarn buddy.

And then I colored the toenails in. Yarn buddy #2 is done!

The last yarn buddy for today is made a bit differently, but is still very similar to the other two. Begin by wrapping yarn around the piece of cardboard like before. Slide the wrapped yarn off the end and tie a piece of yarn in the middle like we already did for the other buddies.

This time cut only one side of the yarn loops to make some hair and leave one side of loops uncut to be his head.

Glue 2 eyes on the head side.

Make another set of feet and glue your yarn buddy to the feet like before.

You can decorate him in whatever way you want to. 🙂 And now you’ve made 3 yarn buddies! Will they all be your buddies or will you share them with someone else who might need a buddy? (They are very good at keeping secrets!) 😉

I hope you had fun making yarn buddies with me! Thanks for stopping by!

Walmart Clearance Gem

I just wanted to share a quick tip on a neat looking item that’s on clearance at the Walmart store close to us. That’s the Crayola Crayon Melter.

While I have never used one of these, it looks like you put Crayola crayons in the Crayon Melter which melts the crayons and allows you to create melted crayon art. It is normally priced at $19.97, but is on sale for the clearance price of $10.

So if you have been looking for one of these, be sure to check in at your friendly neighborhood Walmart. 😊

Toad-i-ly Fun!

We had another friendly visitor to our house this week and he was toad-i-ly fun! He’s brown and he hops around and his skin is all bumpy. Can you guess what I’m talking about?

If you said a toad, you are absolutely right! I was working in my flower bed when he hopped out of a hole and startled me. Has that ever happened to you? People used to say that if you picked up a toad, it would give you warts…but that is NOT true. (He might “pee” on you though!) Toads are actually a good thing to have around because they eat bugs! Here is a closer look at him although he was trying to hide in the grass so I wouldn’t see him.

He’s pretty cool, isn’t he? You can see him pretty well when he is in the green grass. But look at this toad when he is in the dirt.

Can you spot him? He’s harder to see, isn’t he?

How about a couple of toad riddles to try? 🙂

What did the bus driver say to the toad? Answer: Hop on!

What do you get if you cross a toad and a dog? Answer: A croaker-spaniel!

What do toads drink? Answer: Croak-a-cola and Hot Croak-o!

Have a toad-i-ly great day! 🙂

Turn a Small Milk Bottle Into a Piggy Bank

Here’s a fun (and maybe a little bit weird!) idea for you to craft with the kiddos! NOTE: It does require an adult to do a bit of cutting with something sharp like a utility knife. Do your kids get milk in a little plastic bottle when you go to McDonalds? (Maybe other places too.) We grabbed some breakfast items there the other day and I got a milk. Here’s what mine looked like:

Remove the outer wrapper carefully. I used a sharp knife to get it started.

Presto! You have a white bottle!

I had some Washi tape on hand that worked nicely for this project. In fact, I had just purchased it on clearance from a Joann store.

This pack had 7 different colors/patterns.

Starting at the top, right below the rim of the bottle, I taped a piece of the Washi tape around the bottle, overlapping a little.

You can continue wrapping the different patterns of tape down the bottle. Add as many or few pieces as you like. I left some space between my layers, but you can place them closer together too. Layer number two…

Layer number 3…

Keep wrapping until your bottle looks just right to you. 🙂

There are 2 ways you can turn this into a bank…one requires cutting the lid and the second way does not. You can add Washi tape to the top of the bottle as decoration and remove the lid each time you wish to store money inside.

The other way is to cut an opening in the lid so money can be dropped inside without removing the lid.

And you have a new bank for saving money! It’s a great way to re-purpose an item that would usually just be thrown away. Have fun and save those pennies! 😉

Joann’s Store Clearance – Run, Don’t Walk!

Do you shop at Joann’s? Or maybe you call it Joann Fabric’s? It’s one of my FAVORITE stores! If you’ve never shopped at one, NOW is the time! They are having a big clearance sale and I just had to share my sweet buys with you! I’m not sure how long the sale lasts because their flyer is a bit confusing to me with the mixture of sales dates, but HURRY in for best selection! Here’s a few things I picked up…

There are a few small things that I bought that are not included in the picture because I already used (or ate!) them. (Candy…I ate candy…I’m really not in the habit of eating crafts.) My total bill before tax was $27.48…but I saved a whopping $68.20!! Wow!

This adorable little wooden crate (6.5″ x 4.5″ x 3.5″) normally sells for $8.99…I paid $2.69!

I got this round iron container for $3.74 and it normally is priced at $14.99!

Same thing for this oval iron container…normally $14.99, on sale for $3.74.

Many of their Spring and Summer decor items are 75% off! I grabbed 2 bunches of these flowers, normally priced at $14.99 and got them for $3.74 each. 🙂 (Stay tuned for a craft using them coming soon!)

The last of my awesome bargains I want to share with you today is this ADORABLE little pig!

Isn’t he the cutest thing ever?! (This little pig didn’t say a word, allllllll the way home!) They had 2 sizes and 2 different poses and it was really hard for me not to buy a whole family!! He’s normally priced at $19.99 and I got him for $4.99. 🙂

So if you are looking for some new Spring and Summer decor…and many other things on sale…(I ran out of time)…make a quick stop into your local Joann’s store for some great bargains! (Ok, is it even POSSIBLE to make a QUICK trip into Joann’s?! Not for me! LOL) 😉