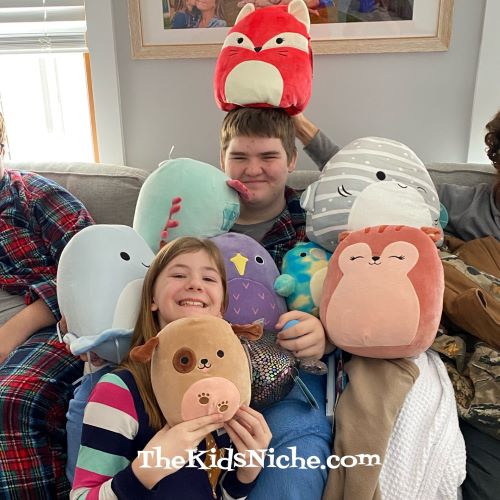
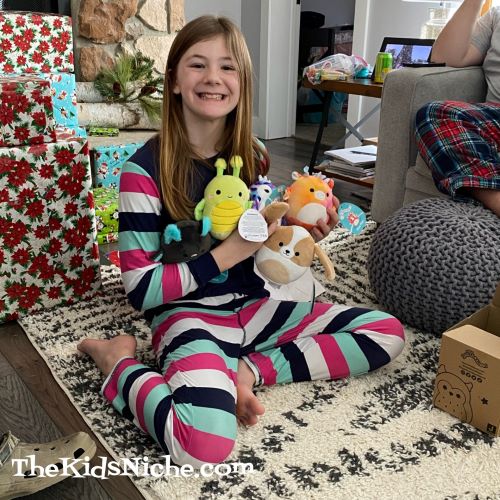
Do you own a Squishmallow? They seem to be very popular now and I’m kinda behind the times on learning about them. Our granddaughter got a BUNCH of them for Christmas and now I know why everyone likes them! They are sooo cute and sooo soft and well, squishable! 🙂 (I’m thinking I might need one…or a few!)
And then there were mini squishmallows too! 😉
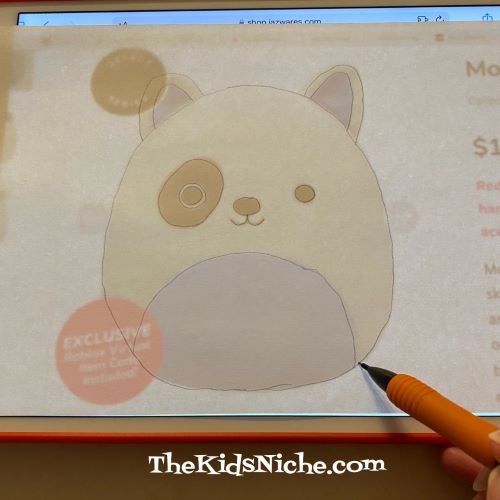
Our granddaughter has been tracing characters and coloring them and that gave me the idea that it would be fun to draw Squishmallows. There are a couple of ways you can do that. One way is to find a picture of a Squishmallow online and save the picture to your tablet.
Lay a piece of thin white paper over the picture and trace the outline of the Squishmallow.
Take the paper off the tablet and color the picture with your favorite crayons, markers or colored pencils. Use the picture as a guide for what colors to use.
Molina is actually white but the white part didn’t show up in a picture so I colored her a light color so you could see her better. Another way you can trace/draw a Squishmallow is to print an online picture first.
Hold the picture up to a window (or tape it on the window) and use a piece of thin white paper to trace it just like we did with the first one.
Color the picture and ta dah! You now have a drawing of Gorm too!
You can make a whole collection of Squishmallow drawings to decorate your bedroom or maybe you’d just like to do one or two. I hope you will have fun drawing your own Squishmallows! 🙂
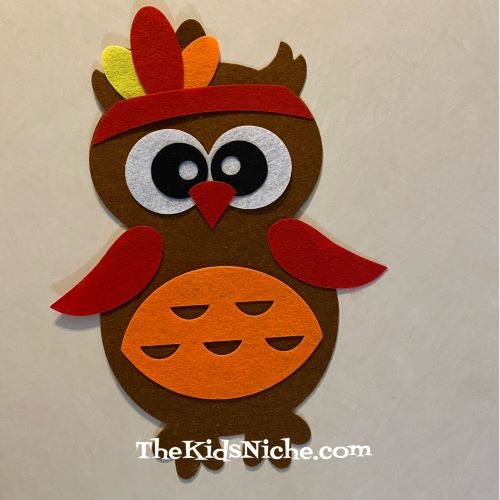
I came across this adorable owl craft kit at our local Dollar Tree store. Just had to share it with you! 🙂
This is a great, simple craft kit that you can do with the kiddos. All you need to complete it is some glue.
There are no written instructions, but you can easily make this owl just by looking at the picture on the package.
These are the pieces inside the package. There are a few pieces you will need to punch out of the felt and then you’re ready to create!
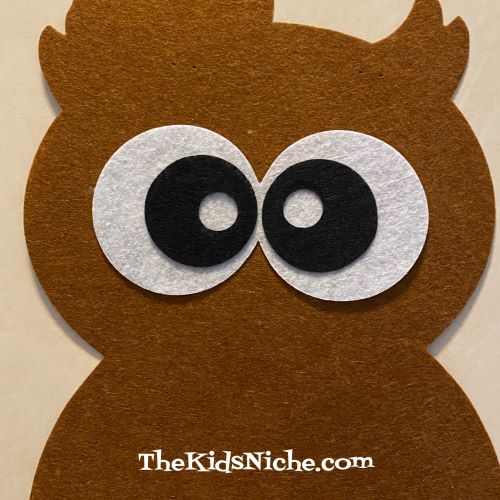
I started with the eyes, first putting the white felt piece in place and then adding the 2 black eyes. You can aim the eyes in the direction you like best. 😉
Next I added the headband, feathers and the beak.
Then I added the tummy and 2 wings.
And your cute little owl is finished! 🙂 Super simple and super cute! And the best part is, it only cost $1.25! (plus tax) Great little project for fall! 🙂
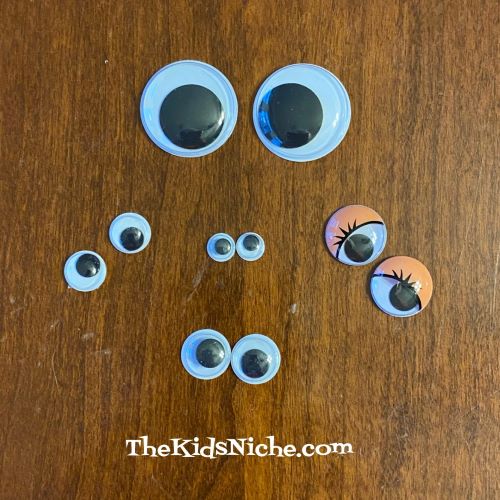
I had a streak of orneriness the other day and decided it would be fun to stick some wiggly eyes around the house and wait for someone to notice them. 😉 What are wiggly eyes? The cute little plastic eyes where the black part of the eye moves around. They are black and white but can also be colored.
I put a small piece of double-sided tape on the back of each eye. A word of caution…be careful not to stick them on anything valuable in case the tape would leave some sticky residue behind or tear paper.
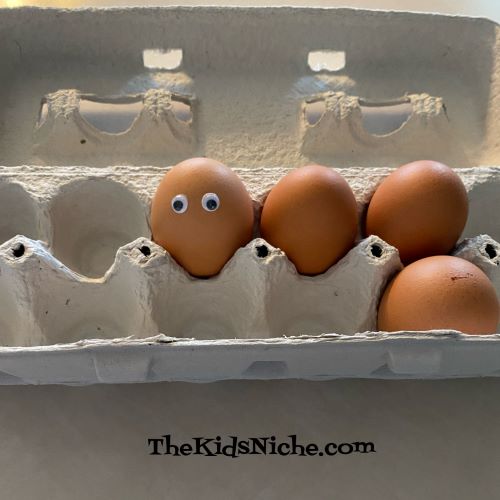
This is what my husband saw when he wanted to fry some eggs. (Yes, he thought it was funny. He’s a good egg.) 😉
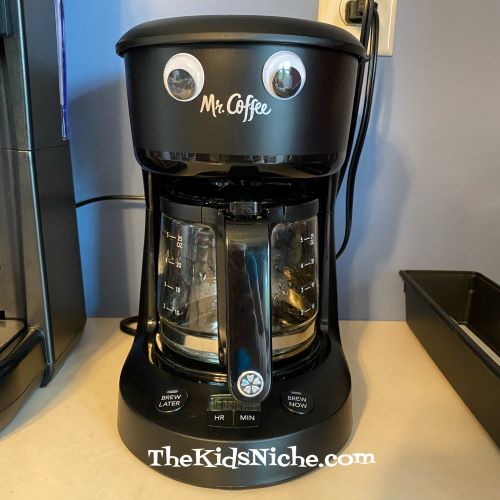
It’s not every day that the coffee pot looks back at you!
Here are a few other places that I put wiggly eyes…
In the fruit crisper drawer in the refrigerator…
On a potted plant…
Inside a bathroom cupboard…
On my hubby’s hat…
On an insulated cup…
On the bathroom scale…
And on the piano. (I didn’t use any tape for this one. I just laid the wiggly eyes on so they would stay in place.)
Did any of those pictures make you grin? 😉 It’s a simple and inexpensive way to have some fun. Who knew a pack of wiggly eyes could be so fun? 🙂 Give it a try yourself!
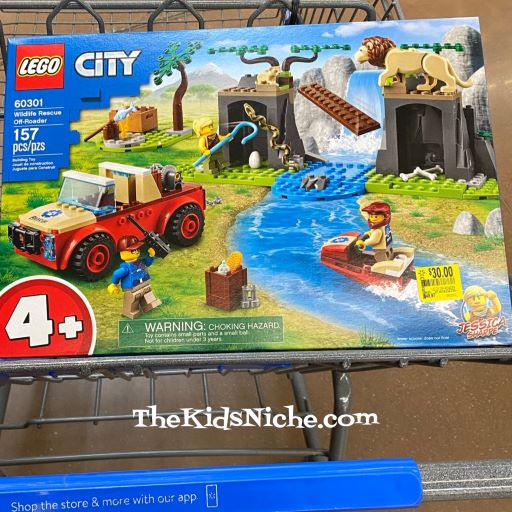
Just want to share a couple of nice toys that I saw on clearance at Walmart. I can’t promise these are available at your nearest store, but it might be worth a stop to check it out. 🙂 The first one is a great Lego set…its the Lego City Wildlife Rescue Off-Roader. (#60301)
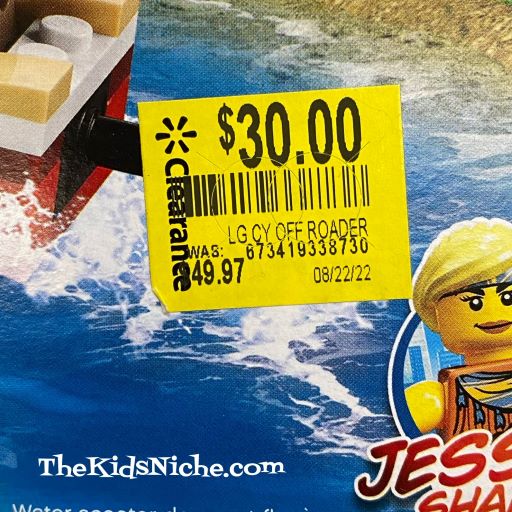
The clearance tag shows the regular price was $49.97 and it’s on clearance for $30.00! Nice price!
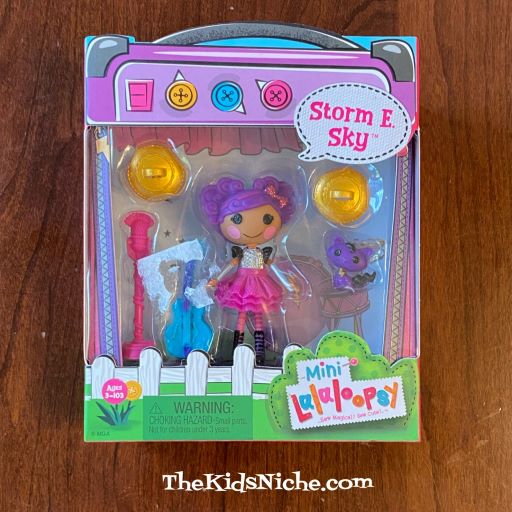
The other toy I want to share with you are the Mini Lalaloopsy dolls.
The regular price on these was $7.44 but they are on clearance for $2.00! Wow! Our store had 3 different dolls available.
Pix E. Flutters…
Storm E. Sky…
And Jewel Sparkles. These are quite cute!
So if you have some time (and a place to stash presents!) you might want to check out the toy clearance at your nearest Walmart store! Good luck! 🙂
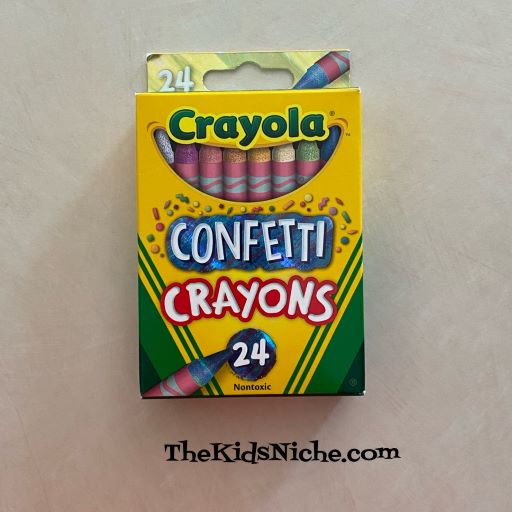
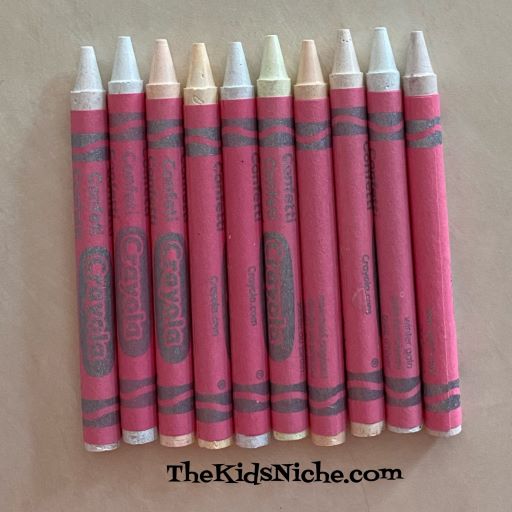
Have you tried the Crayola Confetti Crayons yet? They really are quite fun! I found them at a Walmart store. I would say they are an inexpensive box of fun!
As you can see from the writing on the box, there are 24 crayons included. The box also says “Bursting bits of color! Each Crayola Confetti Crayon has specks of color inside for surprising streaks and a party in every crayon!”
The crayons have some pretty awesome names too! Like party fish…
Or meteor shower or new year’s eve or rain drops… It’s fun just reading the name on each crayon!
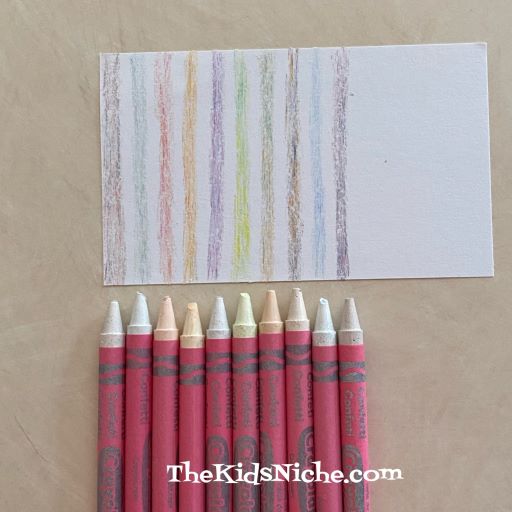
Take a look at all the crayons that look mostly white.
Buuuut….surprise!! Look what it looks like when you start coloring with them!
Pretty cool, right?! Coloring is so much fun because you don’t know when a streak will show up or what color the streak might be! 🙂 Can you see the colorful streaks in this picture?
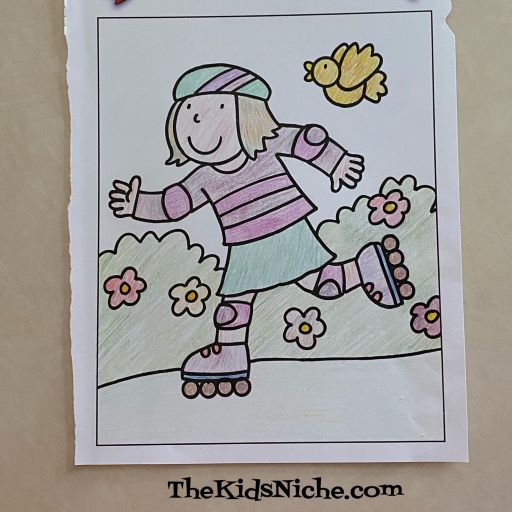
Let’s look a little closer…look at the colors in this bird.
You can see the streaks in the girl’s skate and in the green bush and the colorful flowers.
The colors look much better in person, of course! 😉 Crayola Confetti Crayons are a lot of fun in one small box! 🙂
Hello again! Sorry you haven’t heard from me in a few days but we needed to travel out of state for a funeral. Back home now and trying to catch up again.
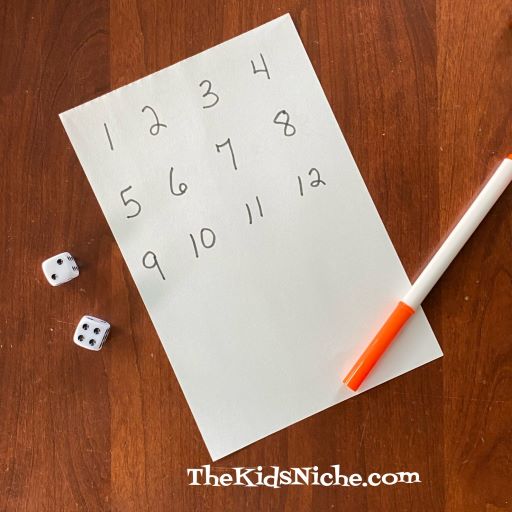
So today let’s look at an easy number game that can be played different ways and only requires paper, some markers or crayons and some dice. The game also reinforces learning numbers and helps with small motor skills. Shhh! Don’t tell the kids that part! 😉 Grab 1 piece of paper for each player and 1 dice to share with all the players to begin with…and a black crayon or marker and 1 marker of another color for each player.
Basic version…
Have each player write the numbers 1 – 6 on their piece of paper. Or for the kids that are just learning their numbers, you can write the numbers for them. Leave a little space between the numbers.
Each player should roll the dice once and the player that gets the highest number will go first. To play, roll the dice once and cross off the corresponding number on your paper. Example, if you roll a 1, cross off the 1 on your paper. Pass the dice to the next player moving clockwise around the circle of players.
Continue with each player rolling the dice once and marking their paper. If you roll a number that you have already crossed off on your paper, you do nothing for that turn and play passes on to the next player.
The first person to cross off all their numbers is the winner!
Version #2…
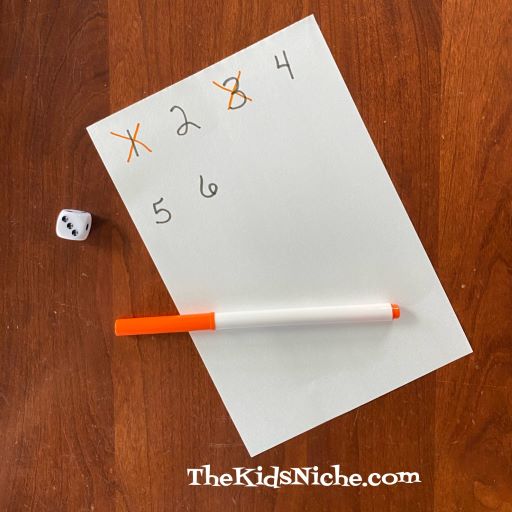
Write the numbers 1 – 12 on each player’s piece of paper. Use 2 dice for this version of the game.
This version is played in a similar manner as the basic version, but each player rolls 2 dice. You can use the number from just 1 dice OR you can add the numbers from both dice together. In the following example, the player rolled a 2 and a 6. You could cross off the 2 OR the 6 OR the 8. You can only cross off 1 number each turn. In this picture, the 2 and the 8 have already been crossed off, so you would cross off the 6.
Again, the first player to cross off all their numbers is the winner. 🙂
Version #3…
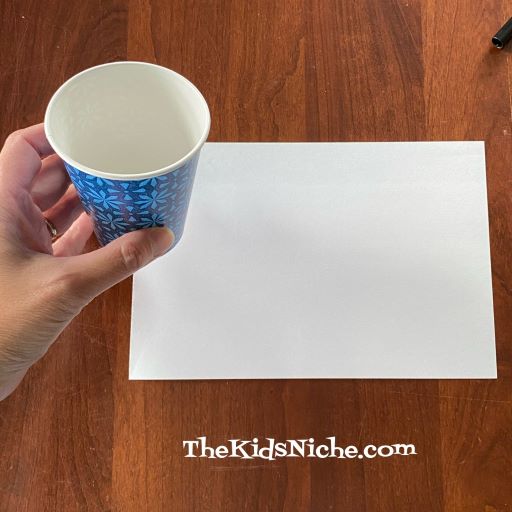
Find something that is round in shape that you can trace around to make circles on each player’s paper. I used the bottom of a paper cup.
Draw 6 circles. (Or more, depending on how you want to play the game.)
Number the circles 1 – 6. Grab a few crayons for this version of the game.
As each player rolls the dice, they can color in the matching circle. (Sneaking in some small motor skills practice!)
You can also take the opportunity to talk about the colors the players choose to use. Some questions you might ask… What color did you choose for number 3? What is your favorite color? What else can you think of that is green? (Or whatever color they are using.)
First one with all their circles colored is the winner!
Version #4…
Draw 6 circles for this version of the game, but make the number inside each circle smaller. When the player rolls the dice, they draw/color that number of objects in the correct circle. For example, if you rolled a 6, you might draw 6 dots in the number 6 circle.
The winner is the first one to complete all their circles. I can see this game getting rather silly when players draw crazy things in their circles! 😉
I’m sure you can think of even more ways to play this game, but hopefully these ideas will get you started on your way to having fun with the number game! 🙂
I found a couple of felt craft kits at the Dollar Tree store and wanted to share this idea with you. At just $1.00 for each kit, you can craft with up to 5 kids! Pretty good price, right?! So here’s the 2 kits I found:
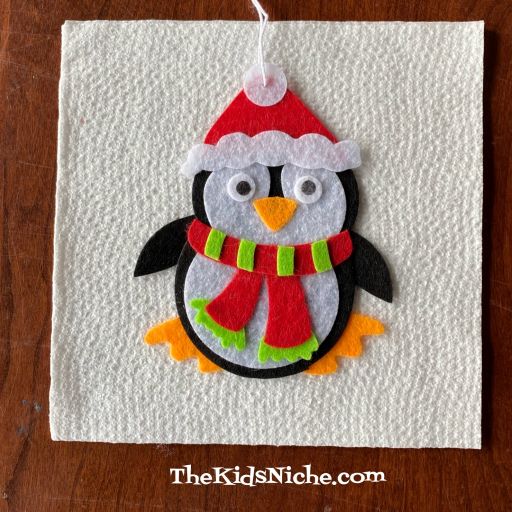
Let’s look at the penguin felt ornament kit first.
This little guy is so cute!
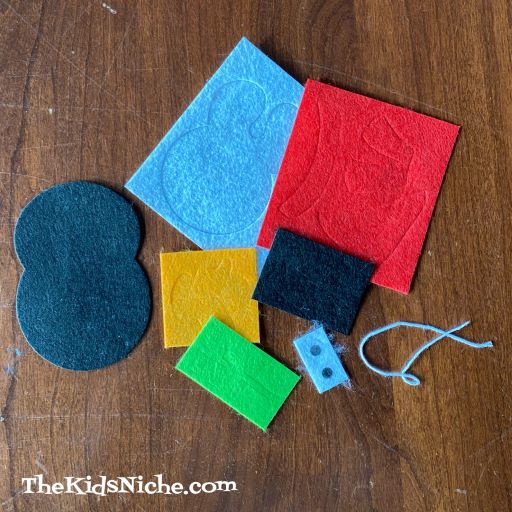
When you open the package, you will find 5 individually packaged kits.
In each individual package, you will find this:
The felt pieces for making the penguin have been punched and for the most part you can gently pull them apart to get the pieces ready to use. Have a pair of small scissors handy in case any pieces need a little help getting free.
Once all the pieces are separated, you are ready to put your penguin together. I would recommend using a craft glue like Tacky Glue instead of Elmer’s glue. I used the Elmer’s glue when making my penguin and I had some trouble getting the pieces to stay together. I switched to the Tacky Glue.
There weren’t any instructions included in the package, but you can figure out how to put the penguin together by looking at the picture on the front of the package. (Remember, this kit only cost $1.) 😉 And here is my finished penguin! I think he’s a cutie!
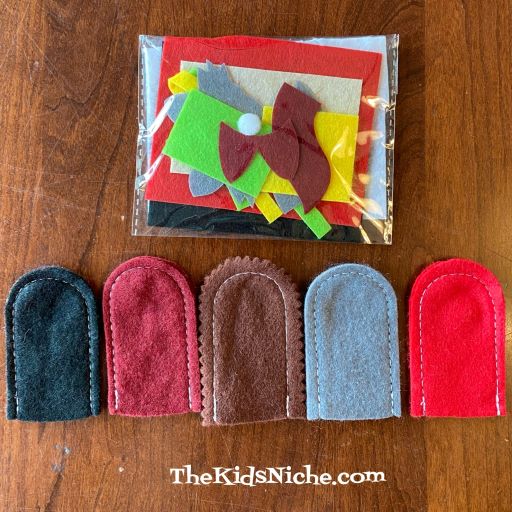
Now let’s look at the second kit I bought. This kit is for making animal finger puppets.
They are cute too!
I had more difficulty getting these felt pieces separated and I did resort to using a pair of scissors at times. Also this package did not have the kits divided into separate kits already, so you will have to figure out which felt pieces go with each finger puppet. It’s rather like making a puzzle. 😉
Here they are separated into the pieces for each animal. I didn’t go ahead and make the puppets because I wanted to save them for a fun project for some kids I know. 😉
These kits might be a little too difficult for really young children but I’m sure ages 7 or 8 and up will enjoy making them. I’m not sure if the felt pieces will stick together well enough to be used as finger puppets, but they would definitely make some very cute ornaments to hang around your house. 🙂 Mark these down as 2 more fun projects from Dollar Tree! 🙂
Sometimes kids (and grownups) wake up on the “wrong side of the bed”. In other words, they wake up and for one reason or another, they aren’t in a very good mood. And sometimes that bad mood comes later in the day from things that have happened during the day. But sometimes all it takes is a little bit of kindness or a little bit of fun to turn that frown upside down. 🙂 Those little things I like to call smile starters. Maybe its a hug that lasts more than a few seconds. Or maybe its seeing a funny smiley face that was made just for them. Here are a few smile starter ideas for you to try.
Draw a smiley face on an orange. Who can resist that sweet face?
Draw several smiley faces on a bunch of bananas. Maybe they are even looking at each other.
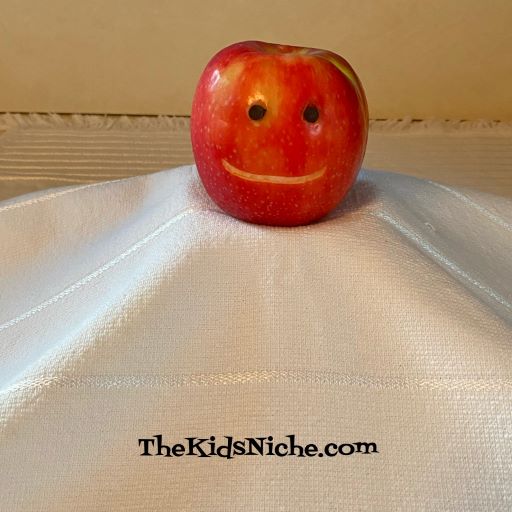
Carve a face into an apple and add a couple of chocolate chips for the eyes.
Use ketchup and mustard to make a funny face on a hamburger.
Draw a smiley face on the top of the lid on a bottle of juice.
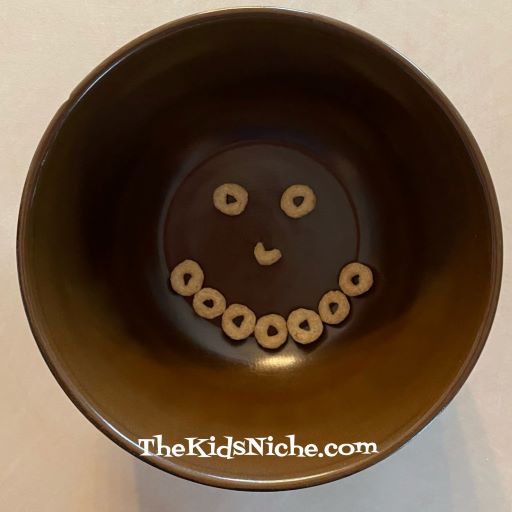
I’m guessing you would get a smile out of someone who looks into their bowl at breakfast time and sees this looking back at them!
None of these things take very long to do, but I’m betting they will work great to get some smiles started at your house! Or sneak one of these into a lunchbox for a fun surprise. I’m sure you will be able to think of other simple things like this that you can do to encourage someone to be happy. After all, smiling is contagious so start passing some around today! 🙂
We haven’t done any tongue twisters for a while, so let’s try some today. Wiggle your tongues around to get them loosened up and here we GO!!
Trying saying each of these 5 times fast. 🙂
1.) Mixed biscuits
2.) Pirates Private Property
3.) An ape hates grape cakes.
4.) Willy’s real rear wheel. (Oh my, this one is hard!)
5.) A happy hippo hopped and hiccupped.
Wow! Some of those I had trouble saying right just ONE time! Haha! I hope you have fun trying to say these! And be sure to try them out on your family and friends! 🙂