Paper Caterpillar Racing Fun

Well, it’s Easter weekend and many things are different this year because of the Covid-19 pandemic and the “stay-at-home”and quarantine orders. We can choose to be miserable and dwell on what we can’t do or we can pick ourselves up and make our own fun things to do. Here is one suggestion that will bring giggles and smiles to the kids’ faces. Let’s race paper caterpillars! 🙂 All that’s needed is some construction paper, something to color with, a pair of scissors and a drinking straw. The Crayola company has beautiful directions for this project on their website and here is the link to get you there:

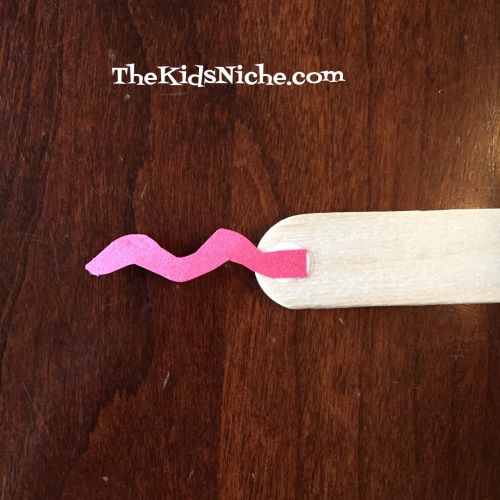
We tried this project at our house so I want to share our paper caterpillar fun with you. Here are our caterpillars…let’s see…they need names…how about Carl and Cathy?

Carl is the one on the left and Cathy has the dots and stripes. They are ready for the race! Let’s set up the Finish Line!

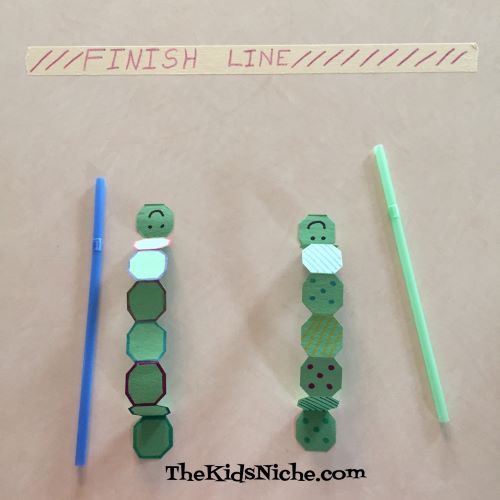
The way you make them race is to blow on their backs through the straw. It will make them hop up and down and move forward. Here we go! Ready….Set…GO!! And the caterpillars are off! They’re inching their way down the racetrack…steady there, guys…oh, my, this is going to be a close race! Who will cross the finish line first?! Aaaaaand the winner IS…….

Cathy Caterpillar!! YAAAAY!! But look at that! Carl was very close behind! I think he might win the next race, don’t you? Everyone in the family can make a caterpillar and you can have a competition. I hope you at least have fun making and racing your caterpillars! Happy Good Friday to you! 🙂

Let’s Draw Bart the Bull

It’s time to get your paper and drawing utensils out again! Today let’s create Bart the Bull. A bull is a male or boy cow. About 2 weeks ago we drew Bessie the cow. If you missed that post, you can go back to it here and have fun drawing Bessie. https://thekidsniche.com/2020/03/26/lets-draw-a-cow/

Here’s Bessie:

Ok, back to drawing Bart! We’ll start the same way we did when we drew Bessie, with an oval shape laying on its side.

Next we’ll draw part of a rounded rectangle for his head on top of the oval. Like this:

My rounded rectangle didn’t come out even, but that’s ok, it will still look fine when we are finished drawing. So if yours isn’t perfect either, don’t worry about it! It will still be great! 🙂 Now let’s add 2 small ovals for Bart’s eyes and 2 ovals for his nose. Here’s where to place them:

The next step is to color only half of the eyes in. Bart will be looking to the right or to the left or up or down depending on which half you color in. Also color in the 2 ovals inside the larger oval for his nose holes. Then draw 2 eyebrows above his eyes and a curve for his mouth smiling. I drew his mouth on the side and his eyebrows coming close together to make him look ornery. 😉

Now draw his 2 ears.

And now he needs you to give him 2 horns.

It’s up to you to decide if Bart is a black and white cow like Bessie or some other color. Here’s one way he might look if he is a black and white cow.

This is Bart if you’d like to make him a brown cow.

And there you have it! All done and a great job you did! Now you can draw as many cows as you like. I hope you had fun drawing with me today!

Craft Stick Fun Project #5

Today let’s look at making Ssssssnakes with craft sticks! 🙂 This is a really quick project and good for kids that are old enough to color. Glue 2 wiggly eyes onto the end of a craft stick.

Grab your colored pens or markers and decorate your snake however you like. I went with polka dots!

Cut a curvy tongue out of red construction paper or red felt.

Glue to the bottom of your snake on the end by the eyes leaving most of the tongue hanging out past the stick.

Aaaand your first snake is done! I couldn’t resist making a second one! 🙂

This is a quick and easy project for even young children. These don’t have to look like real snakes as you can see mine don’t! Lol It’s a nice time to practice the letter “S” since “snake” begins with “S” and snakes make a hissing sound…ssssssss! 😉 I’d love to see your snakes if you make some! Thanks for stopping by!

Craft Stick Fun Project #4

Here we go again with another great craft stick project! Today we’re making a puzzle! To get started, line up several craft sticks flat on a table. I used another stick to make sure my 5 sticks were lined up well.

Place 2 pieces of masking tape or painters tape across the sticks to hold them together. These are just used temporarily while we are making the puzzle.

Flip the craft sticks over and draw/color a picture on them. I suggest that some of your pictures are on more than one stick so there will be things to match up again when making the puzzle.

Once your picture is complete, remove the tape from the back. Move the sticks around so they are out of order.

Let your kids put the puzzle back together.

Ta dah! Kids will have fun drawing and coloring a picture on the sticks themselves or you can make the puzzle for them. Another idea for making a puzzle with craft sticks is to write the letters of your child’s name on sticks…one letter on each stick…and then let them put the sticks in the right order to spell their name. Great practice for learning how to spell their name!

If your child is just beginning to learn their name, you can add some other little drawings on the sticks that they can use to help match the sticks in the right order and complete the puzzle. In the same way I added the circle, square, triangle and star in my example.

One more puzzle idea that is a little bit harder to craft but just as much fun for your littles to put together, is to use a small picture (I used one from a magazine), cut it in strips and glue it to the sticks. Older kids could enjoy making puzzles this way. Here are the steps I used…find a picture that is just a little bit shorter and the same width as the number of sticks you are using.

I decided to use the same sticks that I used for the name puzzle only using the back sides of the sticks. You can fit 2 puzzles on 1 set of sticks this way. 🙂 Place your picture upside down and lay the coordinating stick on top, then trace with a pencil down the side of the stick.

Make sure to lay the sticks in the right order so that the puzzle on the other side will still fit together. Cut the strip off the picture and glue it to the back side of the first stick.

Lay the next stick in line onto the picture, trace down the side as you did with the first stick, cut the paper strip off and glue it to the back of the second stick.

Continue in the same manner with the rest of the sticks in your puzzle until each stick has a piece of the picture glued to it.

Great job! Now mix up the sticks and let the kids have a go at putting the puzzle together!

I hope you found these ideas interesting and that you and your favorite kids have fun making puzzles together! 🙂 Thanks for stopping by! Tune in tomorrow for some more craft stick fun! 🙂

Craft Stick Fun Project #3

Sorry I missed a couple days this week – things got kinda crazy here as they likely have for all of you! Let’s move on to our next craft stick project! Today we’ll be adding names to sticks in two different ways. 🙂 The first way is using glittery sticker letters.

This is pretty self-explanatory, I guess. Just peel and stick the letter stickers onto the craft sticks to form a name.

You can make one for everyone in the family or make some for your friends. 🙂

The second way to make name sticks is using the little plastic beads with letters on them.

This is a good project to help kids learn or reinforce knowing their letters by letting them sort the beads out and find the letters for their name. If they need a little help, try printing their name on a piece of paper so they have something to help them know which letters they are looking for.

You can arrange the letters straight up and down, turn them a little bit to make them a little more fun or even put them on the stick sideways.

The pack of letters I bought also had a few red hearts and they added a happy little extra to the sticks.

You can use the sticks for marking each person’s place at the table. Or make a snack in little paper cups and add the stick to each one. Hide the cups for the kids to find and they will know which one is theirs by looking at the stick. Its good practice being able to recognize their name! The sticks can also go in the child’s room or hang on their door by adding a piece of string. I’m sure the kids will have fun coming up with other ways to use them! Have fun! Thanks for visiting! 🙂

Craft Stick Fun Project #2

Here’s our second craft stick project for this week! This one uses wiggly eyes and some markers or colored pens with the craft sticks.

For this project we are making some funny people. Glue 2 eyes on one end of the stick and use your markers or pens to draw on faces and however much more of a person you would like to include. Here is Ben…

And next we have Mary…

It’s also fun to just draw eyes on your person. This is Lou…

And finally Betsy.

And now we have enough to have a puppet show! A simple but fun craft! 🙂

Simple Winter Wreath

Are you ready to put away your Christmas wreath but feel like its too soon for spring decor? Here’s a fun and quick little project for a winter wreath. We can still have snow where we live for a couple of months yet, so making a wreath with snowmen and snowflakes seems totally appropriate. You can use whatever theme you’d like – even a spring theme, if you are so inclined. This project is probably geared more for older kids or for younger kids with lots of help from an adult.

Here’s what you need to get started: a wreath form, (I used a 14″ one), some fabric printed with your theme, a glue gun, and some little items you might like to use to decorate the wreath. Gather up any items that might go along with your theme and you can play around with them till you decide which ones to use.

Start by cutting strips of fabric 2″ wide by the width of the fabric. You can use shorter strips if that’s what you have because we will be gluing them together anyway. I needed 5 strips to cover my 14″ wreath.

Trim off the white selvage edges.

Take one strip and start wrapping it around the wreath form. You can glue down the first edge if you want to but I just wrapped the fabric strip around the wreath close enough that it held the end in place.

When you get to the end of your strip, cut it as much as is needed so that you attach the next strip on the backside of the wreath. That way it won’t show on the front.

Using the glue gun, make a line of glue close to the end of the strip on the top side of the fabric.

Lay the end of the next fabric strip on top, lining up the edges. It will then look like a continuous strip of fabric.

Continue wrapping the fabric strips around the wreath form and adding new strips as needed.

When the entire wreath is covered with the fabric, trim the end so that you glue the end down on the backside of your wreath.

This time put the glue on the wrong side or the backside of the fabric.

And now the wreath is ready for decorating! 🙂

Lay your little decorative items around on the front of the wreath. Take time to move them around and to try different ideas.

Once you decide where you want them, use the glue gun to glue them in place.

You did it! And I’m sure it looks great! Find a place to hang your wreath where everyone can enjoy it! Hope you had fun making a winter wreath! 🙂