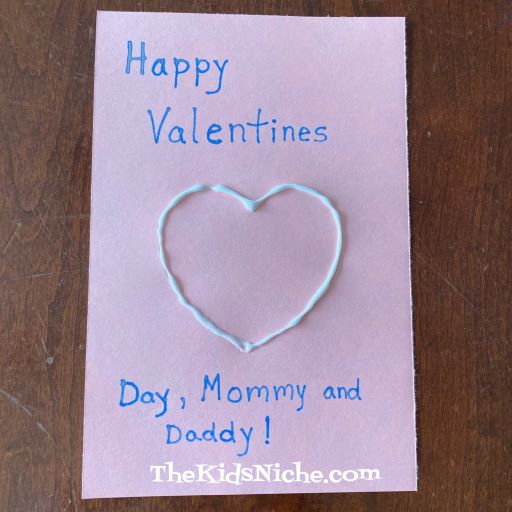
I had some other Valentine’s Day crafts in mind to do for you, but when I got sick with Covid, that all kinda went by the wayside. But I do have one more cute Valentine card idea for you that’s super quick and easy. You can make it as a decoration or a card. You’ll need a piece of construction paper (I used pink), some glue, pretty string or yarn, a pencil, markers or crayons and scissors. Begin by drawing a heart on your piece of construction paper. I used a heart shaped cookie cutter to trace around for my heart. (My apologies for the poor quality of pictures. I was coming down sick when I made this and didn’t feel up to moving around to find better lighting.)
Write your message on your card.
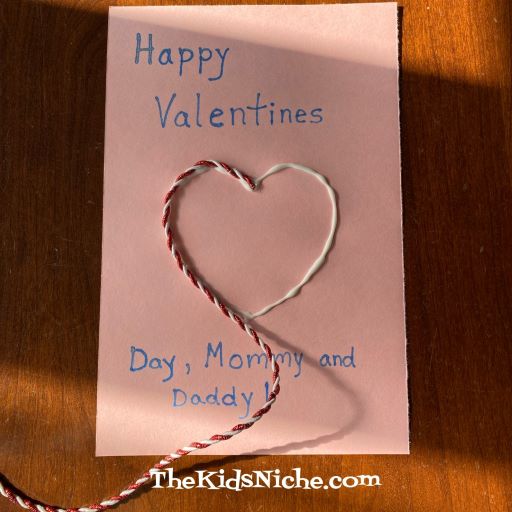
Draw a line of glue on the heart shape.
Lay a piece of the pretty string or yarn all around on the line of glue.
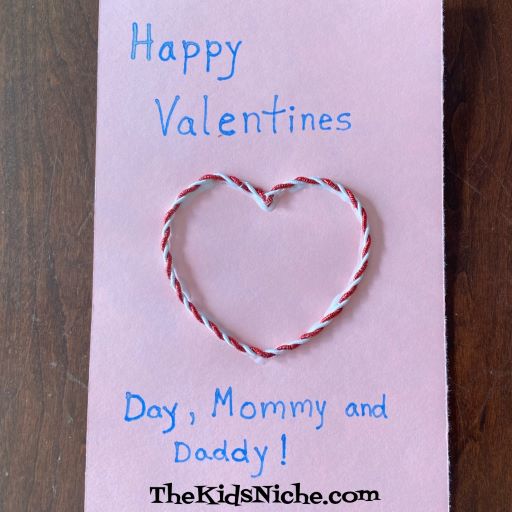
Cut the string or yarn to the right length to finish the heart shape.
That’s all there is to it! 🙂 Your card or decoration is finished! Allow the glue time to dry and then share your craft with that special someone.
Yesterday it was raining and storming and so gloomy and today it’s cold and snowing! I think we all need something to cheer us up, so let’s make some flowers!
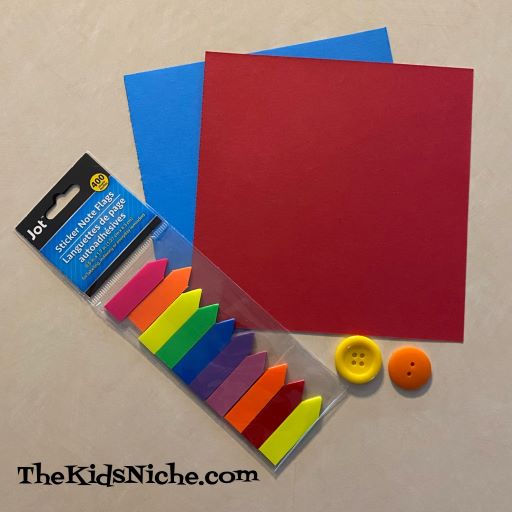
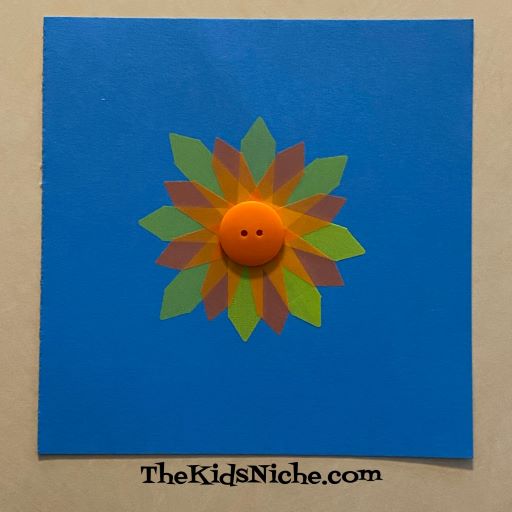
This project calls for some cardstock or regular paper, some sticker note flags, a large button for each flower and some glue.
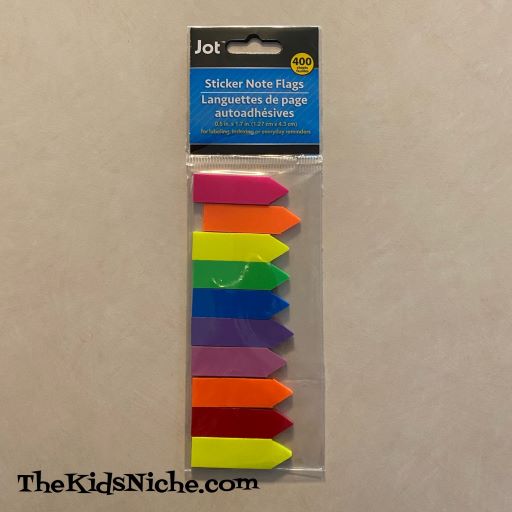
The sticker note flags that I’m using I found at a Dollar Tree store, but you can likely find some in the stationery section of any big box store or an office supply store.
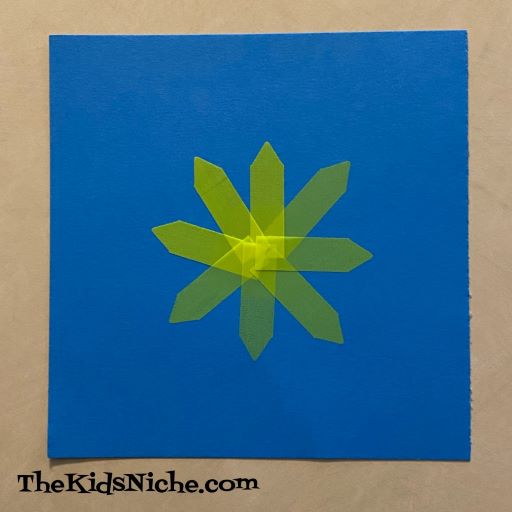
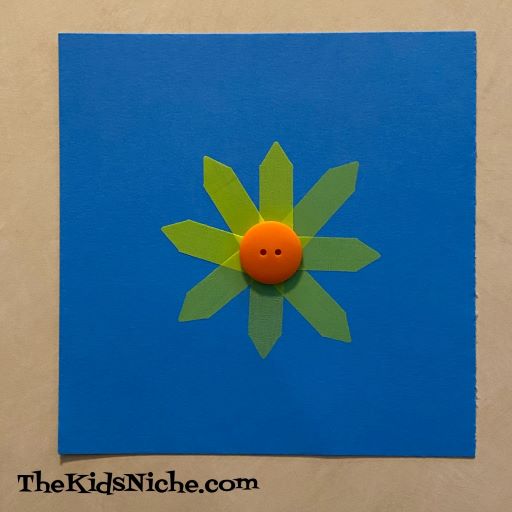
Only the pointed tip of these flags is sticky, but it’s not necessary to glue down the rest of the flag because they will be glued in place later all at one time. Pick the color of flags that you would like your flower to be. I went with yellow for my first flower. (Note: While I used colored paper, the flowers will show up brighter on white paper.)
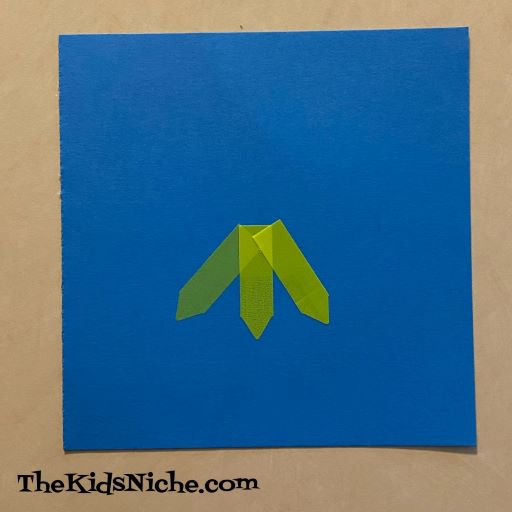
Begin by placing the flags in a circle with the points facing out. These will be the petals of the flower. Overlap the square ends of the flags in the center.
Keep placing the flags until you’ve made a complete circle. It doesn’t matter that the center looks a bit messy because it will be covered up.
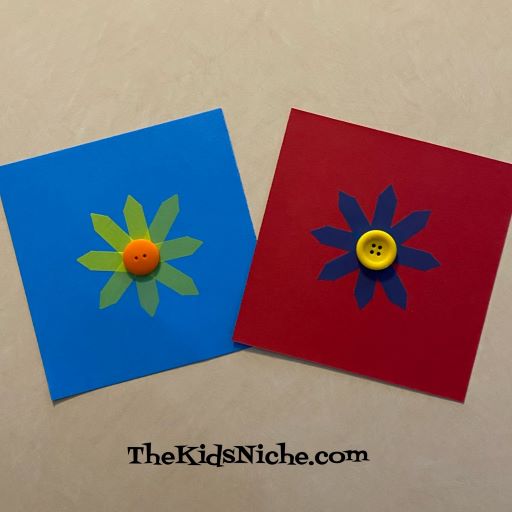
Glue a large button in the center and your first flower is complete! Feel free to decorate the rest of the paper as you like.
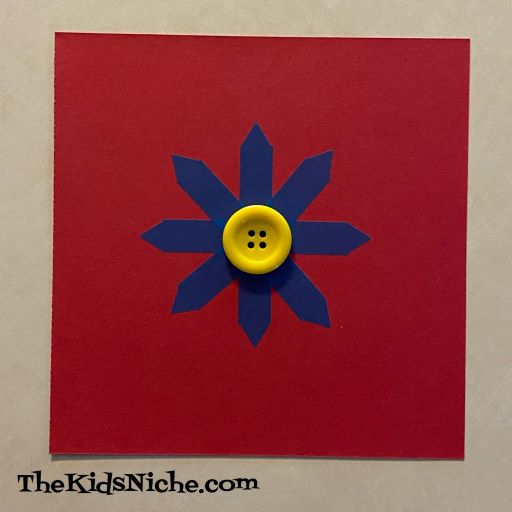
My second flower was made using blue flags on red paper. This time I laid the flags out opposite each other and they look lined up a little better on this flower.
I glued a yellow button in the center of this flower.
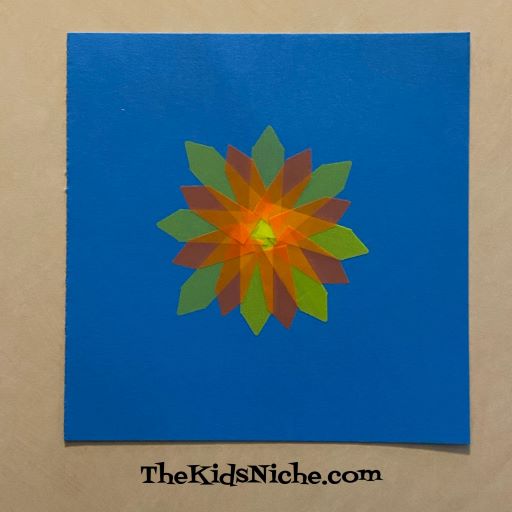
One more little trick you might want to try is to add another layer of flower petals before gluing on the button. I like using a different color of flags and trimming a little bit off the square end to make them fit on the flower.
And then add the button. 🙂
Your flowers could be hung up and enjoyed by the whole family or you could turn them into a card to share with someone special. I hope you’ll have fun making some colorful flowers and brightening your part of the world. 🙂
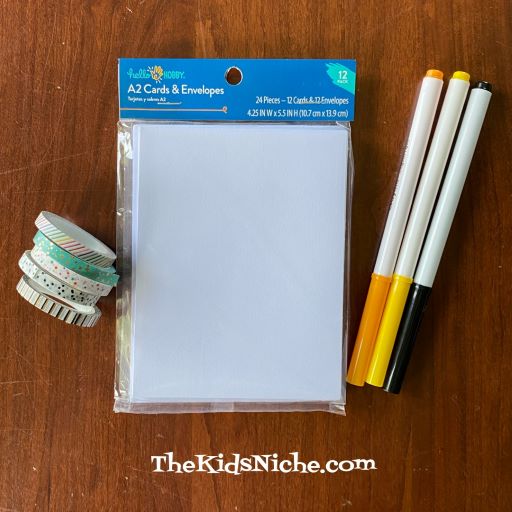
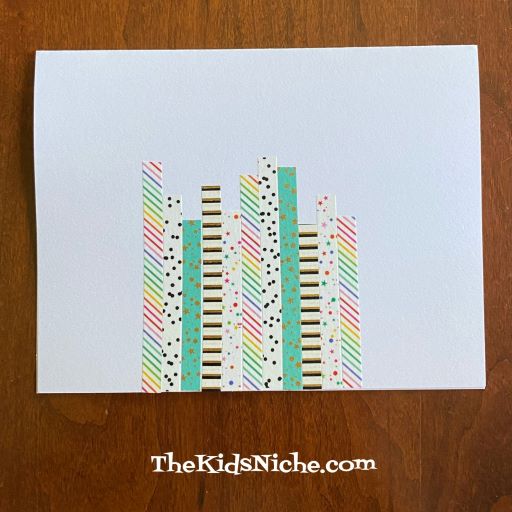
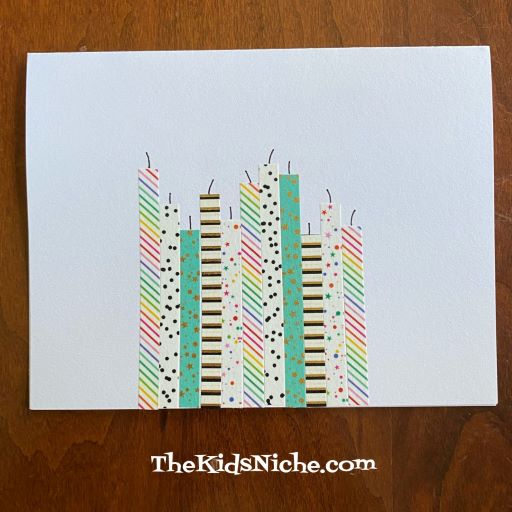
Today I want to share a super simple way to make a birthday card using Washi tape. In case you’ve never heard of it, washi tape can be bought at craft stores and big box stores. It comes in many colors/patterns and in different widths. Super cool stuff! Isn’t this card cute? 😉
For this project you will need some blank cards and envelopes, a few different colors/patterns of Washi tape, scissors and some markers. You can pick whichever width of Washi tape you like and the number of different colors/patterns that you use, but I used 5 colors/patterns in about 1/4″ wide.
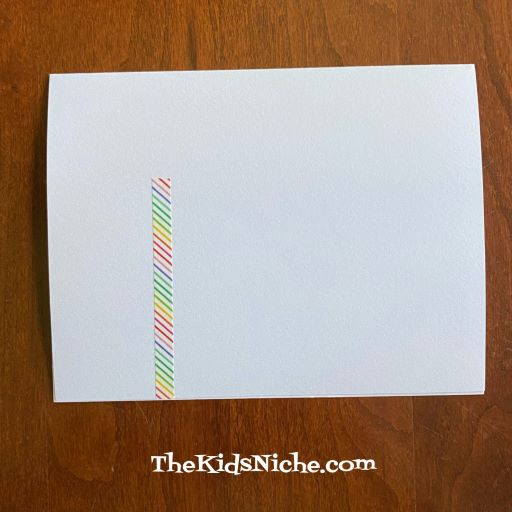
Begin by cutting and placing a piece of Washi tape perpendicular to the bottom front of the card.
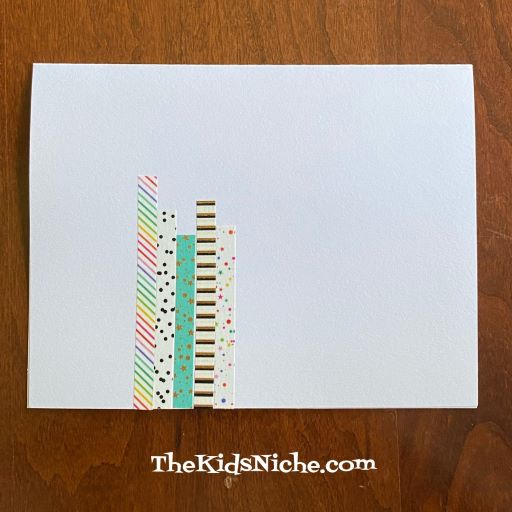
Continue cutting and placing strips of Washi tape in a line across the front of the card with each piece right up against the previous piece of tape. I like to vary the heights of the “candles” by using different lengths of tape.
Continue adding pieces of tape until you have the number of candles you want on your card.
Using a black thin marker, draw a short line on the top of each candle for the wick part of the candle.
Next take a yellow marker and draw a tear-shaped flame on the top of each candle wick. Use an orange marker to outline each flame. I drew my flames going in different directions, but you might like to make yours all lean the same way so it looks like someone is blowing on them.
Now all that’s left to do is to add whatever message you’d like to include. For instance, you might write “Wow…that’s a LOT of candles! Happy Birthday!” You can write on the front of the card and/or put a message on the inside of the card. It’s all up to you and what you want to say to the recipient.
Super simple card to make but so cute when you’re done! If you don’t have washi tape, you could cute strips of scrapbook paper or use construction paper of different colors. Your imagination is the only limit! 🙂 Have fun!
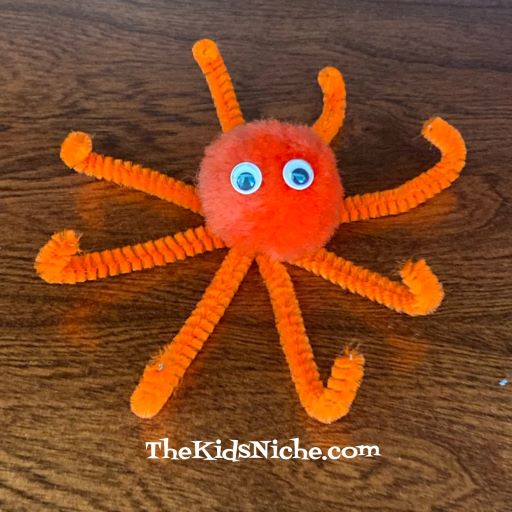
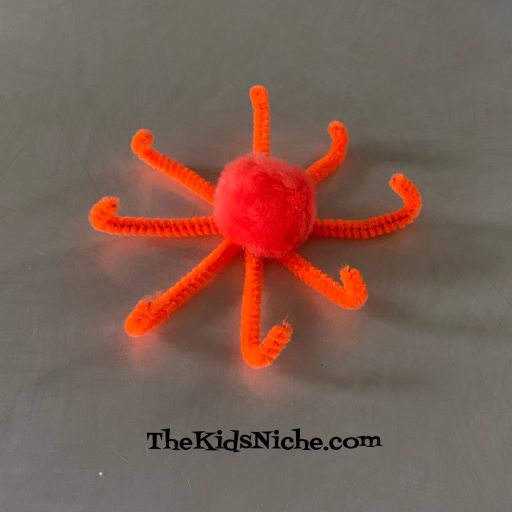
Let’s talk about octopus today and then I’ll show you how to make one with a few craft supplies. I bet you know quite a bit about an octopus already. Like do you know how many “arms” an octopus has? Yes, eight! Wow, do you think it would be cool to have 8 arms?! Is the body of an octopus soft or hard? It’s soft, so soft in fact that they can alter their shape so that they can squeeze through small spaces. How many eyes does an octopus have? It has 2 just like we do and they have excellent eyesight! Octopus are actually quite intelligent too. How do octopus protect themselves from predators? One way is to camouflage themselves into their surroundings so its hard for their enemy to see them. Another way is by expelling “ink” which is a dark colored substance and that gives them some time to swim quickly away. Did you know that when an octopus swims, it’s “arms” extend behind them? So, what do you think? Are octopus pretty cool? I think so too! Now let’s craft an octopus! 🙂
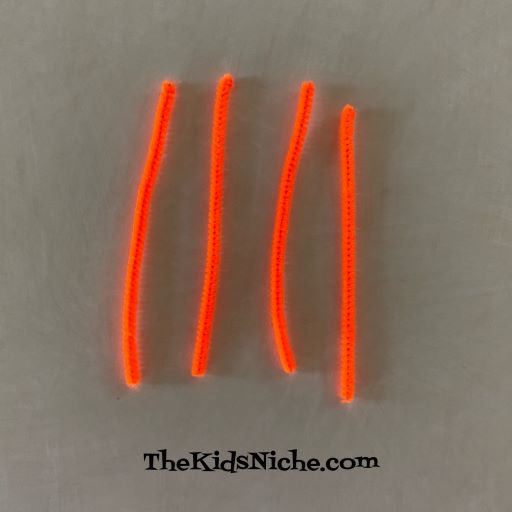
You will need 2 pipe cleaners (or chenille stems), 1 pom-pom, 2 wiggly eyes, a pair of wire cutters or strong scissors and some glue.
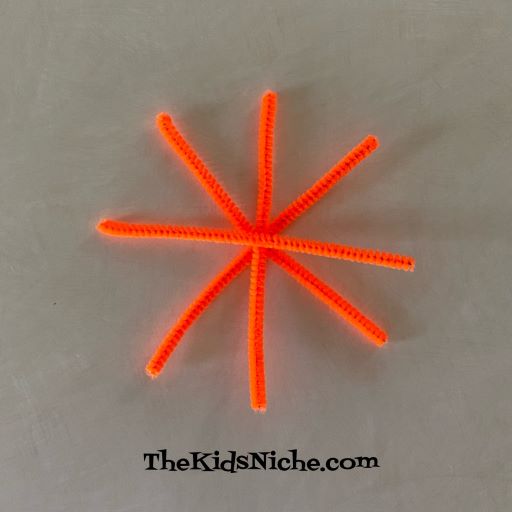
To begin, use the wire cutters to cut the 2 pipe cleaners in half so you have 4 pieces.
Arrange the pipe cleaners into a star pattern like in the picture below.
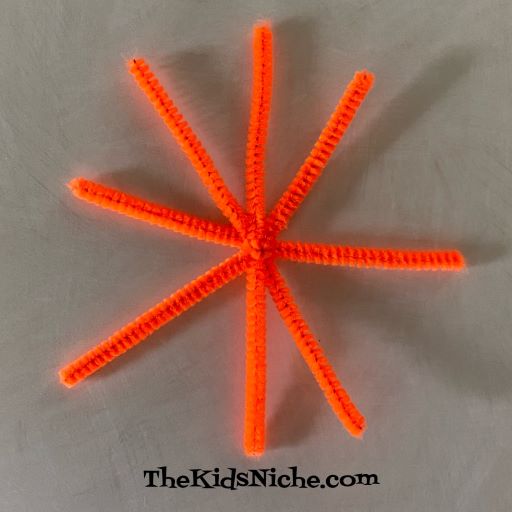
Wrap 1 of the pipe cleaners once around the group to hold them all together.
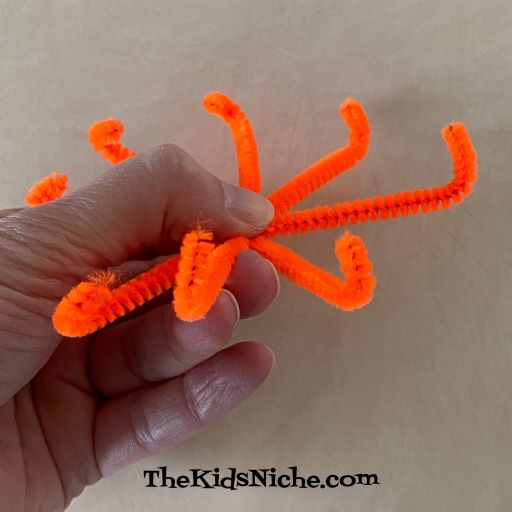
Curl each end of the pipe cleaners up a little bit for the octopus’s arms.
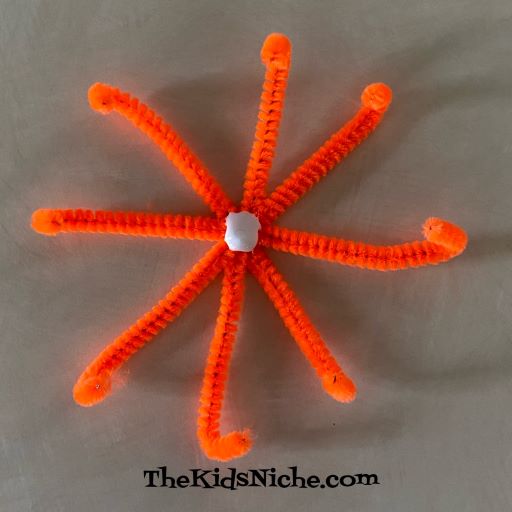
Put some glue in the center of the pipe cleaners…
…and place the pom-pom in the center. Push it firmly down into the glue and hold it in place for a few seconds.
Glue the 2 wiggly eyes to the pom-pom and your octopus is complete!
Find a fun place to display your octopus. Hmm, do you suppose an octopus would be good at playing the piano since it has so many arms? Haha! Yes, we are just being silly now but it’s fun to think about an octopus playing a piano! 😉
I hope you had fun learning a few facts about octopus and that you will have fun making your own! 🙂
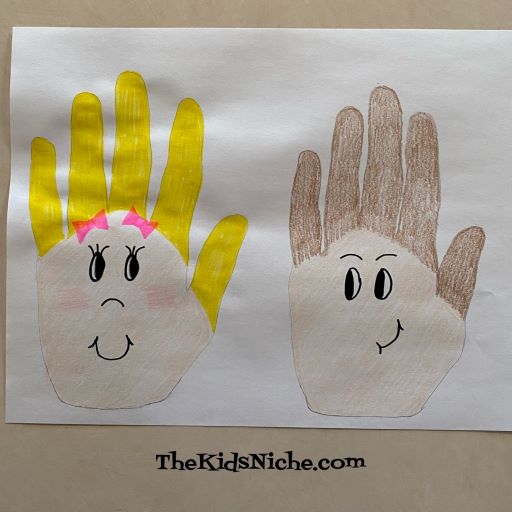
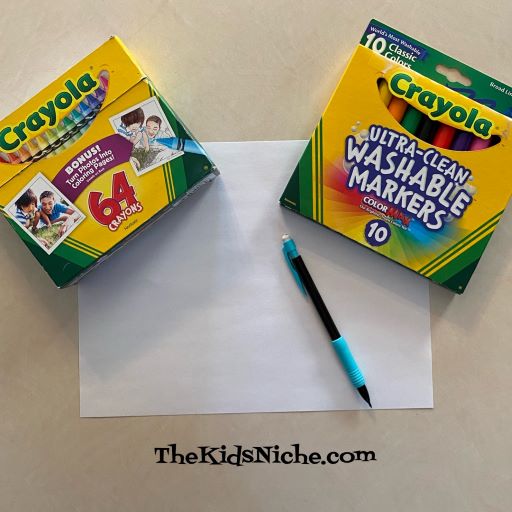
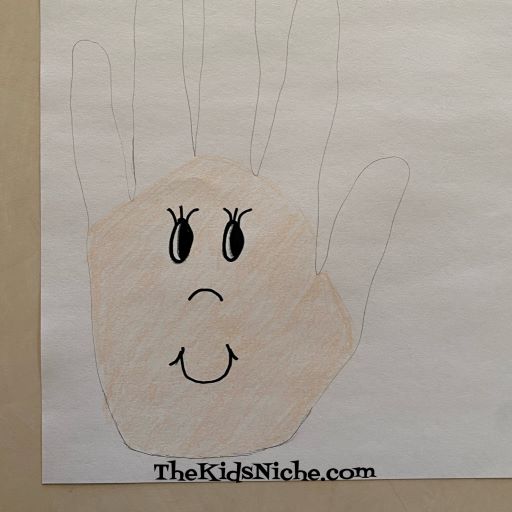
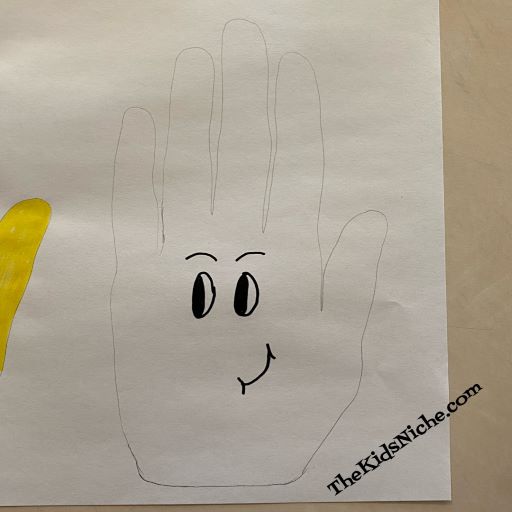
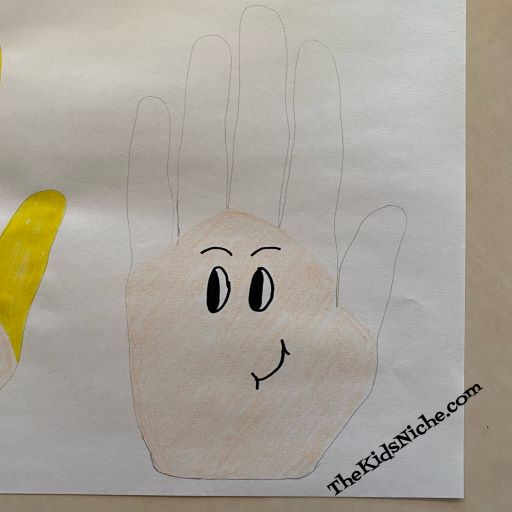
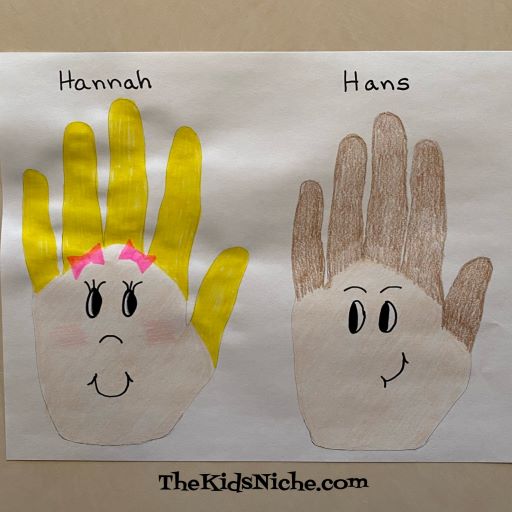
Have you ever traced around your hand with a pencil and paper and turned that hand into a picture? One popular way is to make a turkey at Thanksgiving time. But today we’re making some new friends by tracing around our hands and coloring them in with crayons or markers.
All you need is a piece of paper, a pencil, crayons or markers and your hand. 😉
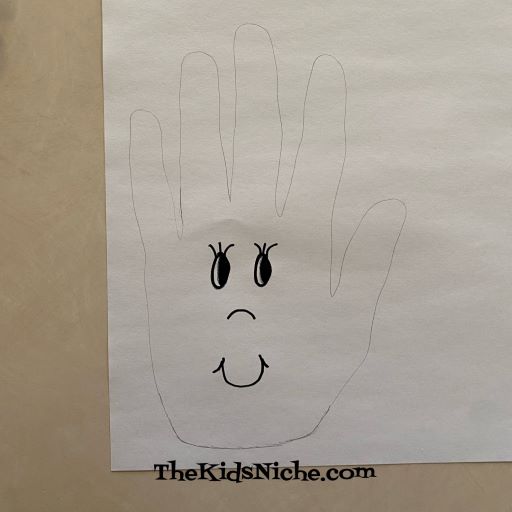
Start by placing one hand on the paper and using your other hand to trace around your entire hand and in between each finger with the pencil.
This will be a girl so draw a sweet girl’s face.
I used a Peach crayon to color her face.
I chose blond hair for my girl and colored her hair…or the fingers…with a yellow marker. (The marker did make the paper bump up for some reason.)
Add a couple of bows to her hair and a little pink color to her cheeks and you’re finished. I’d like you to meet Hannah. 🙂
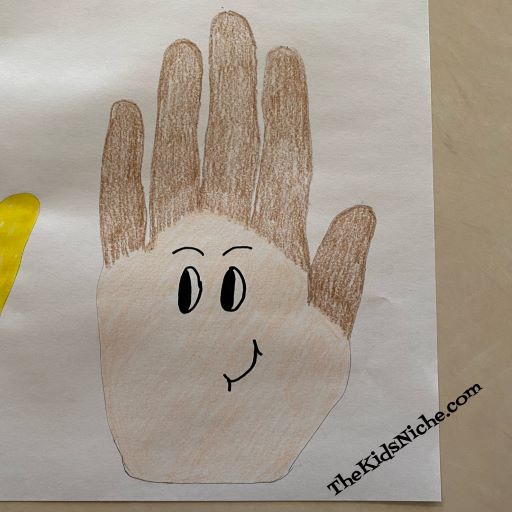
Hannah would like to have a friend, so let’s make a boy too. Trace around your hand again on the other side of the paper. Or on a new sheet of paper if the first one is out of space.
Draw an ornery face…boys are rather ornery, aren’t they? 😉
Color his face in with a crayon…I used Peach again.
Color in his hair. I decided to give my boy brown hair. And ta dah, he is finished too! Now I would like you to meet Hans. 😉
And there you have 2 new friends…Hannah and Hans. (Get it? Hannah and Hans made from hands? Haha!) 😉
I hope you will have fun drawing some Hand Friends! 🙂
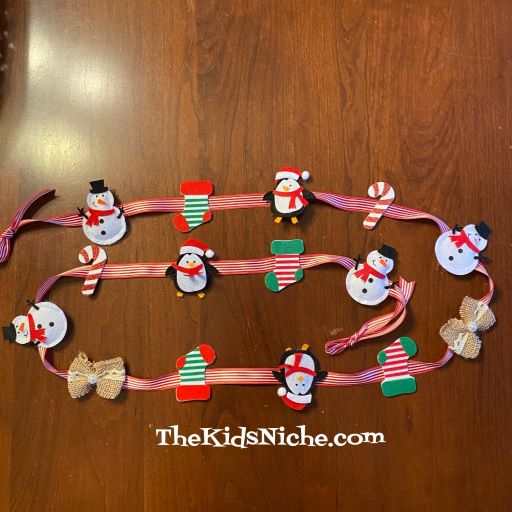
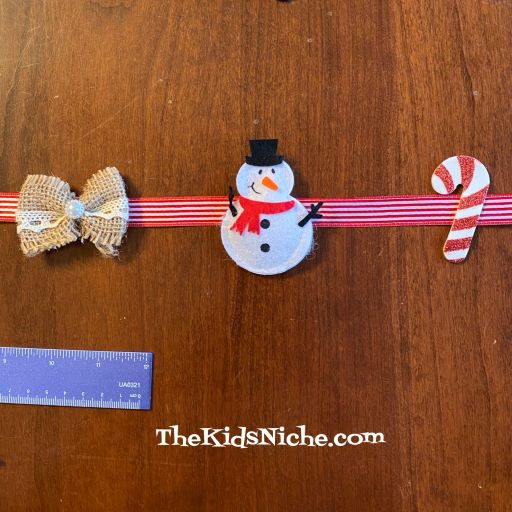
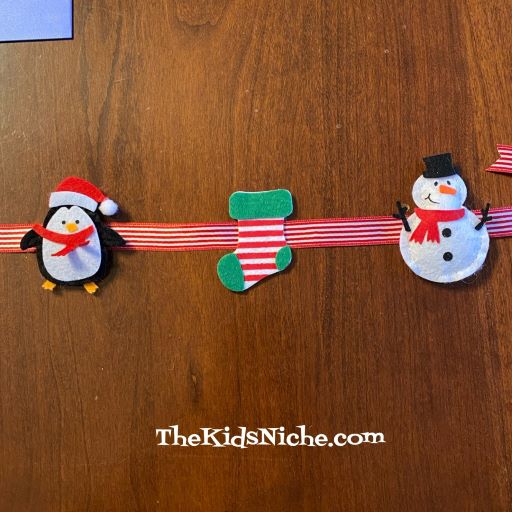
Today I want to share with you a Christmas garland that I made using puffy stickers. It’s simple to make but does require using a hot glue gun. Regular school glue might work but I wasn’t sure it would hold the weight of the stickers so I used a glue gun.
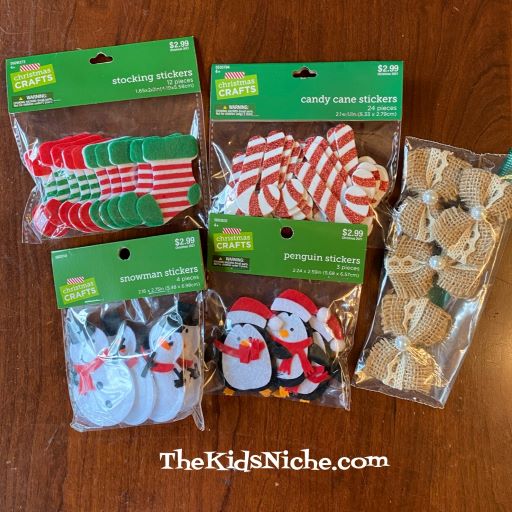
You’ll need some ribbon in the color/design of your choice and some puffy stickers. You could use regular stickers too, but leave the backing on them for this project. Begin by picking your ribbon.
Get your stickers out and ready. I found these at Hobby Lobby for 50% off. Except for the burlap bows…those are some I had leftover from another project.
Decide how long you want your garland to be and cut the ribbon a few inches longer to allow for making a slip knot on each end for hanging.
I folded my ribbon in half and made a tiny mark on the center. I picked which sticker I wanted to be in the center of my garland. Then I put some glue on the mark.
Don’t remove the backing on the sticker. Just place it on the glue dot and hold it in place for a few seconds.
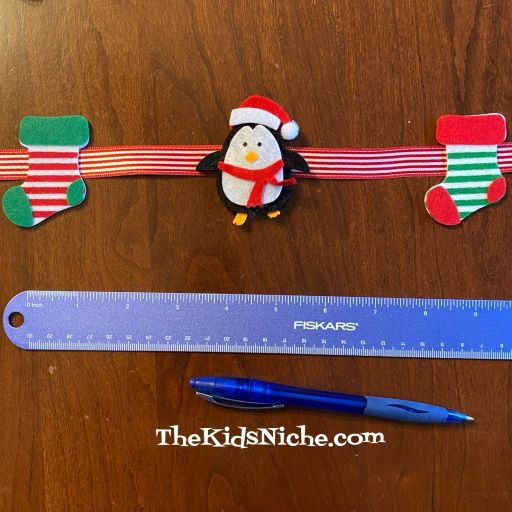
I used a ruler to measure from the center of the sticker to 4 inches in each direction. I made a small dot on the ribbon with a pen and that’s where I placed the next dot of glue from the glue gun.
I followed the same pattern on both sides of my center sticker.
Just keep marking the ribbon every 4″ and gluing on stickers until you run out of room on your ribbon.
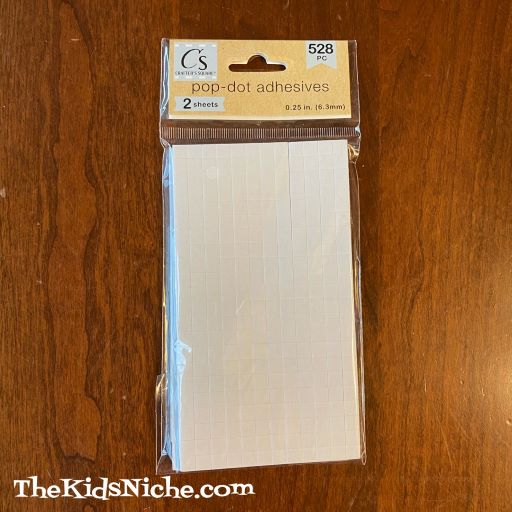
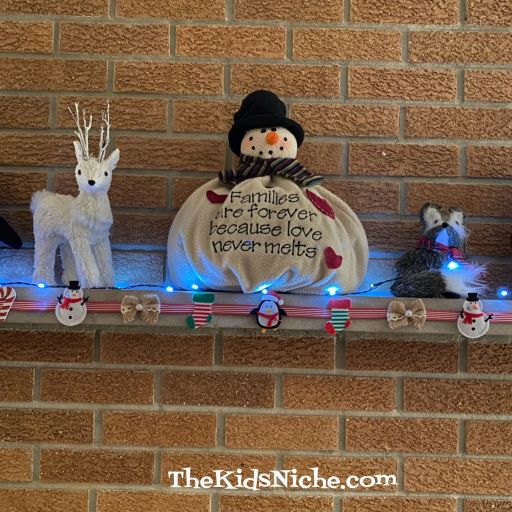
The weight of the puffy stickers made the stickers want to lean forward when I tried to hang the garland up. So I used some of these little dot adhesives to help hold my garland to our fireplace mantel. Depending on what type of stickers you use if you will need to do this step. (The pop-adhesive dots might not work well on painted walls so be careful where you use them.)
So here you are! I think my garland is cute and I’m sure yours will be too!
I hope you will have fun making a Christmas sticker garland for your home! 🙂
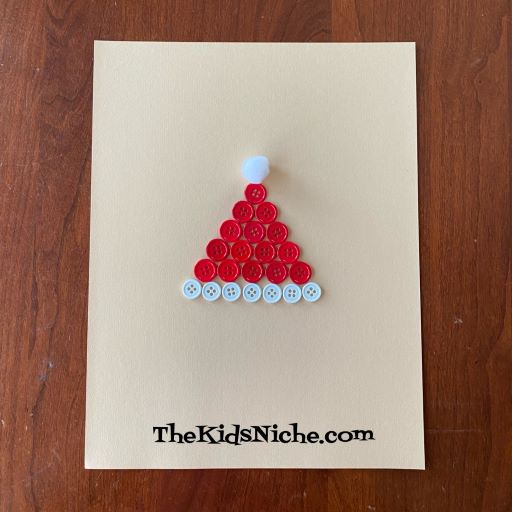
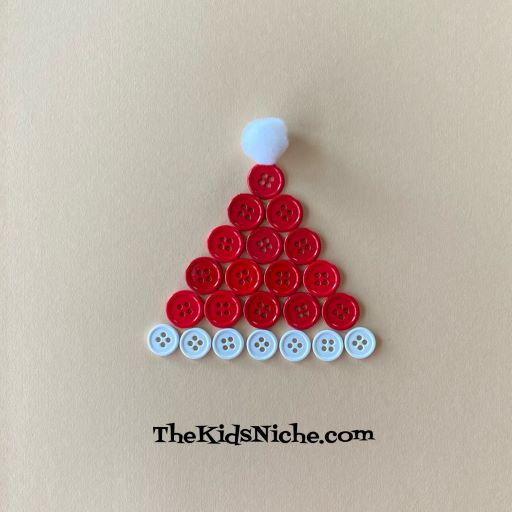
I hope you all had an amazing Thanksgiving holiday and weekend! I’m sorry I didn’t get to post last week but things were pretty crazy here! I’m here now and I have an adorable craft for you today. I’ll show you how to make Santa’s hat using buttons and a pom pom. 🙂
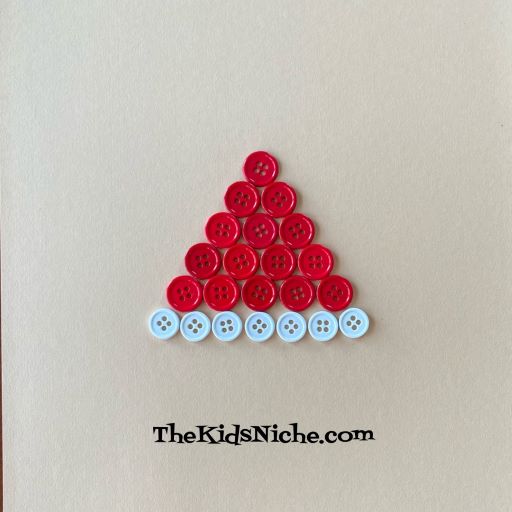
You’ll need an off white or darker colored piece of cardstock, approximately 15 red buttons and 7 white buttons and 1 white pom pom. And glue to hold it all in place. The number of buttons will vary according to the size of buttons you use and how large you want to make your Santa’s hat.
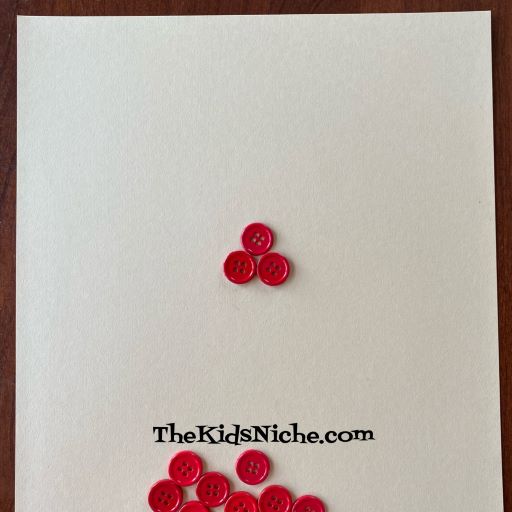
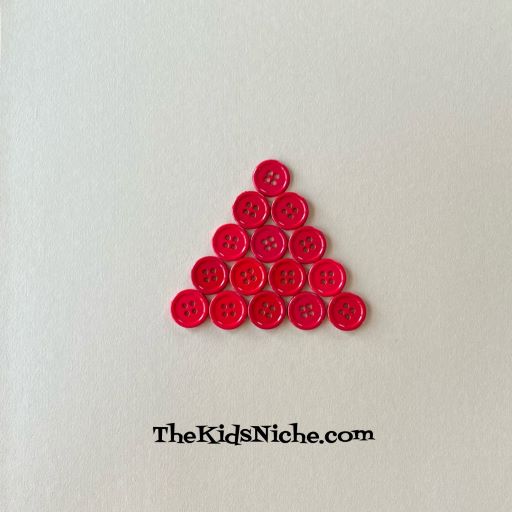
Start by placing 1 red button toward the top of your piece of paper. In the second row, place 2 red buttons. You can glue the buttons down as you go or go back and glue them down after you have them all in place.
Row 3 will have 3 red buttons, row 4 will have 4 red buttons and row 5 will have 5 red buttons. Your Santa’s hat should look like this so far.
Now it’s time for the white buttons. They will go in row 6 along the bottom to be the white edging on Santa’s hat.
Add your white pom pom to the top and you’ve finished making your Santa’s hat! Great job!
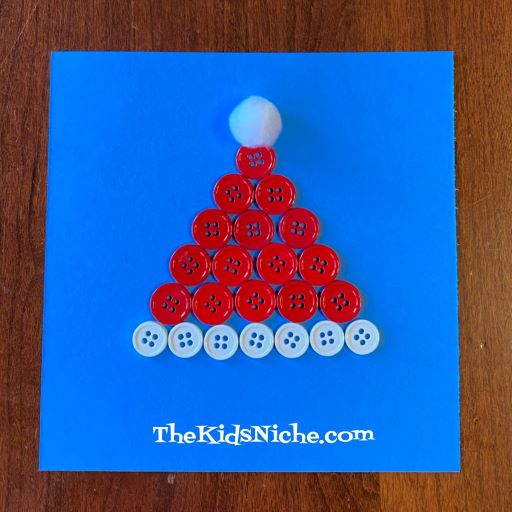
I wanted to use the darker brown craft paper for my background, but I didn’t have any on hand. I would suggest using a darker color of cardstock than I did for mine because the white of the hat will show up better. Here it is on green:
And one more time using a blue background.
Which way is your favorite? I think I like the blue background best. 🙂 You can make Santa’s hat as a decoration to hang up or make it on the front of a card for a special Christmas card. Whatever you decide to do, I hope you will have fun making a Santa’s hat from buttons! 🙂
Thanksgiving is just a week away! It’s time to make a fun Thanksgiving Turkey!
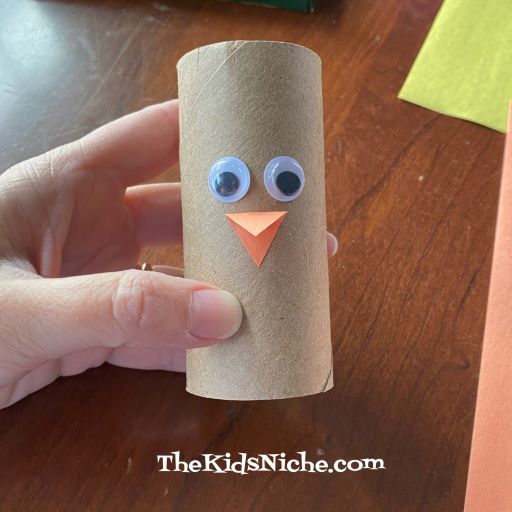
You’ll need an empty toilet paper roll, some different colored paper, pencil, glue and/or tape, scissors, a piece of thin cardboard or cardstock, 2 wiggly eyes and you might want some markers.
If you would like to color your turkey’s body (the toilet paper roll) with the markers, go ahead and do that first. I decided since the toilet paper roll was already brown, I would use it as is. Glue the wiggly eyes onto the turkey’s body.
Let’s make the turkey’s beak next. Cut out a small rectangle from either orange or yellow paper.
Fold the rectangle in half, bringing the 2 shorter sides together.
Keeping the folded side up, cut from approximately the middle of the bottom side up to the right hand corner.
Make the same type of cut up to the upper left hand side, forming a folded triangle.
Still keeping the folded edge at the top, glue the bottom side of the triangle onto the turkey below his eyes.
Cut another small rectangle from red paper to make the turkey’s wattle. No need to be perfect, just cut something similar to the one in the following picture.
And glue it on the turkey beside his beak.
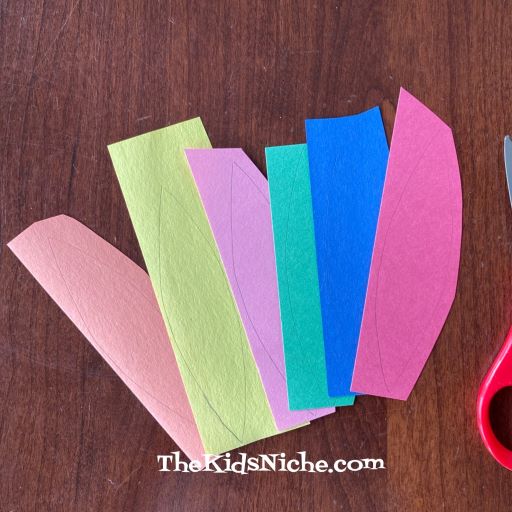
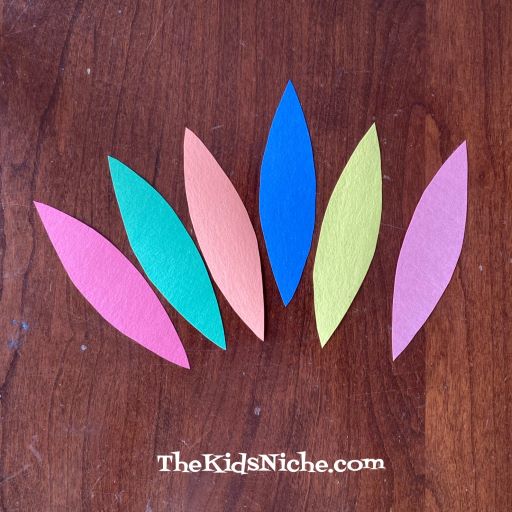
It’s time to make some feathers. Using the thin cardboard or cardstock, draw a simple feather shape to use as the pattern for making feathers for the turkey’s tail. (It doesn’t need to be perfect. The feathers will overlap each other and hide any flaws.) 😉
Trace around the feather pattern on several different colors of paper. I used 6 different colors but if you don’t have that many colors, make more than one of the colors you have so you end up with 6 feathers.
Cut the feathers out. This is great practice for kids in using their small motor skills.
Glue the feathers to the back side of the turkey, but put glue only on the bottom part of the feathers. Only put glue on the part that will be up against the turkey’s body or where it lays on another feather.
And your Thanksgiving turkey is finished and ready to be part of your home’s decorations for the holiday! What’s nice about this turkey is that nobody will be eating him! 😉
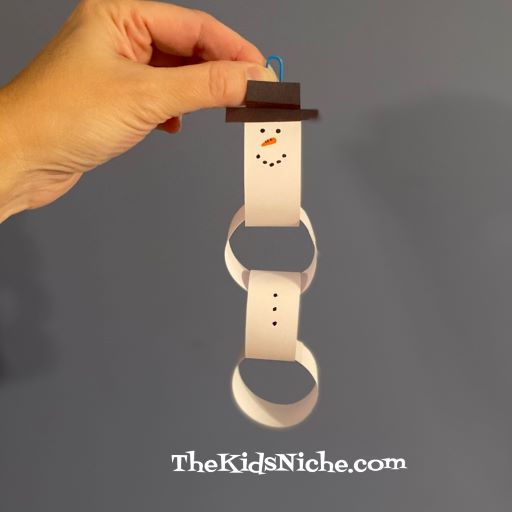
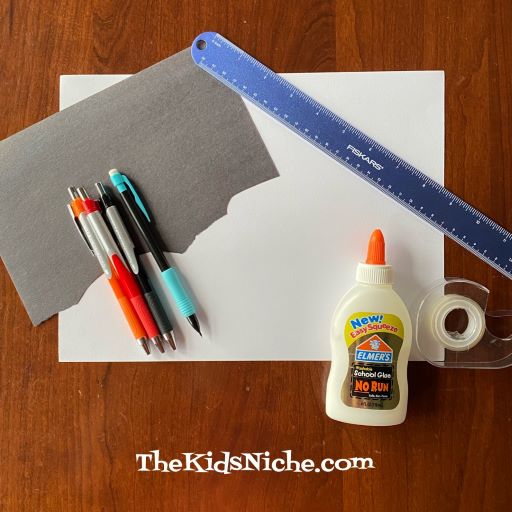
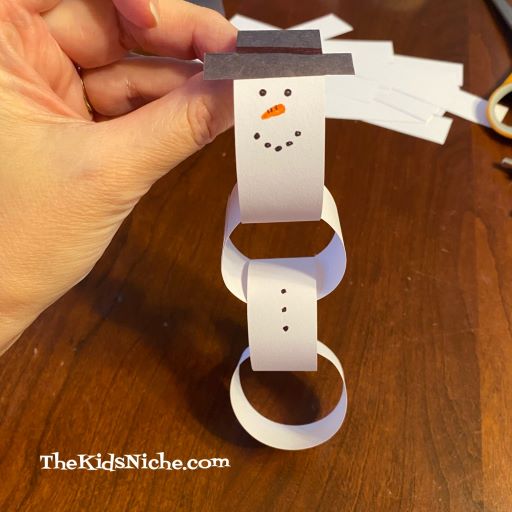
Are you ready for a snowman craft? It’s just about a week till Thanksgiving Day and we’ve had some snow here already so I think we’re good to go! This guy is so cute and so simple that you and the kids are going to love making him. And maybe want to make more than one! 😉 Check him out!
All you need to get started is some white paper, a small scrap of black paper, a pencil, a ruler, scissors, glue or double sided tape and some colored pens or makers.
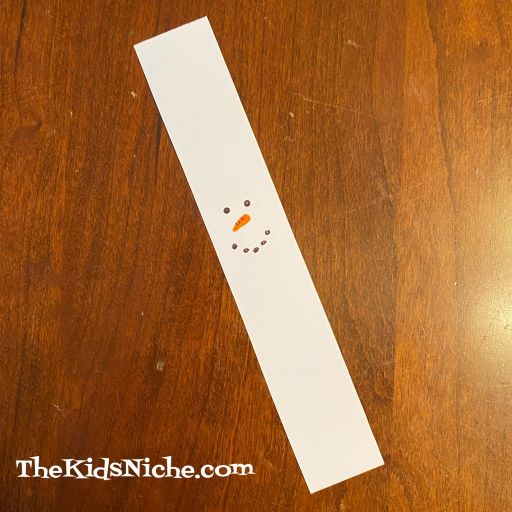
Begin by cutting the white paper into strips approximately 1″ by 6″.
Take 1 strip of white paper and draw a snowman’s face in about the middle of the strip of paper.
Using either your glue or the double sided tape, attach the 2 ends of the paper strip together to form a circle.
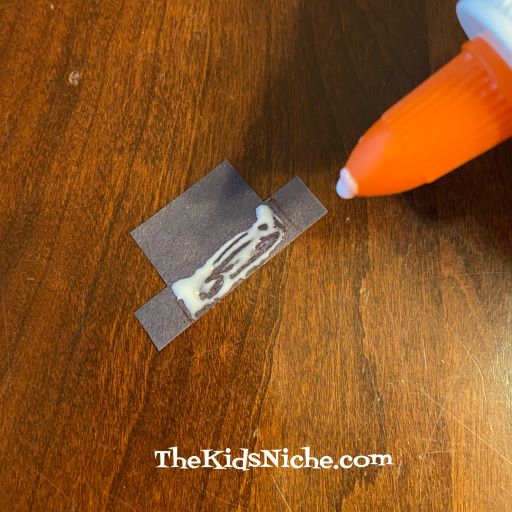
Now cut a hat out of the scrap of black paper, making it as wide as the snowman’s head.
Glue only the small area shown in the following picture so that the snowman’s hat will stand up.
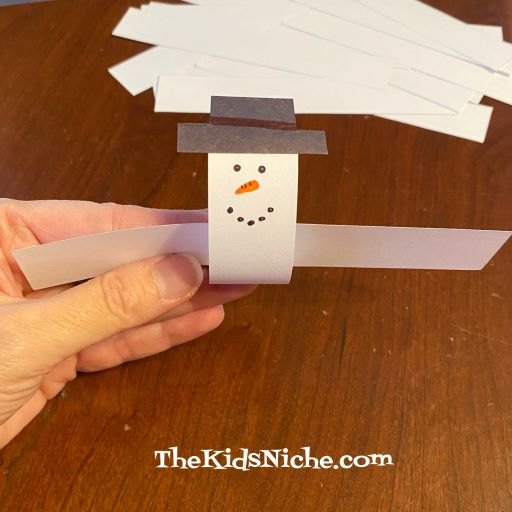
Place the hat on the snowman and hold it in place for a few seconds while the glue starts to set up.
Now you will add a few other strips of the white paper to make a chain. To do this, slide one strip through the snowman’s head, as shown in the next picture.
Using either tape or glue, again fasten the ends together in a circle. Continue adding strips of white paper until your snowman is as long as you’d like him to be.
I made my snowman 4 chains long but he can be as long as you like! 😉 I drew some buttons on his “belly”.
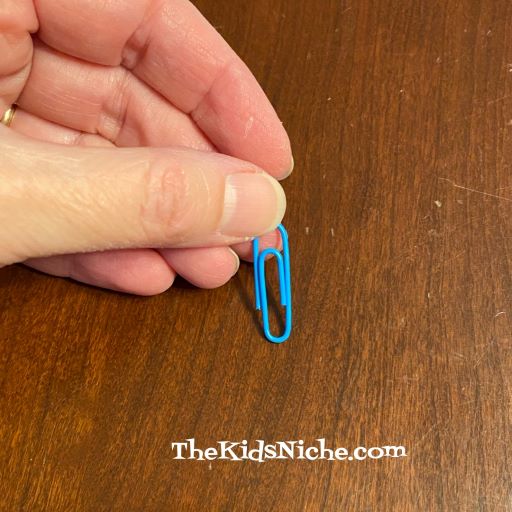
If you would like to be able to hang your paper chain snowman up, perhaps on your Christmas tree, you’ll need a piece of string or a paper clip. If you use string, just fold the string in half and tape the ends to the back of the snowman’s head. I’ll show you how to use the paper clip.
Open the paper clip up.
Using regular scotch tape, tape it to the back of the snowman’s head.
And you’re done! Now you have a cute snowman to use to decorate your house for winter! Have fun making paper chain snowmen! 🙂
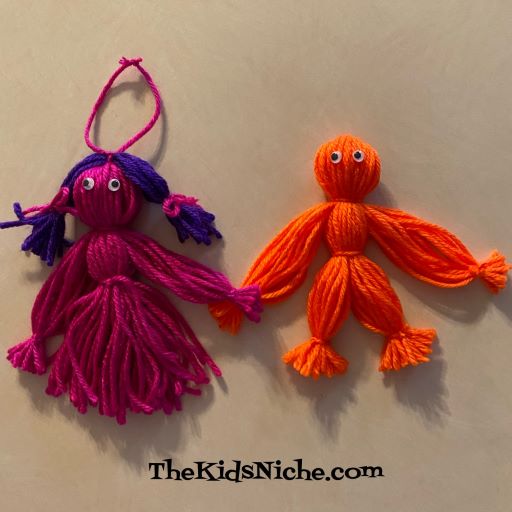
The other day I was thinking about the yarn dolls that we used to make. I can’t quite remember who taught me to make them but I think it might have been a family thing that was passed down to me.
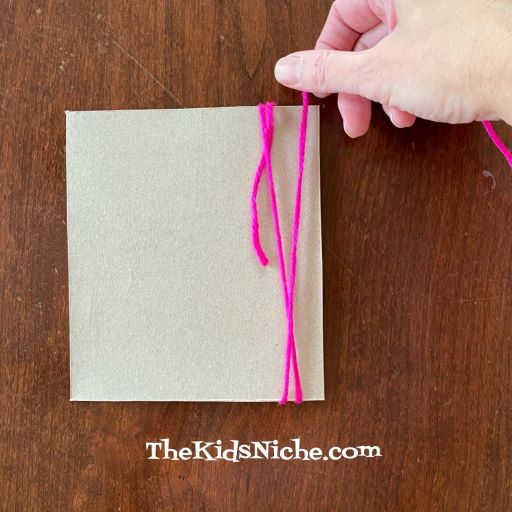
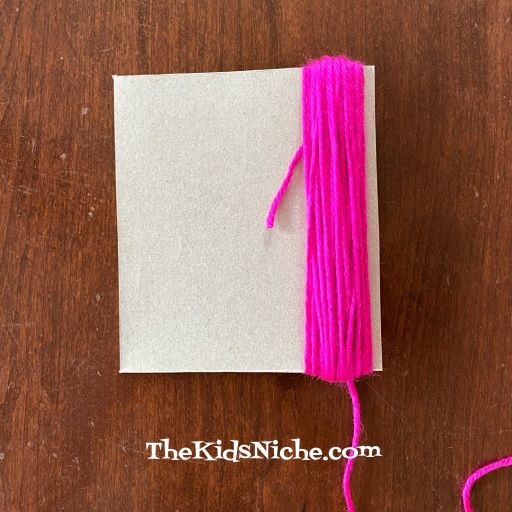
At any rate, making yarn dolls can be fun and all you need is yarn, a piece of cardboard and a pair of scissors.
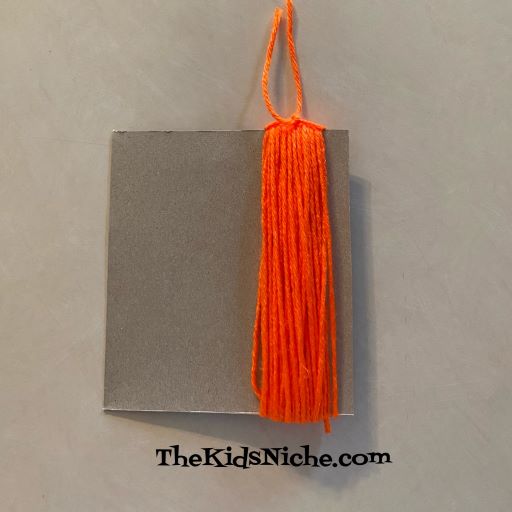
The size of your yarn doll will be determined by the size of your piece of cardboard. My cardboard piece was about 6″ long. Begin by wrapping the yarn around the piece of cardboard.
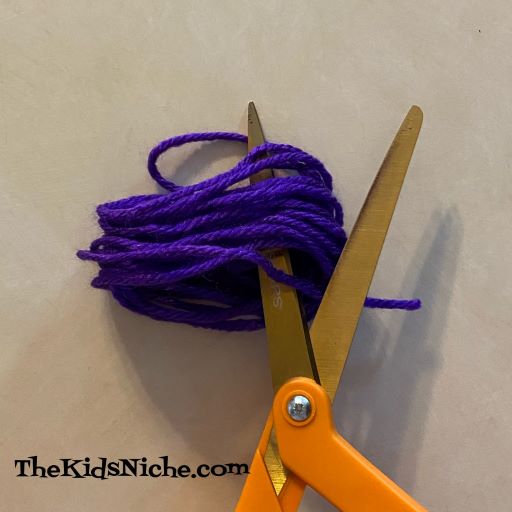
Wrap it around at least 50 times. Then cut the yarn.
There is a step that I forgot to do while I was making the pink doll, so I will be showing that step with the orange yarn I used for a second doll. While the yarn is still on the cardboard, cut another piece of yarn about 5-6″ long and slide it under the yarn on the cardboard. (I added the yarn to the pink doll but at a later time which made it harder to do. Ooops!)
Pull it up toward the top and tie a knot. This piece of yarn will help keep the doll’s head in a nice shape and can be used to add hair or to hang the doll.
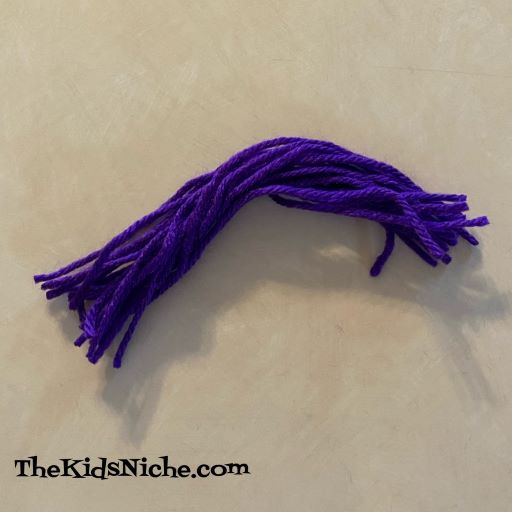
Slide the yarn off the cardboard.
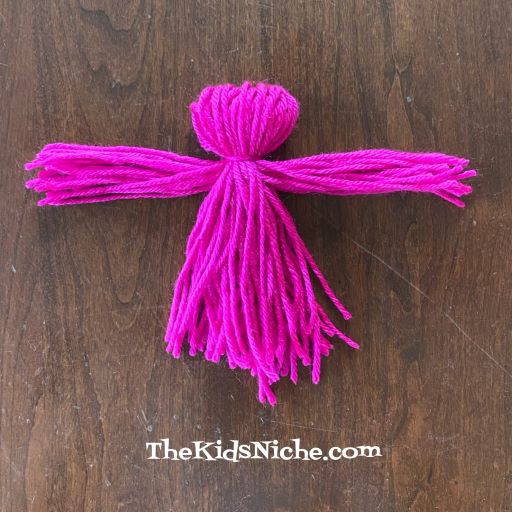
Back to the pink doll! Ha! Using your scissors, cut the yarn on the opposite end from where it’s tied.
Keep the yarn bent in half.
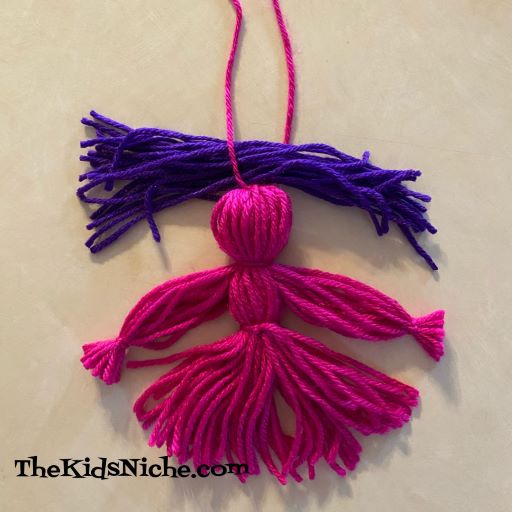
Cut another piece of yarn to be used to make the dolls head and lay it out on your work surface. Lay the folded yarn on top of it.
Tie a knot with the additional piece of yarn and that makes the head.
Separate a section on each side of the body. I did approximately 15-18 pieces of yarn in each side section.
Using a small piece of yarn, tie the 2 side sections close to the ends. Trim and there are your doll’s arms. 🙂
Cut another piece of yarn and lay under your doll, just a little past the arms. Tie a knot. This will make the doll’s waist.
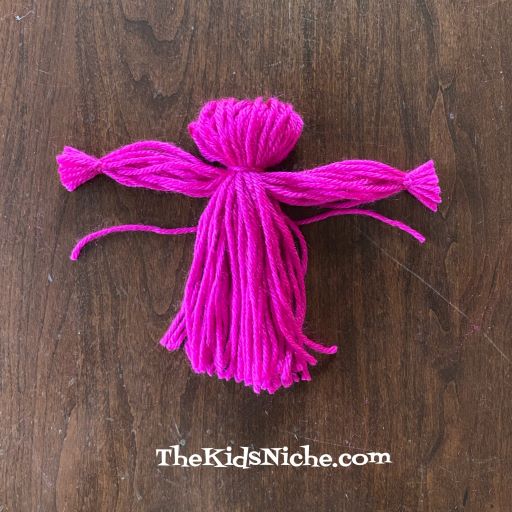
I made this doll to be a girl wearing a dress. So all I did to finish her was trim the bottom yarn to look neater. She’s ready for playing!
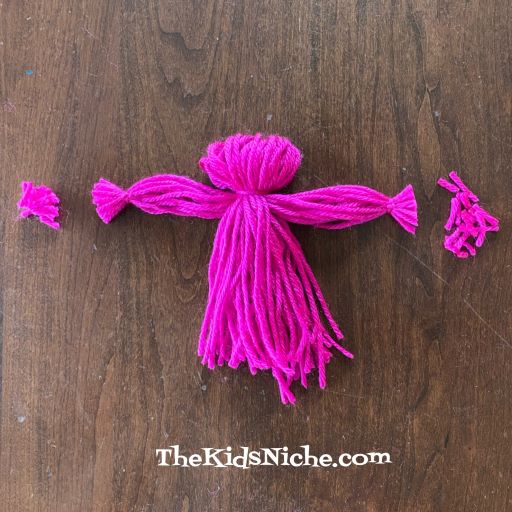
Now, what if you want your doll to be a boy? There are just a couple more steps for that! We’ll pick up with the orange yarn doll at the point where we’ve already made his arms and waist.
Divide the bottom yarn into 2 sections.
Using 2 more pieces of yarn, tie around each leg in the same way you did the arms. Trim, and your boy doll is now finished too! 🙂
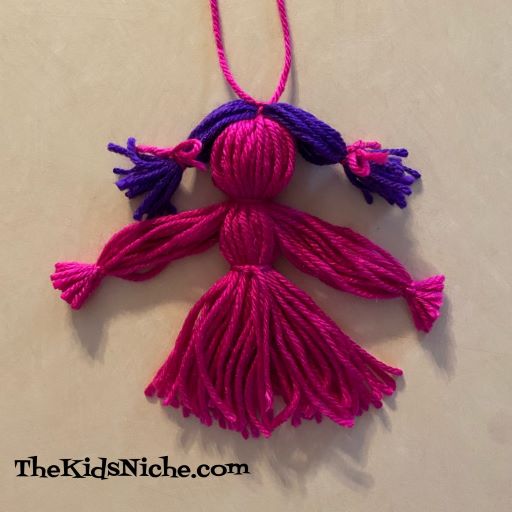
The dolls are ready to be played with now and this is how I remember them. But if you are feeling ambitious, I’ll show you a way to add hair to your doll. Get some more yarn…can be the same color or different. Wrap the yarn around your hand 20 times or so.
Slide it off your hand, keeping the loops together. Cut one end of the loops like we did for the doll.
This time you will lay the hair pieces out flat.
Lay the yarn bundle up at the top of the doll’s head. Using the yarn that is tied to the top of the doll’s head, put one yarn string on top of the bundle and the other yarn string under it. This is so you can tie the hair to the doll.
Tie the knot.
Now you can arrange the hair as you would like. I put it into 2 pony tails and tied each with a piece of yarn tied in a bow.
One more extra detail you can add is to give the dolls some eyes. Simply glue on a pair of wiggly eyes. (I actually prefer the dolls without the eyes, but that’s your choice.)
You can leave the string on the top in case you want to hang the doll up or you can trim it close and get rid of it. I’ve show you one doll done each way.
Yarn dolls are fun and easy to make! I hope you will try a few! 🙂