Do you ever get to the point in a day where everything seems funny? When I was a kid still living at home with my parents, we called it being “slap happy”. Sometimes it happens when we are really tired but sometimes it just seems like lots of things “tickle your funny bone”. So here’s a few things that at least made me smile and some that made me giggle and some that even made me laugh out loud. 😂 I hope they will brighten your day and the giggles will spread from my house to your house too!
Little Red Rusty Hood! “Moooooom! I don’t want to wear this scarf!” (Yes, I know it looks like the toy box exploded in the background!)
The dog’s favorite thing that comes in a Bark Box now! 🤣
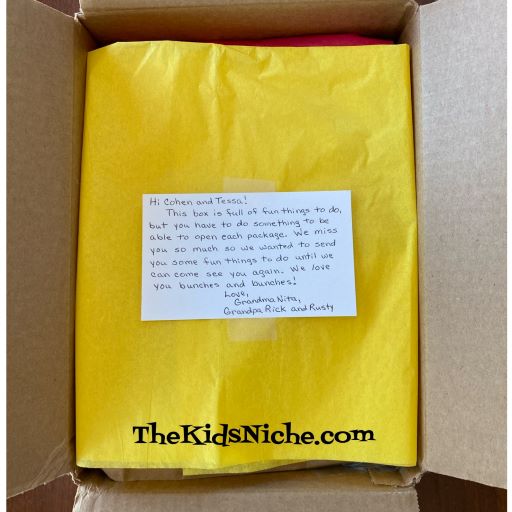
Do you have grandchildren that live some distance away from you that you like to send special little packages to in order to keep in touch with them? We do and so today I want to share a little idea with you that can add a little extra fun to your packages but doesn’t cost anything extra. This is a package that I sent to 2 of our grandkids today:
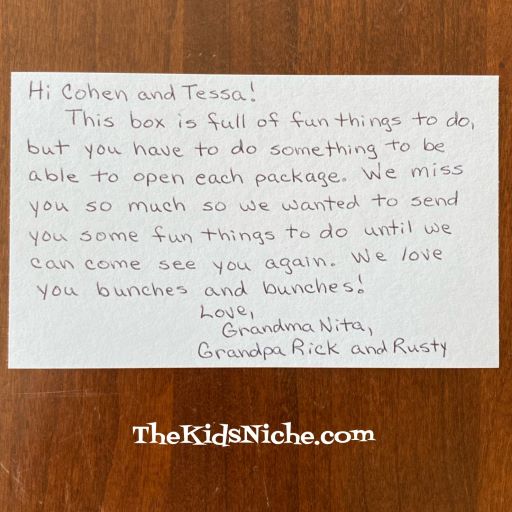
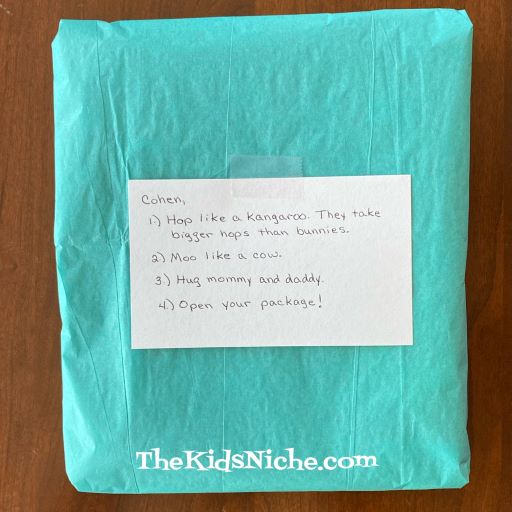
When they open the box, the first thing they will see is this note:
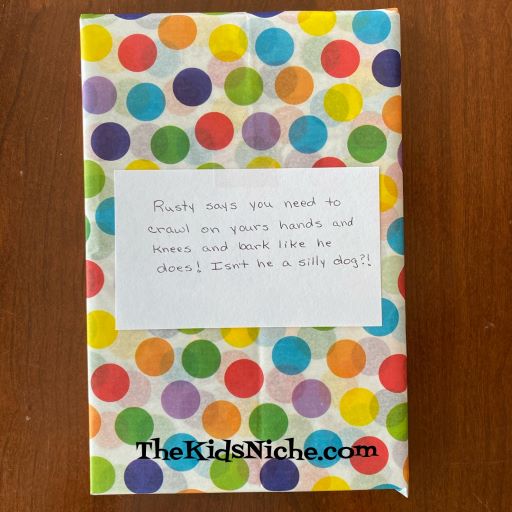
(Rusty is our dog and he loves the kids!) Under the yellow tissue paper they will find this package:
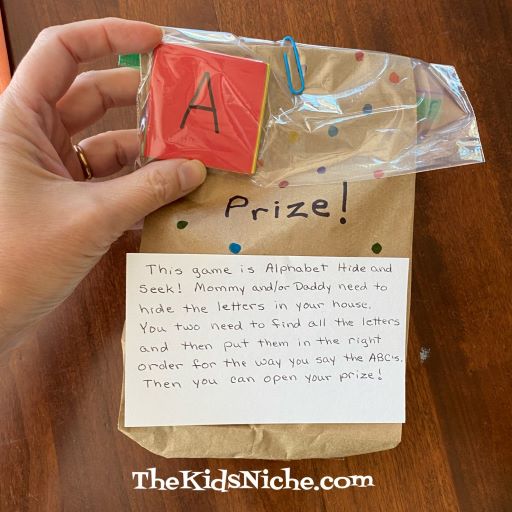
So my idea to make things more interesting is to wrap each little gift in tissue paper (or other paper) and give the child something to do before they can open each package. Their first package involves a hunt for letters and then arranging the letters in alphabetical order. Once they complete that they can open the package and get the prize inside. (This prize is 2 bottles of bubbles.)
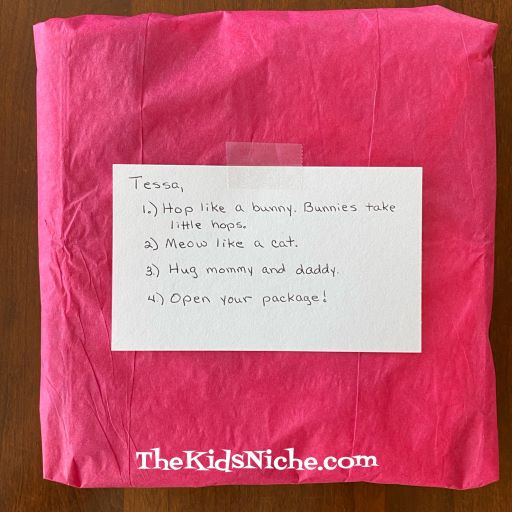
The next packages in the box look like this:
The kids will need to follow the instructions in order to open their packages. The things they need to do are just silly little things that will hopefully make them giggle. For instance, hopping like a bunny or kangaroo and meowing like a cat or mooing like a cow. 😉 (These packages contain a dress for our granddaughter and a tee shirt for our grandson.)
Next they will find a package from Rusty that has them acting like a dog. 😉 (There are 2 books in a series inside.)
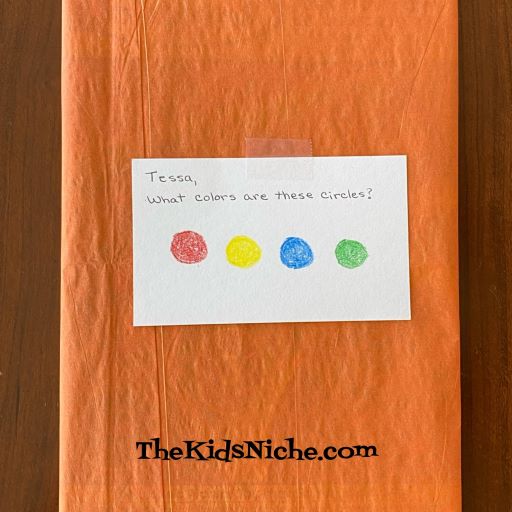
The last 2 packages have our granddaughter identifying colors…
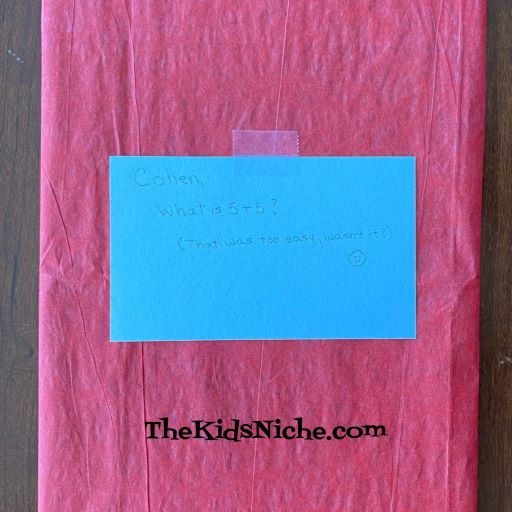
…and our grandson solving a simple math problem. (I realized the colors in this picture didn’t work right AFTER I had already mailed the package to the kids! So no do-overs!) These little packages contain a Colorforms (reusable stickers) set for each.
In case you can’t read it, this package says “Cohen, What is 5 + 5? That was too easy, wasn’t it?” 🙂
By adding a little silly activity to each package, it makes the unwrapping take a little longer. And you can be reinforcing their skills without them even realizing it. You can have them dance or sing or jump or run in place or any number of a million things. Being silly is fun for everyone and will hopefully bring out extra smiles and the giggles. 🙂
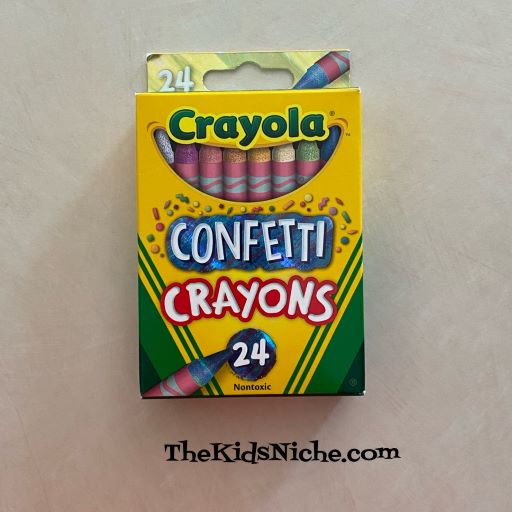
Have you tried the Crayola Confetti Crayons yet? They really are quite fun! I found them at a Walmart store. I would say they are an inexpensive box of fun!
As you can see from the writing on the box, there are 24 crayons included. The box also says “Bursting bits of color! Each Crayola Confetti Crayon has specks of color inside for surprising streaks and a party in every crayon!”
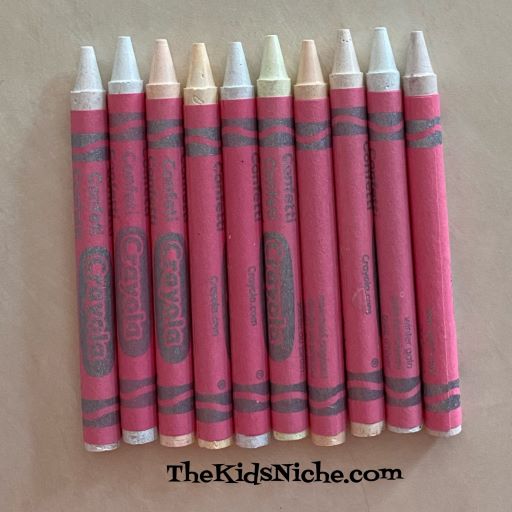
The crayons have some pretty awesome names too! Like party fish…
Or meteor shower or new year’s eve or rain drops… It’s fun just reading the name on each crayon!
Take a look at all the crayons that look mostly white.
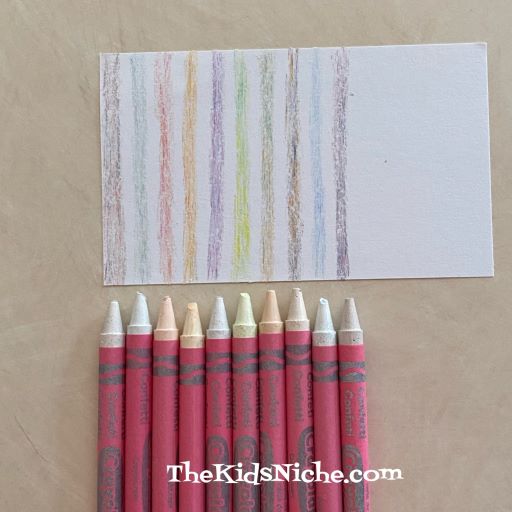
Buuuut….surprise!! Look what it looks like when you start coloring with them!
Pretty cool, right?! Coloring is so much fun because you don’t know when a streak will show up or what color the streak might be! 🙂 Can you see the colorful streaks in this picture?
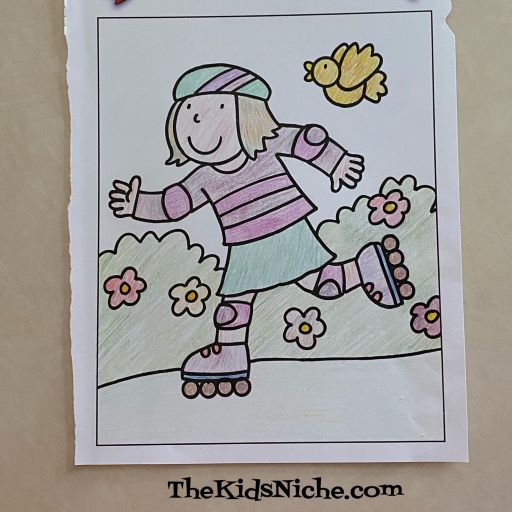
Let’s look a little closer…look at the colors in this bird.
You can see the streaks in the girl’s skate and in the green bush and the colorful flowers.
The colors look much better in person, of course! 😉 Crayola Confetti Crayons are a lot of fun in one small box! 🙂
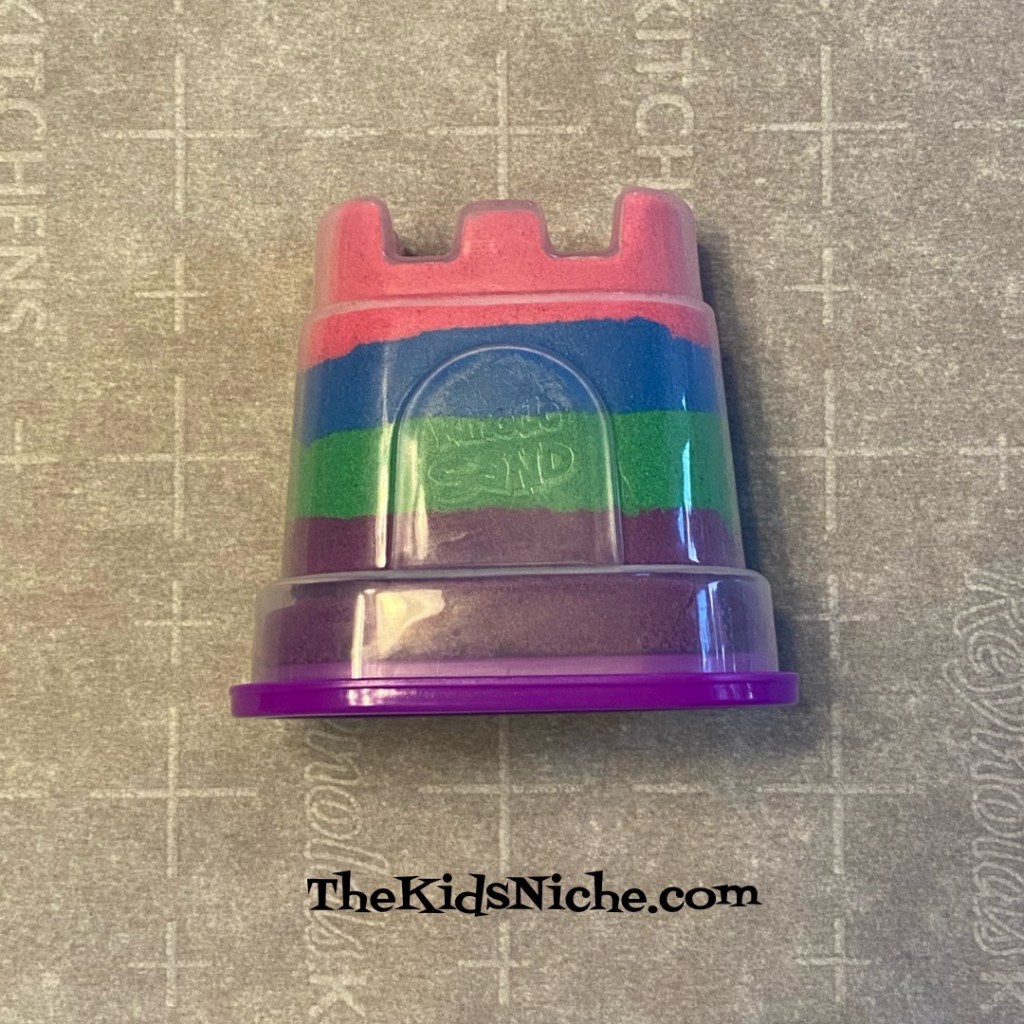
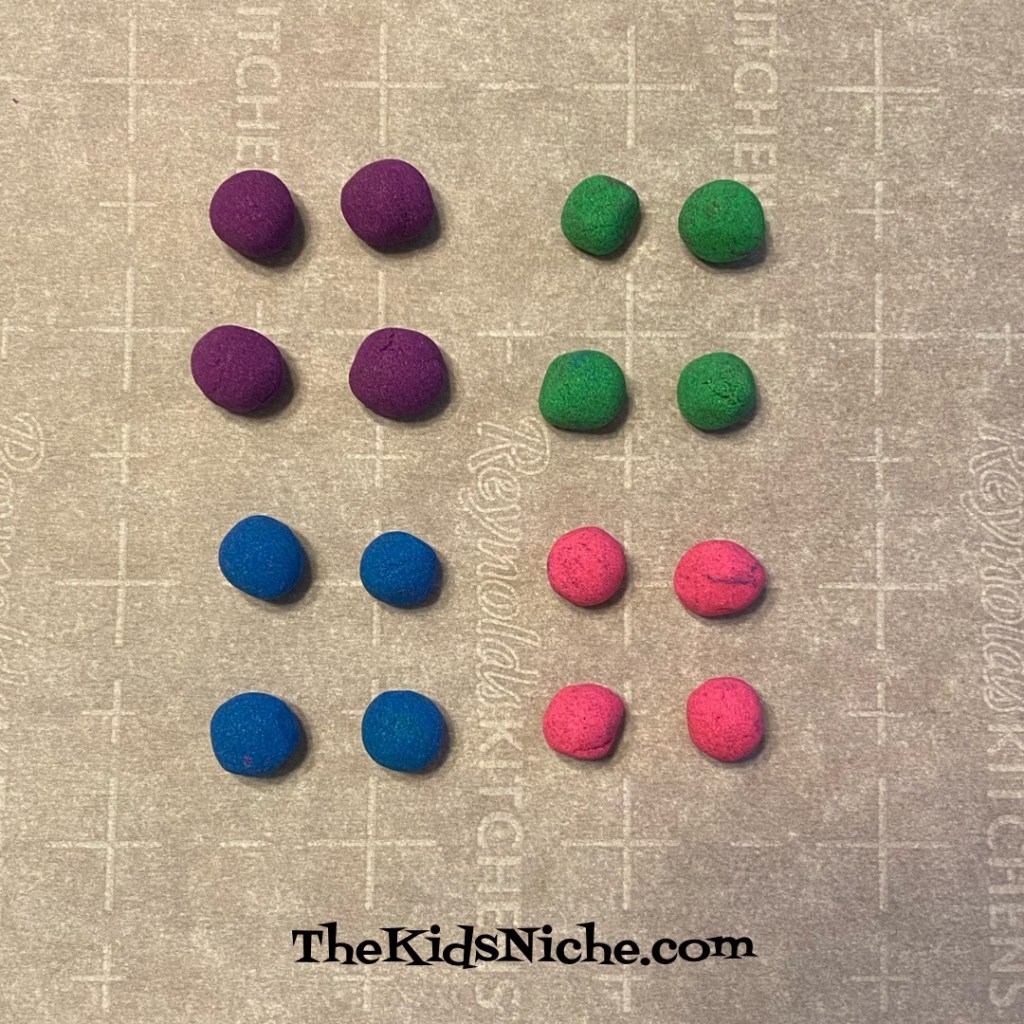
Have you ever checked out Kinetic Sand? I tried it for the first time the other day and it’s great fun! You can buy small containers fairly cheaply and the fun lasts for hours!
The one I picked up had 4 different colors inside. Pretty cool, right?
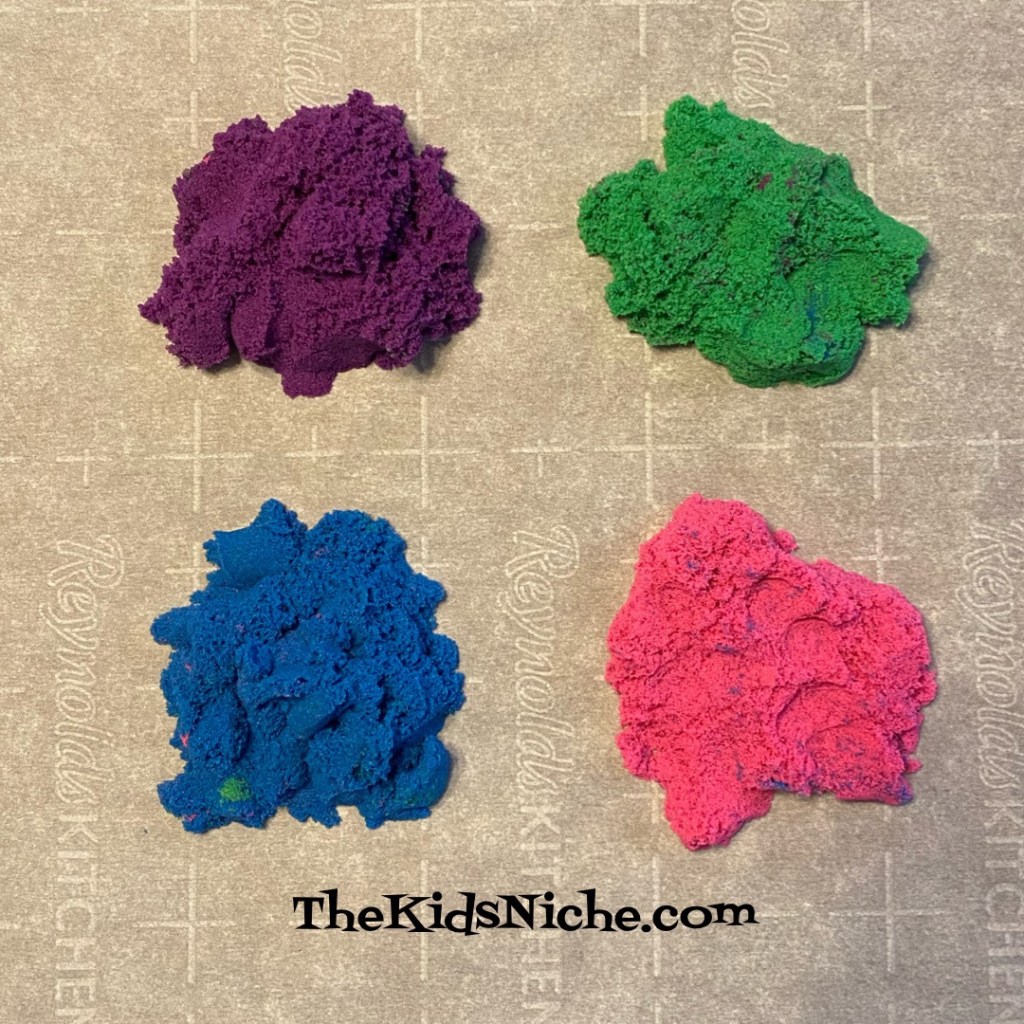
I taped a piece of parchment paper to our table before I started. I was able to separate the colors for the most part with a little bit of the colors mixing together.
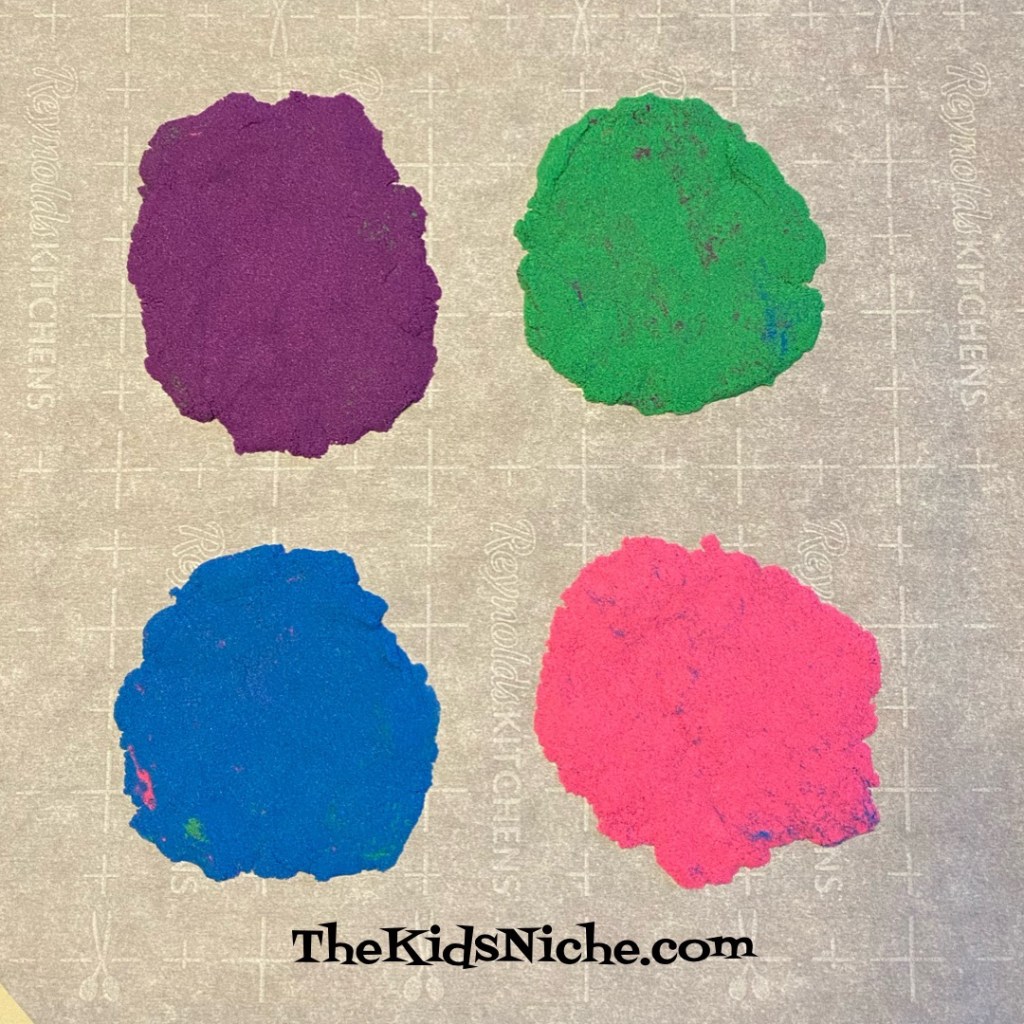
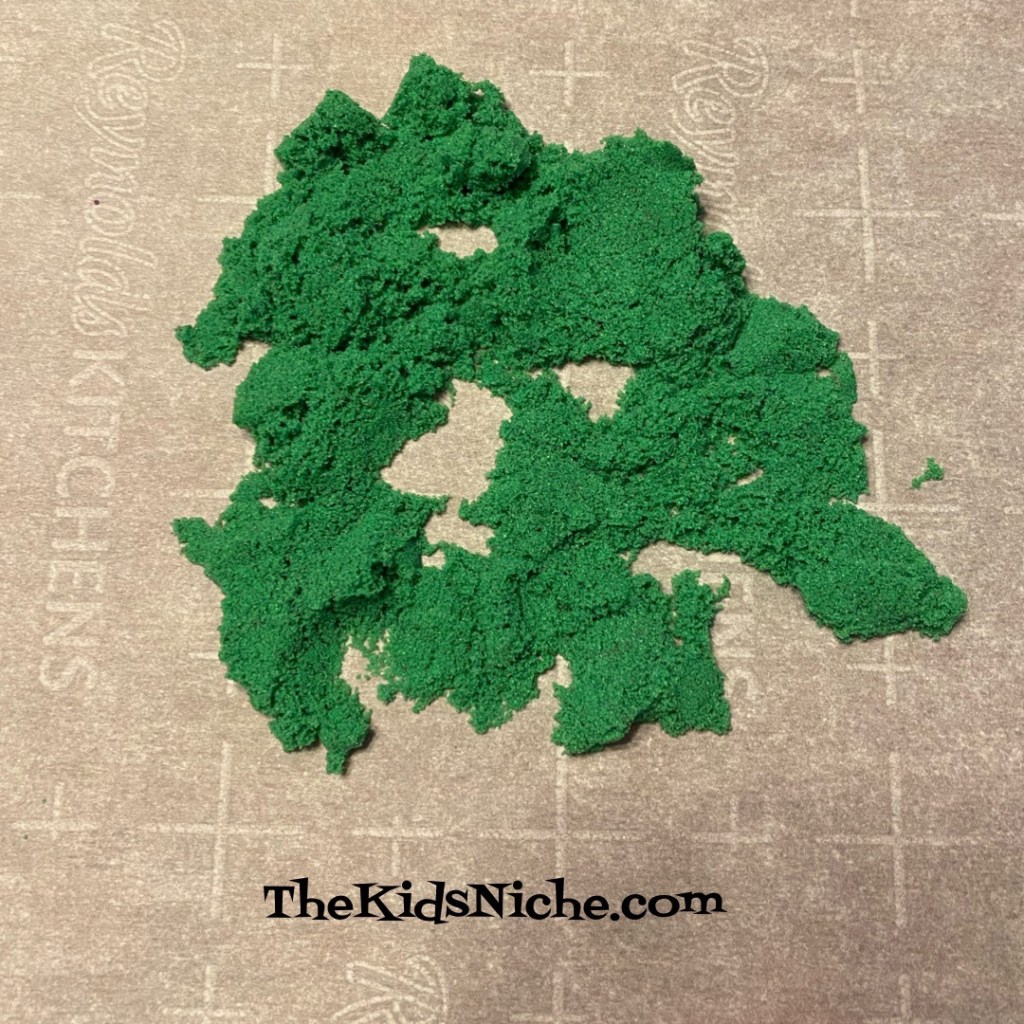
This sand feels pretty cool and “smooshie”. It holds together much better than regular sand and it doesn’t stick to your hands. You can flatten it.
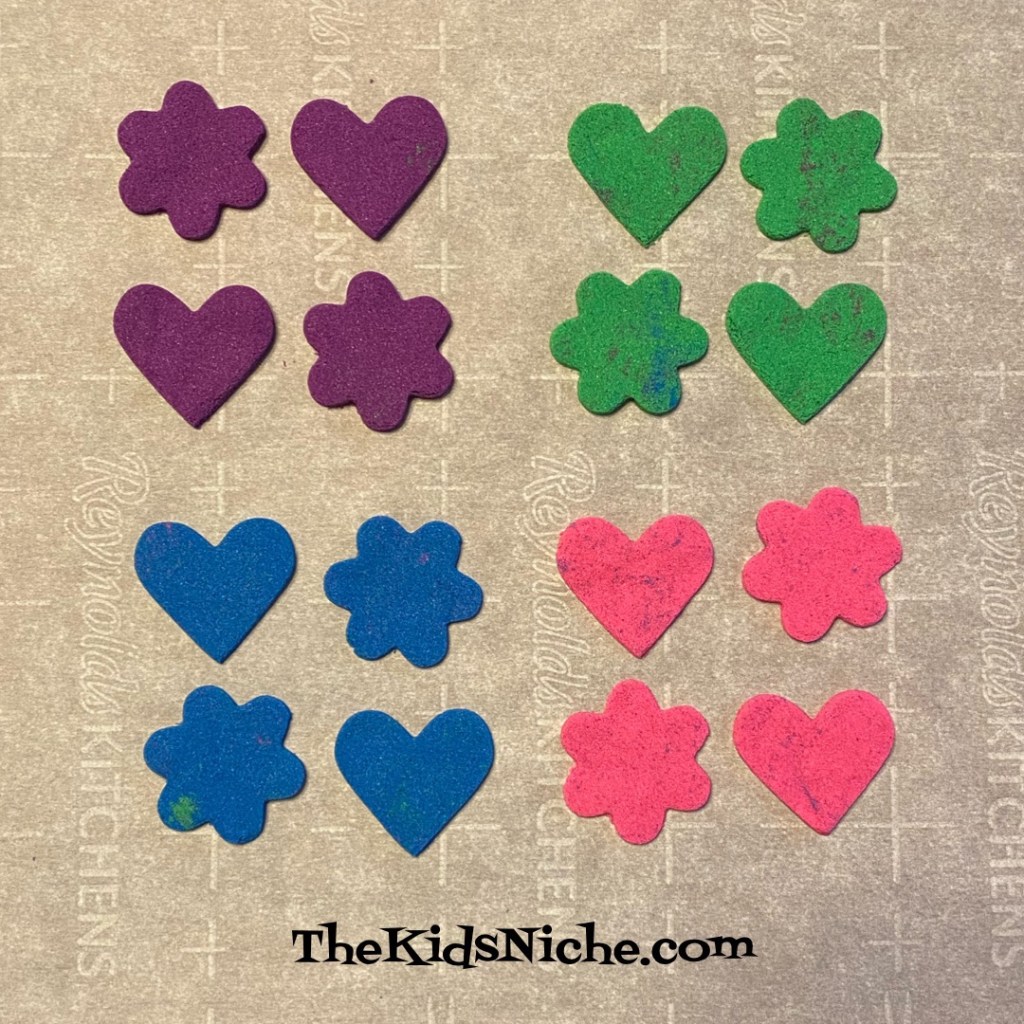
You can use a cookie cutter to cut out shapes.
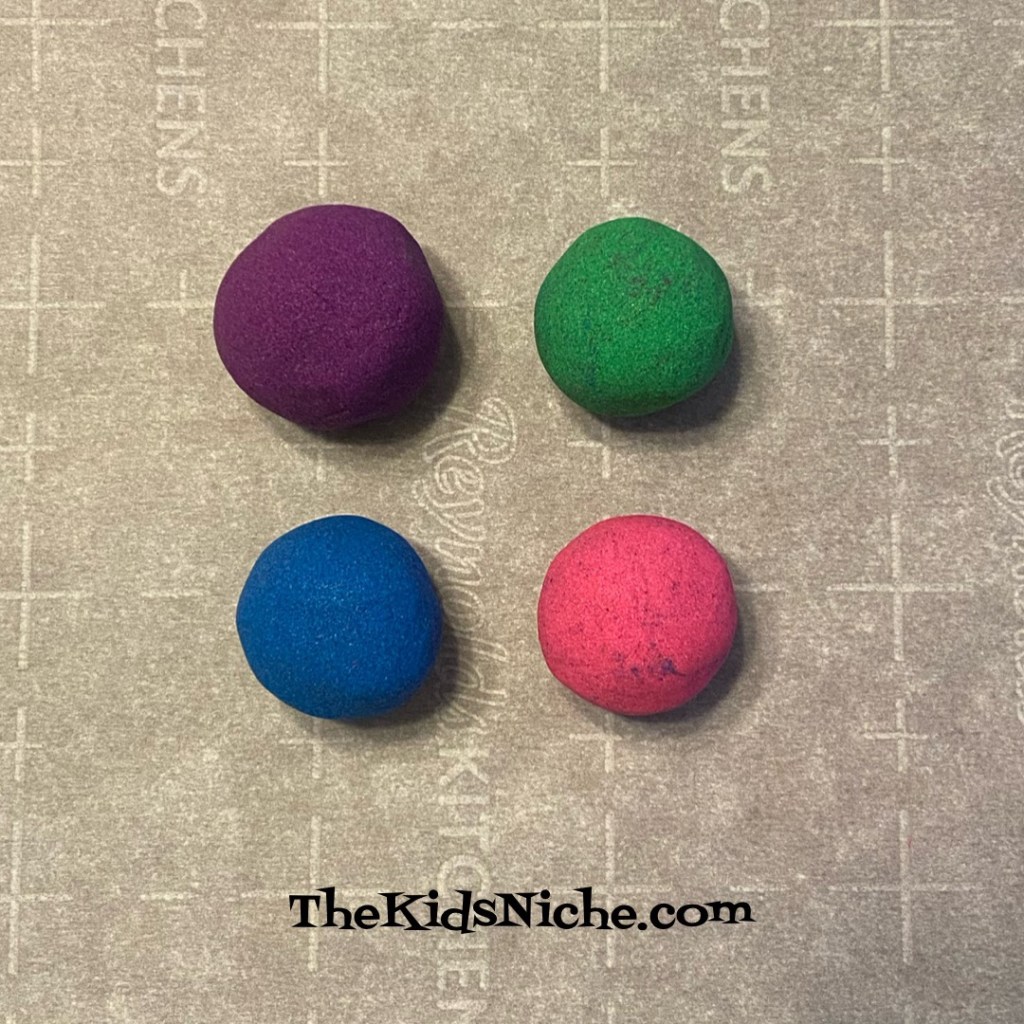
You can roll it into little balls…
Or roll it into larger balls.
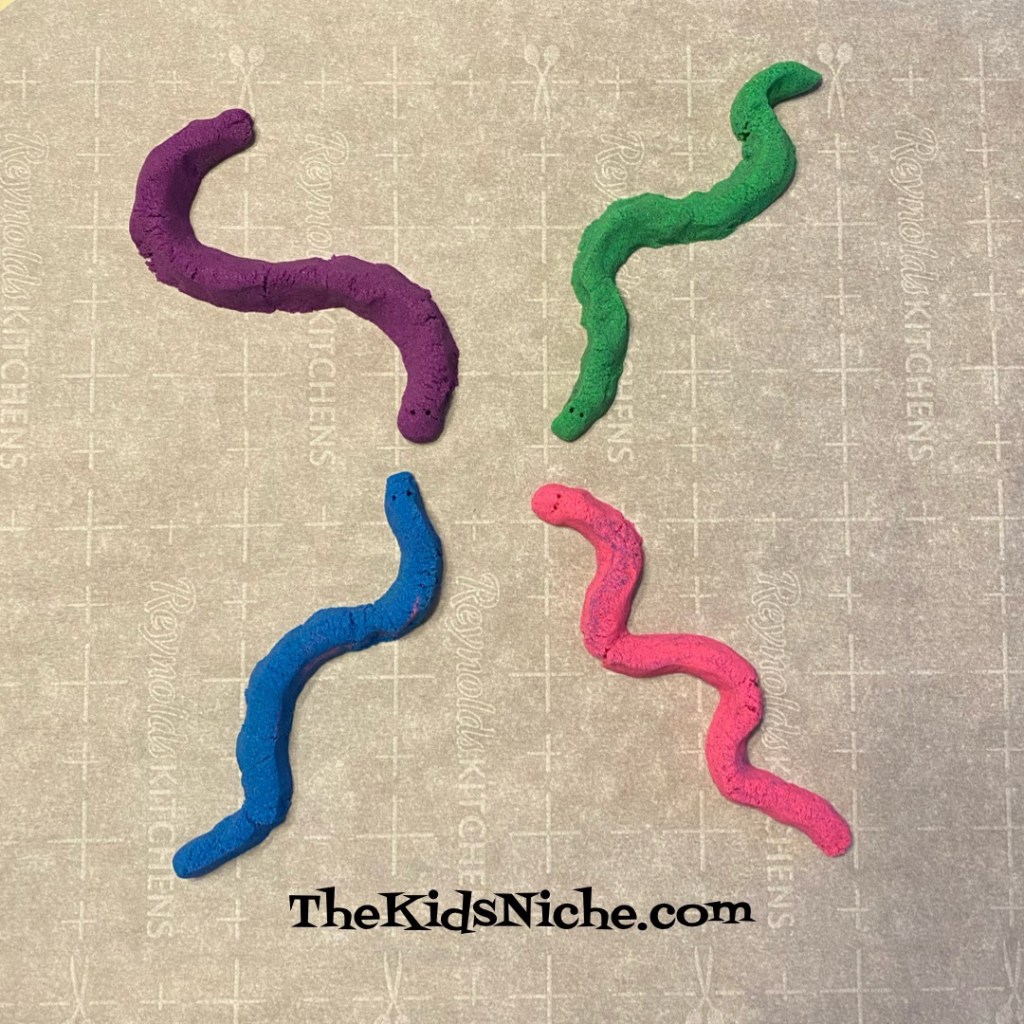
You can make snakes…
I used a toothpick to give the snakes eyes.
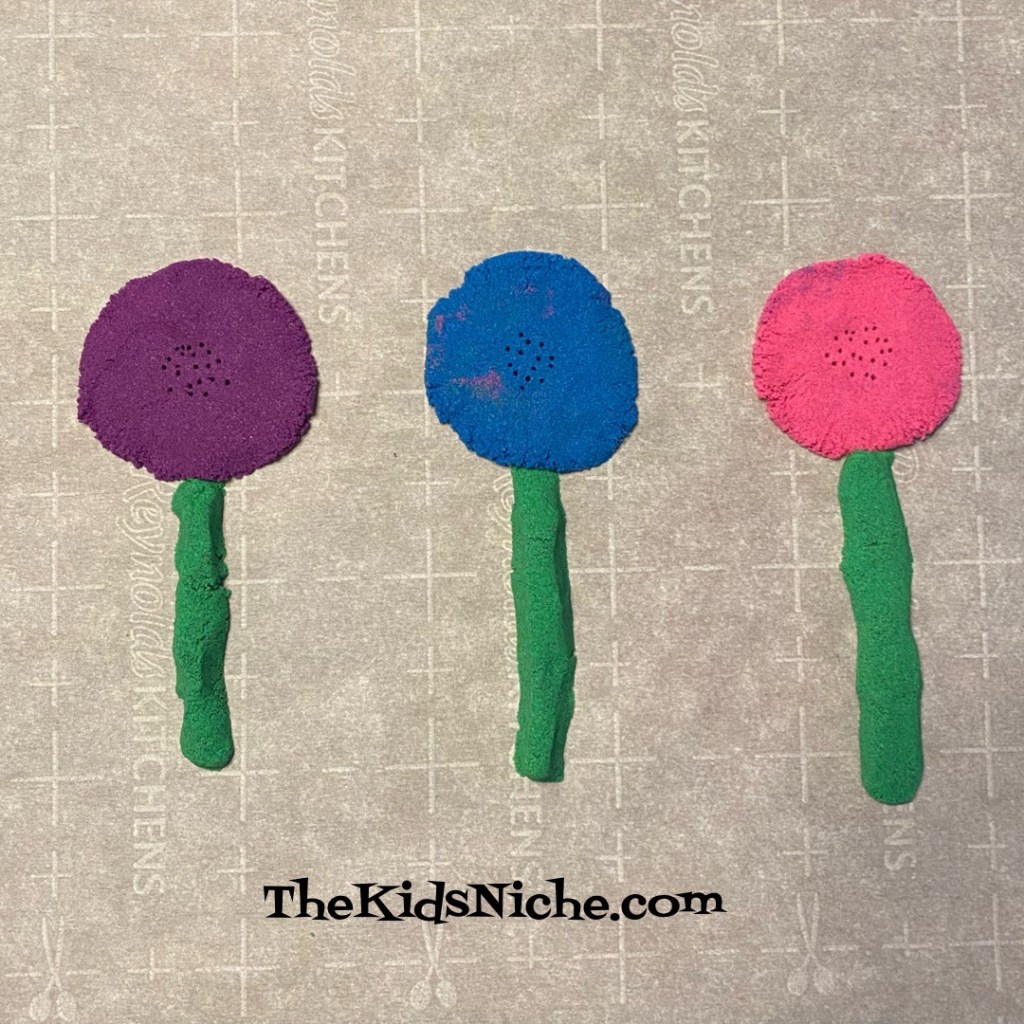
You can make flowers.
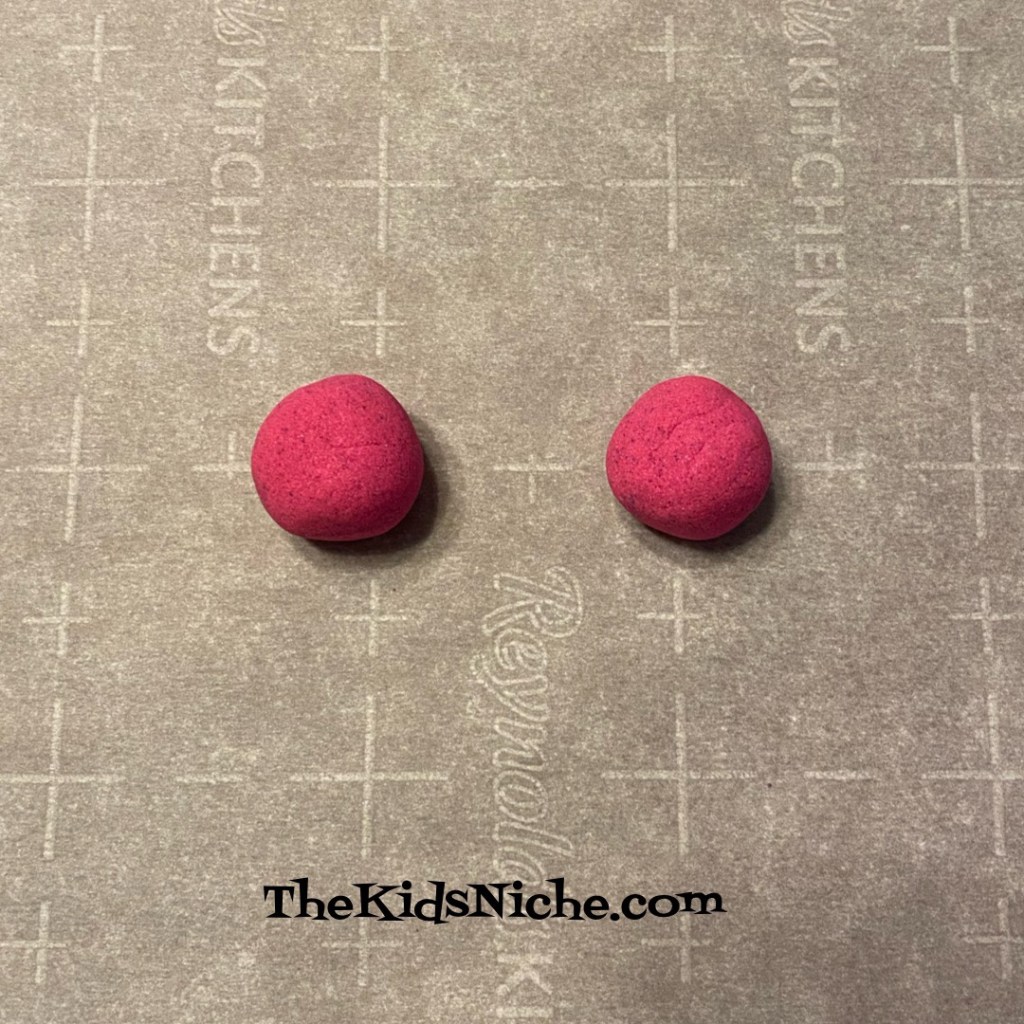
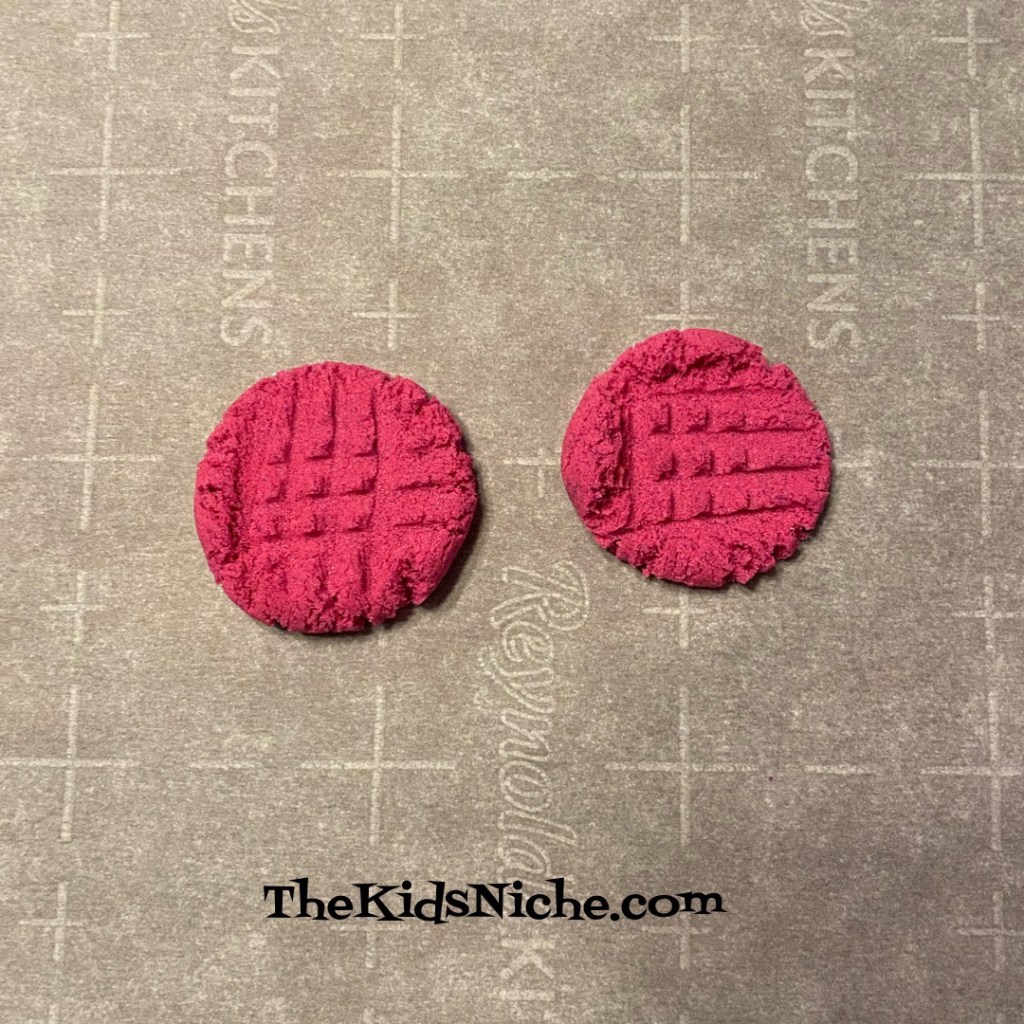
Or pretend to make peanut butter cookies by rolling little balls…
Using a fork to press a mark into the top…
And then crisscross a mark in the other direction.
If you want to hold the sand in your hand, it will crumble up nicely like regular sand does.
You can pack the kinetic sand into a cookie cutter…
And gently push it out of the cookie cutter and you’ll have a 3-D shape.
I’m guessing there are a lot of other things you can think of to do with kinetic sand so be sure you give it a try! 😃
A friend shared this on Facebook today and I had to try it. Yep! That’s what happened to me!
Haha! I didn’t believe it till I tried it, but yep, my sneaky foot changed direction! Give it a try! Have your kids try it too! Great way to start your day with a laugh! 😅
Hi there! Welcome to a new week of fun things for kids to do! Today I want to show you a way for kids to draw a cool tree.
All you need is a piece of paper and a brown crayon and several different shades of green crayons. You might want to start out with a smallish sized piece of paper, say, around 6″ x 9″. A full sheet of paper for this tree could take quite a while to finish and therefore lose your child’s attention.
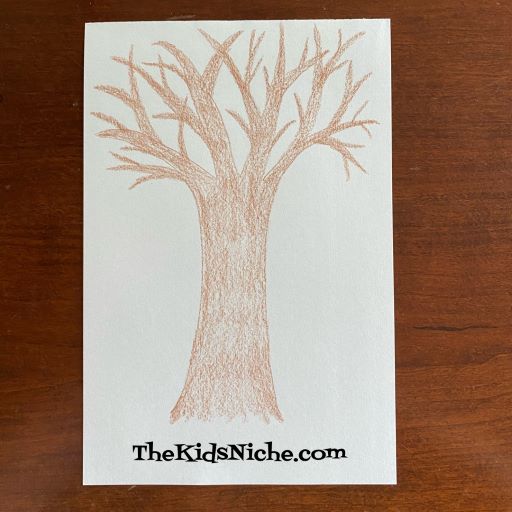
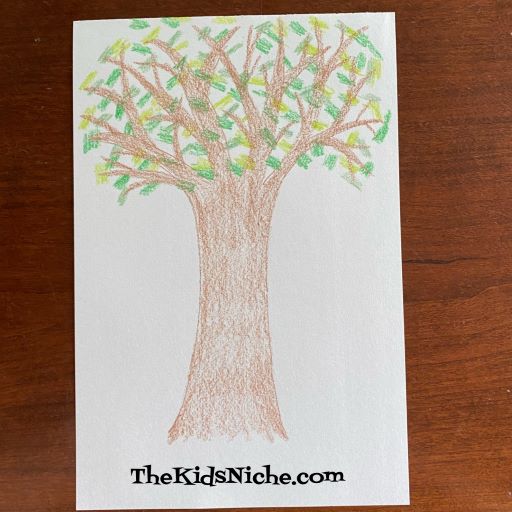
Grab your paper and your brown crayon and here we go! Start by drawing the outline of a tree with a few main branches.
Color the tree trunk and branches with your brown crayon.
Add a few branches to each of the main large branches on your tree.
Then add a few more smaller branches to the medium sized branches you just drew. It’s fine if your branches overlap each other.
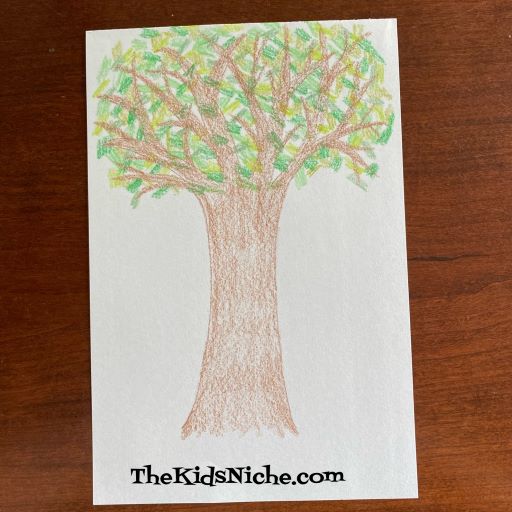
Switch to a green crayon. Color small little patches all over the tree branches. Don’t cover the entire tree because you will switch and use a few more shades of green to fill up your tree with leaves.
Switch to the second shade of green crayon and make some more small patches of green.
Continue adding small patches using as many shades of green crayons you have. Green color number 3…
Green color number 4…
And number 5… If you don’t have 5 different colors of green, just use as many different greens as you have. Continue making leaves until your tree is as full as you would like it to be.
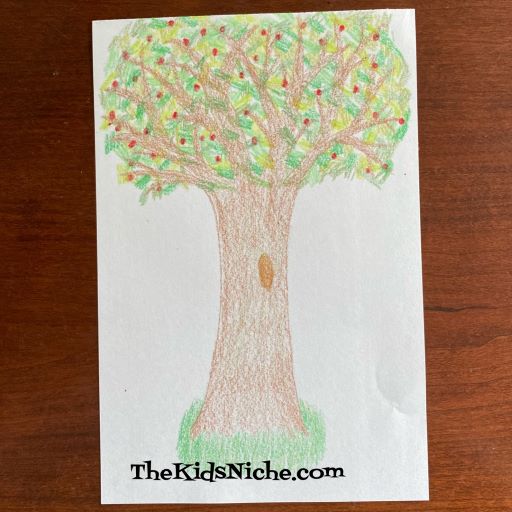
Your tree can be finished now or you can add a few more details. Maybe you would like to lightly add some different shades of brown to your tree trunk and branches. Or maybe you would like a hole in your tree trunk for some animals to nest in. Some green grass around the bottom of the tree would be great.
Using a red crayon, you could add some tiny little red circles to your tree for apples. 🙂
And your tree looks wonderful! Great job! Remember, all the gazillions of trees in the world and none of them look exactly like another. 😉 Your tree is unique and is as wonderful as you are! 🙂 Have fun and maybe draw a whole forest of trees! 😉
Here’s a simple game that can help your kids practice their observation skills, counting skills and learning the alphabet! All while having a treasure hunt and finding a prize at the end! 😉 You will need some paper (different colors or all one color will work), a marker, scissors and a prize. Cut the paper into 26 squares. Whatever size you want to do is fine, but I made mine 2 inches.
Once your paper is cut, write the letters of the alphabet on the squares – 1 letter on each square.
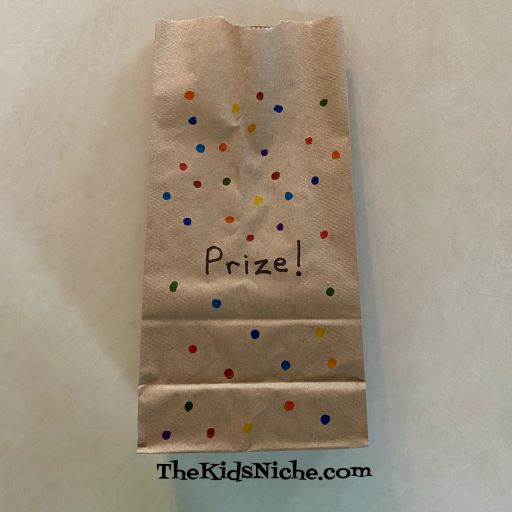
Prepare a prize for the end of the game before you actually start the game with the kids. You can just have the prize hidden somewhere they can’t find it or you can do like I did and make up a paper bag to hold the prize. I added colored dots to my bag just to spiff it up a bit.
The prize can be something simple that the kids will have fun with or a special snack, a new box of crayons, a small Lego set, etc. As you can see in the picture, I used bubbles.
Hide the letter papers around your house in places the kids can look for them. You can keep them all in one room or spread it out a little farther for kids that are a little older.
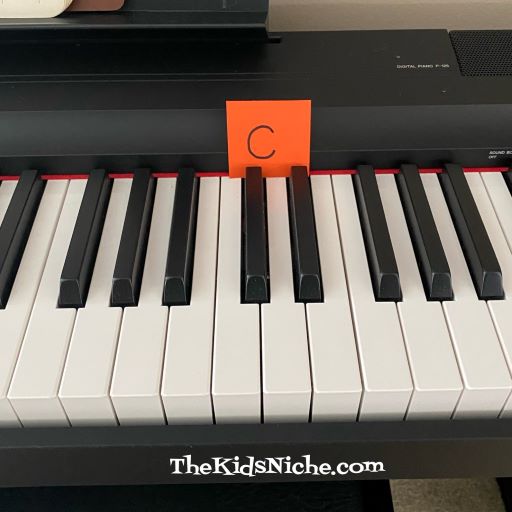
Maybe on the piano…
Or among the cereal boxes…
In the bathroom…
Maybe by their favorite books…
Have the kids go around and find all 26 papers. This uses their observation skills to find the papers and then they also practice counting the papers. 😉 Once they have all the papers, let them line them up in the correct order of the alphabet.
When they finish that, they have finished the game (or treasure hunt) and they receive the prize!
Tweak the game to work for your situation and your kids. Hope the kiddos will have fun while practicing some good skills! 😉
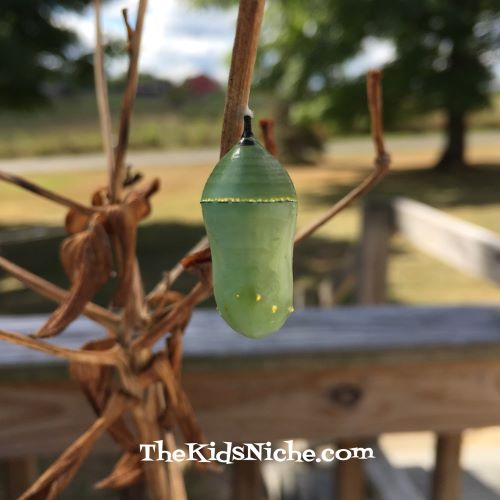
Hello and welcome to another adventure in the life cycle of the Monarch butterfly! Yesterday we looked at how the Monarch caterpillar changes into its chrysalis. Today we’ll see what happens when it’s time for the butterfly to emerge from the chrysalis. (Hang on until the end of this post for a video!) So just to remind you, here’s what the Monarch butterfly’s chrysalis looks like.
When the time for the butterfly to emerge is getting close, the chrysalis will start to turn a darker color and look black. Notice in this picture that one chrysalis looks green but the one in the background is black.
Here is a closer look.
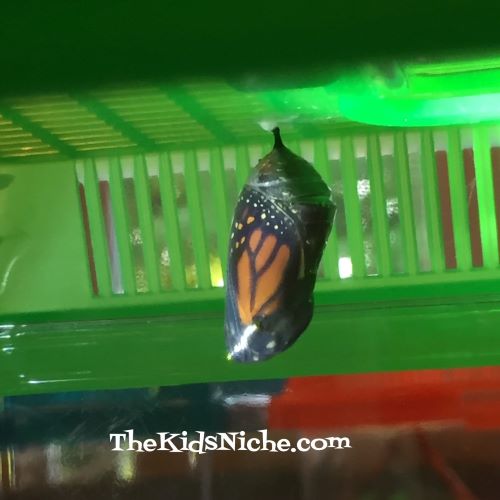
Did you notice that you can see the butterfly’s wing inside the chrysalis? My pictures aren’t super clear because they are taken looking through the plastic container, but here is a picture taken with a flashlight shining on the chrysalis.
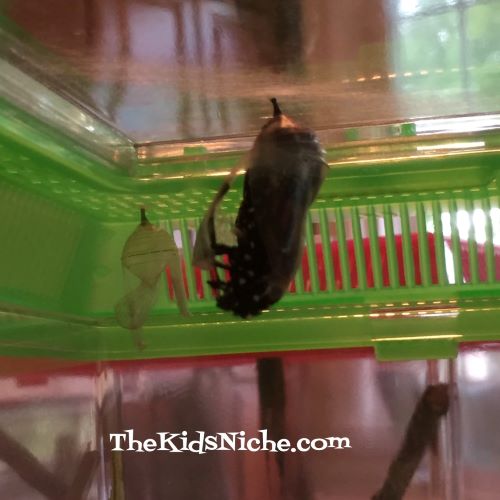
Whoa!! How cool is that?! The chrysalis is now very thin and you can see the butterfly! Next, the chrysalis starts to slowly open. Can you see along the left hand side that the chrysalis is splitting open?
Then the split becomes a little wider. The butterfly is hanging upside down right now and you can start to see its head coming out first.
The butterfly is dropping down a little lower now. You can start to see its legs that are folded up close to its head.
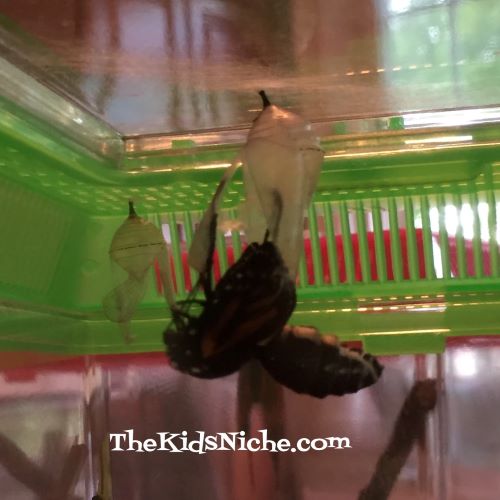
It’s now beginning to slide out of the chrysalis!
Sliding farther out…almost there! The chrysalis will stay attached to the top of the container as the butterfly slides down and out of it.
And it’s out! Look how big it’s body looks right now and how small and folded up it’s wings are.
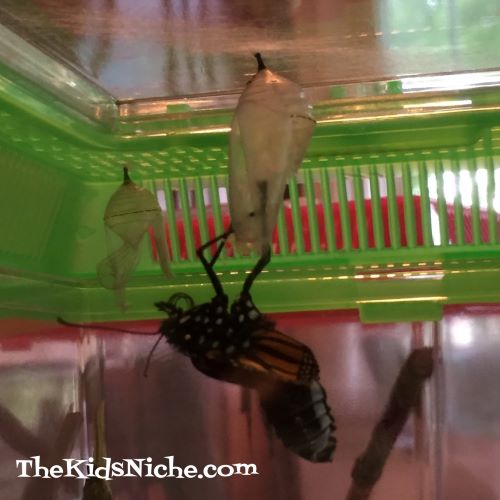
The butterfly grabs a hold of the empty chrysalis and it will hang right side up now.
As the butterfly hangs on the empty chrysalis, it will pump fluid from its abdomen into its wings and the wings will begin to expand and the body will become smaller. This next picture was taken 5 minutes after the butterfly emerged or eclosed. Its wings are still wrinkled looking.
Then 10 minutes…it’s wings are looking straighter.
And then here is 15 minutes after emerging.
It takes a couple of hours for the butterfly to finish this process and for it’s wings to expand and dry off. They don’t need to eat right away so it’s good to give them time to dry off and to begin to flex their wings. After a few hours have passed, I carefully open the container and put my hand close to the butterfly and they usually climb onto my finger. And then it’s time to set them free outside.
Here is a video I took of the process of the butterfly emerging from it’s chrysalis. It is so amazing to watch this happen!
It has been such a rewarding experience for me to help these beautiful creatures along in their transformation from a tiny little egg into an amazing gorgeous butterfly! This is my fourth year of raising and releasing Monarchs and I hope I can continue to do so for many years to come! I hope you have enjoyed coming along with me on this journey! 🙂
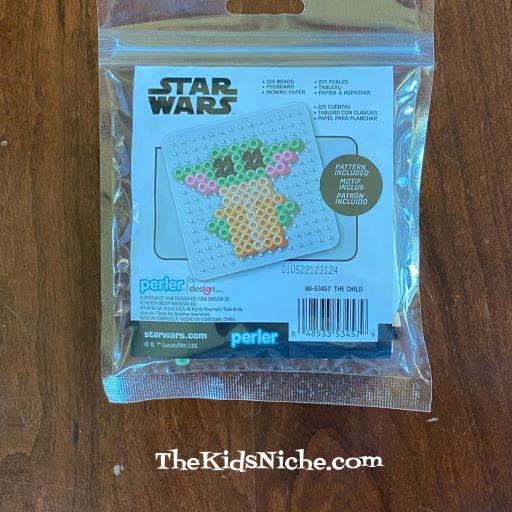
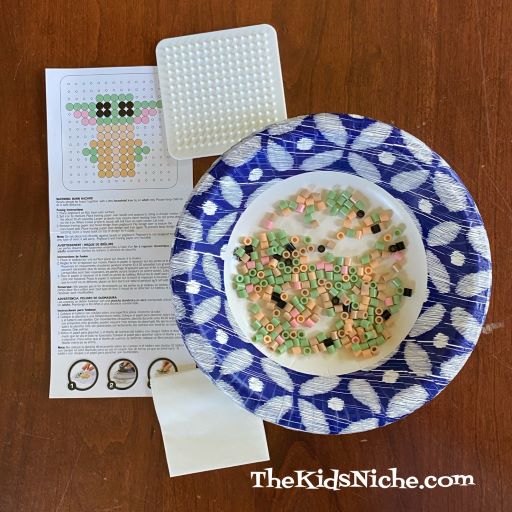
Have you ever done a project using Perler beads? I have seen them for years but I finally tried a small kit and found out they are actually pretty neat! If you haven’t tried them yet, I’ll give you an overview of how they work. Here is the cute Star Wars kit that I bought and tried:
(Isn’t “Baby Yoda” adorable?!) This is everything that was inside this kit (minus the paper bowl): 225 beads (enough to make 2 “Baby Yoda”), a pegboard, instructions and ironing paper. You will also need an iron. I used the paper bowl to contain the beads and keep them from running away. 😉
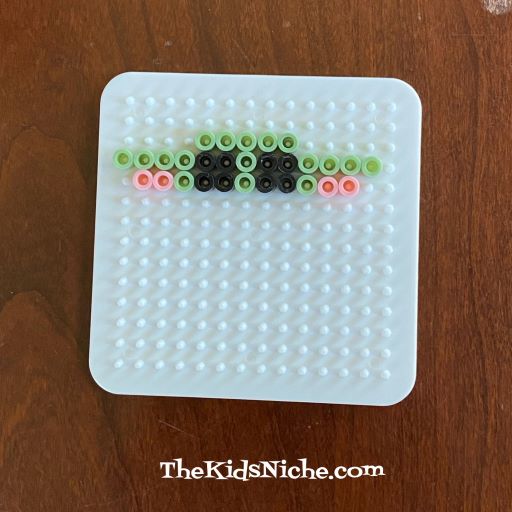
Follow the instructions for where to begin placing the colored beads on the pegboard.
Keep putting beads on the peg board by following the pattern in the instructions.
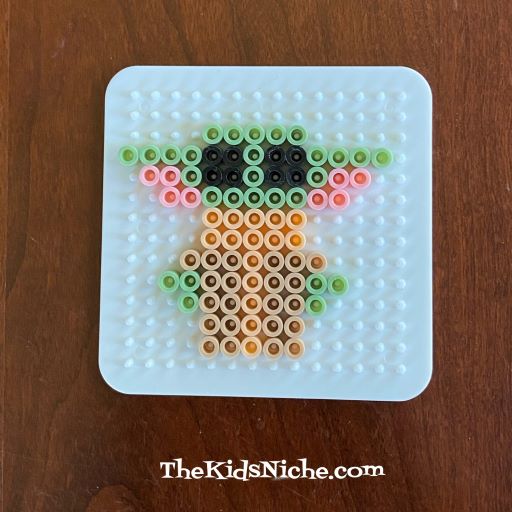
Adding a few more beads…it’s starting to take shape!
And there he is! All the pegs are in the correct order! We’re ready for fusing!
Heat your iron to a medium heat. Place the pegboard on a solid heat-safe surface. I used a wooden cutting board.
Cover the beads with the ironing paper – very important! Your iron should not touch the beads directly. Using a circular motion, iron over the beads and ironing paper for 10-20 seconds. When ironed properly the beads will still have an open center.
Set a heavy book or something similar on your project while the beads cool down to prevent it from warping. Peel the ironing paper back slowly to check that the beads have fused together. If there are still loose beads, iron over them a second time. (This happened to me.)
After the beads are sticking together, carefully remove the design and turn it over. Again, cover it with the ironing paper and iron the second side. Remember to place the heavy object on top again to prevent warping. The pegboard and ironing paper are reusable.
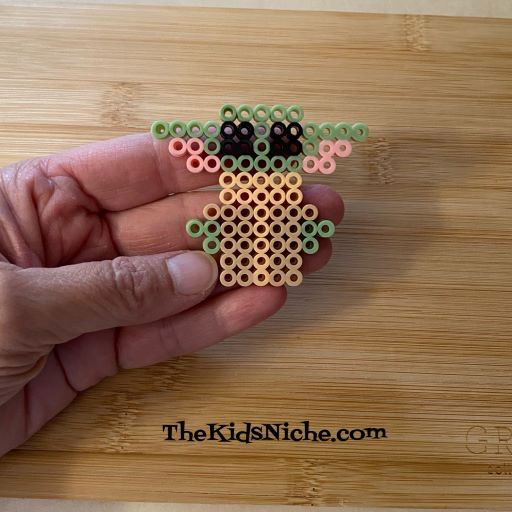
Tah dah! Your project is finished! 🙂
You could slip a thin string or thread through one of the holes if you’d like to hang your project up. Perler beads come in soooo many colors and there are kits of all types available! Be sure to look for a fun Perler beads project the next time you are in your favorite craft store! Have fun! 🙂