Wow, summer seems to be flying past in a big hurry! Are you super busy in the summer? We sure seem to be! Sorry it’s been so long since I posted, but here’s another fun idea to do with the kids! And it’s edible! 🙂 And it’s Cookie Monster! Everybody loves Cookie Monster, right?!
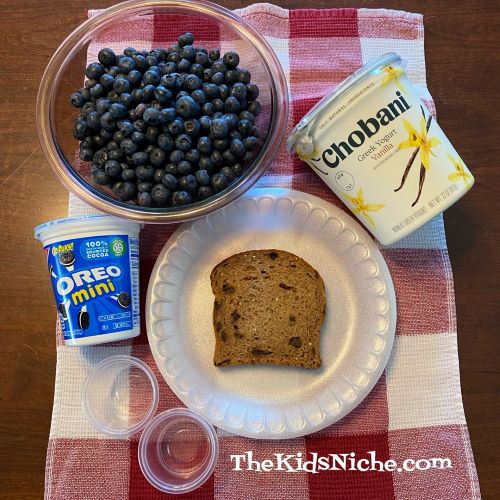
This is what you’ll need: a light colored plate (I used a white Styrofoam one), fresh blueberries, white yogurt (or cottage cheese, fruit dip, whip cream), 2 small cups or dishes, a piece of bread and some small cookies.
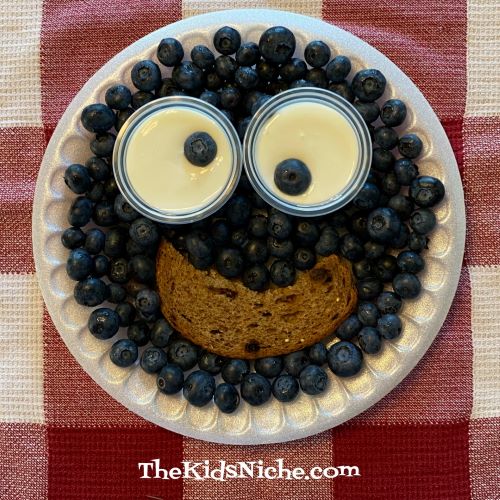
Cut a Cookie Monster shaped mouth out of the bread and lay it on the plate. I used raisin bread.

Fill 2 little cups with yogurt. Any kind of fruit dip, cottage cheese or whipped cream will also work. It just needs to be white.

Place 1 large blueberry in each cup of yogurt to make the eyes. Fill the rest of the plate with blueberries. And you have your Cookie Monster! 🙂
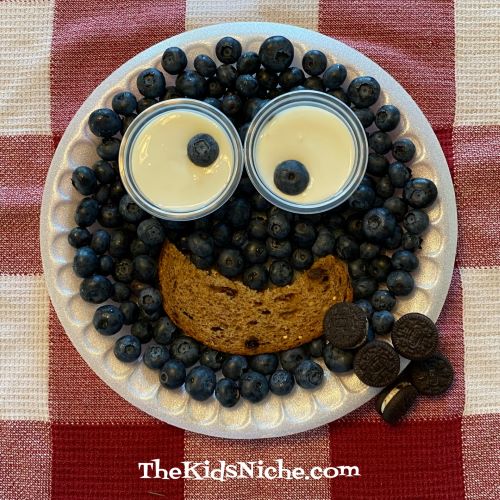
To make it a bit more fun, add a few small cookies close to the mouth.
Super simple, but a fun way to have breakfast or a healthy snack! 🙂 I hope you will enjoy making…and eating…yours too!