I made a stop at our local Dollar Tree store and, of course, I had to check out the kids items. 😉 That’s what grandmas do, right? I want to share 3 fun things with you that I saw.
#1.) Dominoes. Double Six dominoes, 28 pieces.
These will be great for helping kids learn to match numbers and colors or just for playing the game of Dominoes.
And yes, they will stand up so you can build lines that will fall down with a push on a single domino. 🙂
#2.). Sparkle by Number Unicorn Kits
You just peel and stick on little “gems” to make the picture sparkle!
I know a little girl or two that would think this is fun to do and so pretty! (And maybe some BIG girls too!) 😉
There were 2 different unicorn pictures at our local Dollar Tree store.
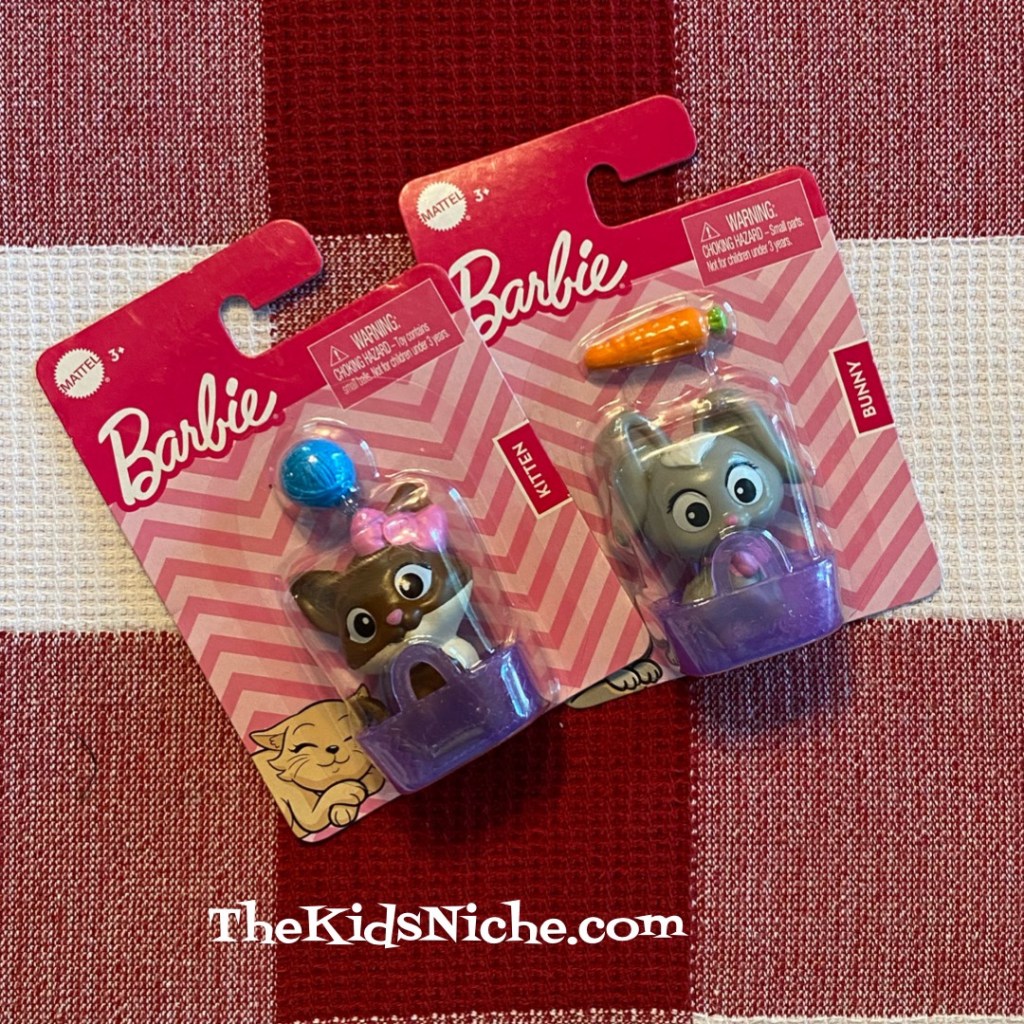
#3.). Barbie pets. They had a kitten and a bunny that would be fun to add to a Barbie doll play set.
I always have fun when I wander the aisles of our local Dollar Tree store! I hope you can find some fun goodies for yourself and for your favorite kids! 🥰
Sorry for the lateness of this post! I’m having computer problems so I’m going to try this post from my phone. Here goes! 😉
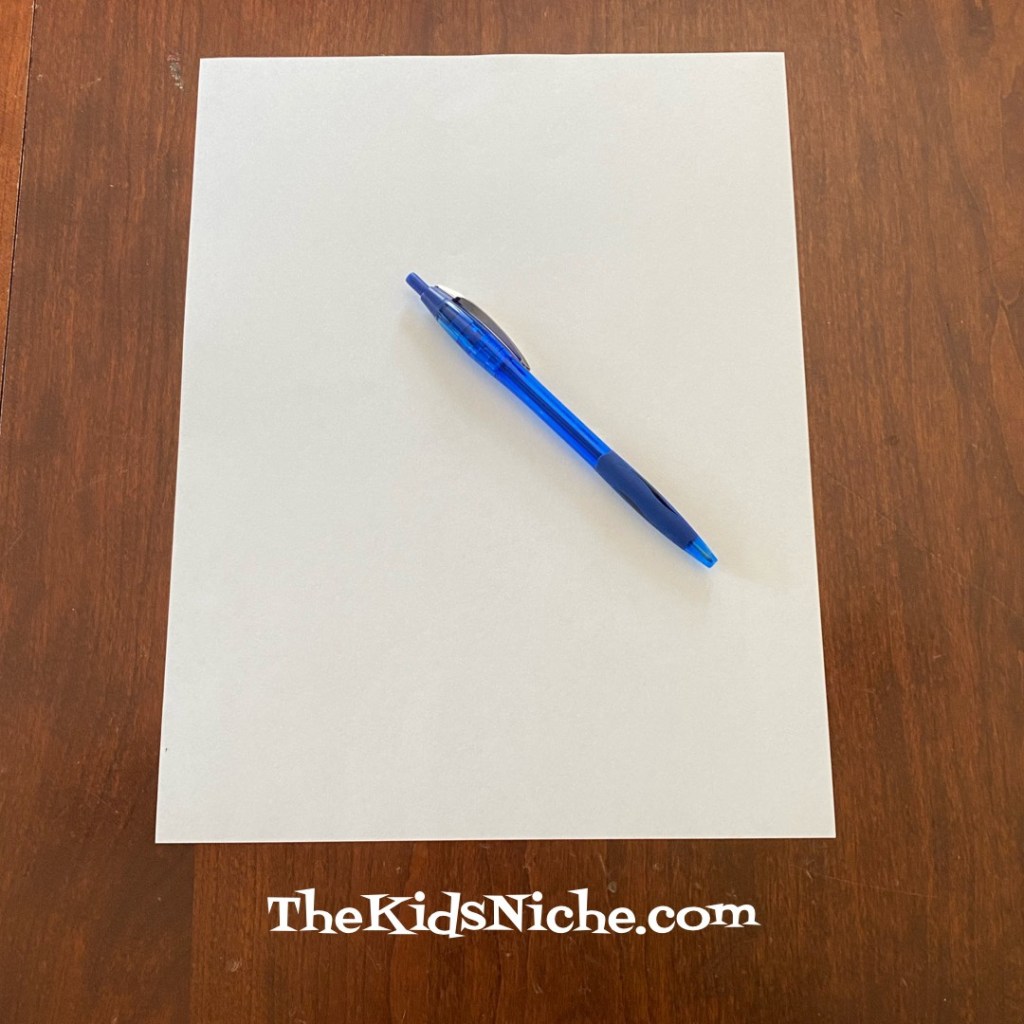
Do you find it hard to keep kids motivated when you are homeschooling or they are doing distance learning at home? Sometimes it helps to take a short break now and then. I’d like to share an idea with you today that might make even a short break more refreshing and fun! All you need is a sheet of paper and a pen.
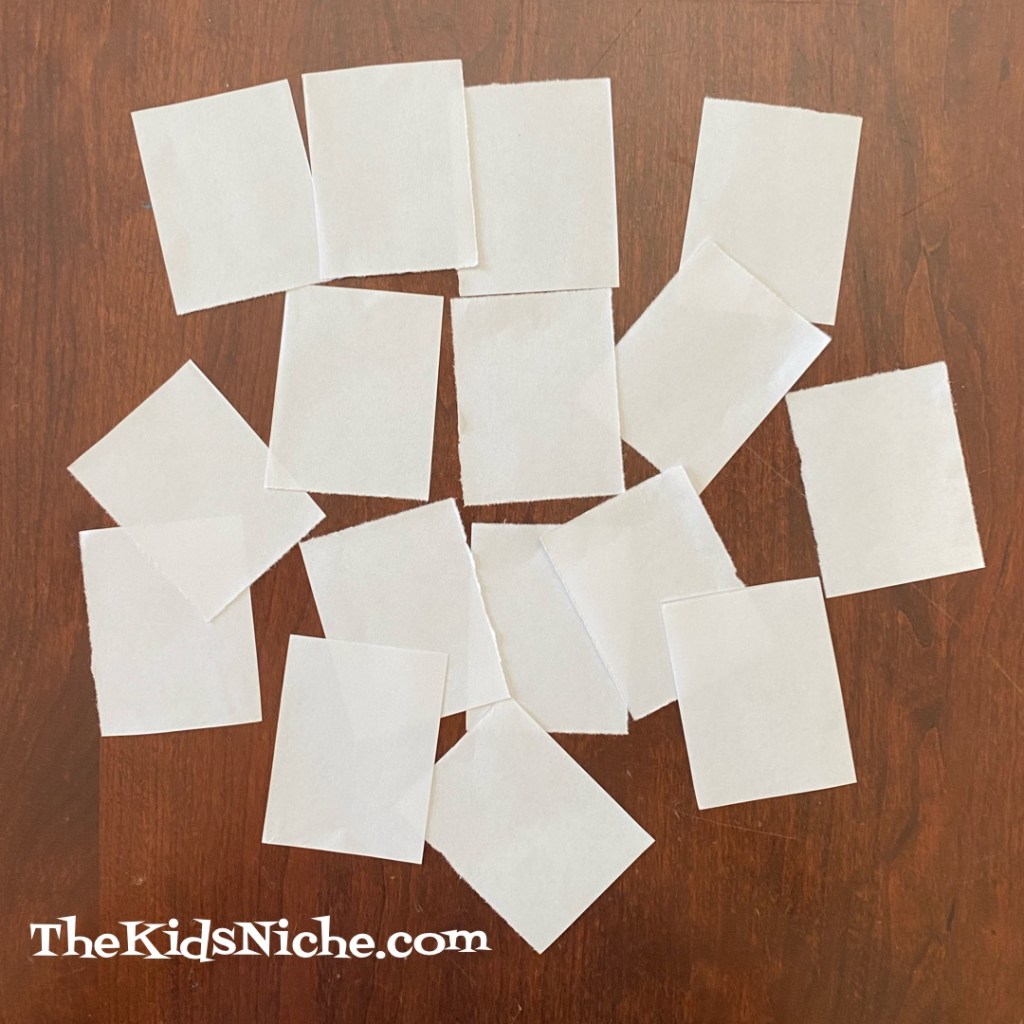
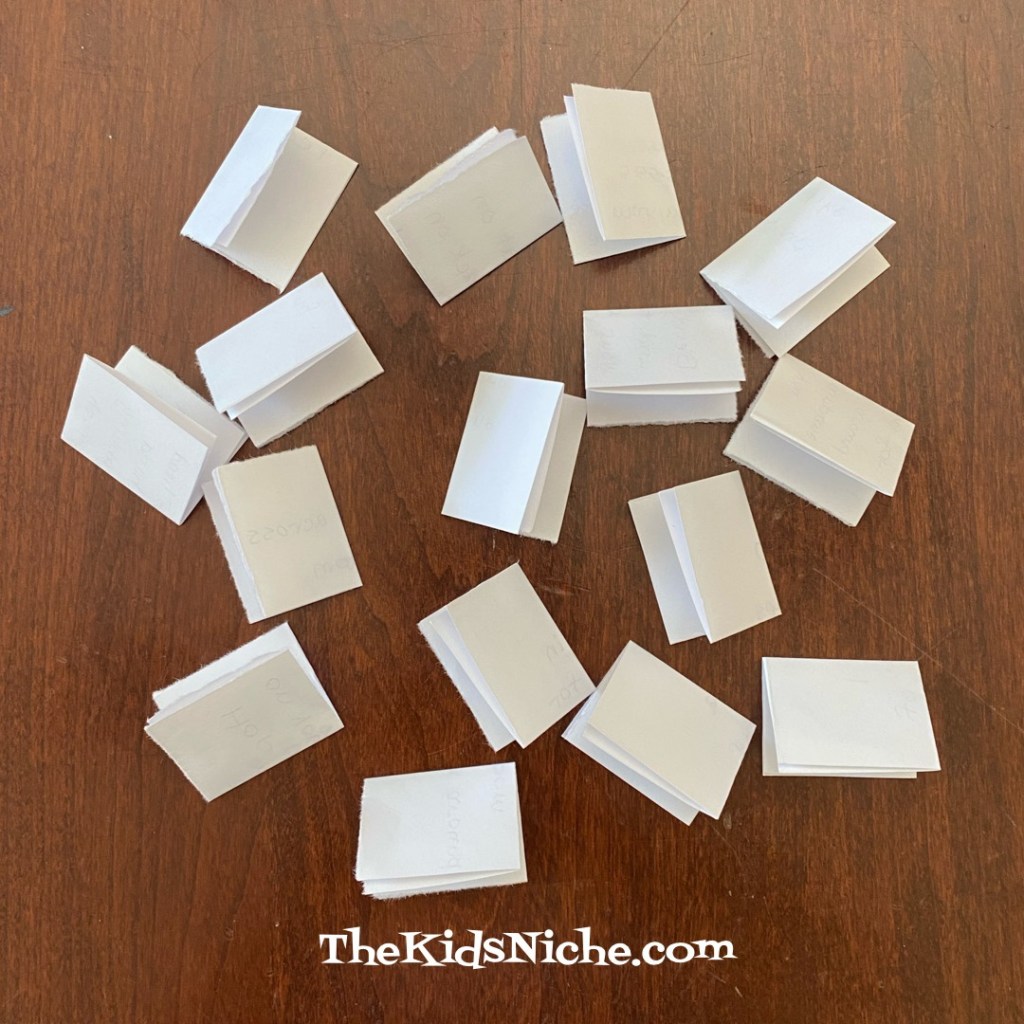
Make the piece of paper into small squares by folding and tearing or by using a pair of scissors to cut it. I made mine into 16 pieces.
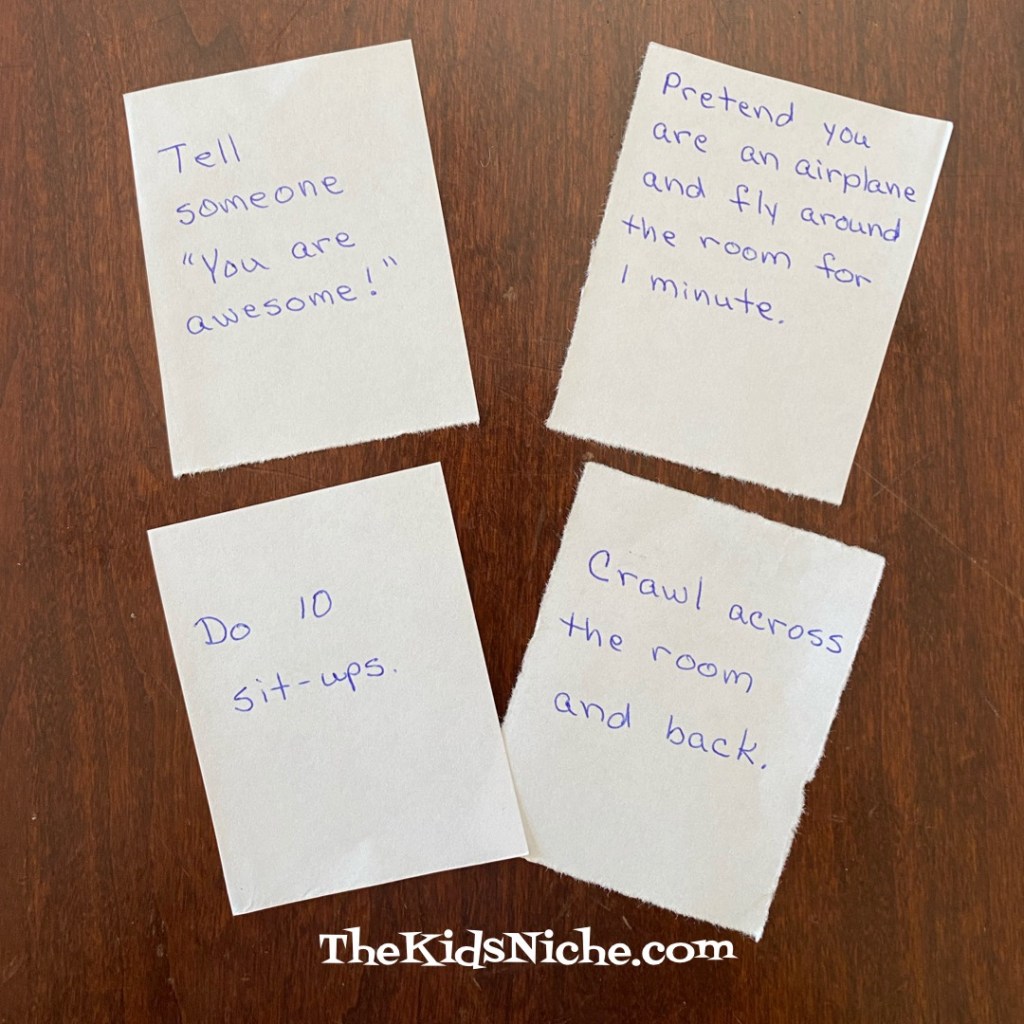
Now write funny little activities on each piece of paper. I’ll show you what I wrote in just a second…
The ages of your children will help you decide what kind of activities to write down. The goofier the better! The idea is to get them up and moving and smiling. 😃 Here are the activities I wrote on my pieces of paper:
After you finish writing on all your pieces of paper, fold them in half and then in half again so nobody can read what they say.
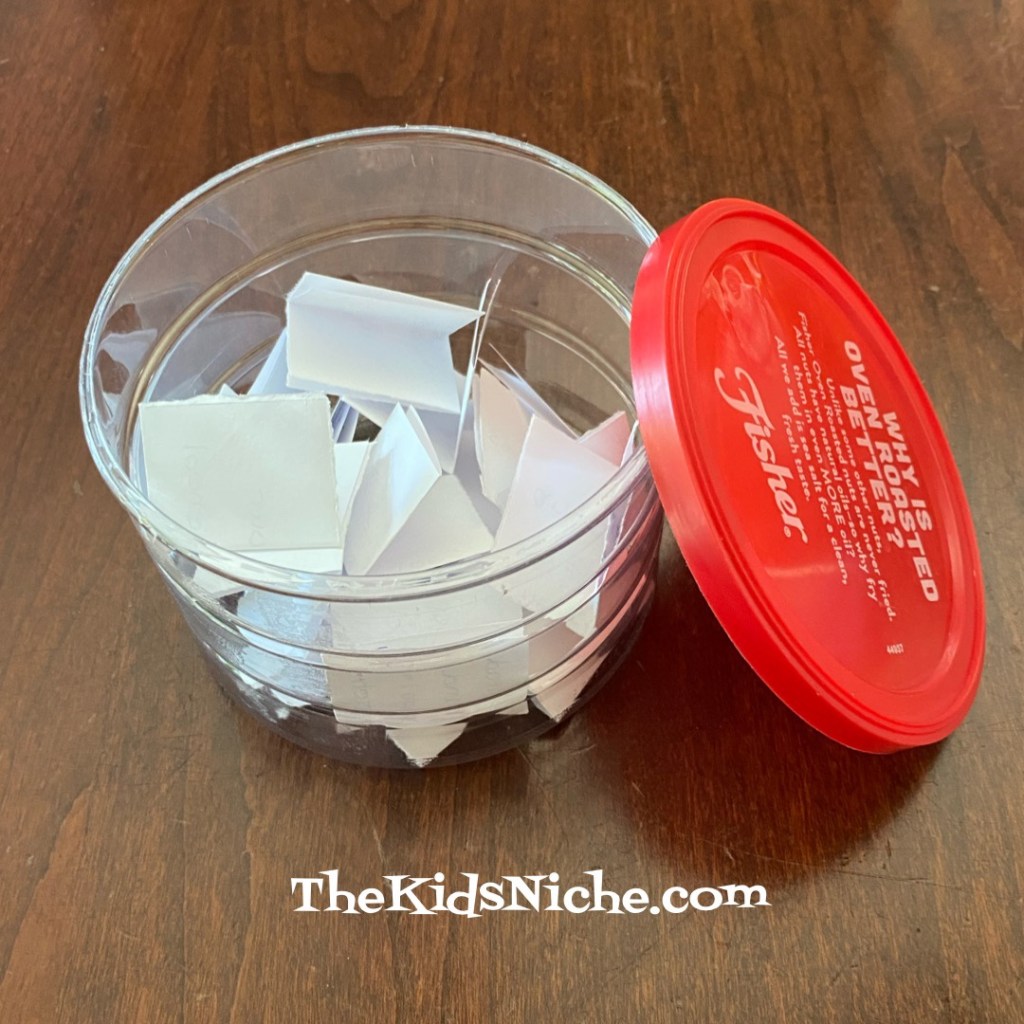
Find a container or bowl to place them in.
You decide when it’s time for a break from studying or working. Maybe it’s after 2 pages of Math or after reading a chapter in a book. When it’s break time, allow your child to reach inside and pull out a piece of paper. Then they read it or have it read to them and they do the activity. It makes for a nice break from sitting for long periods of time. Hopefully after doing their activity, the kids are awake and ready to tackle the next subject. I hope you’ll give it a try! 😃
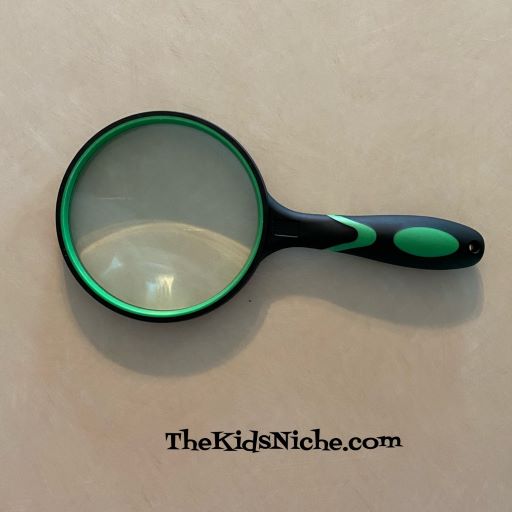
Here’s another simple and inexpensive way for kids to have fun and learn something in the process! Yep, the title gave it away…I’m talking about a magnifying glass. I found one on Amazon for $6.99. And its pretty big.
I know…all it does is make things look bigger. But have you noticed how very COOL things look when they are huge?! Like….books.
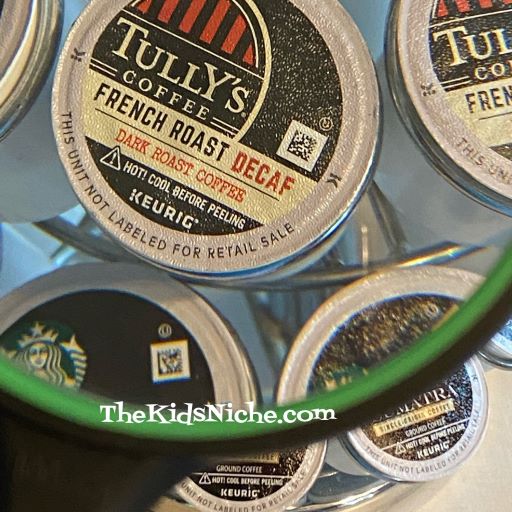
Look at mom and dad’s coffee K-cups.
Or your dog’s nose…
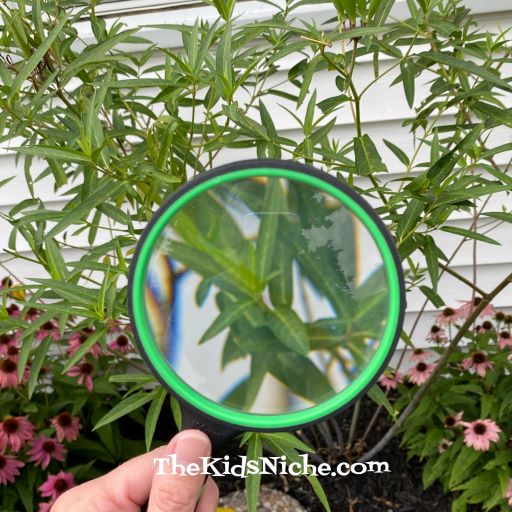
Try looking at plants!
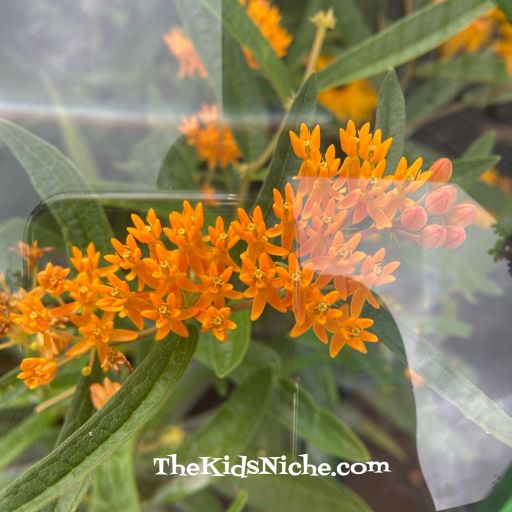
Flowers are cooler when you magnify them.
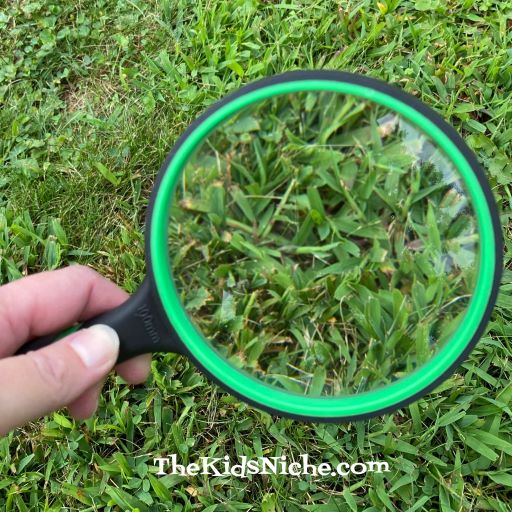
And grass! Check out what you’ve been walking on!
You might even find something cool that lives in the grass!
And dirt! Dirt looks pretty cool up close too!
The list goes on and on! Check out the carpet, your sister’s tongue, a comic book, look at your food…you could do this for HOURS!! Inexpensive, simple, safe and fun! What more could you want? 😉
Sometimes we get caught up in thinking we need to buy TOYS for the kids when really they can be quite entertained with some simple things found in your own kitchen. (Yesterday I saw a 19-month-old boy happily playing with a tag cut off of something new. He was folding and unfolding it and sharing it with me and then taking it back when I offered him his “book” back.) 😉
Today I’d like to talk about one of those things…a simple funnel.
Just the fact that you can pour something into the top of the funnel and watch it run out the bottom part can make for hours of fun for kids! Here are a few ideas of things to play while using a funnel:
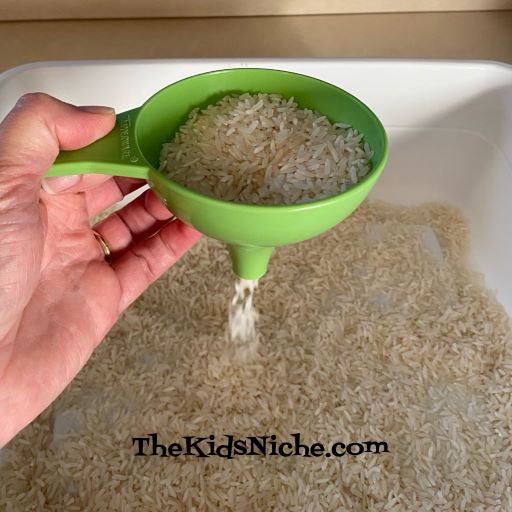
#1.) Rice. White rice is very inexpensive but put some in a tub or bowl and hand your child a funnel and maybe a cup and the fun begins!
#2.) Small dried beans. Small dried beans are a similar idea to the rice. The beans I have are a little bit large for using with my funnel, but they still work, only they move through the funnel more slowly and sometimes you have to shake the funnel a bit to get them to go through.
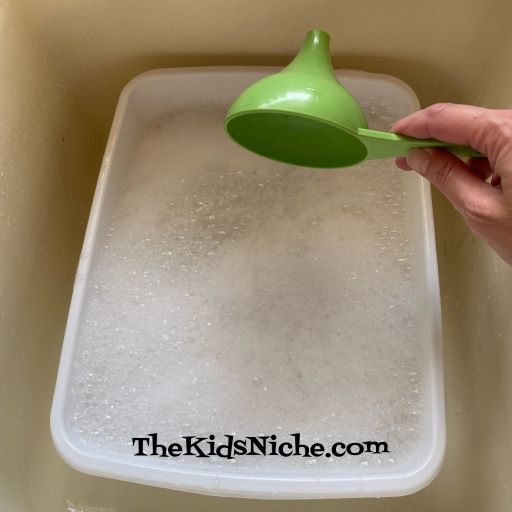
#3.) Water. Yes, just plain ole water! If it’s a hot day, give the kids a funnel and a tub of water outside. Using some cups, they can pour the water into the funnel using one cup and letting the water fill another cup. Even better, give the kids some cups and a funnel while they’re in the bathtub. They’ll want to stay in the tub until their skin is wrinkled up like a prune! 😉
#4.) Speaking of water, add some dish soap and lather up some bubbles! Or if you want to play with this in the bathtub, add some bubble bath soap to the water.
Here’s a fun thing that a funnel is great for with bubbles…scoop up some bubbles with the funnel like this…
Then push the funnel upside down, down into the water and the bubbles will squirt out the top of the funnel! It’s really quite cool! 😉 It’s a little like having your own personal volcano! LOL
#5.) Sand. Yep, you can take a funnel to the beach or bring the beach to your house. Outside is good…lol! You can use a dishpan inside and it works rather well.
Matchbox cars and trucks are fun to bury in the sand. 😉 What truck?
And fun to dig them back out again, of course!
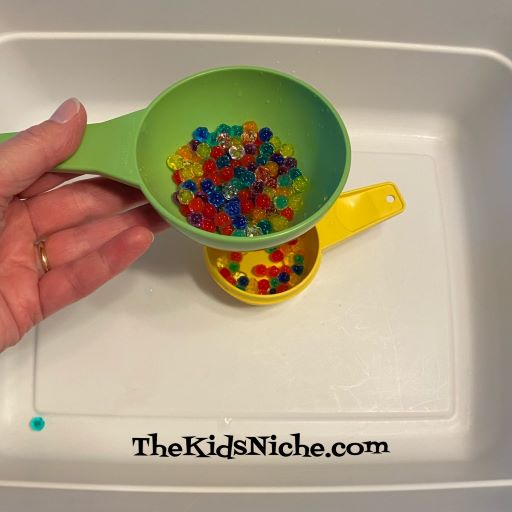
#6.) Water beads. Have your kids played with water beads? They start off very tiny, but as they sit in water they get bigger and bigger. Don’t let them get too big or they won’t fit through the opening in the funnel. This activity is also good for outside play or in the bathtub. 😉
There ya go! 6 ideas of things your kids can play with using a simple funnel found in your kitchen. Hope you all enjoy these ideas! 🙂
We hear a lot these days about stress and how much it negatively affects us. Even kids are dealing with stress. I came across a recipe I had stashed in a drawer for Anti-Stress Lavender putty. (Sorry but it doesn’t say who posted the recipe and I don’t remember where I got it.) Kids love play dough and the lavender essential oil used in this recipe is good to use for calming little people. (And big people!)
So here is my version that I made today. You’ll need 1/2 Cup of flour, 1/4 Cup salt, 4 1/2 teaspoons of cream of tartar, 1 1/2 teaspoons of oil (almond, canola or coconut), 1/4 Cup boiling water and lavender essential oil.
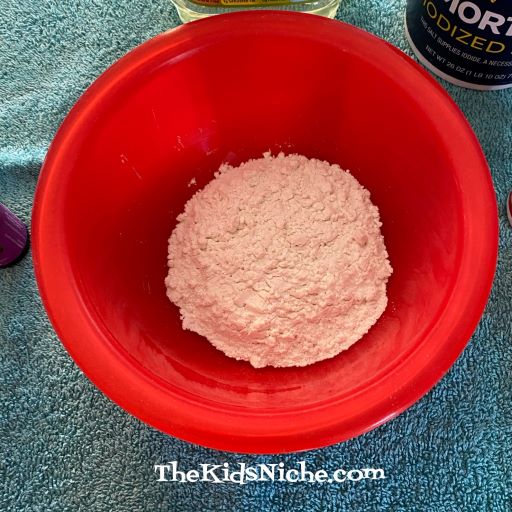
In a medium size bowl, put the flour…
Salt…
Cream of Tartar…
And oil, then start mixing.
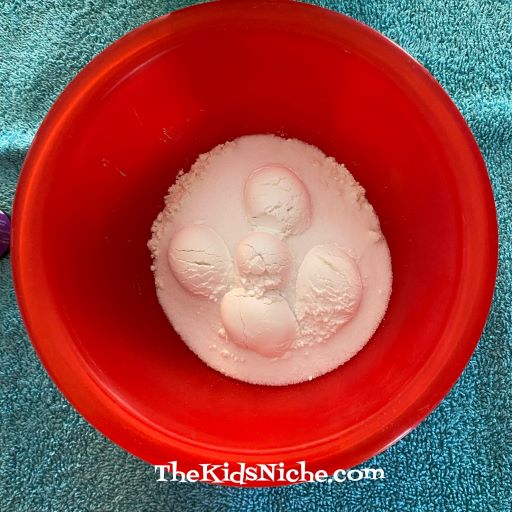
Add in about 5 drops of the lavender essential oil, then mix a little more. If you want a stronger scent, add a few more drops.
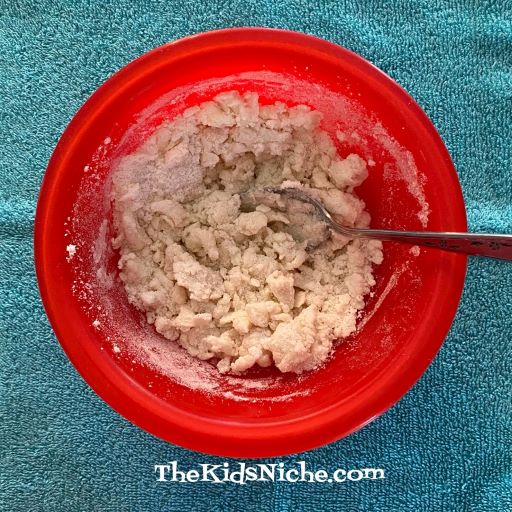
Add the boiling water and stir. To finish mixing it all together, I dumped it out on the counter top on a piece of wax paper and kind of kneaded it.
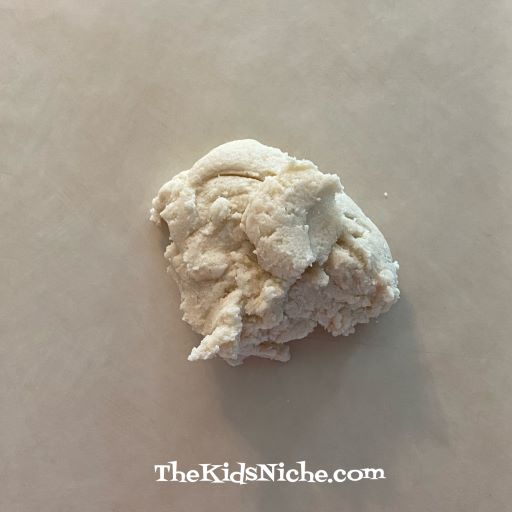
You can add a little more water or flour as needed to get the consistency you want. I needed a little more water. You can also add in glitter but that was more mess than I wanted! LOL It makes a nice soft and easy to shape fragrant playdough.
It’s ready for little people hands and playing! 😉 The idea is that the lavender will help to give the kids a calm feeling while they play. The play dough can be stored in a ziploc bag and should keep for a few months. This is my first batch so I can’t really say how long it will last.
I hope you’ll give this idea a try and that you’ll have great results with it! Think relaxing thoughts as you breathe in the lavender! 🙂
How’s your day going? I hope ok! Today I want to share a super simple way to make your own matching card game. You know, the little cards you line up face down and you turn 2 over at a time and see if they match? Yep, those. 😉 Only a few supplies are needed such as a piece of cardstock or sturdy paper, a ruler, a pencil, a pair of scissors and some stickers.
I used a piece of maroon colored cardstock (8 1/2″ x 11″) and made 12 cards for the game. First you’ll draw lines on the paper to mark the cards into even squares. If you use the same size of paper, your squares can be 2 3/4″. You’ll have just a little bit of extra paper down one side to cut off and discard. (I couldn’t seem to get a good picture of the lines on the paper.)
Cut the squares apart.
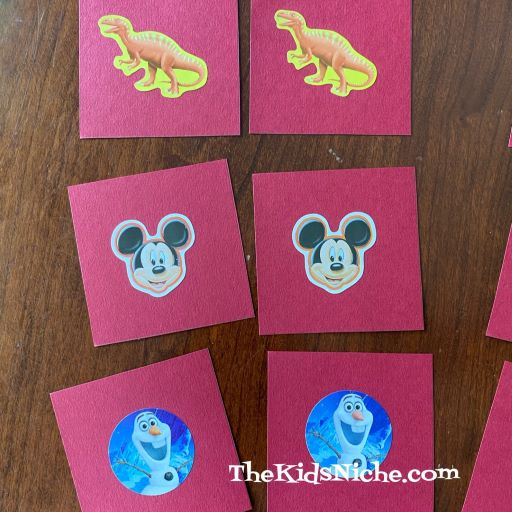
Separate the squares into pairs of 2 cards each. You’ll be making 6 sets of matching cards from one piece of paper. Feel free to make more!
Sort through your stickers to find 6 sets of matching stickers.
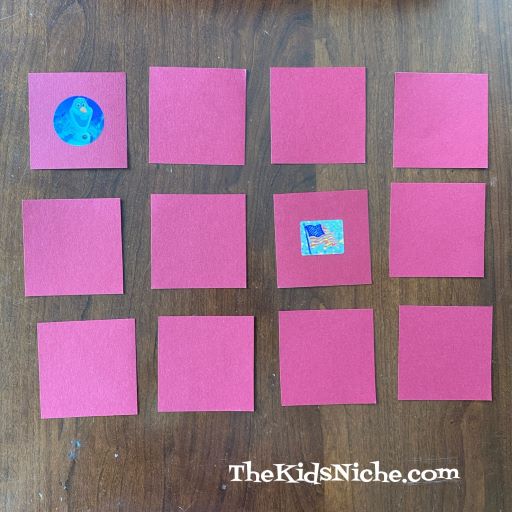
Make a set of cards by placing 1 sticker on each card, making sure there are 2 identical cards.
And your cards are made! You’re ready to play! Turn all the cards face down and mix them up, then line them up in 3 rows of 4 cards each.
The first player turns over 2 cards. If they match, he/she takes the match and turns over 2 more cards. As long as the player is finding a match, their turn continues. If they don’t find a match, the cards are turned face down again and play moves onto the second player.
A match!
6 matched sets is probably enough for small children, but you might want to make more for kids that are a little older. So easy to make and so simple to play! I hope you’ll have fun making your own game AND playing it! 🙂 Thanks for stopping by!
Grab some newspaper to cover your table and a smock or old shirt to cover the kids and let’s have some fun finger painting! I have fond memories of finger painting when I was little . 😉 I found this inexpensive set of finger paints at Walmart for $4.34.
Yep, they are washable!
There are 6 colors in the set.
I also found some white construction paper for $1.47. (Why do packs of construction paper never have white in them?!)
Don’t forget your most important utensil – damp paper towels for cleaning up! LOL
Newspaper, smock or old clothes, paint and paper…looks like we’re ready to go!
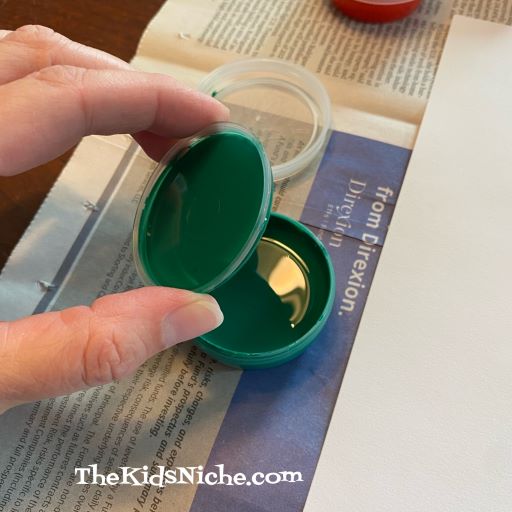
Select your first color…I decided to start with green. There is another kind of plastic lid inside the first lid.
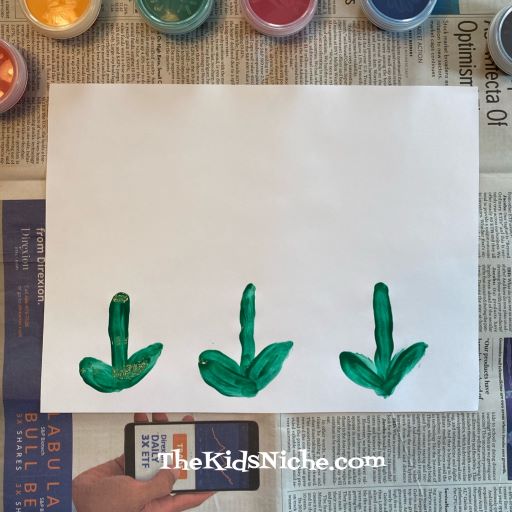
Flower stems and leaves are the beginning of my painting. Just trying something super simple that kids can do. 😉 You need a very small amount of paint on your finger at a time!
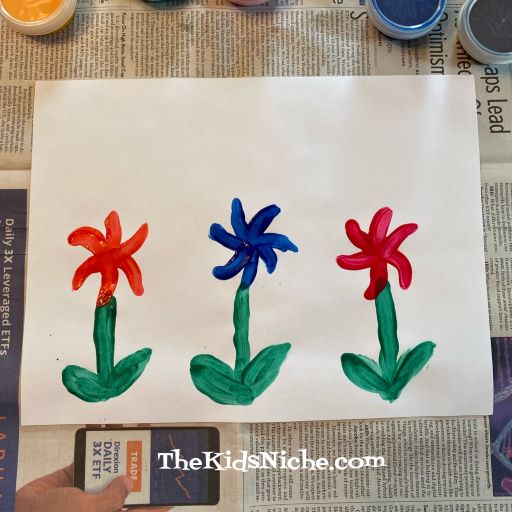
Now for some flower petals…
Let’s add a yellow dot to the center of the flowers, a sun in the top corner and some blue streaks in the sky.
Of course, you and the kids can paint anything you want! No brushes needed! You can put a small amount of each color on a styrofoam plate that the kids can dip their finger onto while they are painting. You never know, this might be the beginning work of a future great artist! Have fun!
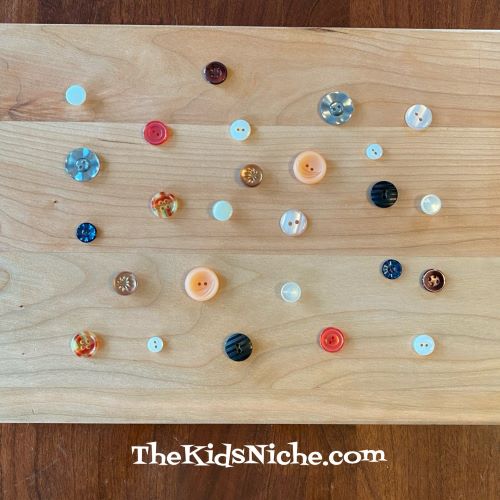
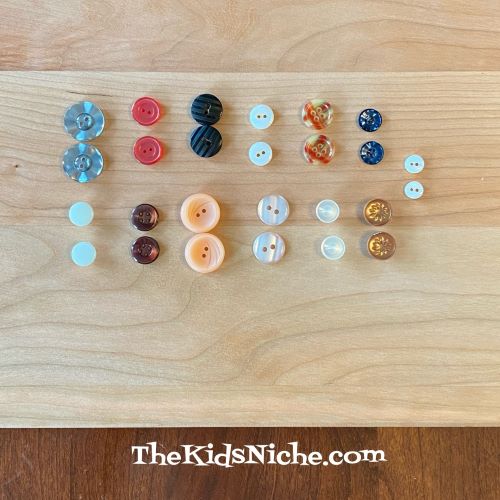
Hello and welcome to a new week at The Kids Niche! Today we’ll talk about a super easy and simple matching game. The first way we played it was using buttons we had around the house. (If you don’t have buttons, its ok…keep reading please.) Pick out several button pairs so you have 2 that match. Lay them out on the table or counter and mix them up.
The age or ability of the children playing can determine how many sets of two you use. Let the children match the button pairs up. If there is more than one child playing at a time, they can take turns finding matches. There isn’t really a winning person in this activity, but everyone wins when all the matches have been made!
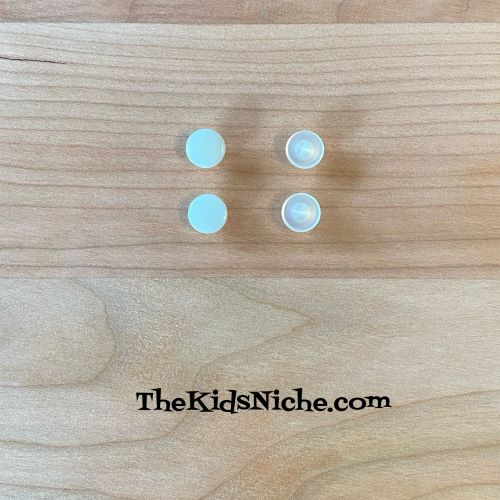
Also depending on the age of the kids playing, how hard you make the matches. For instance, these two sets of buttons look very similar. But one set is white and the other is shiny.
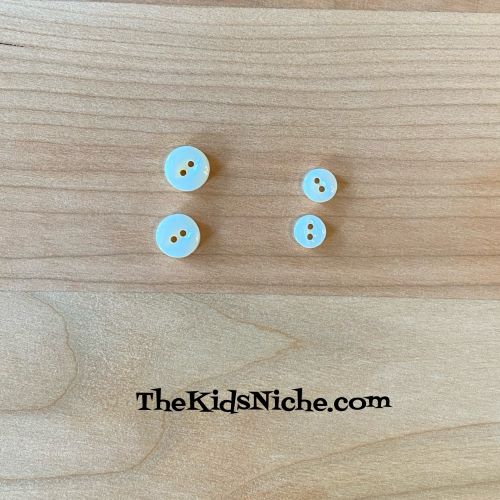
These two sets of buttons look the same except they are different sizes. Be careful of using too small of sizes for the younger kids because we don’t want anyone putting things in their mouth and choking on them!
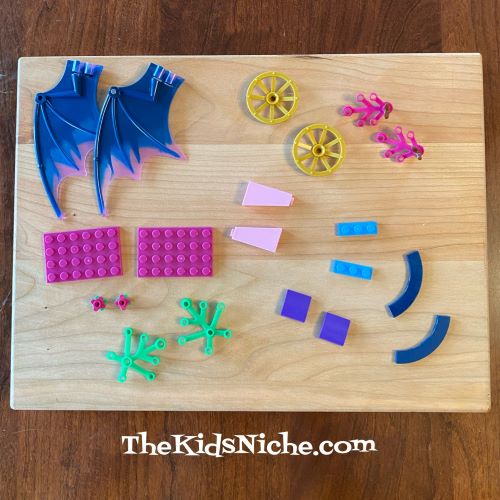
Maybe you don’t have buttons at your house? Lego pieces work great for this activity too. Follow the same instructions that we used for buttons.
All matched up!! Good job!
You can use whatever items you might have around the house. Maybe crayons or blocks or hair barrettes. The idea is just to have things that you have two of for the kids to sort out the pairs. I hope you and the kids have fun trying out this game! 🙂
Welcome to another week of fun with The Kids Niche! Today we’re making a crazy hair octopus! Won’t you join us? 🙂
Just some simple supplies are needed for this project…an empty toilet paper roll, 2 wiggly eyes, some markers or crayons, some yarn, glue, a pencil, a ruler and a pair of scissors.
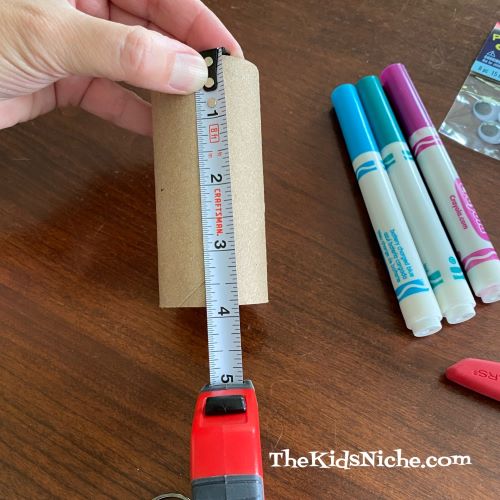
Let’s start by working on the octopus body. Measure up about 2″ and make a pencil mark all around the toilet paper roll.
Next, make a small mark on one end of the roll and a second mark that is about half way around the roll on the other side. Can you see the 2 little marks?
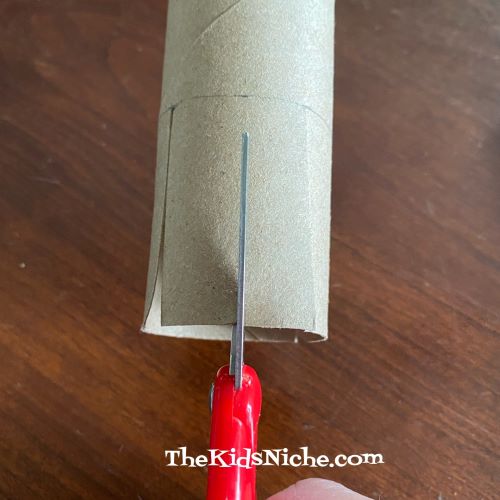
Using your scissors, cut on one of the little marks straight up until you reach the 2 inch line.
Turn the roll around and make another cut the same way on the second small mark. Next cut the two pieces in half so you have 4 sections on that end of the toilet paper roll.
Cut each of the 4 sections in half so that you end up with 8 sections.
What part of an octopus has 8 pieces? It’s legs, right? The 8 sections will become the 8 legs on your octopus. 🙂
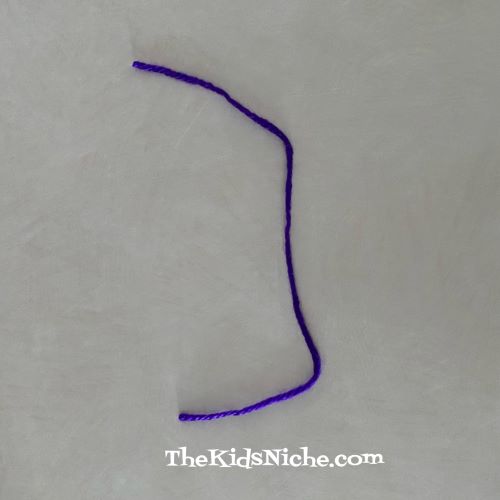
Let’s switch to working on the crazy hair part now. We will be making a pom-pom for the crazy hair. Cut a piece of yarn around 6-7 inches long and lay it out on a flat surface like a table or countertop.
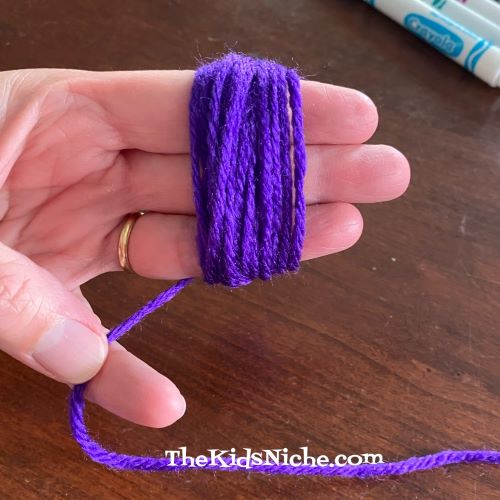
Now take the end of yarn that is still attached to the skein/ball of yarn you are using and place it across your hand like in this picture:
You will now be wrapping the yarn around your hand approximately 50 times. You can use 3 fingers for an adult or wrap around a child’s whole hand.
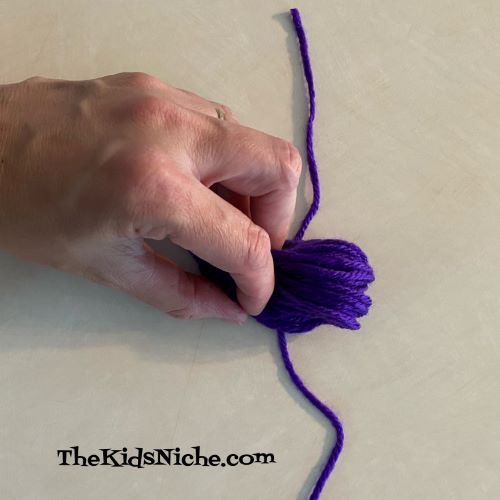
After you’ve wrapped the yarn 50 times, cut the end of the yarn you were wrapping with. Carefully slide the wrapped yarn off the fingers, keeping it together in a bunch and lay it on top of the first piece of yarn you cut. The wrapped bundle should be placed on the piece of yarn so its approximately in the center of the wrapped bundle.
Using your first piece of yarn, tie it in a knot around the wrapped bundle. You will have loops on both sides of the knot.
Use your scissors to cut through the loops on both ends.
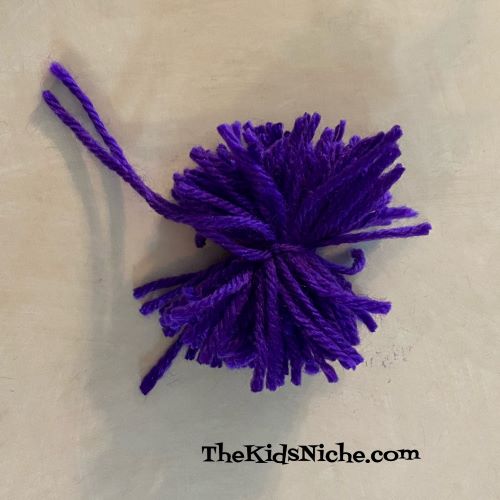
Using your fingers, fluff the pom-pom until it resembles a ball shape.
Trim any pieces of yarn that are extra long and sticking out.
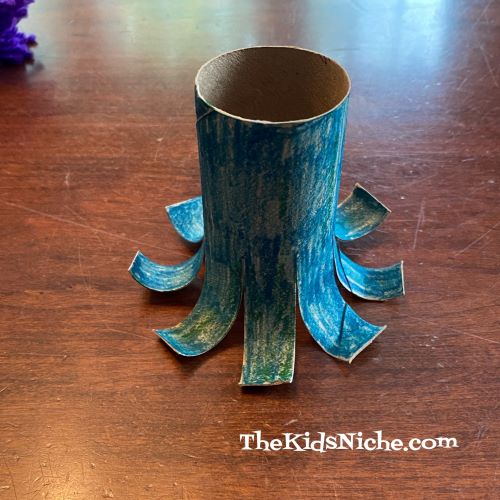
Let’s go back to the octopus body now. Using your markers or crayons, color the entire outside area of the toilet paper roll.
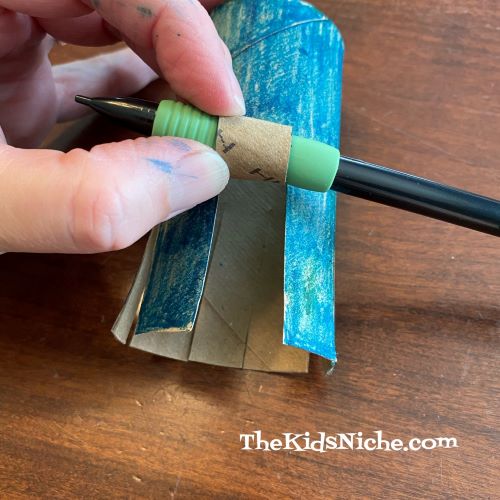
Using your pencil, carefully roll each of the 8 leg sections (one at a time) up around your pencil.
Slide the pencil out and unroll the leg as much as you like.
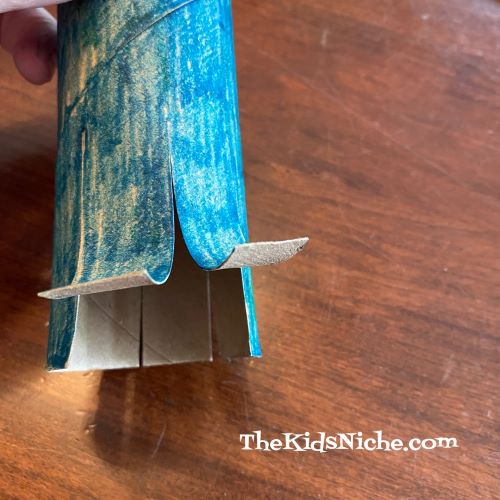
After rolling each of the eight legs, your octopus might look something like this:
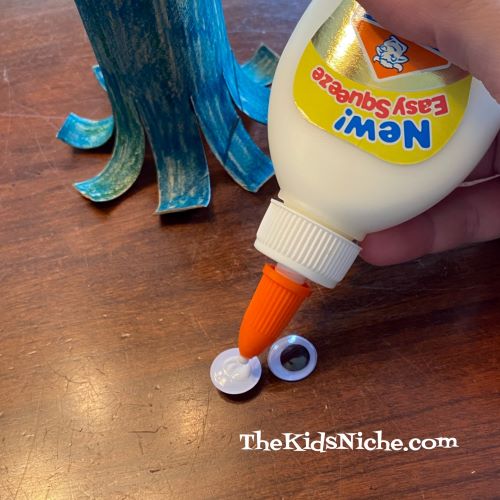
Glue on the 2 wiggly eyes.
Your octopus is taking shape! 🙂
Put a line of glue all around the top edge of your octopus.
Place the crazy hair in place and hold for a little bit while the glue starts to set up.
Give your octopus a smile with a marker!
And your crazy hair octopus is finished! 🙂 Great job! Find a nice place to put him/her so everyone can enjoy seeing him/her! I hope you had fun making your crazy hair octopus!
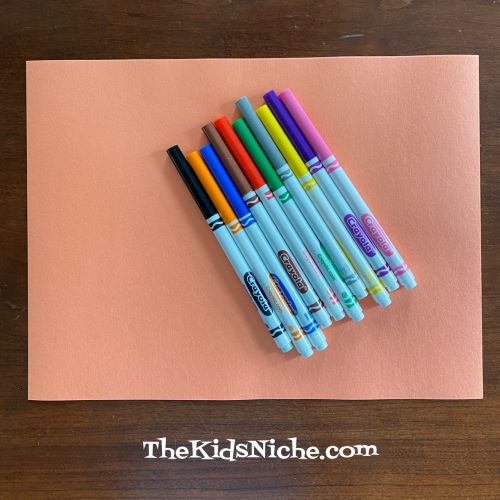
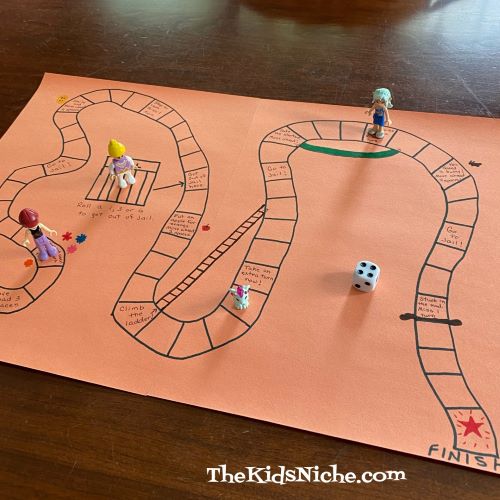
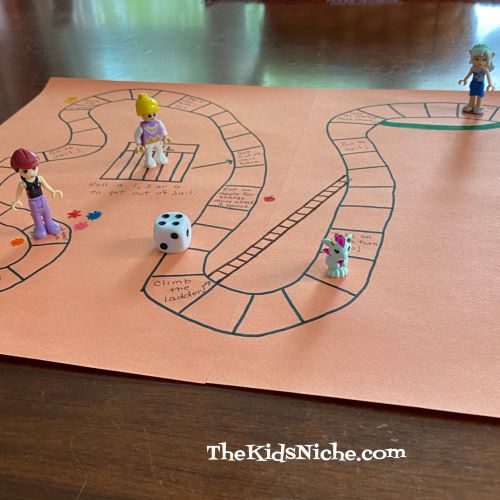
Does your family like to play games together? I’m thinking board games, like Chutes and Ladders, or card games, like Uno. We have played a lot of games in our family over the years and we always have a great time. 🙂 Here’s an activity that your kids might enjoy, especially if they like playing games. And that activity is making your own game! Grab a couple sheets of construction paper (or whatever kind of paper you have handy), some markers and some tape. You’ll need some game markers of some kind and 1 dice when it’s time to play the game you make. Let’s do this!
You can use one or more sheets of paper, depending on the size the paper is and on what size you want your game board to be. I taped 2 pieces of construction paper together to make my board a little larger.
Turn your paper over so you don’t see the tape and let’s begin drawing! Pick where you want the “Start” to be.
Draw a path with 2 lines on your paper from Start to Finish.
Now divide your path into sections.
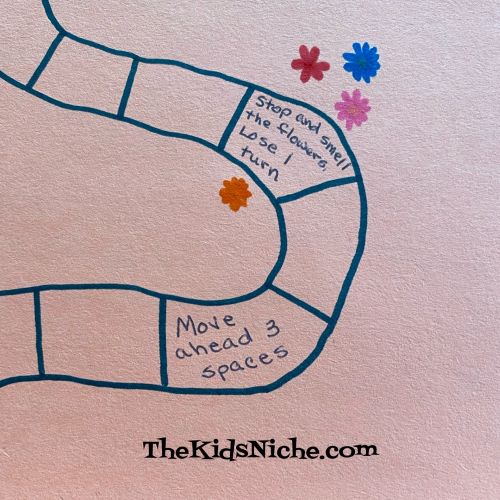
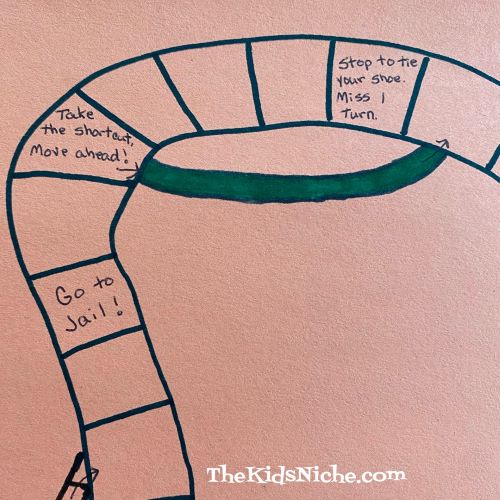
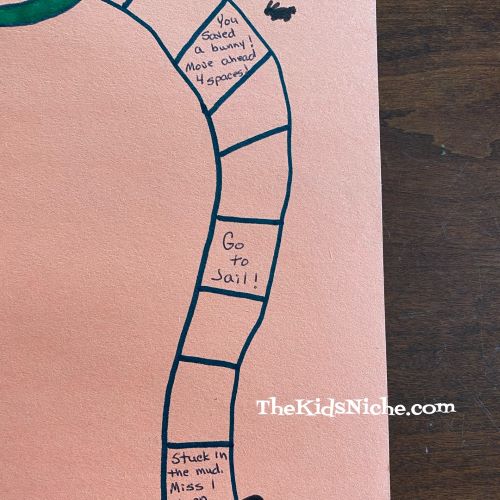
Add some fun (and not so fun) things along your path that each player must do when/if they land on that particular space.
Here are a few examples that I used for my game.
Yikes! Go to Jail??!
I hope I get to climb the ladder!
Ooo, a shortcut!
Coming down the home stretch! Don’t go to Jail now!
You can use whatever you have handy around the house for your markers for the game. You could use a penny and a dime for 2 players, for example. I found some Lego figures that will work great for playing this game. All you need is 1 dice and you’re ready to play!
The rules for my game would be: Each player rolls the dice and the player that gets the highest number, goes first. Play will continue clockwise. When it is your turn, roll the dice one time and move your marker forward on the path that number of spaces. Do whatever the space says to do. If the space doesn’t have any instructions, your turn is finished. Continue playing in this manner with each player rolling the dice once, moving their marker ahead that number of spaces and doing what the space says to do. The first player to reach or go beyond the Finish space is the winner!
Let the kids make up the rules and the things to write in the spaces. Your game may get a little crazy and you may spend the entire game in Jail, but it’s fun to let the kids have the freedom to control the game. It’s also great to make a game yourself that has a set of rules to follow to help kids learn about following directions. But sometimes, crazy fun is the best fun! 😉 And the things kids can dream up that you have to do can be pretty hilarious!
I hope you will give this a try and you’ll have a ton of fun! Now I need to go find someone to play my new game with me! Maybe I can draft my husband… 😉 LOL