
Yep, you read that right…turkey headbands! It seems like a lot of folks have gone from celebrating Halloween straight to Christmas preparations, but I think we should enjoy Thanksgiving first! So here’s a Thanksgiving craft to do with the kiddos that will also make for a cute photo op on Thanksgiving Day. 😉
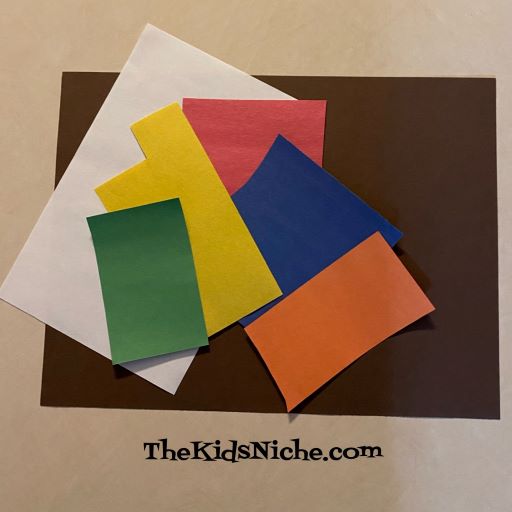
You will need a piece of brown or black construction paper, some scraps of different colored construction paper, a small piece of cardboard or cardstock, scissors, a black marker or crayon and glue or double sided tape.
Cut 2 strips about 1 1/2″ wide the length of the brown construction paper. Make sure that 2 pieces put together will fit around the head of the child making this. You can cut more strips if needed.
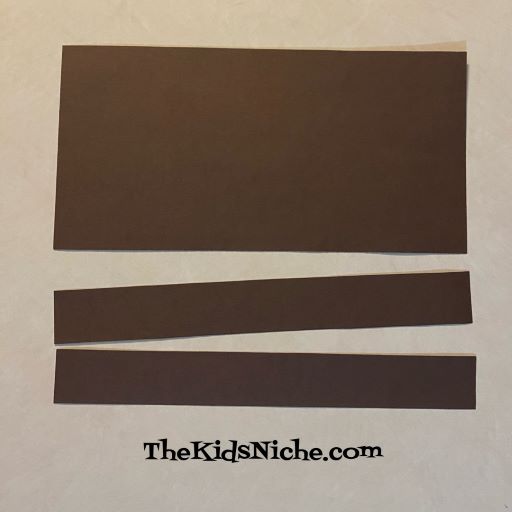
Tape or glue 2 narrow ends together to make a longer strip for the headband.

Wrap the strips around your child’s head so the headband is snug enough to stay in place. Tape or glue the other 2 ends together too. Your headband will now look like a circle.

Now let’s make the turkey parts! Using the piece of cardboard or cardstock, make a pattern in the shape of a narrow leaf or feather.
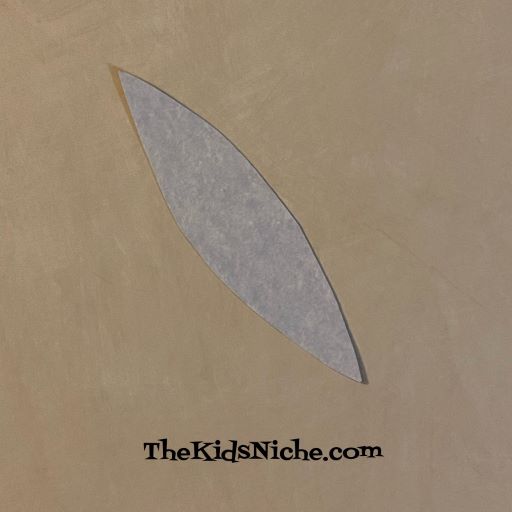
Use the pattern to trace around the feather on each scrap piece of colored construction paper.
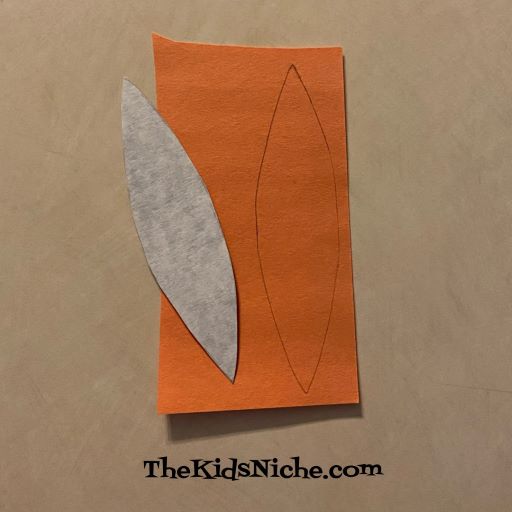
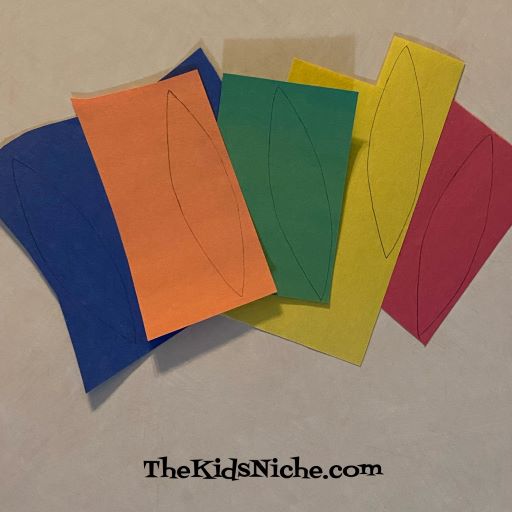
Cut out each feather.

You know the red thing that hangs down by the turkey’s beak? It’s called a snood. You can draw one on a piece of red construction paper. Don’t worry about being exact here. Just draw something similar to this:
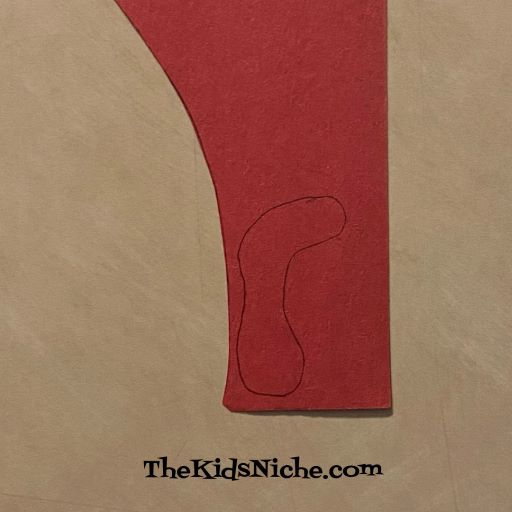
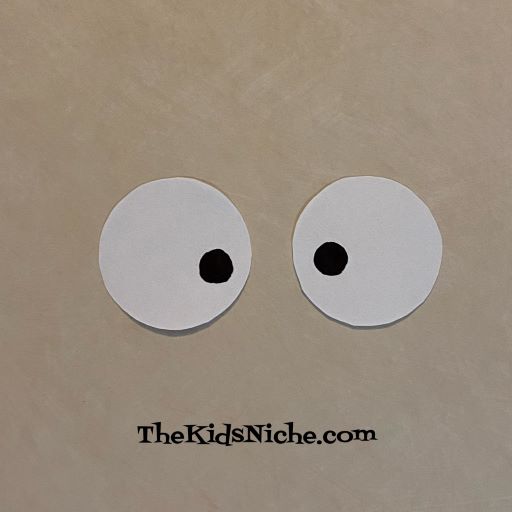
Cut it out using your scissors. Next, draw 2 fairly big circles on white paper for the turkey’s eyes. You might have a tiny glass you can use to trace around to make your circles.
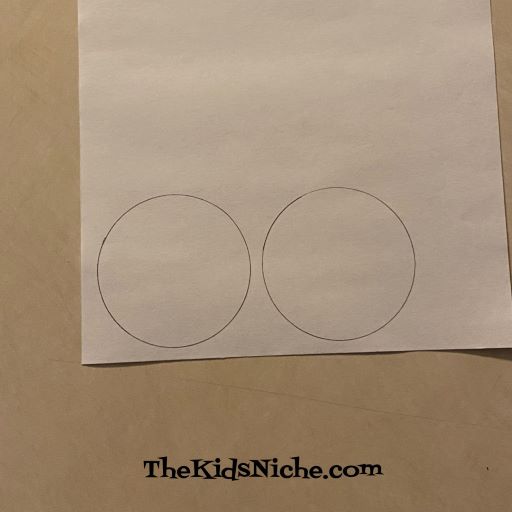
Using a black marker or crayon, color 1 dot on each white circle for the eye pupil.
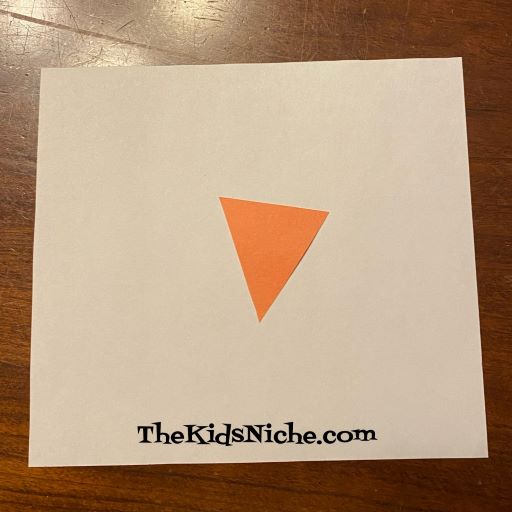
Cut a nice sized triangle out of orange paper for the turkey’s beak.
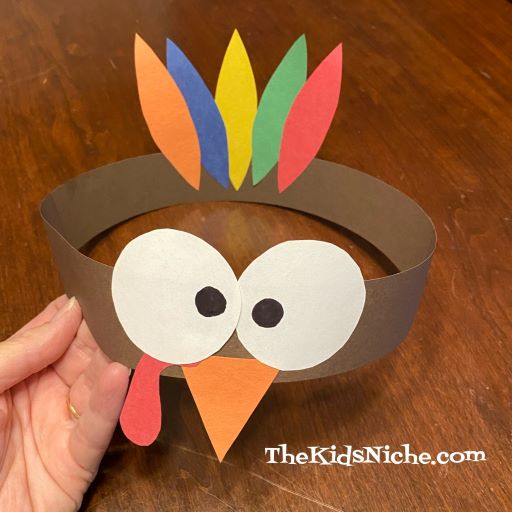
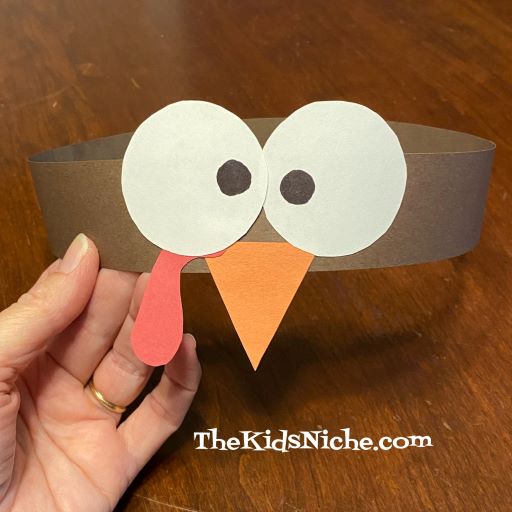
Ok, we have all the pieces ready so let’s put the turkey headband together! You can use glue or double sided tape. I went with the tape. First glue/tape the orange triangle on for the beak.

Put the snood on next, right at the corner of the beak.

It’s time to add the eyes! You can put them on in any direction you like. I put the black dots close together, but you can experiment with the eyes to see how you want your turkey to look.
Apply the feathers to the inside of the back of the headband. You can put on as many feathers as you like.
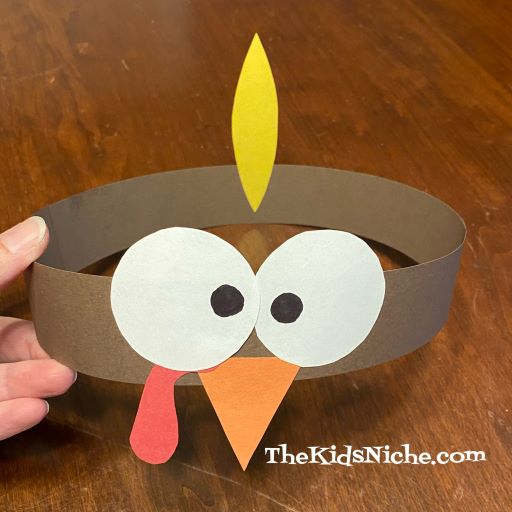
Once the feathers are attached, your turkey headband is ready to wear! (Unless the glue needs to dry first.)

If you have more than one child making a turkey headband, you can customize them so each child’s look a bit different from the others. I tried to get Rusty (our dog) and my husband to model my headband for you, but both said they would rather not. 😉 Have fun and don’t forget to take some pictures!
