Yep, my calendar told me that today is America Recycles Day.
So what does that mean? Well, here’s a little blurb I found that explains it:
“About America Recycles Day
The Keep America Beautiful America Recycles Day is the only nationally-recognized day dedicated to promoting and celebrating recycling in the United States. Held on and around Nov. 15, America Recycles Day educates and encourages individuals on how to be more mindful of what they consume, where and how to properly recycle, and to pledge to recycle more and recycle right in their everyday lives.”
Ok then! So today I want to share some ideas with you about some ways you can recycle things you might have otherwise thrown away into something that can be used again. Here are a few things we’ve had fun recycling at our house.
Some cardboard pieces found in a box of tea bags…
Turned into bookmarkers!
An egg carton…
Turned into a caterpillar!
Empty toilet paper rolls…
Turned into adorable snowmen!
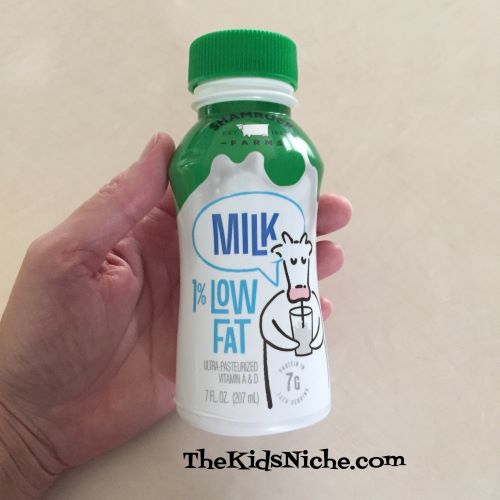
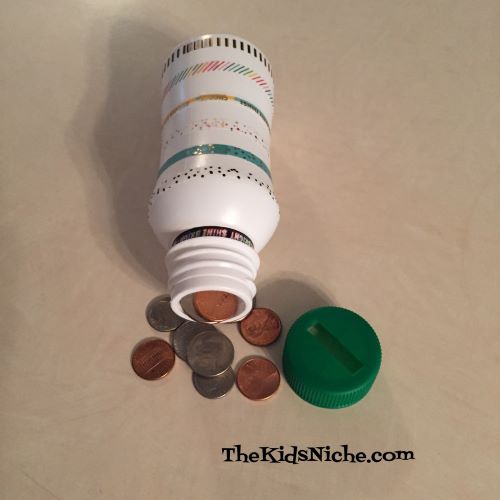
A empty, washed milk bottle…
Turned into a bank for saving coins!
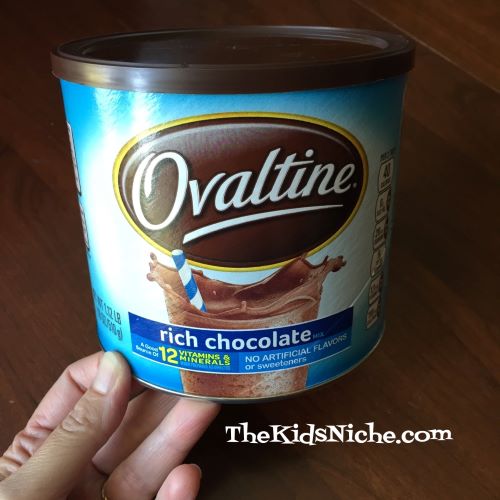
Repurposing an empty Ovaltine container…
Into a great place to store things!
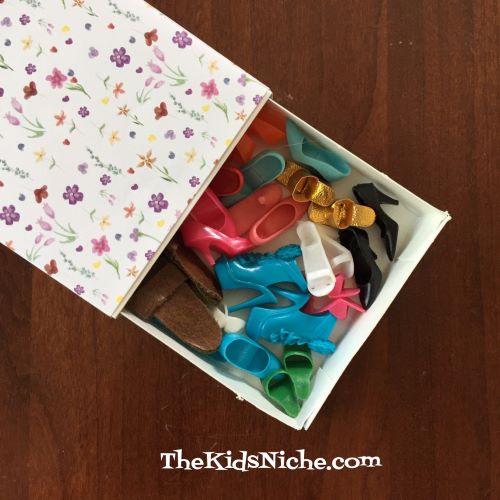
Turn an empty Q-tip box into…
A super place to store Barbie doll shoes!
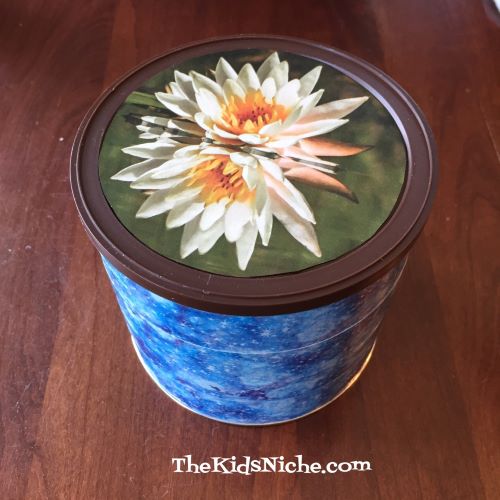
How about turning an empty oatmeal container…
Into a Special Treasures container!
I hope these ideas will spark some ideas of your own on ways you can reduce, reuse and recycle! Happy America Recycles Day 2021! 🙂
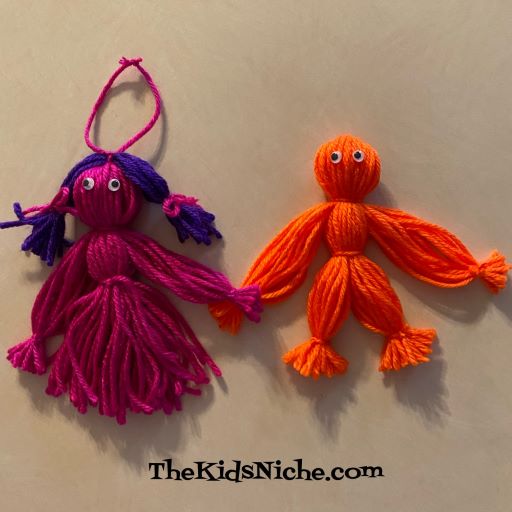
The other day I was thinking about the yarn dolls that we used to make. I can’t quite remember who taught me to make them but I think it might have been a family thing that was passed down to me.
At any rate, making yarn dolls can be fun and all you need is yarn, a piece of cardboard and a pair of scissors.
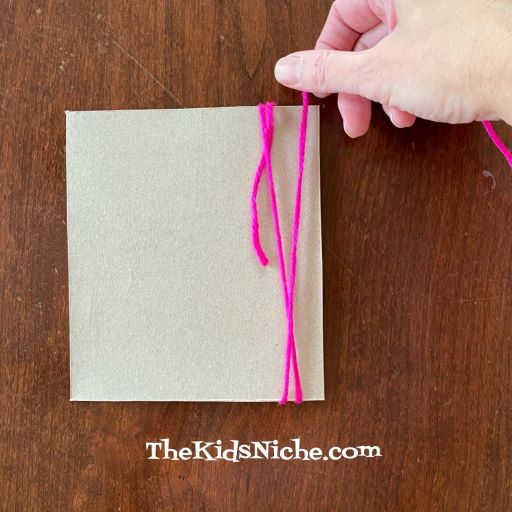
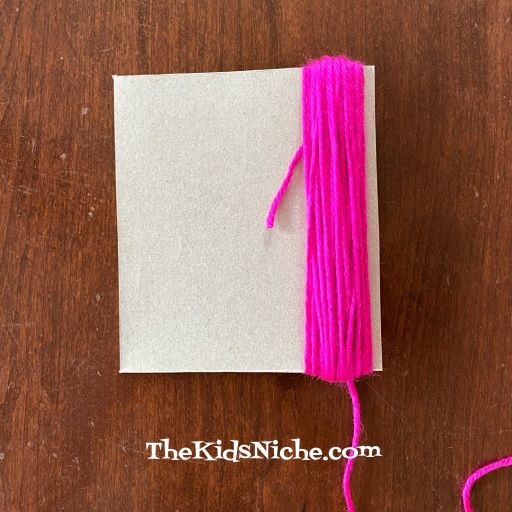
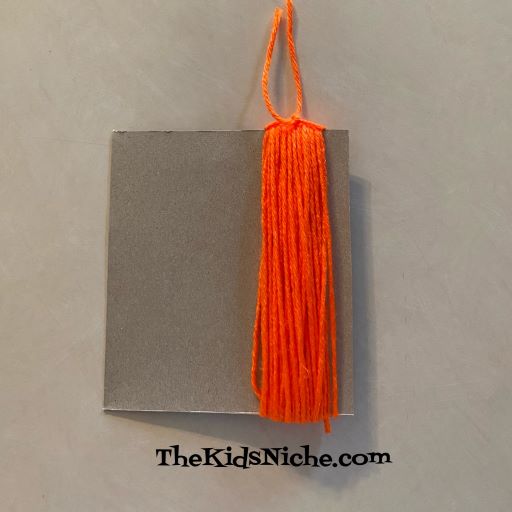
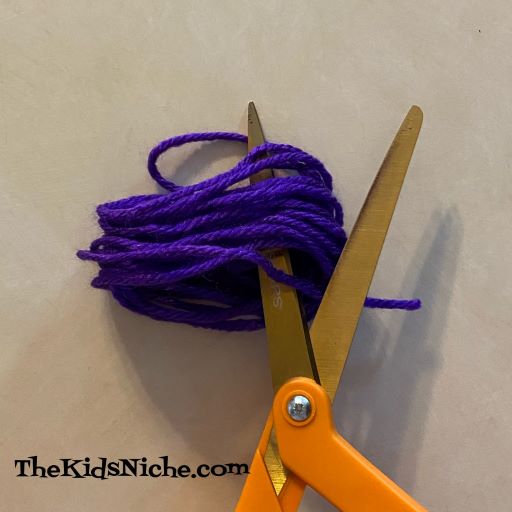
The size of your yarn doll will be determined by the size of your piece of cardboard. My cardboard piece was about 6″ long. Begin by wrapping the yarn around the piece of cardboard.
Wrap it around at least 50 times. Then cut the yarn.
There is a step that I forgot to do while I was making the pink doll, so I will be showing that step with the orange yarn I used for a second doll. While the yarn is still on the cardboard, cut another piece of yarn about 5-6″ long and slide it under the yarn on the cardboard. (I added the yarn to the pink doll but at a later time which made it harder to do. Ooops!)
Pull it up toward the top and tie a knot. This piece of yarn will help keep the doll’s head in a nice shape and can be used to add hair or to hang the doll.
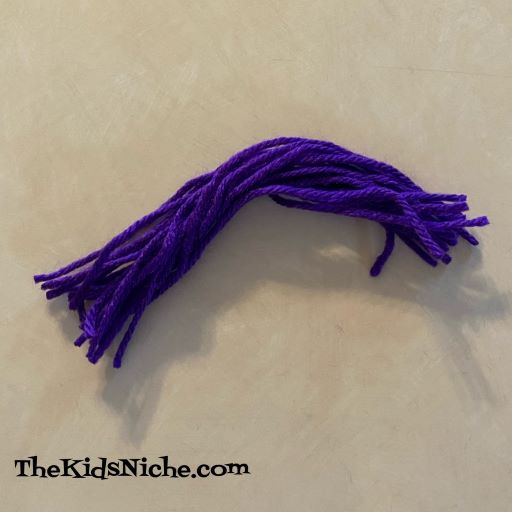
Slide the yarn off the cardboard.
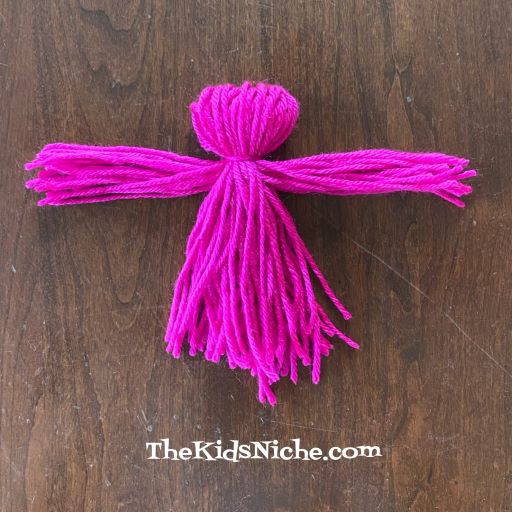
Back to the pink doll! Ha! Using your scissors, cut the yarn on the opposite end from where it’s tied.
Keep the yarn bent in half.
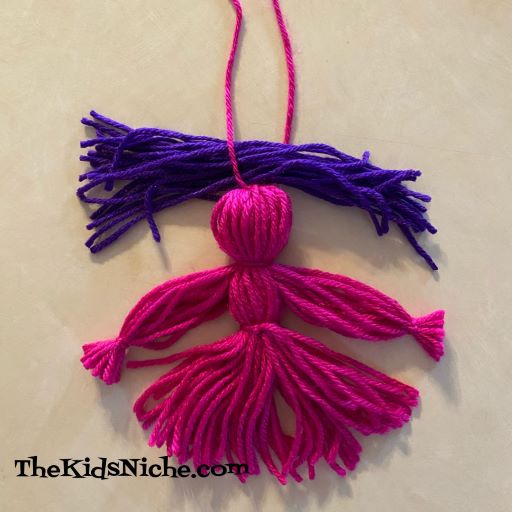
Cut another piece of yarn to be used to make the dolls head and lay it out on your work surface. Lay the folded yarn on top of it.
Tie a knot with the additional piece of yarn and that makes the head.
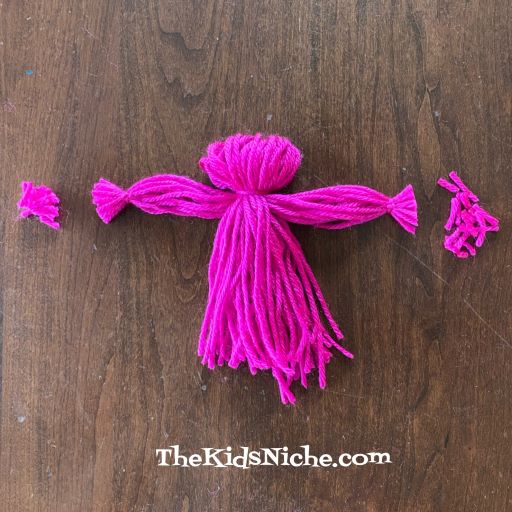
Separate a section on each side of the body. I did approximately 15-18 pieces of yarn in each side section.
Using a small piece of yarn, tie the 2 side sections close to the ends. Trim and there are your doll’s arms. 🙂
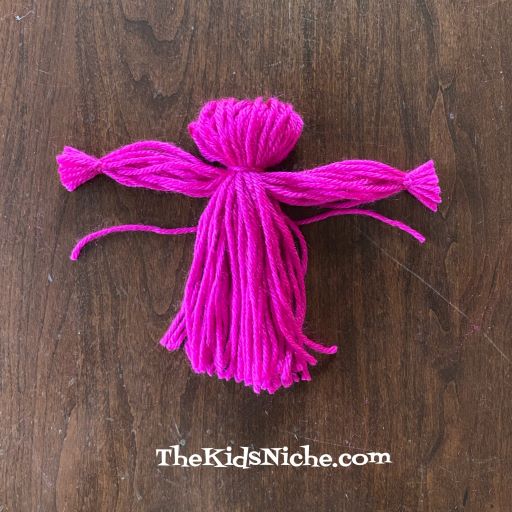
Cut another piece of yarn and lay under your doll, just a little past the arms. Tie a knot. This will make the doll’s waist.
I made this doll to be a girl wearing a dress. So all I did to finish her was trim the bottom yarn to look neater. She’s ready for playing!
Now, what if you want your doll to be a boy? There are just a couple more steps for that! We’ll pick up with the orange yarn doll at the point where we’ve already made his arms and waist.
Divide the bottom yarn into 2 sections.
Using 2 more pieces of yarn, tie around each leg in the same way you did the arms. Trim, and your boy doll is now finished too! 🙂
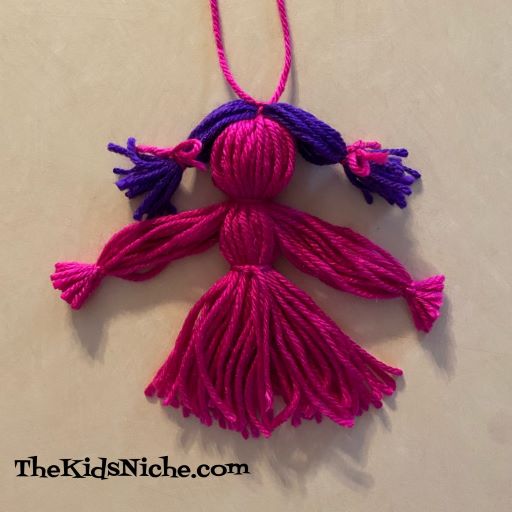
The dolls are ready to be played with now and this is how I remember them. But if you are feeling ambitious, I’ll show you a way to add hair to your doll. Get some more yarn…can be the same color or different. Wrap the yarn around your hand 20 times or so.
Slide it off your hand, keeping the loops together. Cut one end of the loops like we did for the doll.
This time you will lay the hair pieces out flat.
Lay the yarn bundle up at the top of the doll’s head. Using the yarn that is tied to the top of the doll’s head, put one yarn string on top of the bundle and the other yarn string under it. This is so you can tie the hair to the doll.
Tie the knot.
Now you can arrange the hair as you would like. I put it into 2 pony tails and tied each with a piece of yarn tied in a bow.
One more extra detail you can add is to give the dolls some eyes. Simply glue on a pair of wiggly eyes. (I actually prefer the dolls without the eyes, but that’s your choice.)
You can leave the string on the top in case you want to hang the doll up or you can trim it close and get rid of it. I’ve show you one doll done each way.
Yarn dolls are fun and easy to make! I hope you will try a few! 🙂
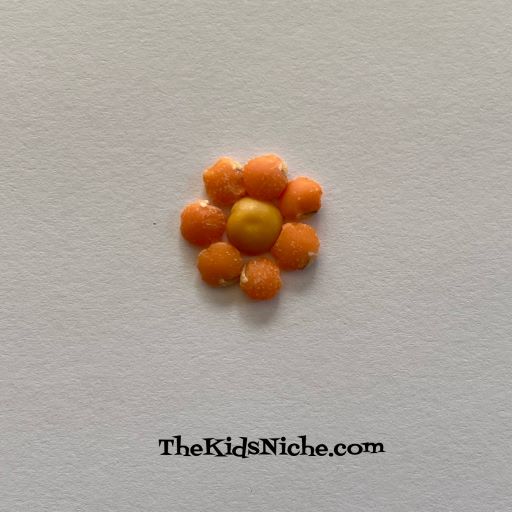
This is a fun and easy activity that your kids may have done in school. We did it way back in the dark ages when I was in school. 😉 All you need is a piece of paper, some dried beans, lentils, seeds, rice, etc and some glue. A pair of tweezers and/or a toothpick might come in handy. I used some leftover lentils and rice mixture I had from making a batch of soup.
I suggest you choose the size of your pieces according to the age of the kids making a picture. For instance, the size I used is easily bumped out of position so you have to be careful and take your time. Larger beans for younger kids might be a good idea.
All you do is arrange the dried items in a pattern to make a picture and glue them in place. It can be a “real” item or just a pattern that the kids enjoy making. Start by pouring out a few of your dried items onto the area where you are working so you can get a hold of the individual pieces.
I decided to make some flowers. Here’s how I arranged the lentils to start a flower.
Then I made 4 flowers, switching the colors of lentils for some of them.
Next I added some stems and a few leaves.
Finally I added some rice at the bottom to be grass.
After everything has been glued down and the glue has had time to dry, you can write some words on your picture if you would like to. These would make adorable gifts for the kids to make and give at Christmas time. Putting it in a frame would make it even nicer. I hope you’ll have fun creating pictures! 🙂
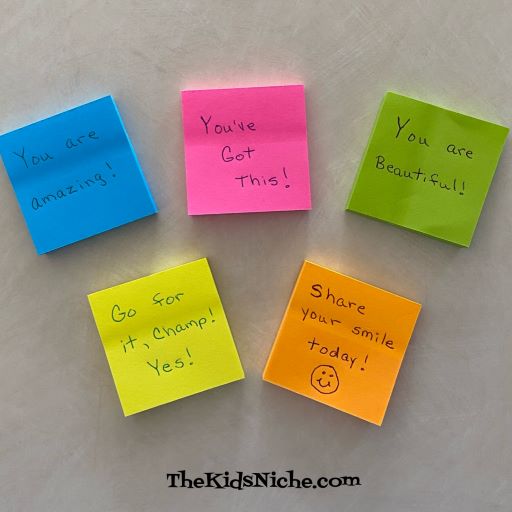
In my last blog post, we were talking about drawing smiley faces on things to spread some smiles and cheer people up. Here’s another little twist to the same idea. We all could use a few more smiles right now, couldn’t we? 🙂 All you need for this fun idea are some sticky notes and pens or just any piece of paper and some tape plus pens or markers.
Use your pens to write short little messages on some pieces of paper. Here are a few suggestions of things you might write, but please come up with your own that fit the person you’re making them for.
After you have written your notes, put them in places where the person you wrote them for will find them. Like….
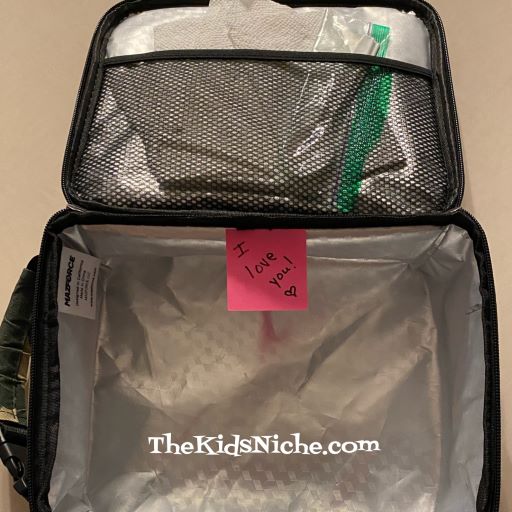
In their lunch box…
On the front of a cabinet door or mirror…
By their alarm clock…
On the coffee maker…this one is hard to read but it says “You are Amazing!”
On the front of their tablet or tucked inside the cover…
In the refrigerator on their favorite drink…
Inside a book they are reading…
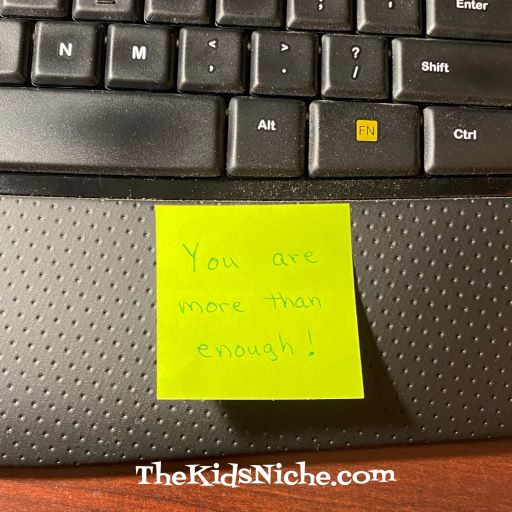
On their keyboard…
On a bottle of water that you put in their lunch bag or back pack…
On their dresser or chest of drawers…
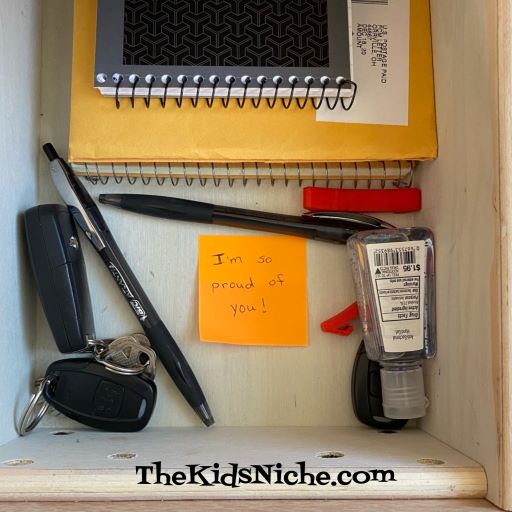
Or even inside a drawer.
You can leave these notes for anyone and everyone! Maybe you can think of places to leave them when you aren’t at home. You could also leave them in places for someone to find them even if you will never know whose day was brightened by finding it. 🙂 Our grandson has left notes for us a couple of times after he has been here. He hides them right before he leaves and we have enjoyed finding them later.
And yes, I’ve saved some of them! 🙂 Every time we see them, it makes us smile and think about him. 🙂
Not only can you make these yourself for your kids, you can also help your kids make some for others. So make some sweet notes today for other people so you can do your part in spreading some smiles and happiness! 🙂 It won’t take long to do and you’ll be glad you did!
Sometimes kids (and grownups) wake up on the “wrong side of the bed”. In other words, they wake up and for one reason or another, they aren’t in a very good mood. And sometimes that bad mood comes later in the day from things that have happened during the day. But sometimes all it takes is a little bit of kindness or a little bit of fun to turn that frown upside down. 🙂 Those little things I like to call smile starters. Maybe its a hug that lasts more than a few seconds. Or maybe its seeing a funny smiley face that was made just for them. Here are a few smile starter ideas for you to try.
Draw a smiley face on an orange. Who can resist that sweet face?
Draw several smiley faces on a bunch of bananas. Maybe they are even looking at each other.
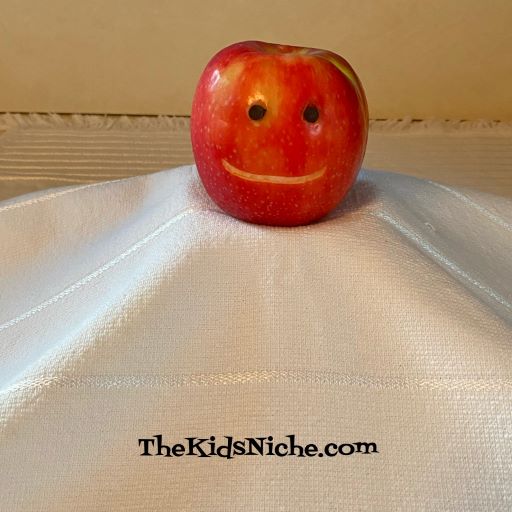
Carve a face into an apple and add a couple of chocolate chips for the eyes.
Use ketchup and mustard to make a funny face on a hamburger.
Draw a smiley face on the top of the lid on a bottle of juice.
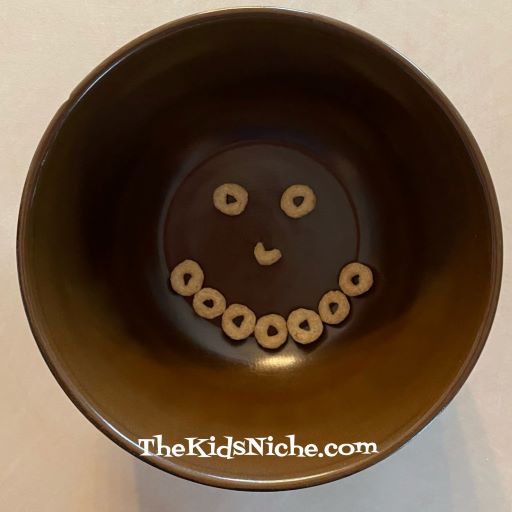
I’m guessing you would get a smile out of someone who looks into their bowl at breakfast time and sees this looking back at them!
None of these things take very long to do, but I’m betting they will work great to get some smiles started at your house! Or sneak one of these into a lunchbox for a fun surprise. I’m sure you will be able to think of other simple things like this that you can do to encourage someone to be happy. After all, smiling is contagious so start passing some around today! 🙂
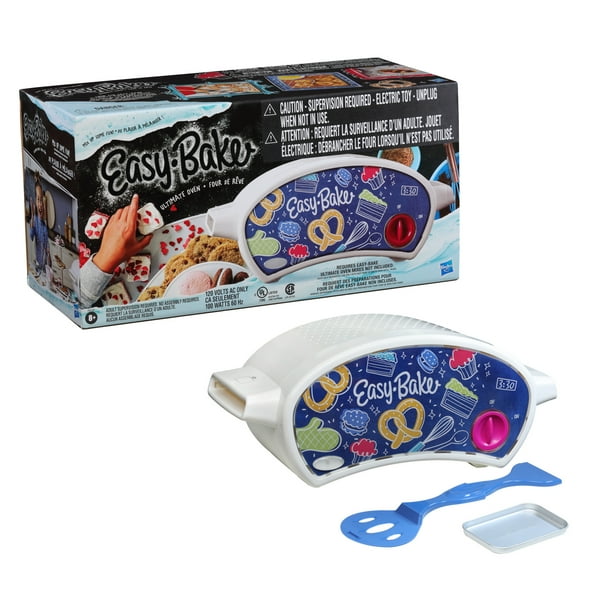
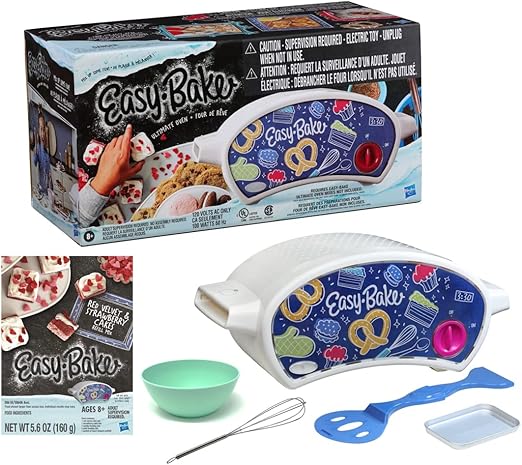
Is there a special young baker you are buying a gift for this Christmas? If you are thinking about buying an Easy Bake Oven, I suggest you shop around and compare prices! While doing some checking of my own today, I discovered that Walmart has the Easy Bake Oven that comes with 1 pan and 1 spatula for $39.97. This set does NOT come with any of the food mixes, but you can buy those separately. (We’ll talk about the mixes in a minute.)
BUT…let’s look at Amazon and their prices! Hang onto your hat! This set comes with the same Easy Bake Oven, 1 pan, 1 spatula plus 1 little whisk, 1 little bowl and 1 cake mix. Their price is $129.96!! I am not kidding you!
Talk about sticker shock! Wow! Walmart has the same cake mix for $7.97 and I’m sure you can find a little whisk and bowl for a couple dollars. MUCH CHEAPER deal! The prices of the Easy Bake Oven mixes also vary by quite a bit so do your comparison shopping on those too! I’m going to do my own research and see if I can make some mixes up from scratch a lot cheaper than buying the ready made ones.
Moral of the story is…don’t assume that Amazon always has the cheapest price on everything! 😉