How to Keep Your Sanity When the Kids Are Home…All. The. Time.

Our world has changed very rapidly over the past few days. Maybe your old routine had the kids at school all day and you at work. Suddenly everyone is at HOME. TOGETHER. 24/7. We are all struggling to adjust to our new way of life for the time being. If you are feeling overwhelmed by suddenly caring for your family every minute of every day, figuring out how to do their school work, keeping them fed healthy meals, stopping them from attempting to murder each other because “he looked at me funny”, keeping all bodies dressed in clean clothes and trying to do your own work too… are you ready to scream and your quarantine just started?! I hereby give you permission to just STOP…take a DEEP breath…let it out slowly…take another deep breath…let it out slowly…and now I’m telling you, YOU’VE GOT THIS!

You do, you really do!! I want to offer just a couple of tips for you. #1.) Give yourselves time to adjust to a new routine. Hey, even give yourself time to FIND that new routine! You’ll get there! Making a list of things that need to happen each day or once a week or whenever will help you to make a schedule up so you can see where you are and what needs done each day.

#2.) Don’t expect perfection from your kids…or from yourself. Kids are gonna be kids and they are likely going to moan and groan about having to do school work at home. Isn’t home just for playing and hanging out? Nope, sorry, kiddo! Just stand firm and don’t take no for an answer. You ARE the parent. 😉 You’ve got this!

#3.) Don’t beat yourself up over what didn’t get done today. Did you have peanut butter sandwiches for lunch again? That’s ok! Did the kids (and you) spend the entire day in their (your) pajamas? That’s ok! You can just declare that today is a “stay-in-your-jammies-all-day” day!

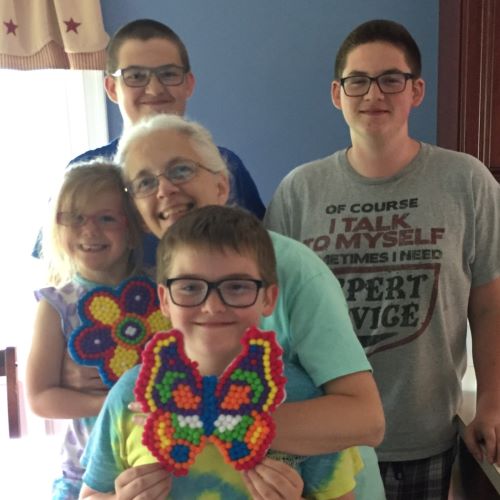
And you can even add on “messy-hair-don’t-care” day to that. As you can see, we have had some of those days here! Lol

#4.) I hope you will turn to this blog for ideas and suggestions of things to do with your kids. There are lots of ideas on here already and I plan to keep posting new ones. We’ll get through this by supporting each other. This can turn out to be a special time of being together as a family if we all are willing to put forth a little effort and step out of our comfort zones.

#5.) It’s ok for kids to get bored sometimes! They really won’t die of boredom, no whatever what they tell you. 😉 There are books and games and crafts and electronics and I could go on and on. When all else fails, suggest a nap. I’m betting they will find something to do quite quickly! Or suggest they clean their room!

So the point of this post is just to encourage you that in spite of the overwhelming way things feel right now, you can do this…just take it one step at a time! I’ll leave you with this for today…

Hugs to everyone! Thanks for visiting! You’ve Got This!!

Happy St. Patrick’s Day!

Still need something fun to do for St. Patrick’s Day? Here’s a super quick idea that can still bring plenty of smiles! You’ll need some green paper and a “prize” for each child that will be participating in this game. Start by drawing some shamrocks or clover shapes onto the green paper. I happen to have a cookie cutter shaped like a four-leaf clover so I placed it on the green paper and traced around it with a pencil. You will need as many shamrocks as there are children.

Cut out each shamrock.

Write a message on each shamrock. I wrote “It’s Your Lucky Day!”

Make sure you have 1 shamrock for each child. I made 4 for this example.

Turn the shamrocks over and write a number on the back of each one, starting at 1 and going up.

Make the same number of little squares of paper and number them with the same numbers so that there is a square with the matching number that is on each shamrock. Get your “prizes” together and tape 1 numbered square to each prize. A prize can be a small toy, a new book, some candy or a special cup of snacks, just for a few suggestions. Have your prizes in a place where they can’t be seen by the children. Hide the shamrocks but leave a tiny bit of green visible. Gather the kids in the same place and turn them loose to hunt for the shamrocks. If you like, you can make up a story about a mischievous leprechaun that visited your house and left behind shamrocks for them to find. The kids must search for the shamrocks in order to find the treasure from the end of the rainbow that the leprechaun brought them. Or make up a story of your own. 🙂 When all the shamrocks have been found, the kids should bring them to you and you can give them the prize that has the number taped to it that matches the shamrock they found.

This should be a fun little treasure hunt for kids of all ages. 🙂 Have fun and Happy St. Patrick’s Day!

Learning In Quarantine

With lots of kids out of school now due to the Covid-19 “social distancing” and quarantines, moms and dads are looking for educational things their kids can do at home. Cool websites with educational themes seem to be popping up all around. I will try to share the ones I come across in order to help keep our kids’ minds sharp on their extended Spring breaks and provide some fun while we’re all staying home.

The Cincinnati Zoo and Botanical Garden has a very interesting Facebook page you’ll want to check out. They have started sharing a Facebook Live video called Home Safari each day at 3:00pm EDT. Monday’s video was about a hippo named Fiona.

There is also a fun quiz you can do and you’ll find the answers in the hippo video. Completing the quiz gets you entered into a drawing to win 4 tickets for a visit to the Cincinnati Zoo after they reopen. Each day they will highlight a different animal that calls the Cincinnati Zoo home. Here is a link to their Facebook page. https://www.facebook.com/pg/cincinnatizoo/posts/?ref=page_internal

Another really fun looking website that will keep the kids entertained and all their brain cells working is the Scholastic Learn at Home site. https://classroommagazines.scholastic.com/support/learnathome.html

Here’s the little blurb you’ll see on their website:

“Even when schools are closed, you can keep the learning going with these special cross-curricular journeys. Every day includes four separate learning experiences, each built around a thrilling, meaningful story or video. Kids can do them on their own, with their families, or with their teachers. Just find your grade level and let the learning begin!

-The Editors of Scholastic Classroom Magazines.

To begin, choose a grade level. Then you’ll find books to read right on the website, videos to watch and activities to do. There are currently 5 days worth of things to do, but they will be adding more until there are 20 in total. Looks like a lot of fun!

Enjoy these fun websites! I’ll pass more onto you as I find them! Stay in, enjoy being each other and wash your hands!! LOL 😉

Craft Stick Fun Project #6

Here are a few hints about what project we will be making today – it’s green, has 4 legs and lots of sharp teeth! Can you guess what it is? An alligator!! Whoa! Alligators are scary, aren’t they? Well, the REAL ones are, but this alligator is cute and fun to make! Take a look at him…

He’s pretty cool, isn’t he? Let’s get started making him! 🙂 You will need 1 flat wide craft stick, 2 green pipe cleaners, 2 wiggly eyes, a small piece of white paper and markers or paint. First you need to color/paint the craft stick green. I used a green marker for mine as it dries much faster than paint.

Take 1 green pipe cleaner and cut it in half. Use each piece to make the alligator’s legs by wrapping it around the stick and bending the ends a little to look like his feet.

Here’s another view…

Take the second green pipe cleaner and wrap it around the stick between the 2 sets of legs. Slide the legs in to meet the wrapped pipe cleaner so the alligator’s “tummy” is covered by the pipe cleaner.

Glue 2 wiggly eyes on. I placed mine close to his front legs so that he has a long nose. I made them a little crooked just to make him look funny. 😉 Draw 2 half circles on for his nose holes.

Next add some “V” shapes to his tail area.

All he needs now is some sharp, pointy teeth! Lay a craft stick on the edge of the white piece of paper and draw some jagged teeth around it.

Cut the teeth out with your scissors and glue them to the underside of your alligator.

And there you have it! All done and ready for some play time adventures!

Great job! Are you going to name your alligator? I’m thinking that Fitzgerald is a good name for my alligator. 🙂 Thanks for stopping by!

Craft Stick Fun Project #5

Today let’s look at making Ssssssnakes with craft sticks! 🙂 This is a really quick project and good for kids that are old enough to color. Glue 2 wiggly eyes onto the end of a craft stick.

Grab your colored pens or markers and decorate your snake however you like. I went with polka dots!

Cut a curvy tongue out of red construction paper or red felt.

Glue to the bottom of your snake on the end by the eyes leaving most of the tongue hanging out past the stick.

Aaaand your first snake is done! I couldn’t resist making a second one! 🙂

This is a quick and easy project for even young children. These don’t have to look like real snakes as you can see mine don’t! Lol It’s a nice time to practice the letter “S” since “snake” begins with “S” and snakes make a hissing sound…ssssssss! 😉 I’d love to see your snakes if you make some! Thanks for stopping by!

Craft Stick Fun Project #4

Here we go again with another great craft stick project! Today we’re making a puzzle! To get started, line up several craft sticks flat on a table. I used another stick to make sure my 5 sticks were lined up well.

Place 2 pieces of masking tape or painters tape across the sticks to hold them together. These are just used temporarily while we are making the puzzle.

Flip the craft sticks over and draw/color a picture on them. I suggest that some of your pictures are on more than one stick so there will be things to match up again when making the puzzle.

Once your picture is complete, remove the tape from the back. Move the sticks around so they are out of order.

Let your kids put the puzzle back together.

Ta dah! Kids will have fun drawing and coloring a picture on the sticks themselves or you can make the puzzle for them. Another idea for making a puzzle with craft sticks is to write the letters of your child’s name on sticks…one letter on each stick…and then let them put the sticks in the right order to spell their name. Great practice for learning how to spell their name!

If your child is just beginning to learn their name, you can add some other little drawings on the sticks that they can use to help match the sticks in the right order and complete the puzzle. In the same way I added the circle, square, triangle and star in my example.

One more puzzle idea that is a little bit harder to craft but just as much fun for your littles to put together, is to use a small picture (I used one from a magazine), cut it in strips and glue it to the sticks. Older kids could enjoy making puzzles this way. Here are the steps I used…find a picture that is just a little bit shorter and the same width as the number of sticks you are using.

I decided to use the same sticks that I used for the name puzzle only using the back sides of the sticks. You can fit 2 puzzles on 1 set of sticks this way. 🙂 Place your picture upside down and lay the coordinating stick on top, then trace with a pencil down the side of the stick.

Make sure to lay the sticks in the right order so that the puzzle on the other side will still fit together. Cut the strip off the picture and glue it to the back side of the first stick.

Lay the next stick in line onto the picture, trace down the side as you did with the first stick, cut the paper strip off and glue it to the back of the second stick.

Continue in the same manner with the rest of the sticks in your puzzle until each stick has a piece of the picture glued to it.

Great job! Now mix up the sticks and let the kids have a go at putting the puzzle together!

I hope you found these ideas interesting and that you and your favorite kids have fun making puzzles together! 🙂 Thanks for stopping by! Tune in tomorrow for some more craft stick fun! 🙂

Craft Stick Fun Project #3

Sorry I missed a couple days this week – things got kinda crazy here as they likely have for all of you! Let’s move on to our next craft stick project! Today we’ll be adding names to sticks in two different ways. 🙂 The first way is using glittery sticker letters.

This is pretty self-explanatory, I guess. Just peel and stick the letter stickers onto the craft sticks to form a name.

You can make one for everyone in the family or make some for your friends. 🙂

The second way to make name sticks is using the little plastic beads with letters on them.

This is a good project to help kids learn or reinforce knowing their letters by letting them sort the beads out and find the letters for their name. If they need a little help, try printing their name on a piece of paper so they have something to help them know which letters they are looking for.

You can arrange the letters straight up and down, turn them a little bit to make them a little more fun or even put them on the stick sideways.

The pack of letters I bought also had a few red hearts and they added a happy little extra to the sticks.

You can use the sticks for marking each person’s place at the table. Or make a snack in little paper cups and add the stick to each one. Hide the cups for the kids to find and they will know which one is theirs by looking at the stick. Its good practice being able to recognize their name! The sticks can also go in the child’s room or hang on their door by adding a piece of string. I’m sure the kids will have fun coming up with other ways to use them! Have fun! Thanks for visiting! 🙂

Craft Stick Fun Project #2

Here’s our second craft stick project for this week! This one uses wiggly eyes and some markers or colored pens with the craft sticks.

For this project we are making some funny people. Glue 2 eyes on one end of the stick and use your markers or pens to draw on faces and however much more of a person you would like to include. Here is Ben…

And next we have Mary…

It’s also fun to just draw eyes on your person. This is Lou…

And finally Betsy.

And now we have enough to have a puppet show! A simple but fun craft! 🙂

Craft Stick Fun Project #1

Hello and Happy Monday! This week I want to focus on some craft projects using the wide flat craft sticks…the ones that look like short tongue depressors. 😉 Ever have the Dr. hold your tongue down with a stick so he/she can look at your throat? Yea, some sticks like that, but used in a much nicer way! I think we are all longing for Spring, so today we’re going to do a project using some cute little flower stickers with the sticks. I found the craft sticks and the flower stickers at Walmart.

These flower stickers have several flower shapes and a couple of leaf shapes and come with the adhesive on the back. All you have to do is peel and stick them where you want them. These are cute flower shapes and glittery too!

Some of the larger flower stickers have the center hole punched so that you can remove it if you want to.

If you don’t like seeing the wooden stick through the hole, just grab a yellow marker and color a circle on the stick.

Place the flower sticker on top of the yellow circle and presto! Your flower now has a yellow center like some real flowers do.

I did the same thing with a little differently shaped purple flower and used a different leaf.

How about putting 3 small flowers together on a stick?

For this stick, I used one of the bigger flowers that has the center punched, but I left the center in place…and added a smaller flower too.

If you save the center circle pieces from several flowers, you can even decorate the sticks with them. Plus a few leaves used in a different manner.

Let your children have free rein with the sticks and stickers and see what neat ideas they come up with themselves. You can give them a small cup or vase to display their Spring flowers in. Or you can add a name to their flower stick and use them to mark their place at the table or as a bookmark or tuck them into a special snack cup…the ideas are endless and I’m betting your kids will think of their own ideas of how to use them. 🙂

Most of all, have FUN! Hopefully this project can help us all hang on until the real Spring flowers arrive! Be sure to check back later this week for more craft stick ideas! Thanks for visiting!

M&M Messages

Have you seen the new M&M Messages? They are packs of M&M’s that have cute sayings on the outside of the bag. I saw them for the first time this week and some of them are rather funny. 🙂 They would be a fun way to give someone a little treat along with a “hug”. Here’s two that I saw…

“I’d follow you anywhere in a non-creepy way.”
“I just want to apologize for whatever I do in the future.”

There are a lot more sayings to choose from. Like…

1.) “Have a great day pretending to work.”

2.) “I wish I had more friends like me.”

3.) “Friends don’t let friends eat chocolate alone.”

4.) “Emotional support candy.”

5.) “Congrats on that thing that you did.”

6.) “Miss your face.”

You can check them out and even buy some at https://www.mms.com/shop/mms-messages

Have fun! I’ll see you on Monday with some new ideas for kids playing with craft sticks! Enjoy your weekend! 🙂