Thankful Thursday

What is it about things that are gooey or slimy or feel like cold eyeballs that make kids like it?! (Some of it gives me goosebumps…which, of course, makes it all the more appealing to my grand kids!) Take water beads, for example. They start out as these tiny little balls about the size of a pin head. BUT add them to water and wait an hour or two…or 24…and they grow! They grow bigger and bigger the longer you let them sit in water…up to the 24 hours or so says the package. If you take them out of the water, they will get smaller but you can simply add more water to have them swell up again.
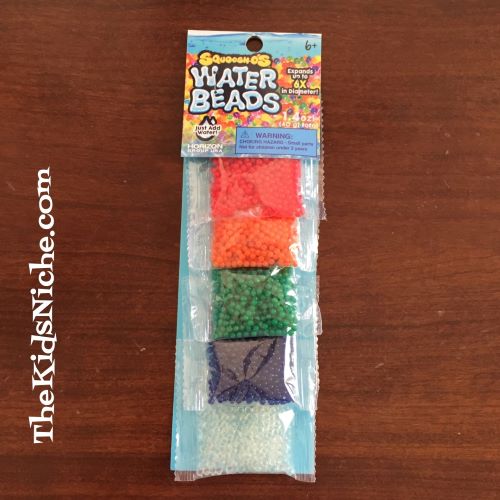
We “grew” some a while back when the grand boys were spending some time with us. I have to say it was pretty cool how those tiny little innocent balls got bigger and bigger.
But what our grandson seemed to think was even cooler was playing with them. Like immersing his hands all the way into the bowl full of them. I was obligated to “feel them, Grandma!”, but I didn’t leave my hands in there any longer than was absolutely necessary. According to Pinterest, there are all kinds of activities you can do with the beads. Like have the child sort them into other small containers by color. Or push some golf tees into Styrofoam and let them balance the balls on the top of the tees. Some people have frozen them for another version of sensory play, but it sounds like that should be the last activity you do with that batch because they don’t survive the freezing and thawing too well. But hey, they are inexpensive fun and just a teaspoon of them goes a long way!
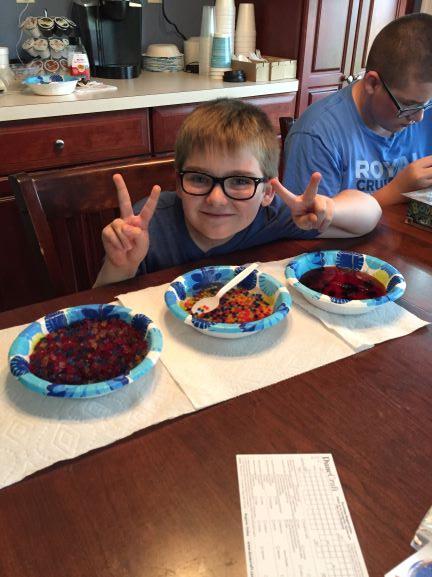
Also on our day of ooey, gooey fun we had a batch of “things” that kinda looked like cubes after they sat in water and swelled up. Or sorta like someone had chopped Jello into very small pieces. They were equally as “cool” as the water beads, according to my little scientist.

But the crowning glory of our fun was the slime. The package made 3 different colors.

Notice the ornery grin on his face that says, “So, is this grossing you out, Grandma?” Not only was it fun to make the slime, but then he enjoyed mixing some of the colors together.

Yep, that smile says it all! So fun and so slimy! While I can’t say I really understand the attraction, my little buddy enjoyed himself. Oh, the things we grandmas do for our kiddos! 😉
I found a cool new toy yesterday at Walmart. 🙂 It’s called the Magic Snake Twisty Puzzle Toy and it cost right around $5.00. I’m thinking that this could be fun even for the older kids…like this Grandma! 😉

This is what the back of the package looks like:

The pieces are all connected but you can twist them around to make different shapes. It was in the shape of a diamond when I took it out of the package. (And I fear it won’t be back in the diamond shape until a grand kid comes and figures out how to get it to do that again!)

I spent a little time trying to figure it out. I managed to make it all into one straight line. (I was quite proud of myself!)
Next, I figured out how to make it into a square. (Really amazing, don’t ya think? Yes, I took a picture of each thing I made that looked like something that really exists. I need documentation just in case I can’t do it again!)

And then there is my greatest feat to date – ta dah! Can you tell what it’s supposed to be?
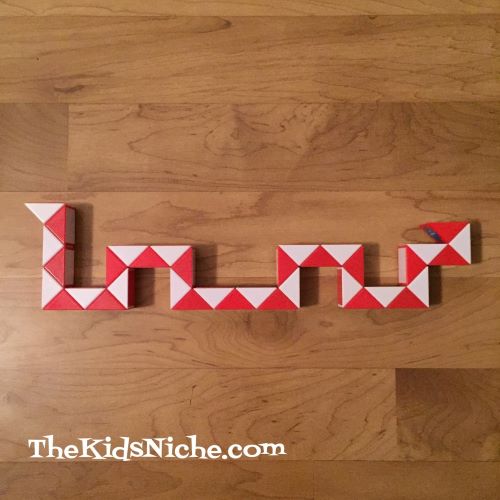
(Yes, it’s a snake! Very fitting since it’s called a Magic Snake!) There weren’t any real instructions with it but there were a few pictures of ideas of things you can make with it.

So I am really liking the looks of those…especially the giraffe! But I might need some grand kids to come show me how to do that! Any volunteers?? 🙂
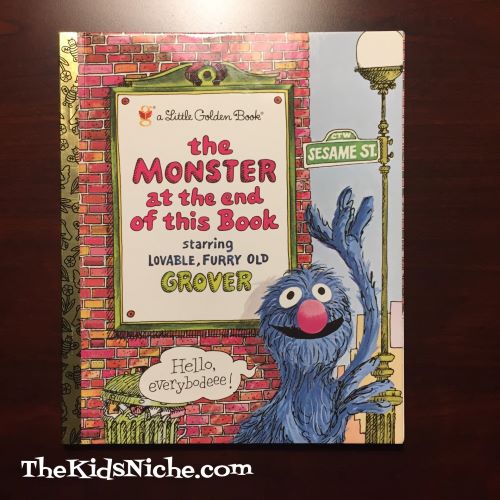
Hope you had a great weekend! Today I’m sharing one of my favorite books with you. It’s a Little Golden Book and it’s Titled The Monster at the end of this Book…written by Jon Stone and illustrated by Michael Smollin. Lovable, furry old Grover from Sesame Street is the main character and he is as adorable as always.
The story begins with Grover realizing that the title of the book involves a MONSTER being at the end of the book and he thinks that sounds rather scary!
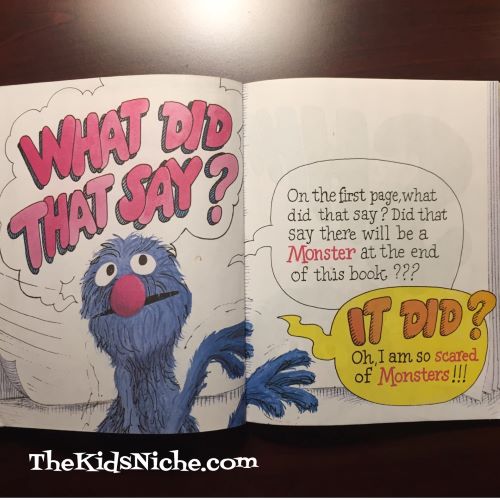
In fact, he thinks it sounds so scary that we really shouldn’t read any farther!
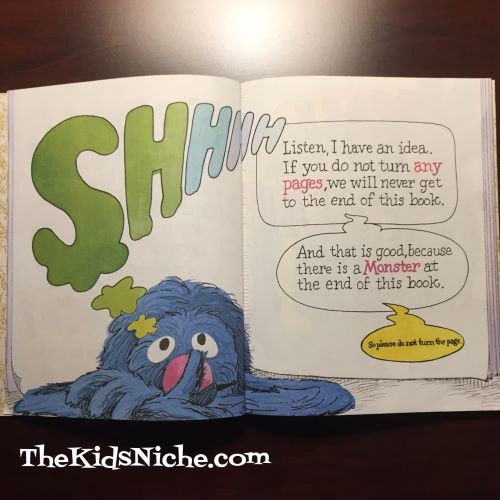
He implores sweetly “So please do not turn the page.” Of course, most kids are not going to go for that idea…you sat down to read this book, right?! Forward ho!
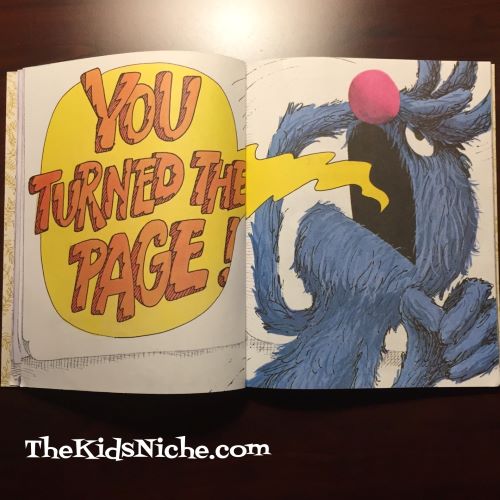
Much to Grover’s dismay, you DO turn the page. Grover tries several other interesting ways to stop us from reaching the end of the book. Things that might involve ropes, nails and cement…and even some begging. He eggs the kids on by suggesting they won’t be able to turn the page which, of course, makes them want to show that they certainly can! It has a cute, funny ending even if it is a bit embarrassing for Grover. 😉 Its been kid-approved in our house by our kids and grand kids and I think you and your kids will give it a thumbs up too!
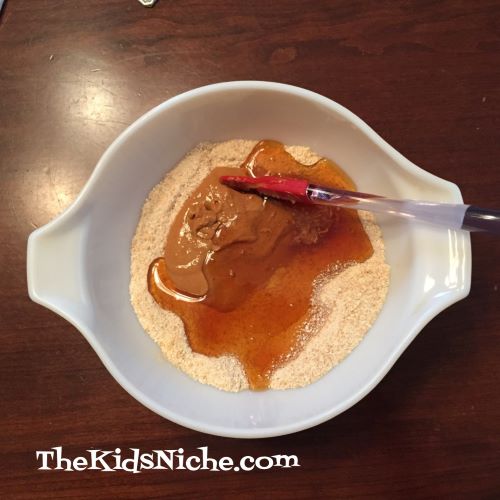
I meant to get this post up yesterday, but I got busy and ran out of time…or maybe I ran out of energy first. (Huh? Sleeping? Me? No, I’m looking at my iPad…or maybe just resting my eyes…a…bit…zzz) Anyway, here’s a fun little no bake recipe to make Peanut Butter Honey Balls. They are kind of a cross between a cookie and a piece of chewy fudge. I made some for my hubby for Valentine’s Day yesterday. You only need 4 ingredients plus something to roll them in for decoration or added taste, if you like, but they can be eaten “plain”. Here’s what you need:

1 Cup nonfat dry milk, 1/2 Cup peanut butter, 1/2 Cup honey and 1/2 Cup graham cracker crumbs. Mix all these ingredients together in a bowl until well blended.


Shape into 1 inch balls. I laid mine on a piece of wax paper.

Roll in desired coating or leave plain. For coatings, I used miniature dark chocolate chips, miniature milk chocolate chips, powdered sugar and colored sprinkles.
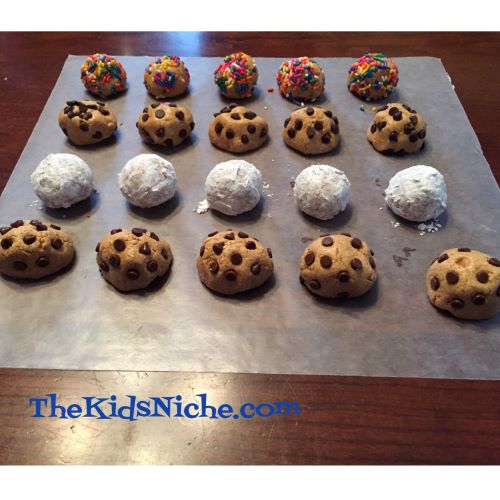
Chill them in the refrigerator if they need to firm up a bit. I prefer to eat them at room temperature but that’s your choice. Makes about 24 balls.

One note: If you use natural or organic peanut butter, I suggest cutting back a little on the dry ingredients. Mine came out a little dry and it was a little bit challenging to get the pieces of the coatings to stick. Have fun and Happy Friday to you! 🙂
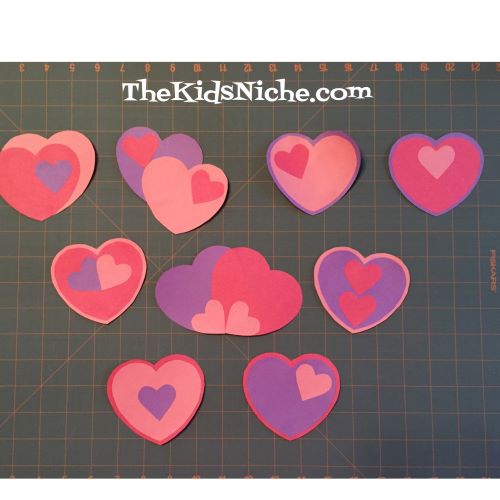
Tomorrow is the day of love and hearts, candy and flowers – Valentine’s Day! Are you looking for some inexpensive fun for the kids? Today I’m sharing one simple way to make some homemade Valentines. I used 3 colors of construction paper (red, pink & purple), 2 different sized cookie cutters, a pencil, scissors, glue and a marker. First I traced around the larger heart shaped cookie cutter 3 times on each piece of paper using a pencil. Then I discovered if I turned my cookie cutter over, I could trace around that side and get a slightly smaller heart shape. I filled up the space that was left on each color of paper by tracing around a much smaller heart shaped cookie cutter.
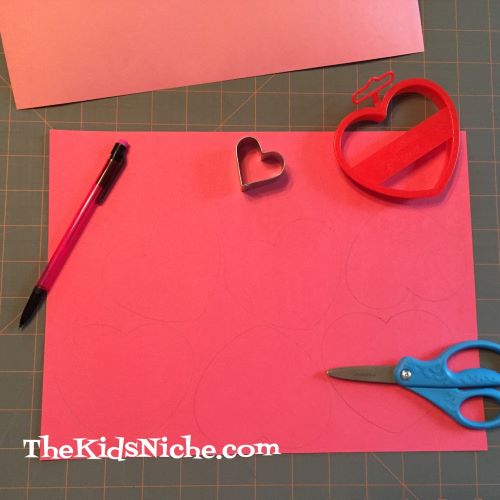
If the kids are big enough to help cut out the hearts, I suggest cutting them apart first to make them easier to handle. More than one child can be cutting at the same time that way too.
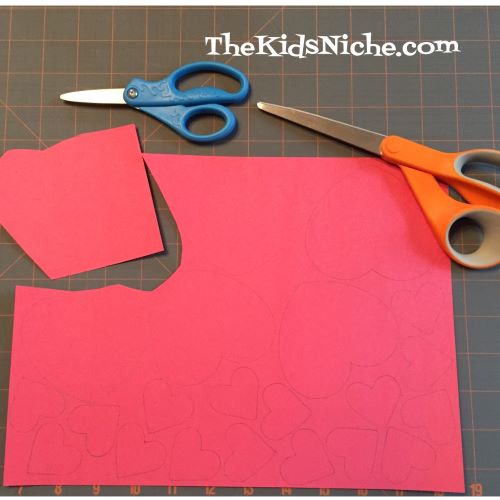
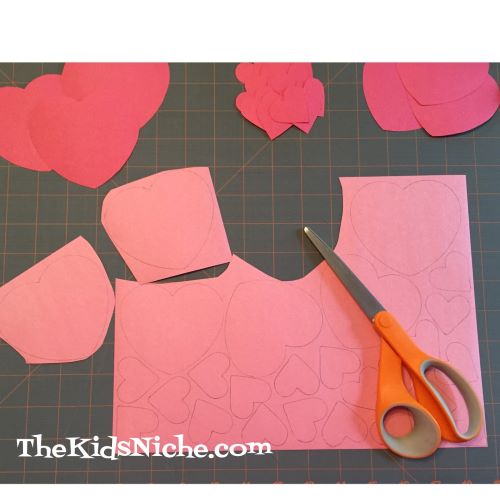
Put the hearts into the same size and color groups for ease in putting your Valentines together.
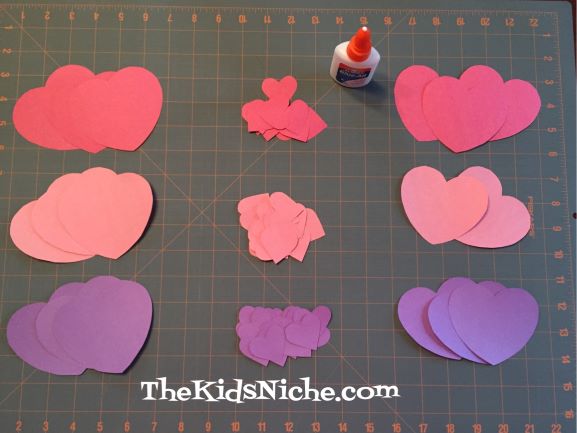
Glue the hearts together in any design you like. Here are some ways that I chose…just to get your creative juices flowing. 😉
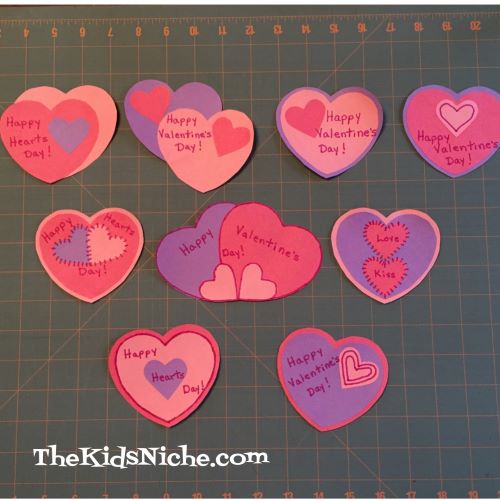
Add your own little message or “Happy Valentine’s Day!” to the front of each Valentine. Sign your name on the back and give them to your favorite Valentine. 🙂
Happy Valentine’s Day! 🙂 May your day be filled with sweet surprises and lots of hugs and kisses! And chocolate…LOTS of chocolate! 🙂
Sometimes its all about how you present something to a child. For instance, you could set this before them for breakfast and say, “Eat your breakfast now.”
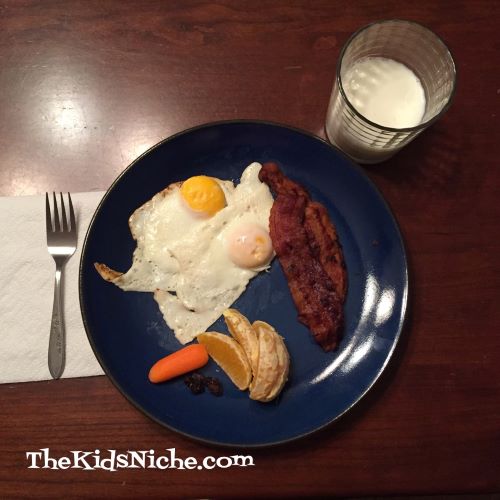
Booooorrrring, right?! Or what if you simply arrange things a little differently on the plate and say, “Mr. Sunshine came for breakfast this morning!”, while you place this in front of them:

It’s a bit different, isn’t it? 🙂 A face on your plate, with a red kid’s sized cup and a frog on your fork – who wouldn’t pick this set up over the first one? (My husband even had to chuckle when I presented it to him this morning. LOL) You can apply this idea to every area of your life or day. Is nap time horrible? Instead of “It’s time for your nap. Go lay down.”, try something like “I know you don’t really like to nap, so today you can take your favorite book to bed with you and after you read it, you need to close your eyes and just rest them for a while.” 😉 Yep, 9 times out of 10, they will fall asleep.
Is cleaning up their toys a struggle? How about giving this a shot: “Let’s sing a song while you pick up your toys. If you can get them all put away before the song ends, we’ll have a snack.” (Or go to the park or do a craft or whatever fun thing comes next.) Pick a song with lots of verses in case you need them! Haha! “The Wheels on the Bus” would be a great one and you can even make up some new verses! 😉

Quite a few kids don’t like vegetables…broccoli, for example. Ranch dressing (or another favorite flavor) can work magic. And by describing the broccoli in a different way. For example, “Let’s try some Ranch dressing for dipping your baby trees in.” Eating a baby tree is way cooler than eating broccoli. There was a time when our grandson was served broccoli salad and he looked at it in disgust, asking “What is that?” Quick thinking Uncle Matt replied, “That’s Green Dessert! It’s really good!” The broccoli salad disappeared and our grandson even asked for more! 😉
Hopefully these ideas will spark a few of your own ideas for ways to present things in a little different light that will make things go more smoothly for you and your littles. 🙂
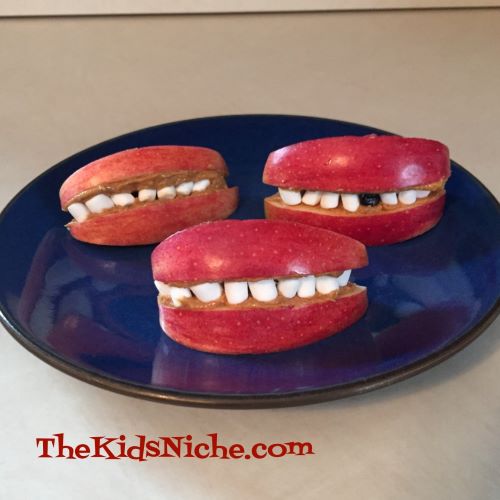
Let’s start your weekend off with a quirky snack for the kids! Apple mouths are sure to make them smile!
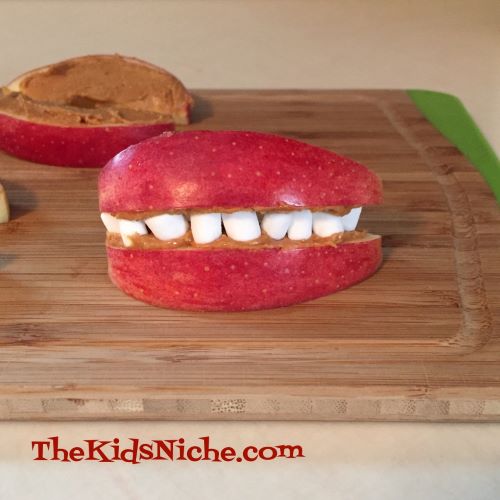
All you need to get started is an apple, some peanut butter and some miniature marshmallows. I used the teeny tiny marshmallows, like the kind that go in hot chocolate.
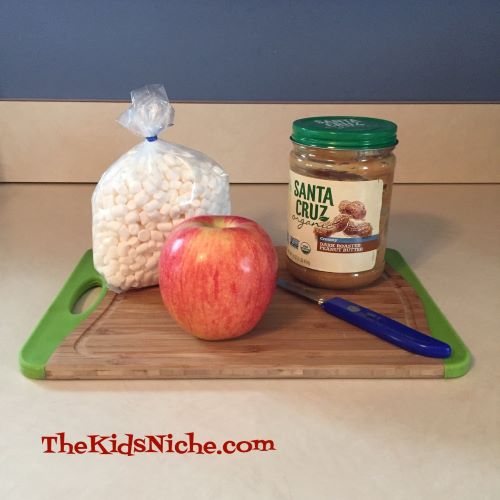
Remove the core and cut the apple into medium sized slices, leaving the peel on.
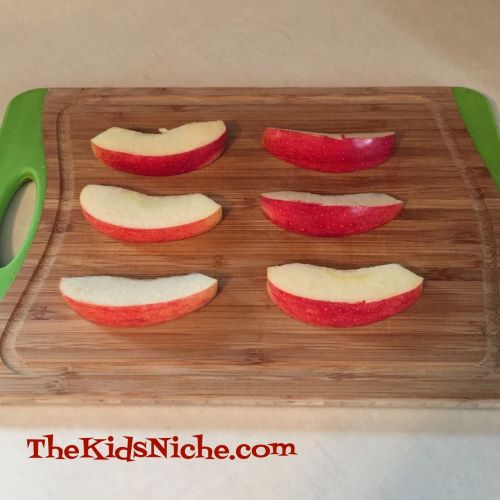
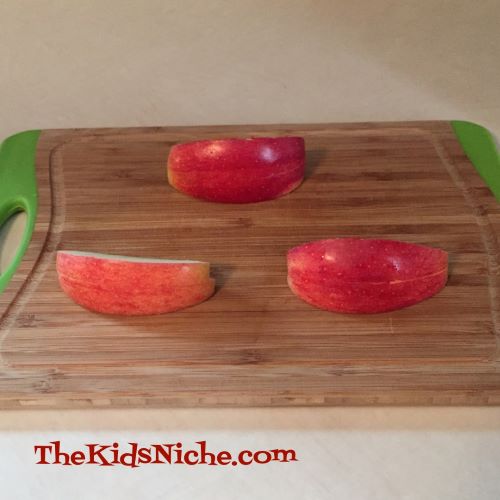
Then pair up the slices so the pieces are close to the same size. Those that were originally side by side will work the best.
Spread a thin layer of peanut butter on the two sides of the apple slices that were touching.
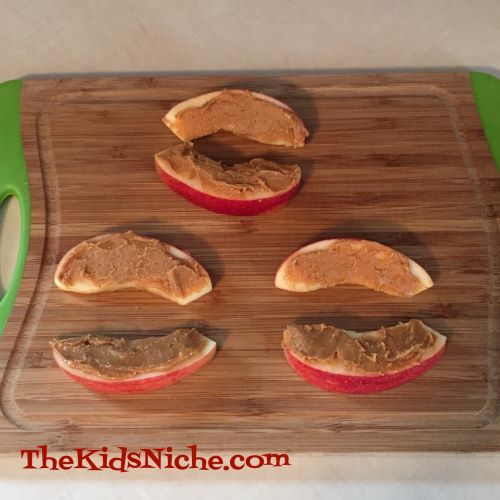
Line up some marshmallows on the bottom apple slice.
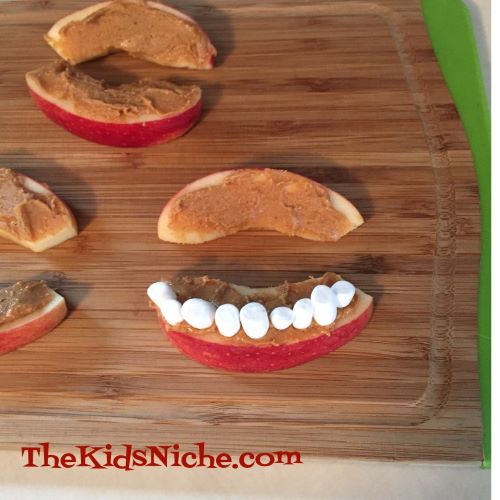
Lay the second apple slice on top of the marshmallows and…ta dah! You have an apple mouth! 🙂

Ooops! It looks like someone didn’t brush their teeth like they should have and they got a cavity! (A raisin…or a chocolate chip…lol)

Makes for a yummy, healthy snack for both little people and their bigger caregivers. Our dog even thought the apple and peanut butter part was quite tasty!