Let’s Make a Christmas Tree With Buttons!

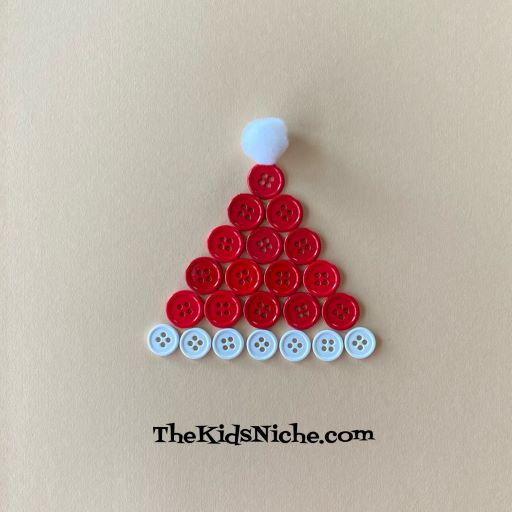
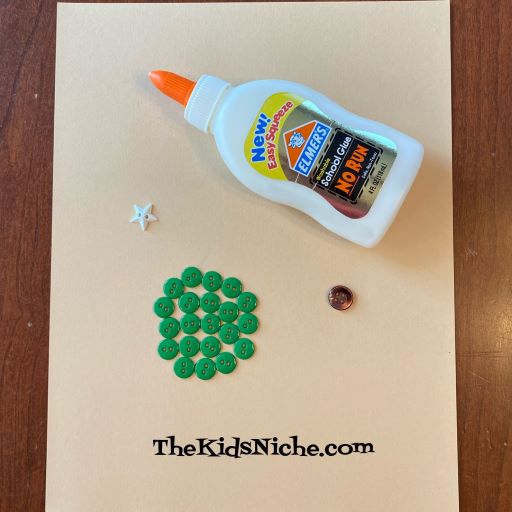
Hi there! Today we’re making another Christmas craft using buttons. Yep, it will be a Christmas tree! What’s nice about this project is that there is an easy version for younger kids, but also a more challenging version for older kids or even adults. 🙂 You will need some green buttons, 1 brown button, 1 star button (or sticker or cutout), a piece of cardstock and glue.

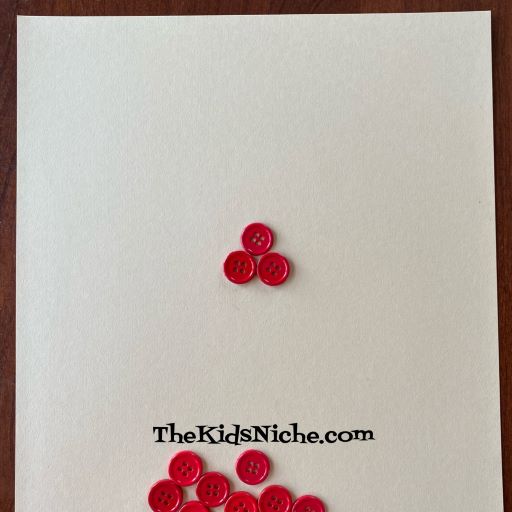
Start making your Christmas tree by laying 1 green button in the first row, then 2 green buttons in the second row, and 3 green buttons in the third row. Look at the following picture to see how to place the buttons. You can glue the buttons down as you go or get them all in place and then go back and glue them.

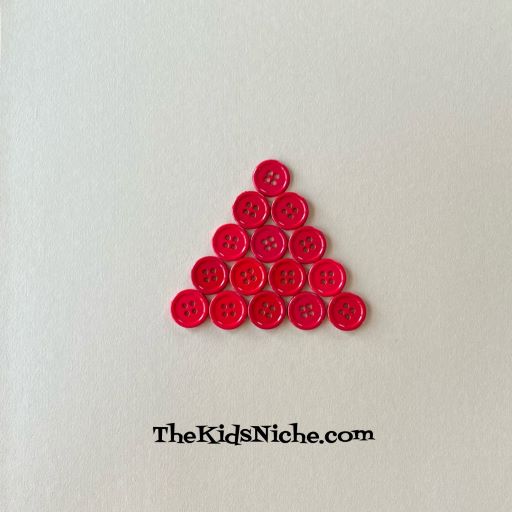
Continue in this manner, adding 1 more green button for each new row until you have laid out 6 rows of buttons.

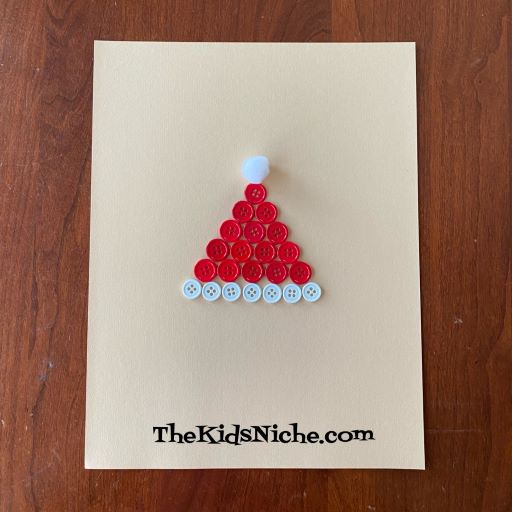
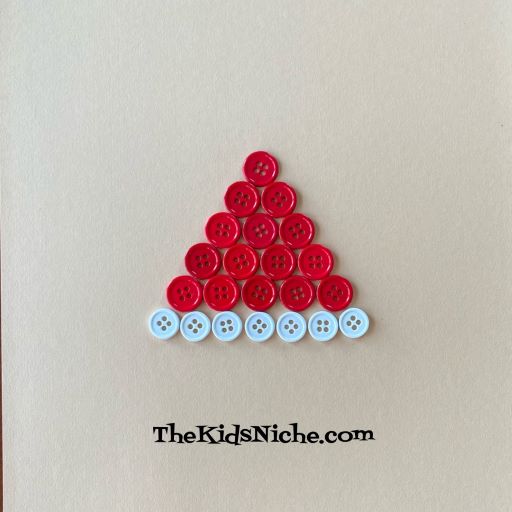
Add the brown button at the bottom in the center for the trunk of the tree. And put the star above the top button.

And there is your Christmas tree! 🙂 How cute is that?!

Next, I’ll show you version #2, which is still a simple version, but uses different colors and only 5 rows of buttons. This time you’ll need 6 red buttons, 9 green buttons, 1 brown button and 1 star.

Row #1 is 1 green button. Row #2 is 2 red buttons. Row #3 is 3 green buttons. Row #4 is 4 red buttons. And finally row #5 is 5 green buttons. Add the star to the top and the brown button for the trunk at the bottom. And this tree is done! 🙂

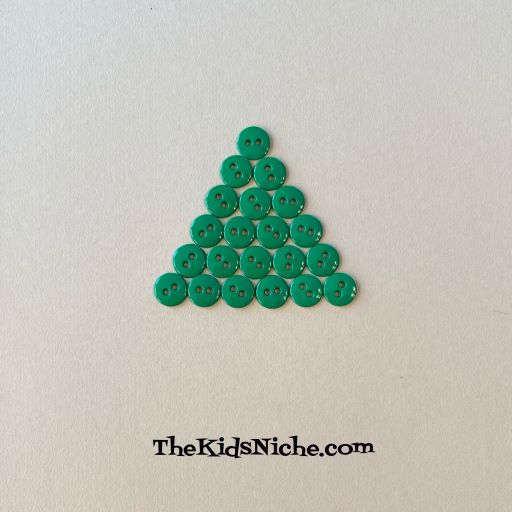
For the last (harder) version for today, make the tree part with all green buttons and add in as many rows as you’d like to make the tree larger. The tree shown here has 9 rows of green buttons. I used slightly different shades of green for my Christmas tree. I used 2 brown buttons for the trunk of this larger tree.

If you would like to decorate your tree, make sure all the tree buttons are glued in place and have had a chance to dry before continuing. I had some tiny heart shaped buttons that I used to make it look like 2 strings of lights on my tree.

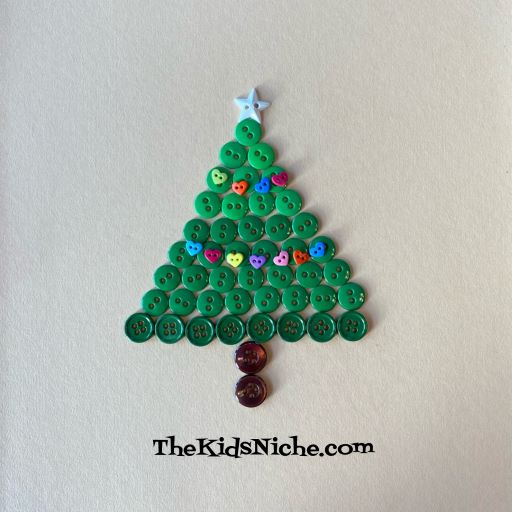
Or you can place your decorations randomly around the tree for this effect.

You could also use bits of pretty yarn or thin ribbon to decorate your tree. So whatever skill level your kids are at, I hope they can have fun making their own Christmas tree! 🙂

I’m back! Let’s Make Santa’s Hat!

I hope you all had an amazing Thanksgiving holiday and weekend! I’m sorry I didn’t get to post last week but things were pretty crazy here! I’m here now and I have an adorable craft for you today. I’ll show you how to make Santa’s hat using buttons and a pom pom. 🙂

You’ll need an off white or darker colored piece of cardstock, approximately 15 red buttons and 7 white buttons and 1 white pom pom. And glue to hold it all in place. The number of buttons will vary according to the size of buttons you use and how large you want to make your Santa’s hat.

Start by placing 1 red button toward the top of your piece of paper. In the second row, place 2 red buttons. You can glue the buttons down as you go or go back and glue them down after you have them all in place.

Row 3 will have 3 red buttons, row 4 will have 4 red buttons and row 5 will have 5 red buttons. Your Santa’s hat should look like this so far.

Now it’s time for the white buttons. They will go in row 6 along the bottom to be the white edging on Santa’s hat.

Add your white pom pom to the top and you’ve finished making your Santa’s hat! Great job!

I wanted to use the darker brown craft paper for my background, but I didn’t have any on hand. I would suggest using a darker color of cardstock than I did for mine because the white of the hat will show up better. Here it is on green:

And one more time using a blue background.

Which way is your favorite? I think I like the blue background best. 🙂 You can make Santa’s hat as a decoration to hang up or make it on the front of a card for a special Christmas card. Whatever you decide to do, I hope you will have fun making a Santa’s hat from buttons! 🙂

Craft Stick Snowflakes

Are you looking for something to occupy the kids while they are off school for Christmas break? Here’s a super easy but fun way to make some great snowflakes. Our grandkids made these and shared these pictures with us. 🙂 (Thanks, Megan!)

They used colored craft sticks, glue, glitter glue and curling ribbon. If you only have the plain craft sticks you could add an extra step and paint them first. If you don’t have glitter glue, regular craft glue and glitter will work too.

Glue the colored or painted craft sticks together into a snowflake pattern. As you can see from the pictures, there are several ways you can glue them together.

After the glue has dried a little, use the glitter glue to decorate your snowflake. Or if you are using glue and glitter, put drops or lines of glue on the craft sticks and then sprinkle glitter over it. Gently shake the snowflake to let the extra glitter fall off.

Tie a piece of curling ribbon onto the snowflake and hang your snowflakes up for everyone to enjoy.

If you open a pair of scissors and pull the ribbon across the blade part of the scissors, the curling ribbon will curl up and look pretty. You can do this to some extra pieces of curling ribbon to add a little more pizazz to your snowflakes. Hope you enjoy making craft stick snowflakes!! 🙂

Christmas Bells Project for Kids

Long ago when I was little, we did a Christmas craft that was my favorite Christmas decoration to make…Christmas bells! I was always so proud of the bells I made and my mom would let me hang them around our house. Its another quick and easy craft, so let’s gather up the few supplies we need and get started! Grab some foil, some disposable cups and some ribbon. When I was a child, we made these using the 5 oz. Dixie paper cups but since I didn’t have that size on hand, I used the 9 oz. plastic cups.

Tear off a piece of foil a little bit bigger than your cup.

Starting at one end, wrap the foil around the cup. I started at one end and rolled the cup slowly while forming the foil to the cup.

Next press the foil flat up against the bottom of the cup and also tuck it down inside the cup.

An adult should do the next step…cut a slit in the bottom of the cup for the ribbon to go through.

Cut about a 12 inch piece of ribbon. Thread one end in through the slit.

Pull the piece of ribbon on the inside until you can reach it enough to tie a knot in the end. This will keep the ribbon from pulling out the top of the bell.

I made 2 bells and then tied them together at the top end of the two ribbons.

You can hang them as they are or make a bow to add on where the two ribbons are tied together.

You’re done! Now find a great place to hang your Christmas bells. They look great hanging on your front door.

Or maybe you’ll find a nice place for them on your fireplace mantel.

Wherever you choose to hang them, I hope they make your house look merry and bright! 🙂

Christmas Riddles

Let’s have a little fun today with some wacky Christmas riddles!

1.) What do elves learn in school? Answer: The elf-abet!

2.) Who brings presents to baby sharks? Answer: Santa-Jaws!

3.) What do snowmen eat for breakfast? Answer: Frosted Flakes!

4.) Where does Santa put his suit after Christmas? Answer: In the CLAUS-et!

5.) What kind of bug dislikes Christmas? Answer: A HUM-BUG!

Weren’t those fun? Hope they tickled your funny bone! Now go try them on your friends and family! 🙂

Cookie Cutter Decorations

Happy December! It’s already feeling like winter and Christmas is coming fast! Let’s make some quick and easy decorations to spruce up your house for the holidays! Grab your favorite winter time/Christmas cookie cutters and some construction paper, a pencil and a pair of scissors and let’s get started! Here are the cookie cutters I found that we have on hand at our house.

Get a sheet of paper, any color you like or just plain white, and a cookie cutter and a pencil. Place the cookie cutter on the piece of paper and trace around the outside edge with your pencil. Try to hold the cookie cutter very still so your lines meet up just right.

Lift the cookie cutter off the paper and make sure you have a complete shape drawn on your paper.

You can color the shape right on the paper and maybe add a few more shapes to fill in the space. Or you can use a pair of scissors to cut out the shape. I cut out 3 different size star shapes on 3 different colors of paper.

You can use the shapes separately or you could do something like I did and glue them together to make one colorful star.

Paper shapes can be left just the way they are or you can color them with crayons or markers for some extra color and designs. Here are a few I did to give you some ideas to get you started. A gingerbread man made on white paper and colored with crayons…

A green Christmas tree shape using markers to color in decorations…

And a pair of blue mittens colored with markers.

You can leave your decorations just one thickness of paper, or you can put two matching pieces together by gluing the back sides together. I added a piece of thread before taping the pieces together so I have a loop to hang my mitten. (I used double-sided tape instead of glue.)

And there we have our first batch of decorations! 🙂

Here are a few suggestions for more ways to decorate your shapes: you can use Elmer’s Glitter Glue which is colored glue with the glitter already mixed in it.

Another idea is to use regular white glue (that dries clear) and some crayon shavings. Start by spreading glue over your shape in the place you want to put the first color…

Then sprinkle tiny crayon shavings over the glue and lightly press in place.

It’s ok if you sprinkle on a little more than you need because you can gently pick up your shape and let the excess fall off onto a piece of paper. Then you can save those bits for another shape.

If you would like to use a second color, put more glue on your shape in that spot. I added glue in lines to make the mitten look like it has stripes.

Sprinkle your second color on the glue. I added yellow crayon shavings and again, very gently pressed them in place.

Now gently lift your shape and let the excess fall back onto a sheet of paper so you can save it for later.

What I like to use even better than crayon shavings is glitter! I used some holographic blue glitter and it was sooo pretty! Make your design on your shape with regular white glue like we did with the last shape.

Sprinkle on the glitter…

And gently lift your shape and let the extra glitter fall off onto a piece of paper like before. Isn’t that so pretty?!

After you make your decorations, have an adult help you hang them up for everyone to enjoy! Add a string to use for hanging or maybe just a piece of tape or double sided sticky tape. You could also use your shapes to make a card to mail to a friend or relative to wish them a Merry Christmas! I hope you have fun making your house beautiful! 🙂