Making Super Simple Flowers

Yesterday it was raining and storming and so gloomy and today it’s cold and snowing! I think we all need something to cheer us up, so let’s make some flowers!

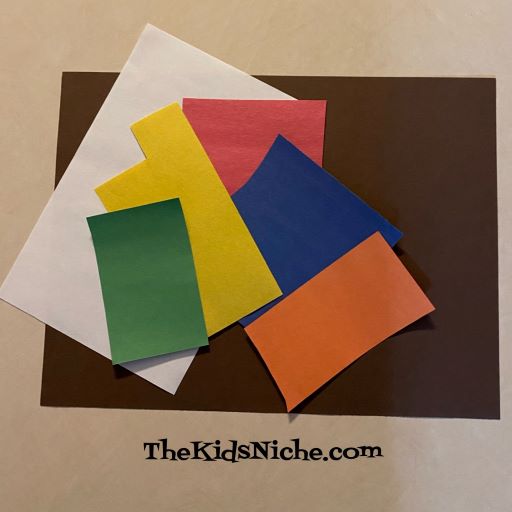
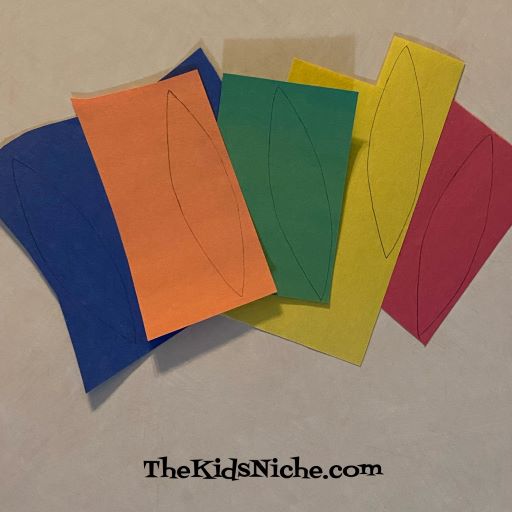
This project calls for some cardstock or regular paper, some sticker note flags, a large button for each flower and some glue.

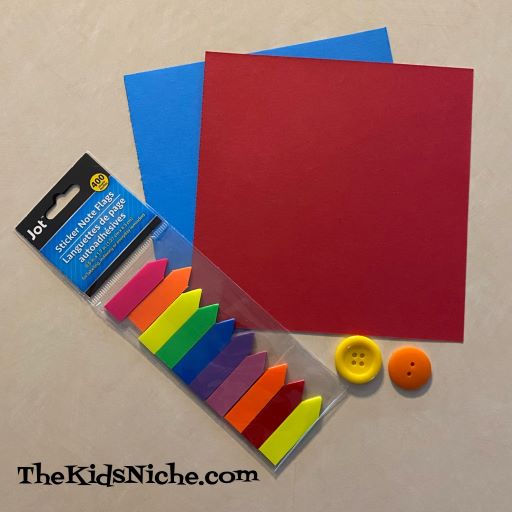
The sticker note flags that I’m using I found at a Dollar Tree store, but you can likely find some in the stationery section of any big box store or an office supply store.

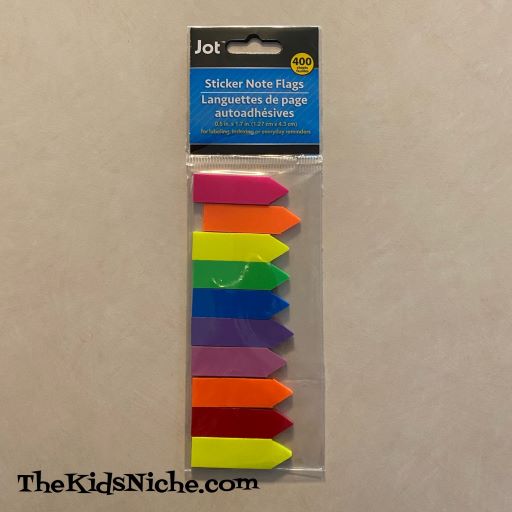
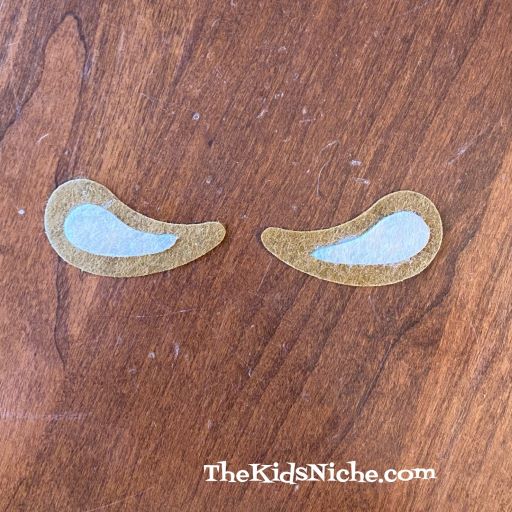
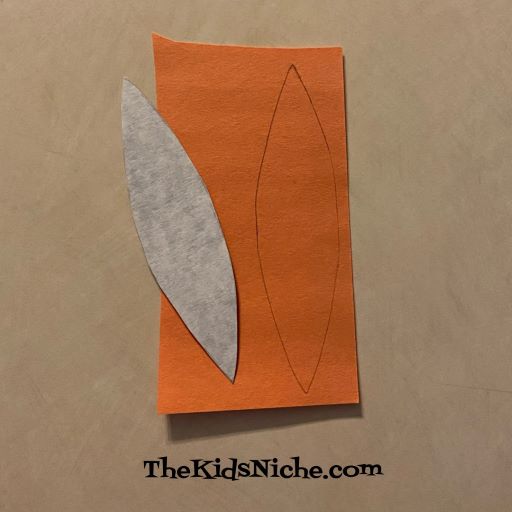
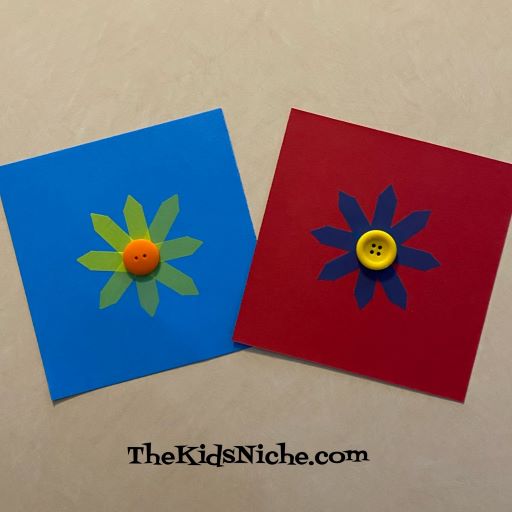
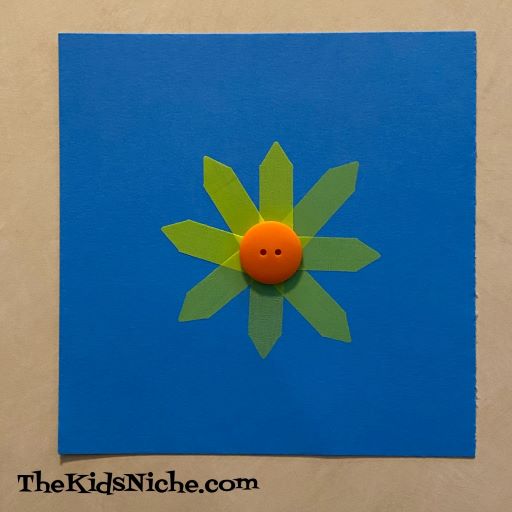
Only the pointed tip of these flags is sticky, but it’s not necessary to glue down the rest of the flag because they will be glued in place later all at one time. Pick the color of flags that you would like your flower to be. I went with yellow for my first flower. (Note: While I used colored paper, the flowers will show up brighter on white paper.)

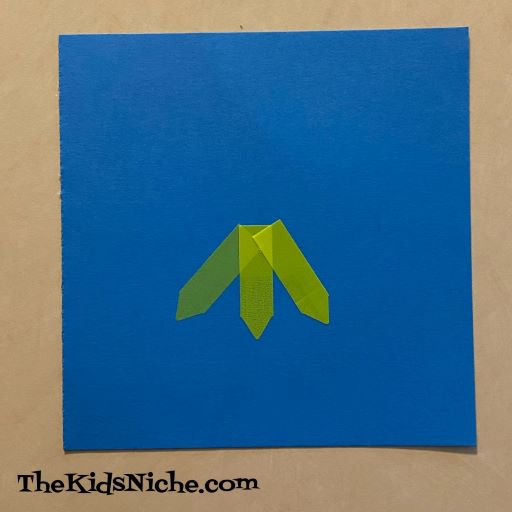
Begin by placing the flags in a circle with the points facing out. These will be the petals of the flower. Overlap the square ends of the flags in the center.

Keep placing the flags until you’ve made a complete circle. It doesn’t matter that the center looks a bit messy because it will be covered up.

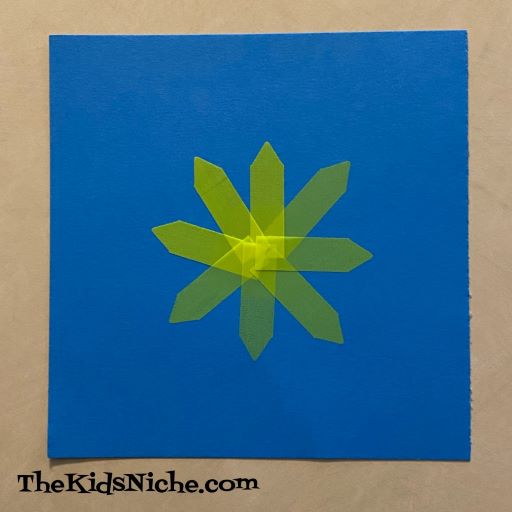
Glue a large button in the center and your first flower is complete! Feel free to decorate the rest of the paper as you like.

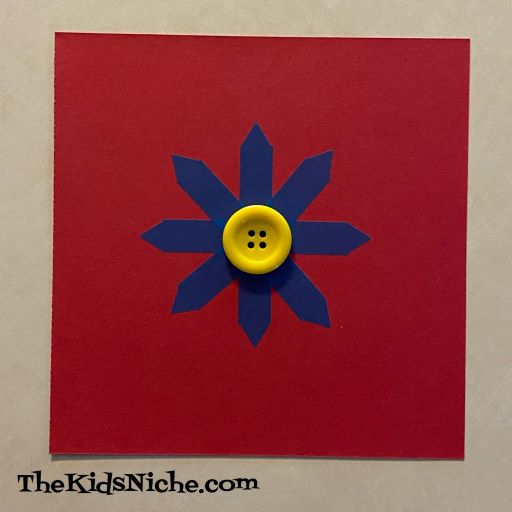
My second flower was made using blue flags on red paper. This time I laid the flags out opposite each other and they look lined up a little better on this flower.

I glued a yellow button in the center of this flower.

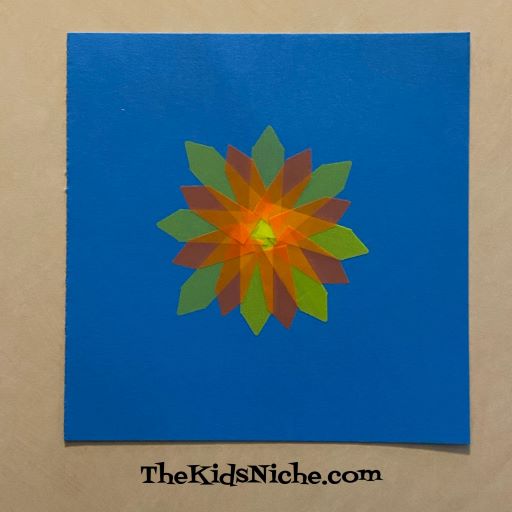
One more little trick you might want to try is to add another layer of flower petals before gluing on the button. I like using a different color of flags and trimming a little bit off the square end to make them fit on the flower.

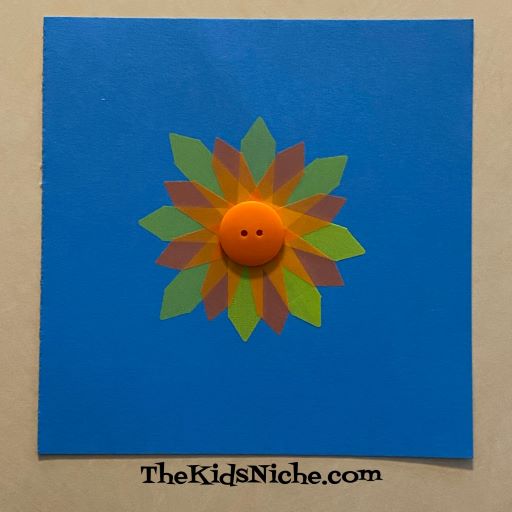
And then add the button. 🙂

Your flowers could be hung up and enjoyed by the whole family or you could turn them into a card to share with someone special. I hope you’ll have fun making some colorful flowers and brightening your part of the world. 🙂

Fun Finger Puppets From Dollar Tree

I made a stop at a Dollar Tree store a couple days ago and I found some cute finger puppet craft kits. The store I was in had 3 different sets.

Monsters…

Medieval…

And animals.

I bought the animal one and thought I would share it with you today. 🙂

This is what you will find inside the package:

The 3 colored squares of felt actually have shapes cut into them that you will need to punch out. Have a pair of scissors handy for any pieces that might need a little help getting free.

You are now ready to start making your puppets! You will need your own glue. I suggest you lay all the pieces together for each puppet before you start gluing the pieces on. These little guys are pretty cute!

Mouse

Dog. The picture on the package shows curling the dogs ears down in front but I didn’t actually glue these puppets together because I wanted to pass this set on to some kids. So my dog’s ears are straight up. 🙂

Bee. This one is so cute!

Tiger

And last, but not least, an adorable owl!

Each kit costs $1.25 (plus tax) and makes 5 puppets. Not bad, eh?

I found these in the Valentine’s Day section of the store. I hope you can find some near you! The kids will be putting on a puppet show before you know it! 🙂

Hairy Fun With Paper Rolls

Have you been saving up those paper towel and toilet paper rolls and wondering what crafts your kids can use them for? Here’s a fun one that girls will like maybe more than boys, but boys can have fun with it too. Let’s make some funny heads with hair you can fix into different hairstyles. 🙂 You will need a toilet paper roll, a single hole punch, yarn, some markers and a pair of scissors.

Start off using the hole punch to make holes all around one end of the paper tube.

Leave a little space from the end of the tube. If you get the holes too close to the end, the holes will tear out easily. (I found out the hard way.)

Cut 1 piece of yarn at least 12″ long for each hole. I had 17 holes on my tube. You can do just 1 piece of yarn per hole, which is how I started out, but I went back and put 2 pieces of yarn in each hole and I like it better with 2.

Take a piece of yarn and fold it in half.

Slide the loop through 1 hole. It doesn’t matter if you start on the inside or the outside of the tube. It will work fine either way.

Pull the loop partway through the hole and then push the ends of the piece of yarn through the loop.

Pull on the ends until the loop part touches back to the paper tube. Pull it gently snug but not hard enough that the paper rips.

Continue adding 1 or 2 pieces of yarn in the same manner to each hole.

It will look something like this when you have put yarn in each hole.

Draw a face on the side of the paper roll.

Now you are ready to start styling your character’s hair! Like tying another piece of yarn around the hair to make a ponytail.

Or a side ponytail…

Or maybe try a braid.

In the next 3 pictures, the character has 2 pieces of yarn per hole. I like it because there is more hair to work with.

Swept to one side…

For this last picture, I twisted the hair together and stuffed some of it down inside the paper tube. 🙂

I’m sure your little hairdressers will come up with ideas of their own. 😉 Some barrettes or clips would add to the fun. I hope this will bring some fun to your day!

Dollar Tree Reindeer Craft Kit

I found this cute Reindeer craft kit at a Dollar Tree store close to us. While I have to admit that this wasn’t one of my favorite crafts that I’ve gotten there, by using lots of glue and not being a perfectionist, it will turn out pretty cute. 😉

Here’s a look at what’s inside the kit:

I started by spreading glue all over the paper plate. Use plenty of glue. (The plate didn’t want to lay flat so if you’d rather make your own circle out of paper, that would work great.)

Stick the brown pom poms all over the plate. I felt like there weren’t quite enough pom poms to cover the entire plate, but in the end it still looks good. I suggest leaving the empty space at the top where it will be covered up by the antlers and hat.

Glue the pieces together to make the face, mouth and nose.

Glue this piece…using plenty of glue…on top of the pom poms. Glue on the 2 eyes. I suggest putting the eyes right on top of a pom pom instead of in the gap between pom poms. That way the eyes will stick on better.

Each ear has 2 pieces, so glue them together next.

I glued the antlers on next…using lots of glue, but only on the bottom part of the antlers. The top part of the antlers won’t be touching anything.

The Santa hat is 3 pieces that you can glue together next.

Now it’s time to glue on the hat and the ears.

Yep, your reindeer will be cute! But I would let it sit for a while to completely dry before moving it around much or trying to hang it up. After my kit was completely dry, it stayed together fine, but it tended to fall apart while the glue was still wet.

I guess this must be Rudolph since he has a red nose! 😉

50% off POP! Craft Kits at Joanns!

Are you looking for some fun crafts for the kids to do for Christmas time? Joann Fabric stores have a bunch of great looking kits the kids are sure to have a blast with. AND they are 50% off right now!

I took some pictures so you can see just some of the kits that are available. Check your local store or online to see if they carry the ones you’d like to get.

That’s only a few of the kits they have! As they say, hurry in for best selection! 😉

Turkey Headbands

Yep, you read that right…turkey headbands! It seems like a lot of folks have gone from celebrating Halloween straight to Christmas preparations, but I think we should enjoy Thanksgiving first! So here’s a Thanksgiving craft to do with the kiddos that will also make for a cute photo op on Thanksgiving Day. 😉

You will need a piece of brown or black construction paper, some scraps of different colored construction paper, a small piece of cardboard or cardstock, scissors, a black marker or crayon and glue or double sided tape.

Cut 2 strips about 1 1/2″ wide the length of the brown construction paper. Make sure that 2 pieces put together will fit around the head of the child making this. You can cut more strips if needed.

Tape or glue 2 narrow ends together to make a longer strip for the headband.

Wrap the strips around your child’s head so the headband is snug enough to stay in place. Tape or glue the other 2 ends together too. Your headband will now look like a circle.

Now let’s make the turkey parts! Using the piece of cardboard or cardstock, make a pattern in the shape of a narrow leaf or feather.

Use the pattern to trace around the feather on each scrap piece of colored construction paper.

Cut out each feather.

You know the red thing that hangs down by the turkey’s beak? It’s called a snood. You can draw one on a piece of red construction paper. Don’t worry about being exact here. Just draw something similar to this:

Cut it out using your scissors. Next, draw 2 fairly big circles on white paper for the turkey’s eyes. You might have a tiny glass you can use to trace around to make your circles.

Using a black marker or crayon, color 1 dot on each white circle for the eye pupil.

Cut a nice sized triangle out of orange paper for the turkey’s beak.

Ok, we have all the pieces ready so let’s put the turkey headband together! You can use glue or double sided tape. I went with the tape. First glue/tape the orange triangle on for the beak.

Put the snood on next, right at the corner of the beak.

It’s time to add the eyes! You can put them on in any direction you like. I put the black dots close together, but you can experiment with the eyes to see how you want your turkey to look.

Apply the feathers to the inside of the back of the headband. You can put on as many feathers as you like.

Once the feathers are attached, your turkey headband is ready to wear! (Unless the glue needs to dry first.)

If you have more than one child making a turkey headband, you can customize them so each child’s look a bit different from the others. I tried to get Rusty (our dog) and my husband to model my headband for you, but both said they would rather not. 😉 Have fun and don’t forget to take some pictures!

Super Easy and Fast Jack O’Lanterns

Hope you all had a good weekend! We’re back with a super fun and super easy way to make a Jack O’Lantern! (And cheap!) All you need is an orange balloon and a black permanent marker.

Step #1.) Blow up the balloon and tie it off.

Step #2.) Draw a Jack O’Lantern face on the balloon.

And you’re done! 🙂 You can tie a string to your Jack O’Lantern and hang it in a door way. Or find some place silly to put him. Like in your mom’s Autumn decorations… 😉

This is such a fast way to make Jack O’Lanterns that you can make a whole bunch of them! You can make a happy face or a scary one or a mean looking one. It’s a fun craft for a Halloween party too! 🙂

Making Yarn Pumpkins For Fall

Do you enjoy decorating your home for Fall or Halloween? Both are appropriate for orange pumpkins, so today let’s look at how to make some easy ones! 🙂 This is a great craft project for the kids too.

You will need some orange yarn, a piece of a green pipe cleaner and scissors.

Begin your pumpkin by wrapping the yarn around your hand. Depending on the size of your hand and the size of pumpkin you want to make, how many times you will need to wrap the yarn around your hand or fingers. You can also use a piece of cardboard instead of your hand. Hands or fingers are just…well, handy! 😉

For an adult size hand using all 4 fingers, you will want to wrap the yarn around at least 100-120 times.

Carefully slide the yarn off your hand but keep all the pieces held close together. Cut a piece of yarn from the yarn ball approximately 5-6 inches long.

Lay the extra piece of cut yarn on the table and lay the wrapped yarn on top of it, keeping the cut piece in the center of the wrapped ball.

Tie a tight knot with the cut piece of yarn in the center of the wrapped yarn. Tie it 2 or 3 times so it won’t come undone. And make sure to keep the knot tight while tying it the second time. It’s easy for it to slip looser and then you will lose the shape of your pumpkin.

Now take the small piece of green pipe cleaner and tie another knot around the middle of it on top of the first knot.

You can also just slip the pipe cleaner under the first knot you tied, but be careful as it can snag the yarn.

Twist the 2 ends of the pipe cleaner together and shape it like the pumpkin’s stem. Trim the extra length of yarn from tying the knots.

That’s all there is to it! 🙂 You can fluff your pumpkin with your fingers to make it look just right to you. Make as many pumpkins as you like and use them to decorate your house for the season.

I hope you will enjoy making yarn pumpkins! 🙂

Cheap Halloween Craft From Walmart

Hello, again and Happy Monday! Today I want to share an inexpensive Halloween craft with you that I found at Walmart. (I know, it’s still September, but the stores are FULL of Halloween stuff!) This package comes with 6 sets of a foam craft for only $1.98! When 6 kids can do a craft for $2, I think that’s a bargain!

Here’s what comes inside the package…

And these are the 6 Halloween characters you can make.

I made the Jack O’Lantern. The foam pieces are partially cut and they have adhesive on the back of them. I found it a bit difficult to punch the pieces completely out because the paper backing isn’t cut through all the way. But never fear! There is a simple way around that problem!

Use a piece of paper for the kids to stick the pieces on and just pull the foam pieces off the backing like you would do with a regular sticker. Don’t worry about punching each piece out because it isn’t necessary.

Use a different color of paper than the color the largest part of the character is so it will show up nicely.

Continue applying the stickers to make your character. The wiggly eyes do not have the adhesive backing so you will need some glue to apply those.

And the Jack O’Lantern is complete! 🙂 The tiny holes on the word “Boo” were a little tricky to get the extra pieces punched out, but using a toothpick helped.

You could use the picture as it is or turn it into a Halloween card. Have fun creating your 6 Halloween characters! 🙂

Crayola Confetti Crayons

Have you tried the Crayola Confetti Crayons yet? They really are quite fun! I found them at a Walmart store. I would say they are an inexpensive box of fun!

As you can see from the writing on the box, there are 24 crayons included. The box also says “Bursting bits of color! Each Crayola Confetti Crayon has specks of color inside for surprising streaks and a party in every crayon!”

The crayons have some pretty awesome names too! Like party fish…

Or meteor shower or new year’s eve or rain drops… It’s fun just reading the name on each crayon!

Take a look at all the crayons that look mostly white.

Buuuut….surprise!! Look what it looks like when you start coloring with them!

Pretty cool, right?! Coloring is so much fun because you don’t know when a streak will show up or what color the streak might be! 🙂 Can you see the colorful streaks in this picture?

Let’s look a little closer…look at the colors in this bird.

You can see the streaks in the girl’s skate and in the green bush and the colorful flowers.

The colors look much better in person, of course! 😉 Crayola Confetti Crayons are a lot of fun in one small box! 🙂