Simple Winter Wreath

Are you ready to put away your Christmas wreath but feel like its too soon for spring decor? Here’s a fun and quick little project for a winter wreath. We can still have snow where we live for a couple of months yet, so making a wreath with snowmen and snowflakes seems totally appropriate. You can use whatever theme you’d like – even a spring theme, if you are so inclined. This project is probably geared more for older kids or for younger kids with lots of help from an adult.

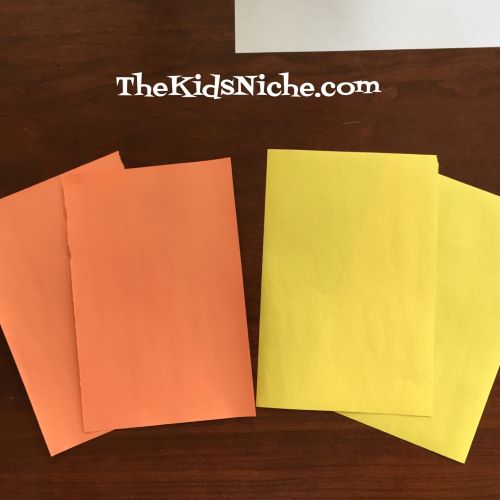
Here’s what you need to get started: a wreath form, (I used a 14″ one), some fabric printed with your theme, a glue gun, and some little items you might like to use to decorate the wreath. Gather up any items that might go along with your theme and you can play around with them till you decide which ones to use.

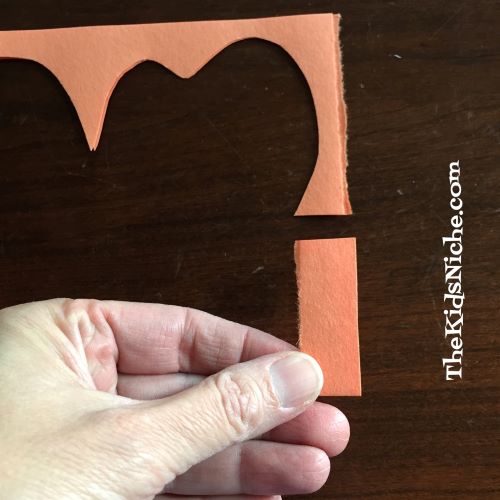
Start by cutting strips of fabric 2″ wide by the width of the fabric. You can use shorter strips if that’s what you have because we will be gluing them together anyway. I needed 5 strips to cover my 14″ wreath.

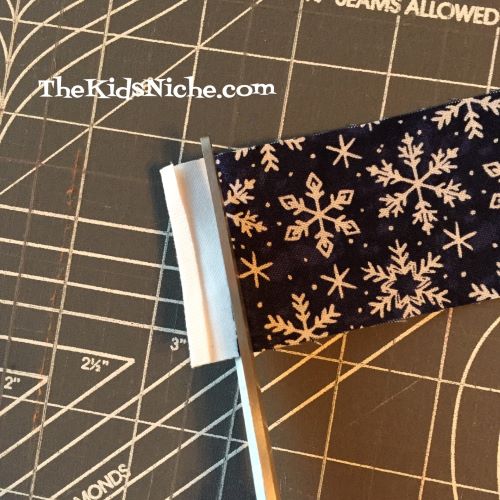
Trim off the white selvage edges.

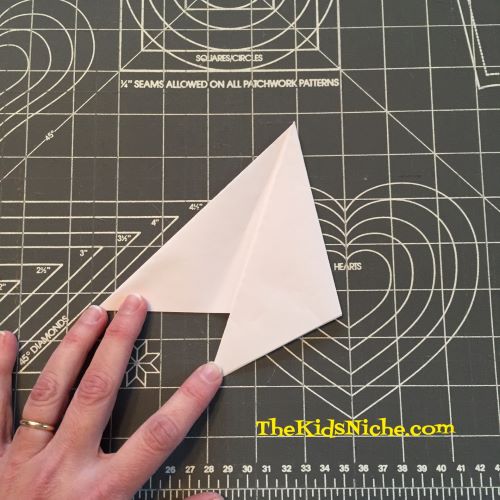
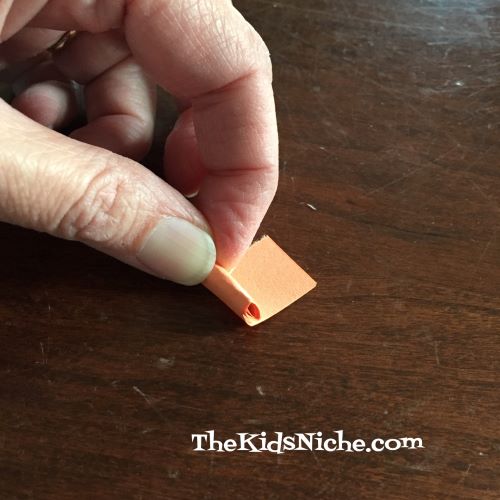
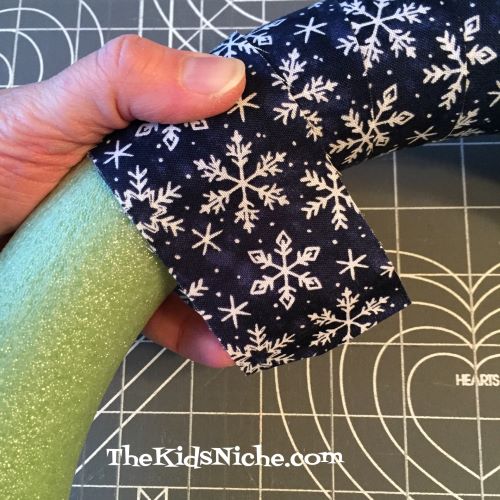
Take one strip and start wrapping it around the wreath form. You can glue down the first edge if you want to but I just wrapped the fabric strip around the wreath close enough that it held the end in place.

When you get to the end of your strip, cut it as much as is needed so that you attach the next strip on the backside of the wreath. That way it won’t show on the front.

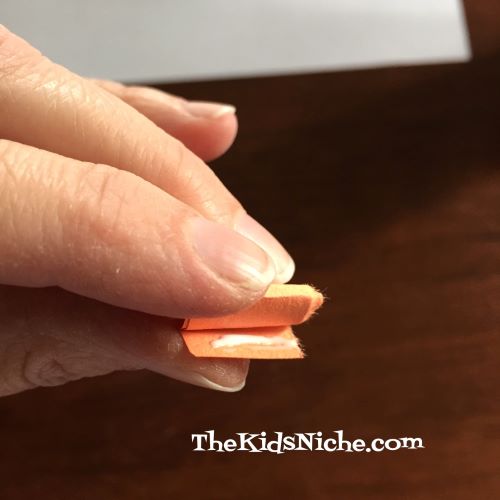
Using the glue gun, make a line of glue close to the end of the strip on the top side of the fabric.

Lay the end of the next fabric strip on top, lining up the edges. It will then look like a continuous strip of fabric.

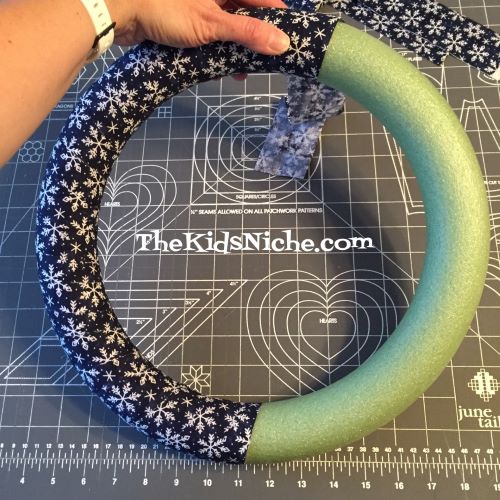
Continue wrapping the fabric strips around the wreath form and adding new strips as needed.

When the entire wreath is covered with the fabric, trim the end so that you glue the end down on the backside of your wreath.

This time put the glue on the wrong side or the backside of the fabric.

And now the wreath is ready for decorating! 🙂

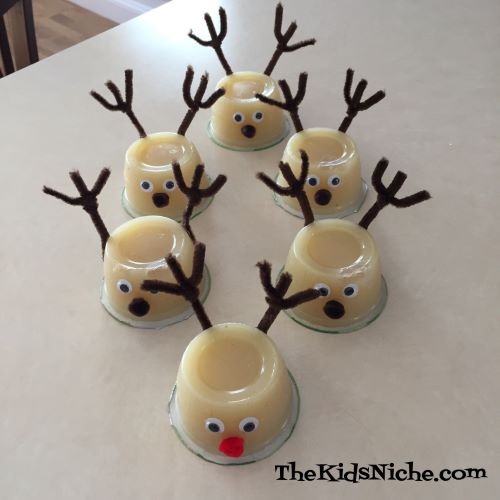
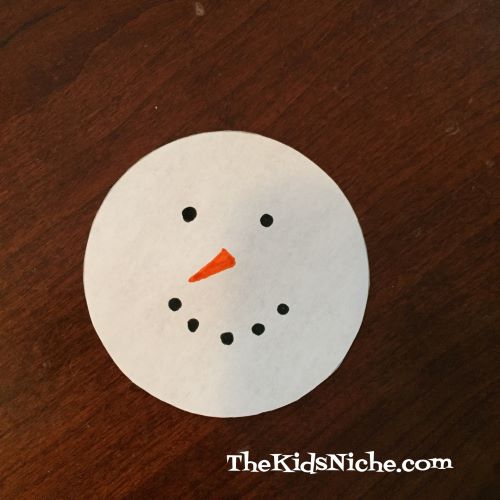
Lay your little decorative items around on the front of the wreath. Take time to move them around and to try different ideas.

Once you decide where you want them, use the glue gun to glue them in place.

You did it! And I’m sure it looks great! Find a place to hang your wreath where everyone can enjoy it! Hope you had fun making a winter wreath! 🙂

A Warm Project to Start 2020

Happy New Year! We are off and running already with 2020! I have lots of fun things in store for our new year so I hope you will stick around to enjoy them! I often think of January as a cold month, so let’s do a fun project that will also help keep you warm! Let’s make a scarf! Don’t know how to knit or crochet? No problem! Have you seen the soft fluffy yarn made with loops? There are several brands that produce it but here is an example of one:

The first time I saw it, I wondered how in the world you could knit it with knitting needles or crochet it with a crochet hook, but then I found out you don’t need either of them! All you need besides the yarn is your FINGERS! There are several ways to ‘knit’ this yarn, but I’ll just show you one way today. Let’s get going!! Here’s what the yarn looks like close up…

It’s just a row of loops. The first thing you need to do is count over the number of loops you need for the width you want your scarf to be. We’ll go with 8 loops.

To start knitting, take the 9th loop and pull it through the 8th loop from the back to the front.

Take the next loop (in this case it’s the 10th one) and pull it through the 7th loop.

Great! Now you have 2 loops done in your first row.

Continue going back down your original 8 loops by pulling the next loop on the yarn strand through until you have done that for each of your 8 loops. This is what it will look like.

Always be careful to match up the next loop on your scarf with the next loop on the yarn strand. Now you are ready to go back across your scarf from left to right, continuing to pull loops through. Take the next loop (green where my finger is) through the first loop on the second row of your scarf (also green in this example).

That’s all there is to the knitting part. Just keep working your way back and forth across your scarf, continuing with pulling loops from the yarn strand through the loops on your scarf.

After a few rows it will begin to take shape and you will see your scarf developing!

Continue knitting until your scarf is as long as you would like it to be. Once your scarf is the desired length, you can bind off to put an end on your scarf. Here is a scarf in a different set of colors to show you how to bind off at the end. Stop knitting so that your yarn strand is coming out the left side of your scarf.

Now go back to the top loops on the right side of your scarf. Take loop number 7 and pull it through loop number 8.

Then take loop number 6 and pull it through loop number 7.

Continue working your way across your scarf in the same manner. See how it is making less loops and putting a finished edge on your scarf?

Continue knitting until you have just one loop left. Now it’s time to cut the yarn strand off from your scarf. Cut on the bottom leaving 2 extra loops on the strand for finishing your scarf.

Take your scissors and carefully cut right at the bottom of each of the 2 extra loops.

This will open up the 2 extra loops and make 1 long strand of yarn.

Take the long single strand and pull it through the last loop left on your scarf.

Pull it down snuggly but not so tightly that you make your scarf look misshapen. Weave the end back through your scarf a few times to secure it. You can use a large needle to do this or just use your fingers.

Trim off the extra yarn strand. And tah dah! Your scarf is ready to wear and keep you toasty warm! This is my finished purple, gray and white scarf. It is soooo soft!

The front and back of your scarf will look a bit differently but that’s the way this kind of knitting works, and it’s all good! Here is the front side…

And this is the back side…

I taught my grandson how to make this type of scarf on New Year’s Day and he really enjoyed working on it. In fact, his whole family then went to the store to buy yarn so they could all make one! Haha! Be careful because this type of knitting is addictive! 😉

Healthy Stocking Stuffers

Are you searching for some healthier alternatives for the kids’ stockings this year? Trying to get away from giving them a ton of sugary candy? Me too! I want to share a fun idea that will have your kiddos grinning while also cutting down on the sugar! While kids would also enjoy making these treats, I used a low temp glue gun to make them, so you’ll want to be careful about using that around the littles. What are we making? Reindeer and snowmen, of course! 🙂 For this project you’ll need individual applesauce cups (or a fruit cup should work fine too.), 2 sizes of colored pom poms, pipe cleaners (chenille stems), wiggly eyes and a low temp glue gun.

Let’s start with the reindeer. Turn the applesauce cup upside down. Find a clear spot on the side that doesn’t have the expiration date stamped on it. Glue 2 eyes onto the side a little more than half way up.

Next add a dark brown pom pom for the nose.

Now take a dark brown pipe cleaner and cut it into fourths. Hold one piece while wrapping a second piece around it a couple of times…then bend them to look like the picture below. Yep, you guessed it – antlers! 🙂 Make 2 for each reindeer.

Glue each antler on the opposite side of where you put the eyes and nose. After the glue has set up a bit, bend the antlers out toward the side just a little. And there he is – your first reindeer!

Can you guess who this is?

Rudolph, of course! “We can’t forget Rudolph, he’s our leader, you know!” While I didn’t have enough applesauce cups to make ALL the reindeer, here are 6 of them!

Onto the snowman! Start again like we did for the reindeer by gluing on 2 eyes, but this time use an orange pom pom for his carrot nose. I used a little piece of a pipe cleaner and glued it on for a smile. I used slightly bigger eyes for the snowman than what I used on the reindeer but the same size is fine.

Our snowmen are going to wear ear muffs so we’ll do those next. I cut a pipe cleaner into thirds for the part that goes across the top of the snowman’s head. Lay it across the top and bend the ends of the pipe cleaner down to fit the cup.

Take the piece off and trim each bent end just a little bit if needed so it doesn’t go too far down on the sides of the cup.

Put glue on only the little bent ends and stick it back on the snowman. Add 2 pom poms on the sides at the ends of the pipe cleaner to finish the ear muffs. These pom poms should be a little bigger than the one we used for his nose.

And now your snowman is finished! I used different colors of pom poms and pipe cleaners for my other snowmen and I made their mouths a bit different.

There you go! A quick, easy and healthy stocking stuffer that your kids will enjoy receiving and eating! 🙂

Do You Wanna Build a Snowman from Paper Snowflakes?

Making a snowman is always fun but here is a new little twist that I think you will like! On December 12, 2019, I showed you how to make paper snowflakes. If you missed that post, you can find it here: https://thekidsniche.com/2019/12/12/do-you-want-to-make-snowflakes/

Here are some of the snowflakes I made that day.

Paper snowflakes are the foundation for our snowman craft for today. You’ll need a piece of colored paper for the background and some white paper for the snowman. I chose blue construction paper for my background.

You’ll need 3 squares cut from the white paper. I made mine slightly different sizes since a snowman’s body is usually bigger than his head. I used a 4″ square for the bottom part of the snowman, a 3 1/2″ square for his middle and a 3″ square for his head. Using only the 2 larger squares, make them into snowflakes. ( https://thekidsniche.com/2019/12/12/do-you-want-to-make-snowflakes/) Cut the smallest square into a circle for the snowman’s head.

Glue the bigger of the 2 snowflakes to the bottom center of your background paper.

Next, glue the second snowflake on for the snowman’s belly.

Now draw your snowman a face on the white circle.

Glue the snowman’s head above the 2 snowflakes on the background paper.

Decorate your snowman in the way you want him to look. I cut a little square and a skinny little rectangle from black construction paper to make my snowman a black hat.

I drew 2 arms with a marker and made them look like sticks for my snowman’s arms.

To finish off my snowman, I used 2 pieces of red ribbon to make a scarf.

All done! Isn’t he a handsome fellow? I hope you had fun making a snowman with paper snowflakes! 🙂

Do You Want to Make Snowflakes?

I don’t know if Elsa and Anna would be impressed, but we can have fun making our own snowflakes too! 😉 And we can stay warm while doing it! All you need is a piece of paper and a pair of scissors. I used a piece of white printer paper to make mine. Here we go! First, you’ll need to make a square from your paper. All you have to do is fold one corner over across to the opposite straight side and make a triangle…look at the picture for help to understand what I mean.

Cut off the extra paper with your scissors so you just have the triangle left. (If you open the triangle, you’ll see that you now have a square piece of paper.)

Now fold the triangle in half from left to right…or right to left. 😉

Turn the triangle around so the longest edge is at the bottom. Then fold the right side over about 1/3 of the way…

Then the left side over to meet the right side edge. If the sides don’t quite meet evenly, go back and move the first fold a little and try again.

Now trim off the extra to make a triangle.

Cut designs all around the edges but don’t cut all the way across. Leave some of the fold on both sides. Take a look at the type of cuts I made on mine. Small children may need some assistance with this step as the thickness of all the paper can be a bit hard to cut through.

Carefully open your paper up and you’ll see the beautiful snowflake you made!

Isn’t that awesome?! They say there are no 2 snowflakes alike so every one you make will look a bit different and that’s just the way it should be. Let’s look at another one I made…first you can see the type of cuts I made…

And now look at the pretty snowflake!

You can make different sizes of snowflakes just by starting with a different size square piece of paper. Look at this little one I did!

And here’s what it looks like opened up.

I hope you found this to be another fun winter project! Make as many as you can and decorate your house with snow that won’t melt any time soon! 🙂

Cookie Cutter Decorations

Happy December! It’s already feeling like winter and Christmas is coming fast! Let’s make some quick and easy decorations to spruce up your house for the holidays! Grab your favorite winter time/Christmas cookie cutters and some construction paper, a pencil and a pair of scissors and let’s get started! Here are the cookie cutters I found that we have on hand at our house.

Get a sheet of paper, any color you like or just plain white, and a cookie cutter and a pencil. Place the cookie cutter on the piece of paper and trace around the outside edge with your pencil. Try to hold the cookie cutter very still so your lines meet up just right.

Lift the cookie cutter off the paper and make sure you have a complete shape drawn on your paper.

You can color the shape right on the paper and maybe add a few more shapes to fill in the space. Or you can use a pair of scissors to cut out the shape. I cut out 3 different size star shapes on 3 different colors of paper.

You can use the shapes separately or you could do something like I did and glue them together to make one colorful star.

Paper shapes can be left just the way they are or you can color them with crayons or markers for some extra color and designs. Here are a few I did to give you some ideas to get you started. A gingerbread man made on white paper and colored with crayons…

A green Christmas tree shape using markers to color in decorations…

And a pair of blue mittens colored with markers.

You can leave your decorations just one thickness of paper, or you can put two matching pieces together by gluing the back sides together. I added a piece of thread before taping the pieces together so I have a loop to hang my mitten. (I used double-sided tape instead of glue.)

And there we have our first batch of decorations! 🙂

Here are a few suggestions for more ways to decorate your shapes: you can use Elmer’s Glitter Glue which is colored glue with the glitter already mixed in it.

Another idea is to use regular white glue (that dries clear) and some crayon shavings. Start by spreading glue over your shape in the place you want to put the first color…

Then sprinkle tiny crayon shavings over the glue and lightly press in place.

It’s ok if you sprinkle on a little more than you need because you can gently pick up your shape and let the excess fall off onto a piece of paper. Then you can save those bits for another shape.

If you would like to use a second color, put more glue on your shape in that spot. I added glue in lines to make the mitten look like it has stripes.

Sprinkle your second color on the glue. I added yellow crayon shavings and again, very gently pressed them in place.

Now gently lift your shape and let the excess fall back onto a sheet of paper so you can save it for later.

What I like to use even better than crayon shavings is glitter! I used some holographic blue glitter and it was sooo pretty! Make your design on your shape with regular white glue like we did with the last shape.

Sprinkle on the glitter…

And gently lift your shape and let the extra glitter fall off onto a piece of paper like before. Isn’t that so pretty?!

After you make your decorations, have an adult help you hang them up for everyone to enjoy! Add a string to use for hanging or maybe just a piece of tape or double sided sticky tape. You could also use your shapes to make a card to mail to a friend or relative to wish them a Merry Christmas! I hope you have fun making your house beautiful! 🙂

One more Butterfly Craft

We have been having so much fun with our Monarch butterflies and doing butterfly crafts! Are you tired of butterflies? No, I didn’t think so! Who gets tired of butterflies?! So I have one more butterfly craft up my sleeve! Today’s craft takes only tissue paper and a pipe cleaner along with a pair of scissors, a pencil and something round to trace around, like a small plate. Want a sneak peek at what we’re making today? Ok, here it is!

Let’s get started! First, take one sheet of tissue paper and fold over one end until it’s large enough for a small plate to fit on it.

Make a good crease in the tissue paper on the fold by running your finger down it. Open the tissue paper back up and cut along the crease you just made.

Now fold the piece you cut off in half the other way until you have a double layer big enough for the plate to fit on.

Take your pencil and trace around the outside edge of the plate.

Keeping the two layers of tissue paper together, cut on the circle you just traced around the plate. You should end up with 2 circles that are the same size.

Now let’s prepare the pipe cleaner to become the butterfly’s body. Fold the pipe cleaner in half and twist it a few times on the end with the bend in it so you have a twist that goes about 1/3 of the way up.

Back to the tissue paper circles now. Starting on one side of the circle, in the middle, start scrunching up the circles until you have them both gathered together in the middle.

Now put the 2 scrunched up circles together by holding them against each other in the center.

Take the pipe cleaner and slide it over the middle portion of the scrunched circles. Give it a few twists to secure it in place.

Don’t worry if your butterfly looks a little scrunched up because now you can gently move the tissue paper around until you get the butterfly’s wings to look just right. Do this gently because tissue paper will tear pretty easily.

And there’s your beautiful butterfly! Make as many as you like in as many colors as you like!

I think these would look lovely if you tied a piece of thread to them and hung them up where they could blow in the breeze and look like they are flying! I hope you enjoyed this project and that you make a bunch of butterflies of your very own! 🙂

3-D Butterfly – Easy Butterfly Craft #2

Let’s get back to making some more butterflies! This craft project takes construction paper, a few little pom-poms, scissors, glue, markers, and a pencil.

Select the color you would like your butterfly to be. You’ll need one color for the butterfly and one for your background paper. I chose orange for my butterfly and white for my background. (I also chose yellow for a second butterfly but I’ll share that craft next time.) 🙂 Your background paper will not be cut so you can set it aside for now. Take your butterfly color paper and fold it in half and then cut or tear it on the fold.

You will only need one piece for each butterfly. Take one piece and fold it in half again.

Using your pencil, draw an outline of one side of a butterfly’s wings. Make sure you draw the part of the wing that would attach to the butterfly’s body on the fold. This is important because after you cut it out, you want to be able to open the wings like you would a book. Sorry it’s hard to see the outline of the pencil drawing. 😦 You can see it better if you look at the yellow piece.

Go ahead and cut out the butterfly wings, but be sure NOT to cut the folded edge where you have drawn where the wings attach to the body.

Taking a marker, draw lines on your butterfly wings…I’ll just be showing the orange wings now and saving the yellow for our next project. 🙂 Or you can decorate your wings however you like. I tried to make my butterfly wings look something like a Monarch butterfly.

Open your wings up and draw or color on the inside part too. Don’t bother drawing on the bottom side as we will be putting glue on there.

Now you are ready to glue your butterfly wings to the background paper. Put glue only on the bottom side where you didn’t color or draw.

The top part of the wing should not be glued down. Now to make it look 3D, take a small piece of the scrap paper leftover after you cut out the wings and roll it up into a little tube.

Glue the end to the roll so it will stay rolled up in a tube shape. Next open the wings and put a little bit of glue on the tube and place it inside the wings right up against the fold.

Place a little bit of glue on top of the little tube…

Then fold the wings closed and hold the wings in place for a little bit till the glue takes a hold. Now your butterfly’s wings look three-dimensional. 🙂

Next, glue the little pom-poms in a row to make the butterfly’s body. I used black for my butterfly.

You’re almost finished! With your marker, you can draw some antennae on your butterfly’s head. And it’s fun to add some dashes out the back to make it look like that’s where your butterfly has been flying. 🙂

Here’s a look at the back side of the butterfly so you can see better how his wings are three-dimensional.

I hope you have fun making your butterfly craft! 🙂 Come back tomorrow for another fun butterfly project! And keep your eyes open for real butterflies when you are outside!

Making a Caterpillar

Are you having all this crazy rainy weather that we are getting in Ohio? Are you going bonkers with your kids shut up inside, not able to go outside to play and burn off some excess energy?? ARGH!! Here’s an idea to keep them entertained for a little while! Let’s make a caterpillar! Items you’ll need for this project are a cardboard egg carton, paint, markers or crayons, scissors and a pipe cleaner is nice, but not a have-to-have. This idea came from one of our grandsons. A few years ago he gave me a caterpillar he had made and I have kept it ever since. 🙂 I came across it again a couple days ago and thought I would share my version with you. Here is my grandson’s caterpillar:

Isn’t it cute?! He did an awesome job making it! 🙂 Now let’s show you how to make your own! Start by cutting the egg carton bottom off…and then cutting the bottom part in half lengthwise.

If your egg carton is like mine, you will need to trim a bit off of the cut side to make the caterpillar sit flat. The edge right by my finger has been cut.

Next, draw a face on one end with a black marker.

If you don’t have a pipe cleaner, you can also draw 2 lines for his antennae. Color each section using the color of your choice. You can use paint, crayons or markers.

Your caterpillar can be all one color or you can color each section a different color.

If you are using a pipe cleaner, poke 2 very small holes in the top of the head section for his antennae. I tried to use the point of a knife, but as you can see I ended up making a slice on one side instead of just a tiny hole. Oops! 😉

Cut the pipe cleaner in half and stick a piece into each hole. Push it through far enough that you can bend the end over a few times on the inside of the head to keep the antenna from pulling back out. Pull the pipe cleaner pieces back up so most of the piece is sticking up above the caterpillar’s head.

Roll the top end of each piece of pipe cleaner into a spiral and your caterpillar is done!

For an added bit of fun, you could read “The Very Hungry Caterpillar” by Eric Carle while your little one holds her/his caterpillar. 🙂

I would love to see your caterpillars if you would care to share your pictures with me!