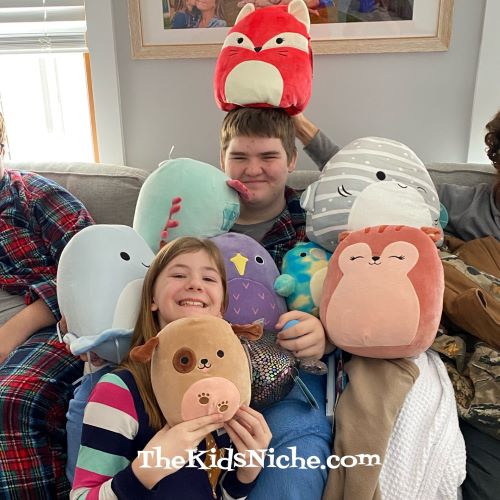
Do you own a Squishmallow? They seem to be very popular now and I’m kinda behind the times on learning about them. Our granddaughter got a BUNCH of them for Christmas and now I know why everyone likes them! They are sooo cute and sooo soft and well, squishable! 🙂 (I’m thinking I might need one…or a few!)
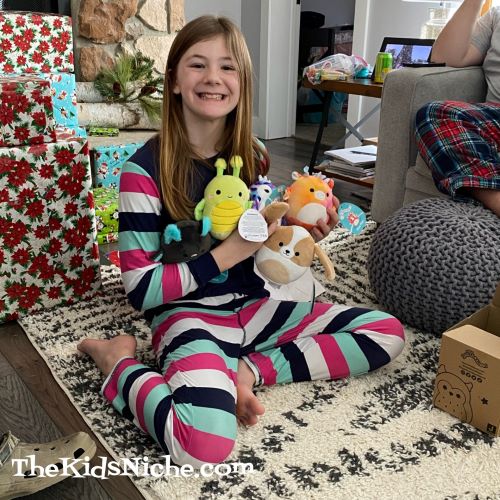
And then there were mini squishmallows too! 😉
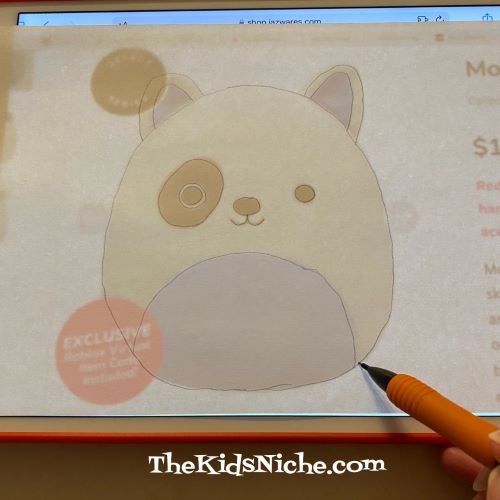
Our granddaughter has been tracing characters and coloring them and that gave me the idea that it would be fun to draw Squishmallows. There are a couple of ways you can do that. One way is to find a picture of a Squishmallow online and save the picture to your tablet.
Lay a piece of thin white paper over the picture and trace the outline of the Squishmallow.
Take the paper off the tablet and color the picture with your favorite crayons, markers or colored pencils. Use the picture as a guide for what colors to use.
Molina is actually white but the white part didn’t show up in a picture so I colored her a light color so you could see her better. Another way you can trace/draw a Squishmallow is to print an online picture first.
Hold the picture up to a window (or tape it on the window) and use a piece of thin white paper to trace it just like we did with the first one.
Color the picture and ta dah! You now have a drawing of Gorm too!
You can make a whole collection of Squishmallow drawings to decorate your bedroom or maybe you’d just like to do one or two. I hope you will have fun drawing your own Squishmallows! 🙂
Almost 2 years ago now, I shared a post on looking at things from different perspectives. It was a fun post so let’s do this again! 🙂
Looking at things from different perspectives can be a little hard to explain to a child. But here is a way that might help them understand that things look differently depending on how you look at them. And it can be a lot of fun! It’s also a good reminder to us adults, that the way kids see things is different from the way adults see them. Sit down on the floor in your in kitchen and take a look around. Can you see what is on top of the countertop? Do the doors on your cupboards look bigger? What if you need a drink of water, but the faucet is waaaaay above your head? I think you understand what I’m talking about. 😉 So let’s have some fun with the perspective of being really close up to something when you can’t see the whole thing and compare it to the perspective of seeing the whole object. See if your kids (and you!) can guess what each close up picture is before you scroll on to the answer that reveals what you’re looking at. Here we go!
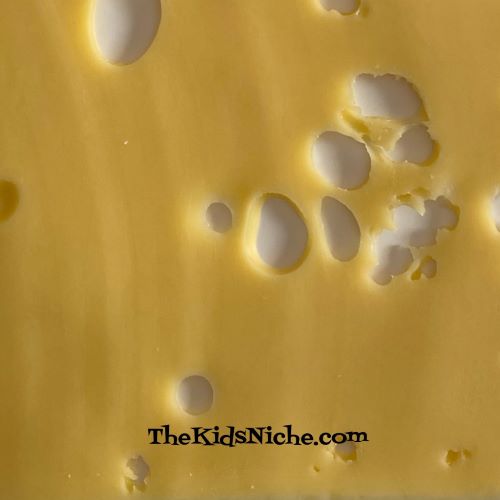
#1.) What is this?
Answer: If you said swiss cheese, you are right!
#2.) What is this?
Answer: It’s a playground ball!
#3.) What do you think this one is?
Answer: Surprise! It’s a toad!
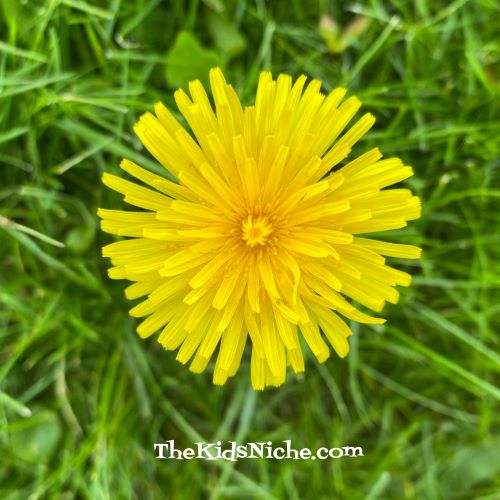
#4.) Can you guess what this is?
Answer: It’s a dandelion! If you said, “flower”, that is right too.
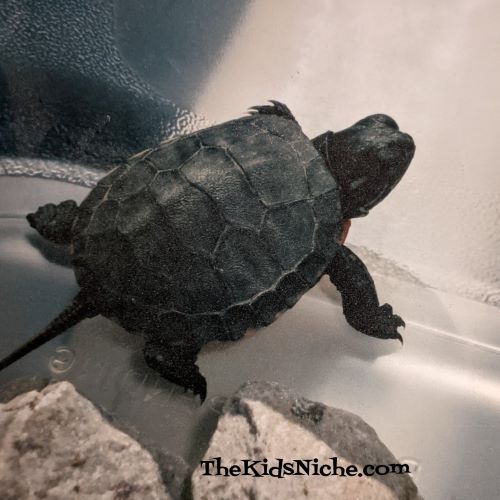
#5.) Ok, what does this look like?
Answer: It’s a little turtle! So cute! 🙂
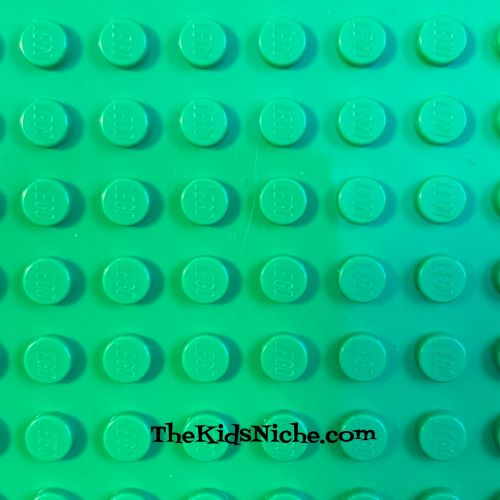
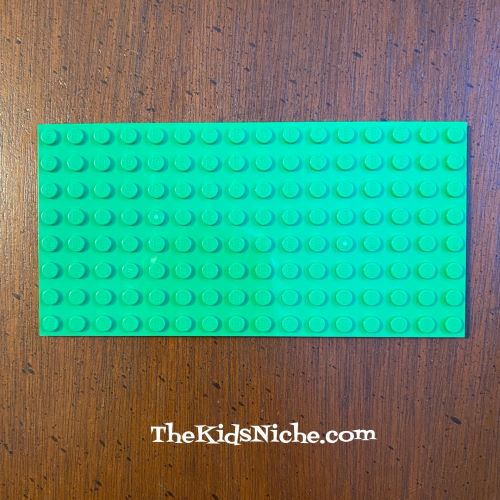
#6.) What is this? (I bet you will get this one right!)
Answer: A piece of Lego!
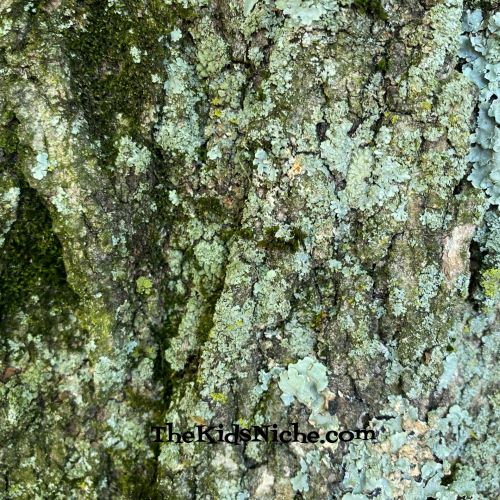
#7.) What is this a picture of? (If you need a hint, this one is outside.)
Answer: A tree!
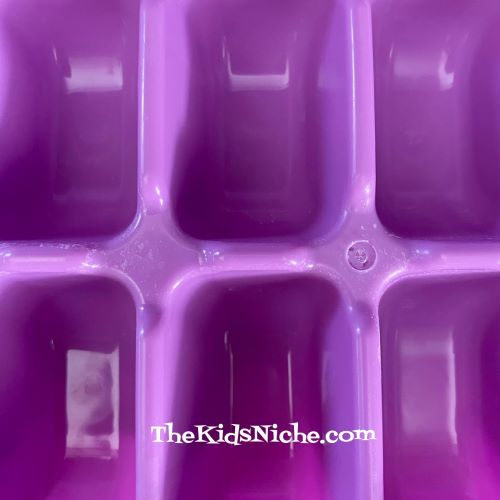
#8.) What is this purple thing?
Answer: An ice cube tray!
#9.) Can you guess this one?
Answer: Yes, it’s a dog! (And his name is Rusty!)
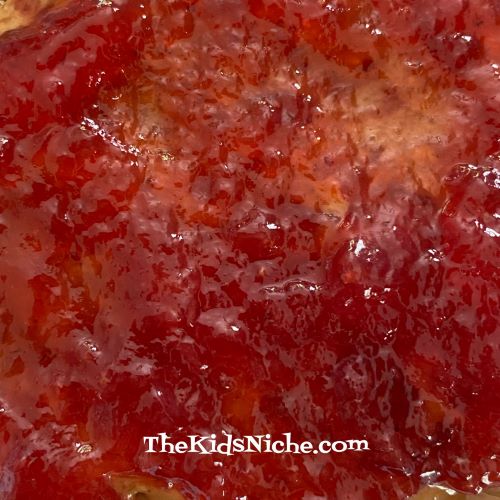
#10.) This is the last one and so its a bit harder. What do you think this is?
Answer: It’s peanut butter and jelly!
Did you guess some of them right or did we fool you? You can use your camera on your cell phone for taking pictures to have handy to entertain the kids when you need a little something more! Just show the kids the zoomed in version of the picture and after they guess what it is, show them the original picture. I hope you enjoyed our little game today! 🙂
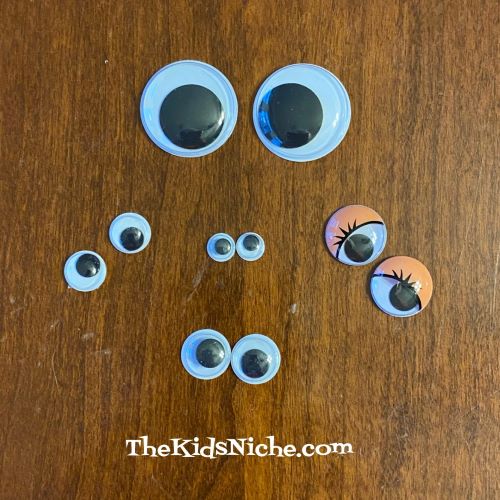
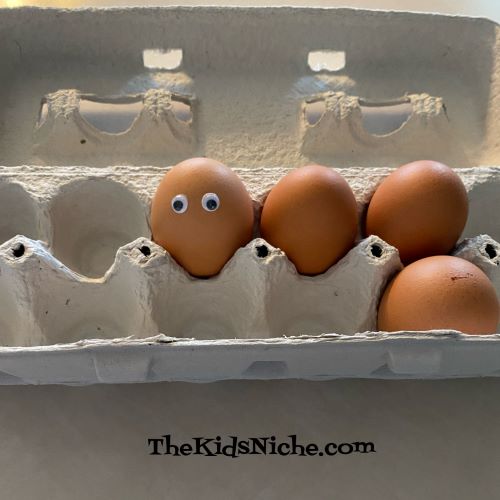
I had a streak of orneriness the other day and decided it would be fun to stick some wiggly eyes around the house and wait for someone to notice them. 😉 What are wiggly eyes? The cute little plastic eyes where the black part of the eye moves around. They are black and white but can also be colored.
I put a small piece of double-sided tape on the back of each eye. A word of caution…be careful not to stick them on anything valuable in case the tape would leave some sticky residue behind or tear paper.
This is what my husband saw when he wanted to fry some eggs. (Yes, he thought it was funny. He’s a good egg.) 😉
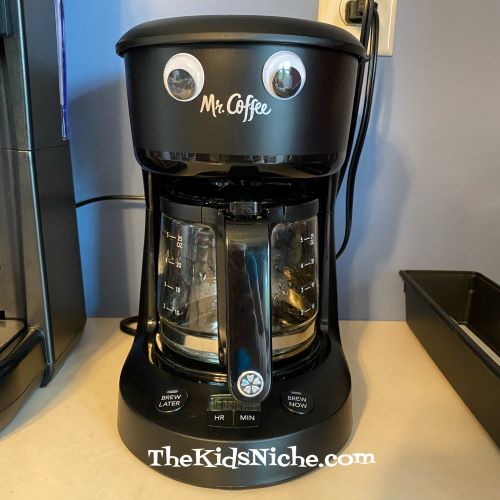
It’s not every day that the coffee pot looks back at you!
Here are a few other places that I put wiggly eyes…
In the fruit crisper drawer in the refrigerator…
On a potted plant…
Inside a bathroom cupboard…
On my hubby’s hat…
On an insulated cup…
On the bathroom scale…
And on the piano. (I didn’t use any tape for this one. I just laid the wiggly eyes on so they would stay in place.)
Did any of those pictures make you grin? 😉 It’s a simple and inexpensive way to have some fun. Who knew a pack of wiggly eyes could be so fun? 🙂 Give it a try yourself!
Hello and welcome to The Kids Niche once again! 🙂 Today we’re going to put a little bounce in your step! Or maybe a little bounce into some fun characters that you make yourself. Ready, set…let’s go!
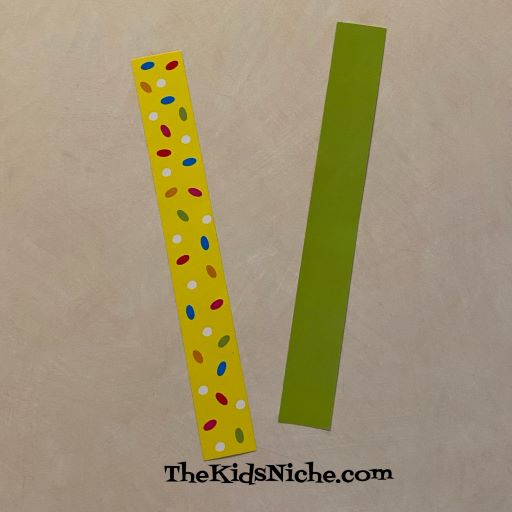
You will need some strips of paper…approximately 1″ wide and at least 7″ long, but they could be a little different from that and still work. Construction paper or scrapbook paper works great. I used some paper that was printed on both sides, but that isn’t necessary. Then you’ll need some scraps of paper, glue or double-sided tape, markers, scissors and a pencil.
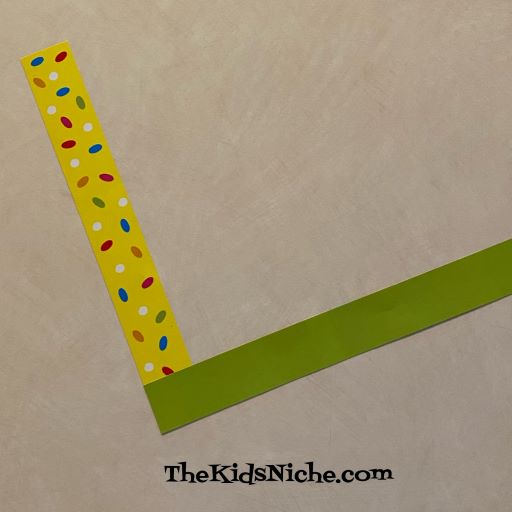
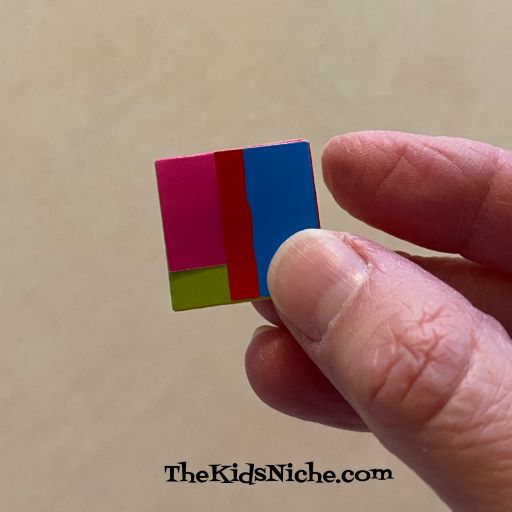
Begin with the 2 strips of paper.
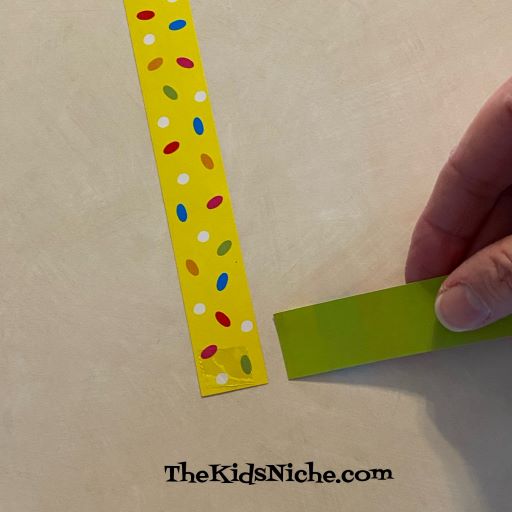
Put a small amount of glue or double-sided tape on the bottom edge of one strip.
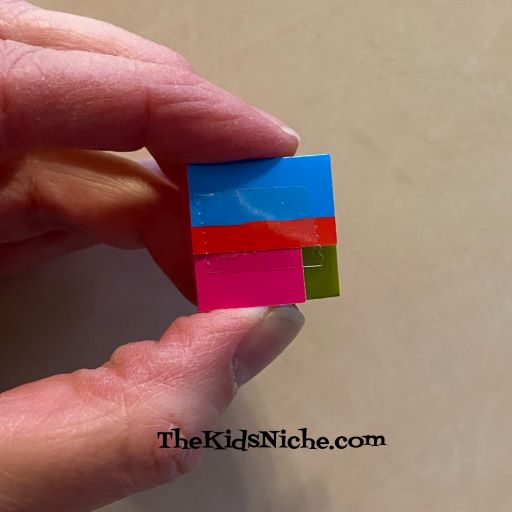
Place the second strip at a right angle to the first one on top of the tape or glue.
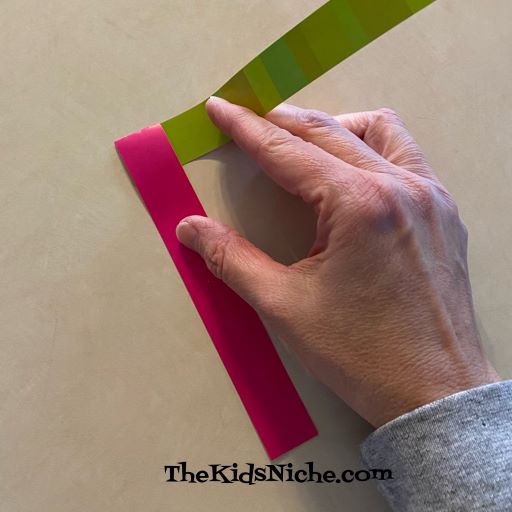
Now you will fold the strips of paper across each other…one at a time…keeping them straight to the corner.
Continue folding the strips until you come to the end of the strips.
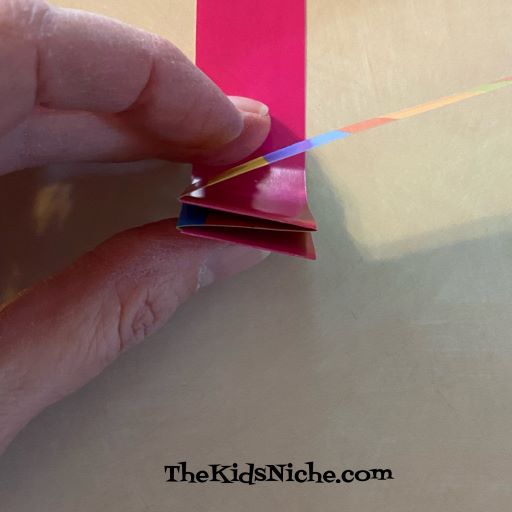
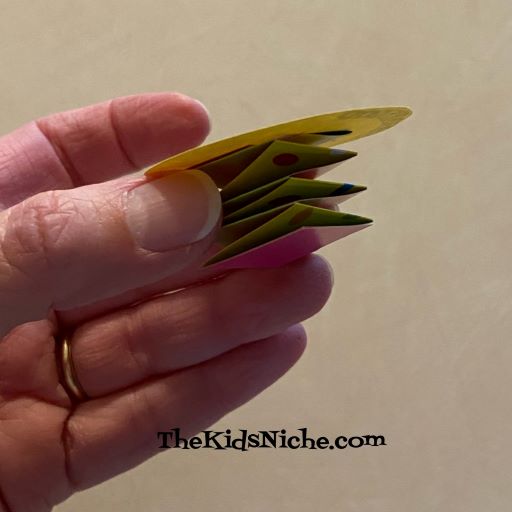
This is a side view of what it should look like.
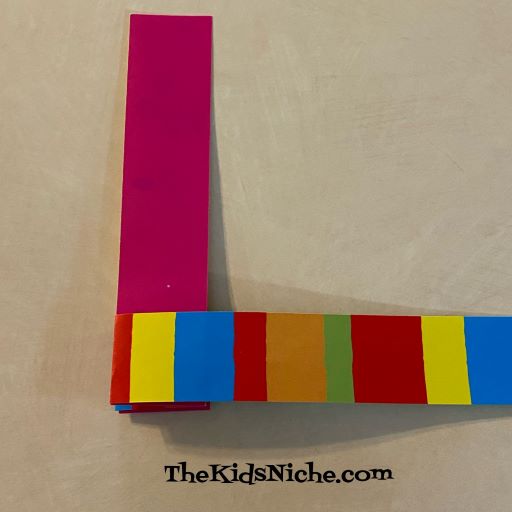
Here we are at the end of the strips.
Fold the last bits over and glue or tape in place.
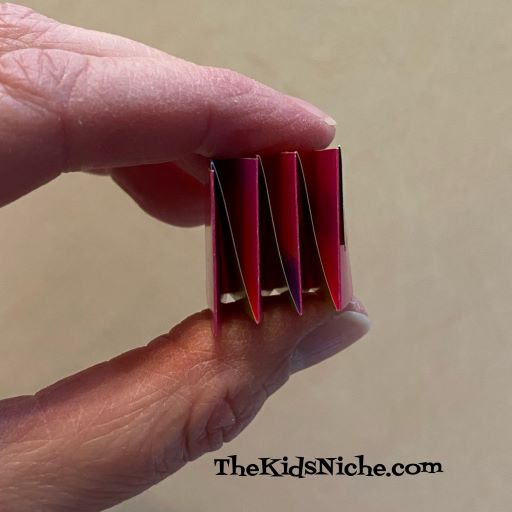
Another side view…this is the part that makes the bounce. It’s rather like an accordion.
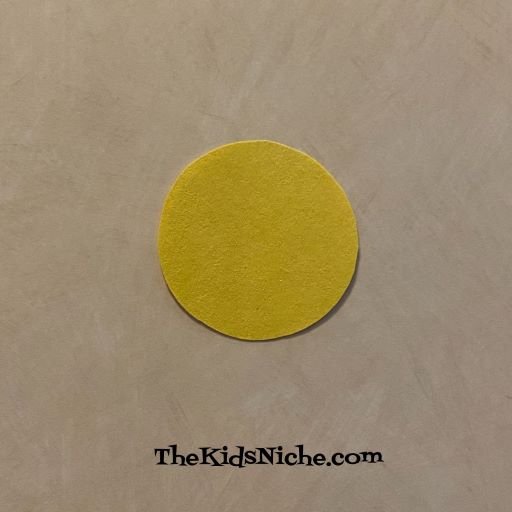
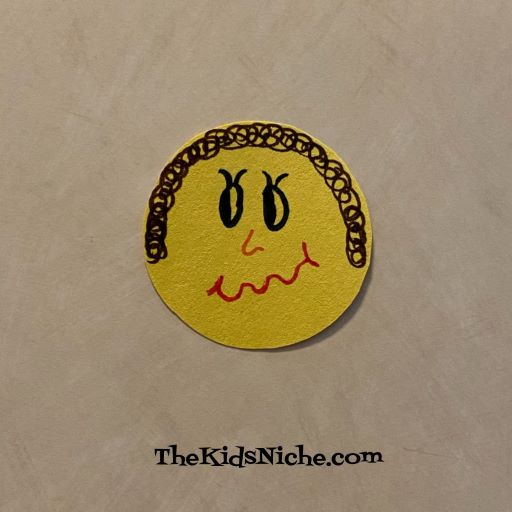
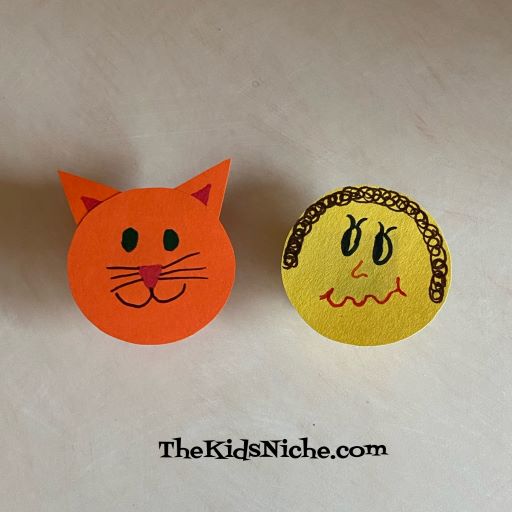
Now let’s make the character’s face. Start by cutting out a circle from your scraps of paper. I used a very small cup to trace around.
Draw a silly face on the circle.
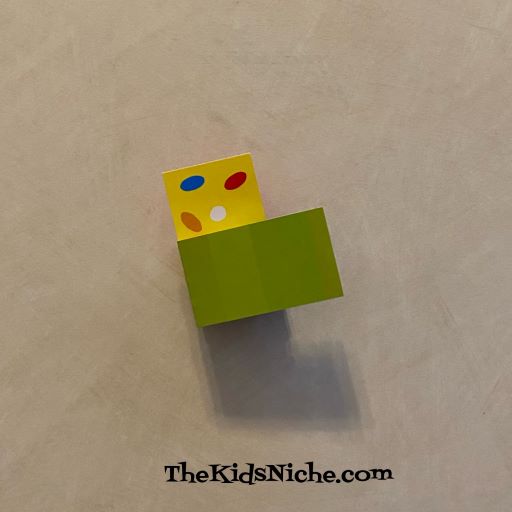
Put some glue or double-sided tape on the top of the accordion piece.
And stick the circle on top.
Put your bouncing character on the tabletop and press it with your finger. It will bounce up and down. 🙂
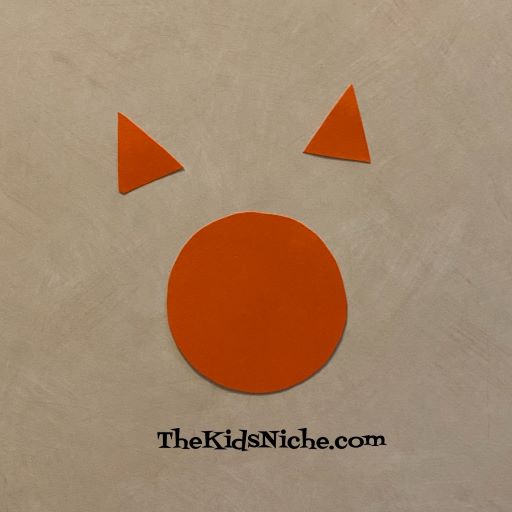
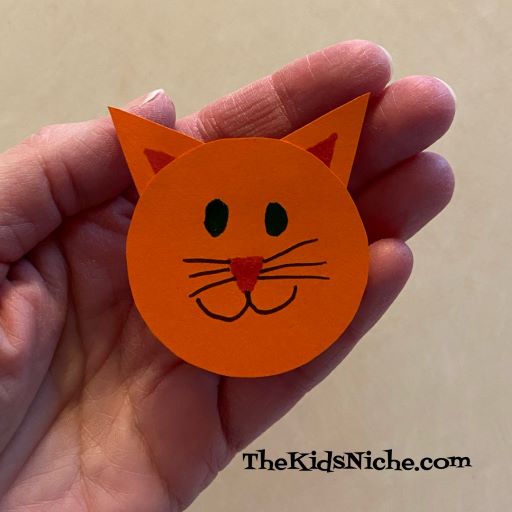
I also made a bouncing cat by folding 2 more strips of paper together. I cut out an orange circle and 2 orange triangles.
Draw a cat’s face on the circle, color in a bit of the ears and glue or tape it together.
Tape it onto the bouncing part you made and you’re ready to play with your bouncing friends!
I hope you’ll have fun bouncing these guys all over the house! 😉
Today we’re looking at a way to make your own stencils AND make a really cool looking picture with them! I tried this 4 different ways, so I will first show you the way that I think worked the best. But if you don’t have those supplies on hand, there are some other fun things you can try that still come out looking pretty great. 🙂 Here’s a sneak peek!
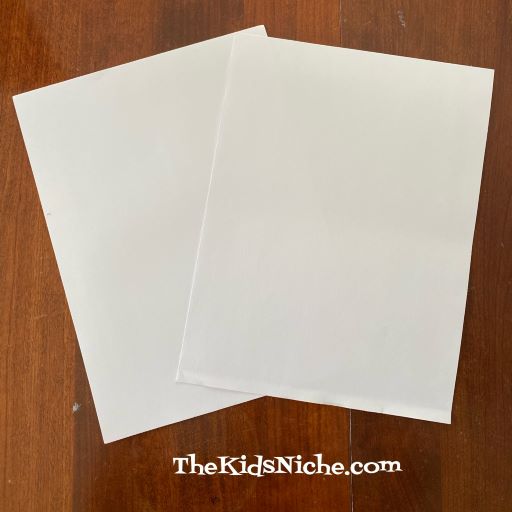
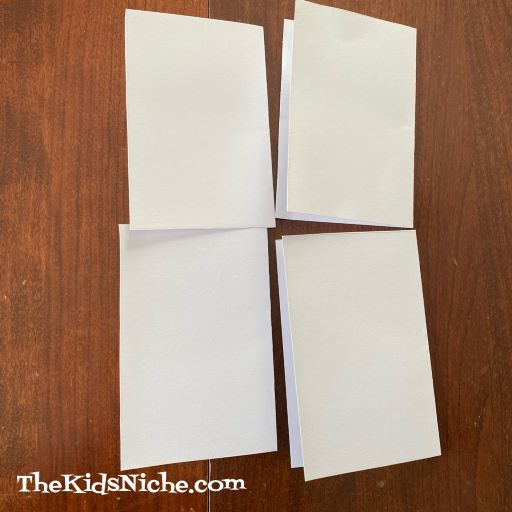
You will need 2 sheets of white paper. I used a sturdy type of construction paper. (I am showing you how to do this project 4 ways, but if you’d rather you can use just one piece of paper and still make 2 pictures.) 🙂
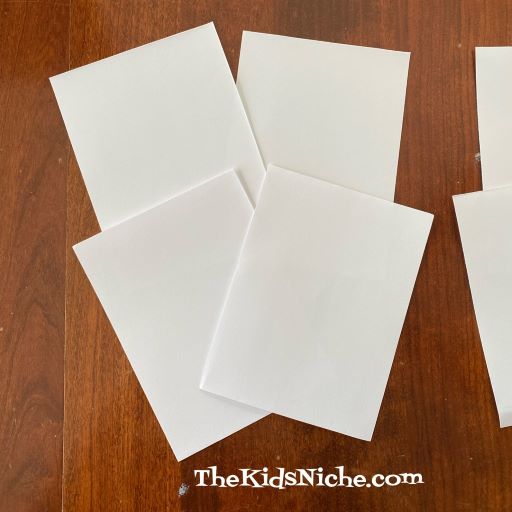
Cut or fold and tear each sheet into 4 equal pieces.
Take 4 of the smaller pieces and fold each one of them in half. Leave 4 smaller pieces of paper flat.
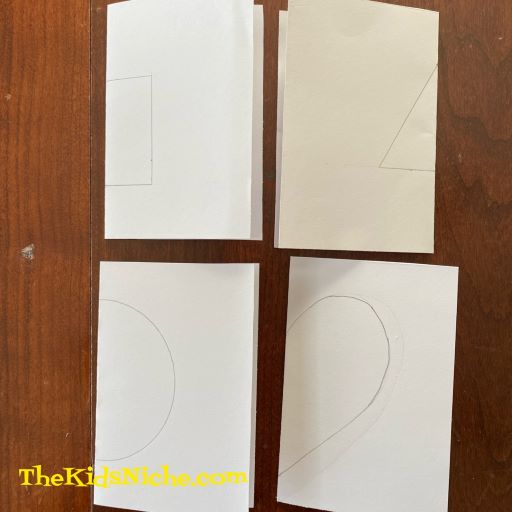
On the folded edge, draw half of a shape. For example, draw half of a heart, triangle, circle, square, etc. Leave some space on both the top and bottom edges.
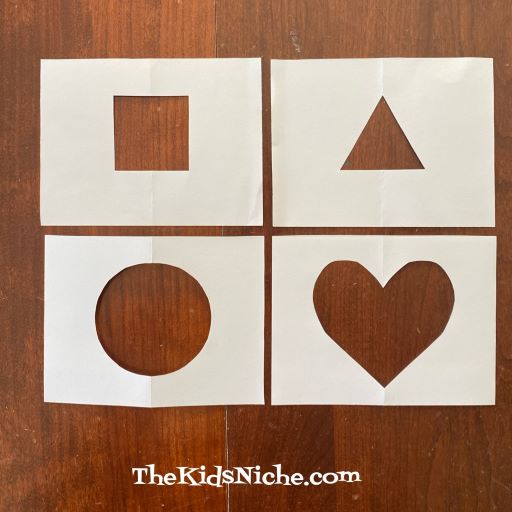
While keeping the paper folded, cut out the shape. Cut through both pieces of the folded paper at the same time.
Now open up the folded paper and you should have the complete shape cut out of the middle of the paper.
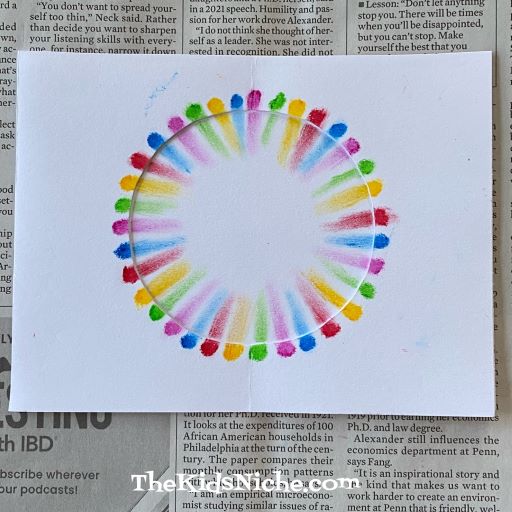
You might want to lay down some old newspaper or paper towels to put your project on. Pick one stencil and lay it on the newspaper.
For the first example, I used water color crayons. They gave the best color to the finished picture.
Pick out 3-5 colors that you want to use. Begin by coloring dots on the edge of your stencil. I like using colors in the same order all around the edge of the stencil. It’s great practice for the kids to help learn about making a pattern.
Make colored dots all around the edge of your shape.
Next lay your stencil on top of one of the flat pieces of paper. Make sure that the 2 pieces of paper stay together all the time for the next step. Use one end of a Q-tip to brush from the colored dot onto the paper laying underneath the stencil. Use the same Q-tip to do all of one color.
Then switch to a new Q-tip end for each color.
Doesn’t it look amazing?! 🙂 Remove the stencil and look at the beautiful design you’ve made underneath.
For my second design I tried using sidewalk chalk. It worked too, but the colors came out very light and rather hard to see, especially in a picture.
I used colored pencils for another try, but this time I didn’t use the Q-tips. I simply colored little patches both on the stencil and the paper underneath. I think the circle and heart shape worked better than the triangle shape did.
And then with the stencil removed. Still made a neat picture!
For my last attempt, I used regular crayons and colored circles or ovals on the stencil and the paper underneath. I think it would look better if I had colored bigger circles, but it still is pretty.
Without the stencil…looks rather like a picture frame. 😉
You can, of course, simply use a pencil to trace inside the stencils and then color the shapes without having the stencil there.
It was a fun experiment! I definitely liked using the water color crayons the best as they gave the best results. I hope you’ll give this project a try! 🙂
Welcome to another Monday! And since sometimes Mondays can be a little rough with going back to school and work after a weekend off, let’s have a little fun with riddles to get us all grinning again. 🙂
#1.) What sign is posted at a Boa Constrictors family reunion?
Answer: “No Hugging!”
#2.) What time is it when a dinosaur sits on your sofa?
Answer: Time to get a new sofa!
#3.) What do frogs eat in France?
Answer: French flies!
#4.) Where did the dog leave his car?
Answer: In the barking lot!
#5.) How do sheep get clean?
Answer: They take a baa-th!
#6.) How do you entertain a cow?
Answer: Take her to the moo-vies!
#7.) What do you feed a race horse?
Answer: Fast food!
#8.) What do you call a parrot that likes to hike?
Answer: A walkie-talkie!
Are you smiling now? 🙂 I hope these riddles helped to lighten your mood and make you grin!
If you have been following me for very long, you know that I love crayons! And I love finding new kinds and colors of crayons. Soooo here’s another box of Crayola crayons that I am enjoying! Presenting Crayola Colors of Kindness Crayons!
The outside of the box shows you the colors of the crayons that are inside the box.
Just look at all those gorgeous colors! 🙂
Each crayon has the words “Colors of Kindness” on it.
Then each crayon has 2 names! One is a…well, we will call it the “kindness name”. There are fun names like “breathe deep”, “life is gouda”, “you’re so a-peel-ing”, “kind to the core” and “have a scoop of fun!”
If you roll the crayon over just a bit, you’ll find the other name. Like “turquoise blue”, “macaroni and cheese”, “banana mania”, “granny smith apple” and “pink sherbert”.
Here are a couple of my favorite names: “oatmeal”. 😉
“robin’s egg blue”. Such a pretty color!
And just one more…”inchworm”. Haha! Did that make you think of a little green inchworm? 😉
You and the kids can have fun reading all the great names on the crayons and then enjoy coloring a great picture with these amazing Color of Kindness crayons! 🙂
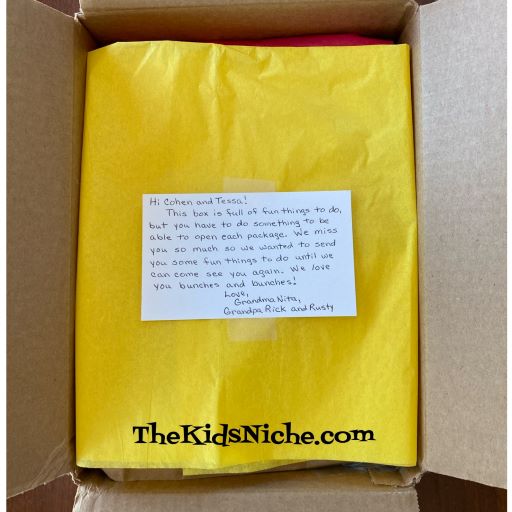
Do you have grandchildren that live some distance away from you that you like to send special little packages to in order to keep in touch with them? We do and so today I want to share a little idea with you that can add a little extra fun to your packages but doesn’t cost anything extra. This is a package that I sent to 2 of our grandkids today:
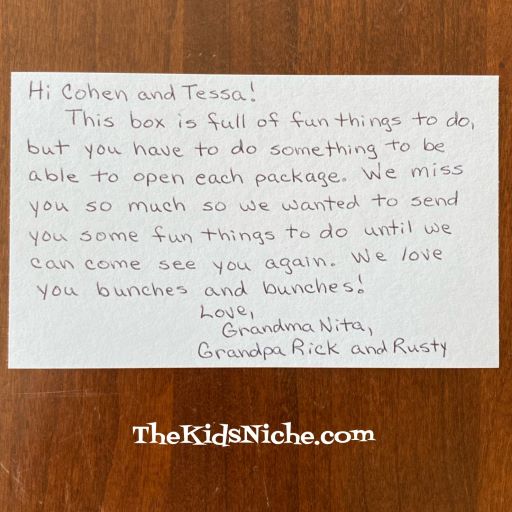
When they open the box, the first thing they will see is this note:
(Rusty is our dog and he loves the kids!) Under the yellow tissue paper they will find this package:
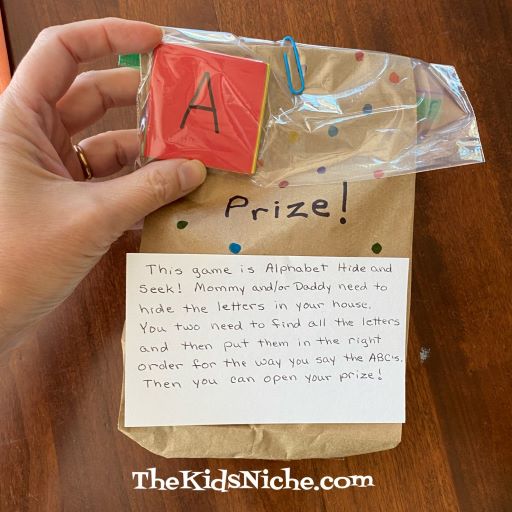
So my idea to make things more interesting is to wrap each little gift in tissue paper (or other paper) and give the child something to do before they can open each package. Their first package involves a hunt for letters and then arranging the letters in alphabetical order. Once they complete that they can open the package and get the prize inside. (This prize is 2 bottles of bubbles.)
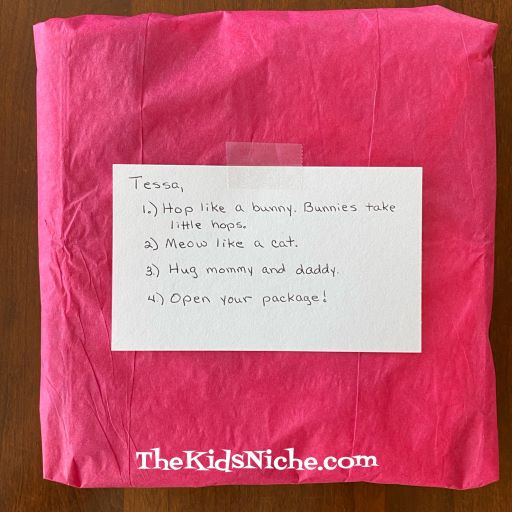
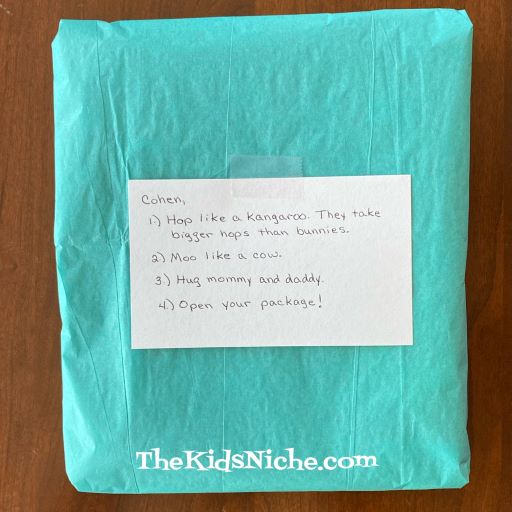
The next packages in the box look like this:
The kids will need to follow the instructions in order to open their packages. The things they need to do are just silly little things that will hopefully make them giggle. For instance, hopping like a bunny or kangaroo and meowing like a cat or mooing like a cow. 😉 (These packages contain a dress for our granddaughter and a tee shirt for our grandson.)
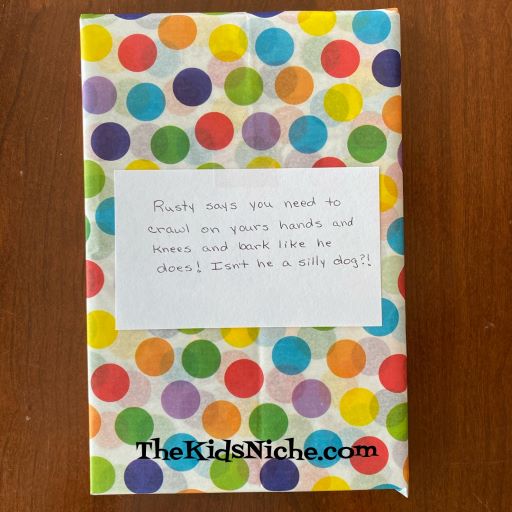
Next they will find a package from Rusty that has them acting like a dog. 😉 (There are 2 books in a series inside.)
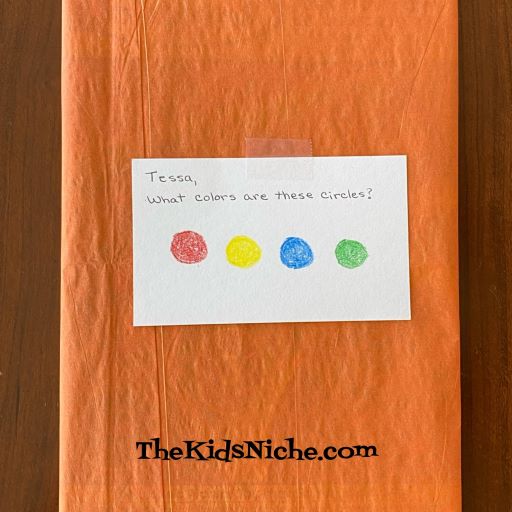
The last 2 packages have our granddaughter identifying colors…
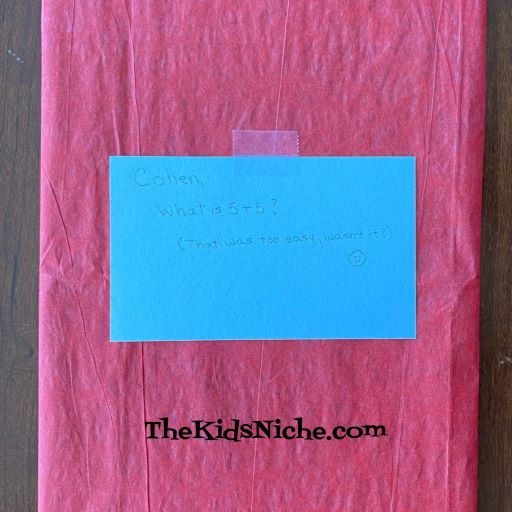
…and our grandson solving a simple math problem. (I realized the colors in this picture didn’t work right AFTER I had already mailed the package to the kids! So no do-overs!) These little packages contain a Colorforms (reusable stickers) set for each.
In case you can’t read it, this package says “Cohen, What is 5 + 5? That was too easy, wasn’t it?” 🙂
By adding a little silly activity to each package, it makes the unwrapping take a little longer. And you can be reinforcing their skills without them even realizing it. You can have them dance or sing or jump or run in place or any number of a million things. Being silly is fun for everyone and will hopefully bring out extra smiles and the giggles. 🙂
We had some strong storms roll through our state on Monday evening this week and a LOT of people have been without electricity. (Including us…for about 44 hours.) Some are still out. That means no TV, no Xbox and soon all the electronics run out of battery. And the kids are home…and they are BORED! Now what??! Here are a few suggestions that might entertain the kids for a while so you don’t pull all your hair out during the first hour of no power. 😉
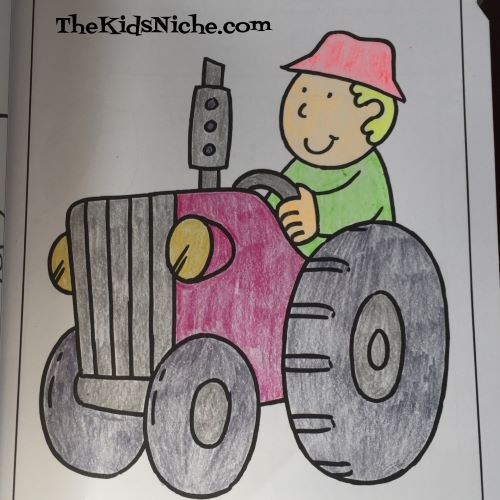
#1.) Coloring pictures. Yep, drag out the boxes of crayons and coloring books and color some pictures. Maybe you “need” some new pictures to hang on the refrigerator or maybe Grandma and Grandpa need some pictures in the mail. 🙂
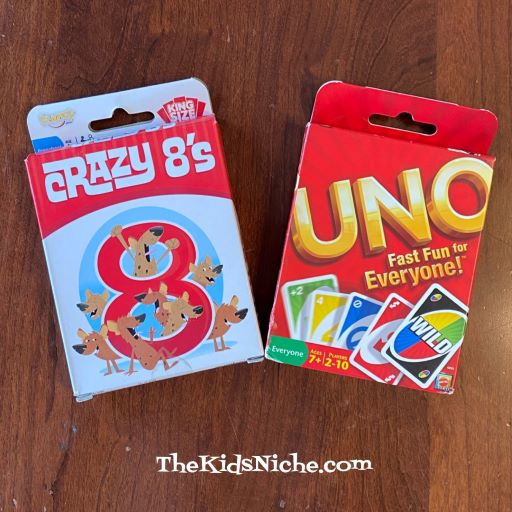
#2.) Play some card or board games. The more people that play the more fun it will be.
#3.) Read some books. Let the kids pick out their favorite book and read it together. Or read a story to them that they haven’t quite mastered reading for themselves.
#4.) Do some simple crafts. Maybe not painting, if you don’t have water available for cleanup. 😉
#5.) Draw some crazy monsters. All you need is paper and markers or crayons. Some wiggly eyes can add to the fun.
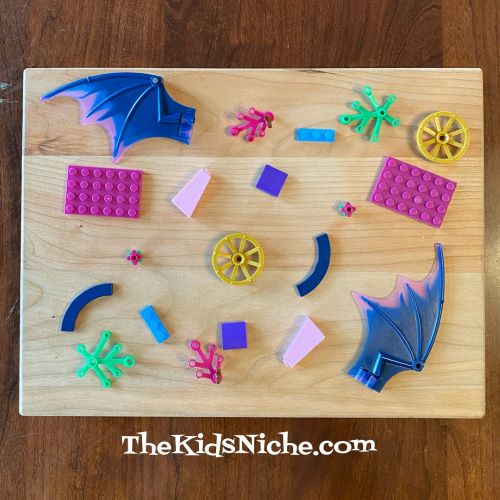
#6.) Play with Lego!
#7.) Give your pets some extra love and attention. Maybe play tug-of-war with your dog or trail a piece of yarn for your cat to chase.
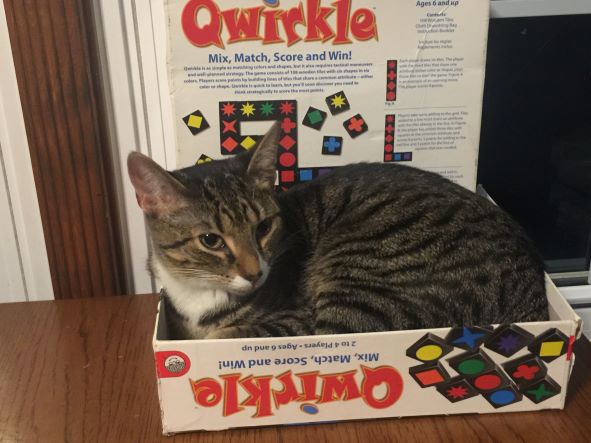
Or maybe play Qwirkle with your cat! Lol 😉
#8.) Play the “connect the dots” game…only need paper and pencils or pens. Make 100 dots on the paper. Each person draws one line and then it’s the next person’s turn. If you complete the 4th side of a box, that becomes your box and you write your initial in the box. Complete the most boxes and you win.
#9.) Play with Dominoes. You can play the actual game of Dominoes or just have fun building with them and/or knocking them down again.
#11.) Make your own board game. Let the kids design their own board game, even if the rules are a bit wonky and constantly changing. 😉 They will feel 10 feet tall when you play their game with them.
#12.) Matching game. Find several pairs of items and mix them up for your kids to match up the pairs.
So the next time your electricity goes out, don’t despair! You can definitely find things to keep the kids occupied with no electricity needed! If you are currently without power, I feel your pain! Hang in there!
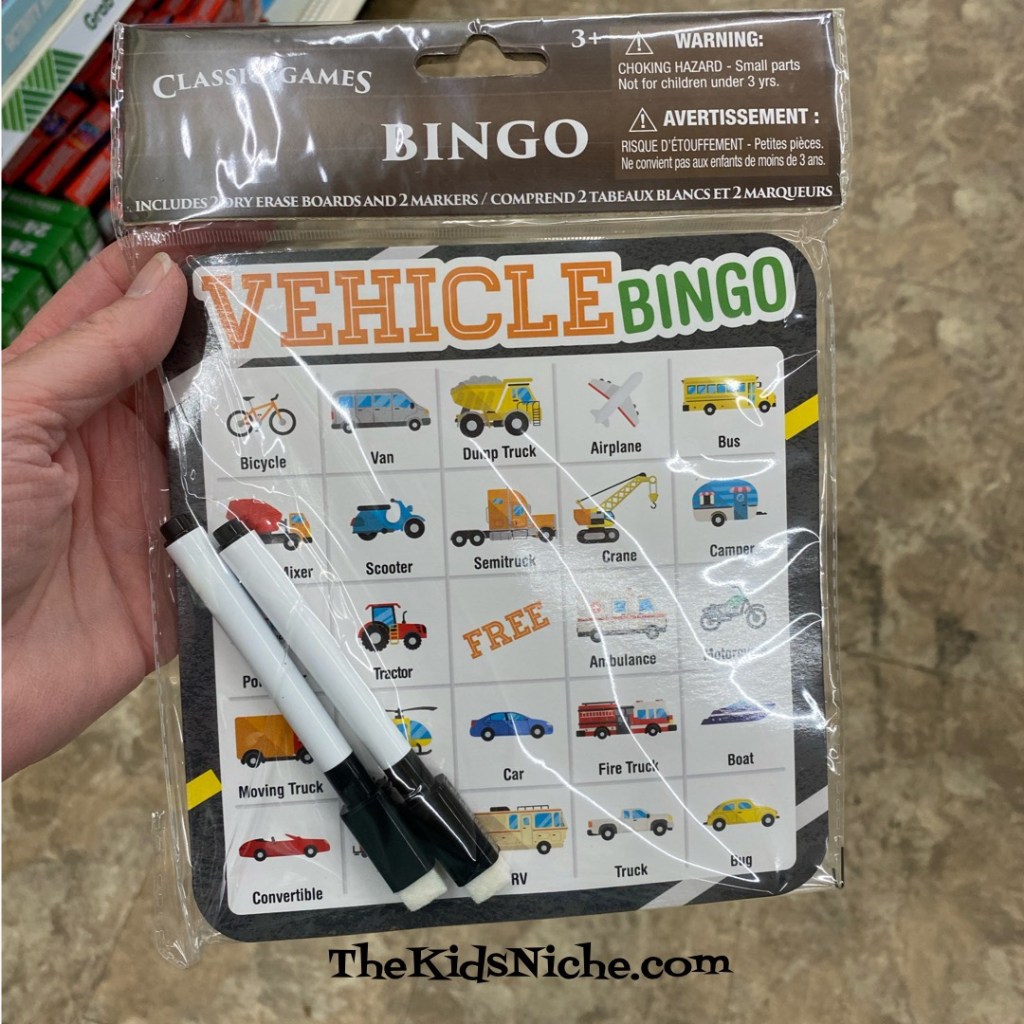
Summer is almost here and school is almost done for this year! Are you planning to take a vacation with your family this summer? Do you dread the long rides in the car with a bunch of kiddos? If so, I saw something at a Dollar Tree store today that might make your ride a bit easier! Bingo Games! There were 3 styles available that I saw.
#1.) Vehicle Bingo
#2.) Roadside Bingo
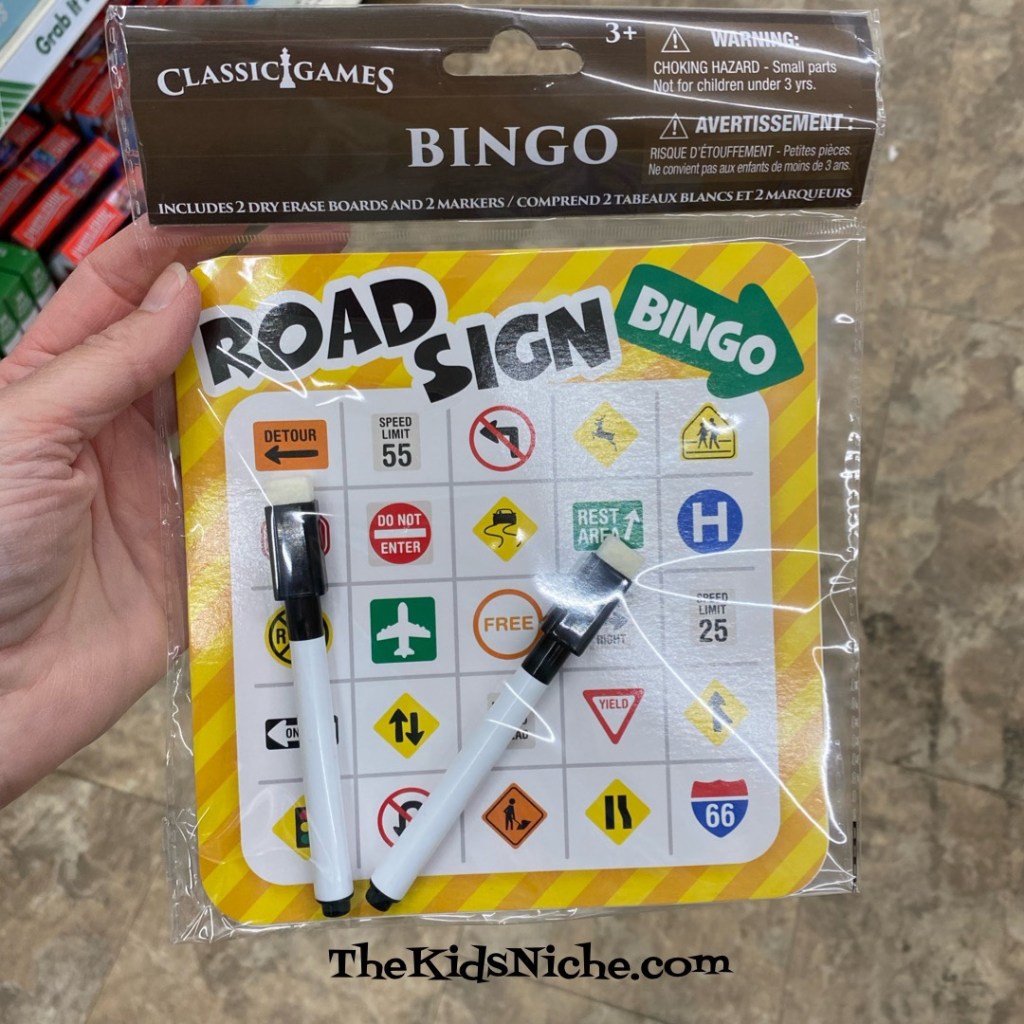
#3.) Road Sign Bingo
Each set includes 2 dry erase Bingo boards and 2 markers with an eraser on the end. My guess is you cross off each item as you see it while you are traveling. First one to get all items in a row marked off is the winner! Could be a great way to get the kids looking out the windows instead of at which sibling might have “touched” them or breathed on them or done some equally annoying thing. 😉 I think it’s easily worth the $1.25 for a little more sanity on your trips in the car!