Turn a Small Milk Bottle Into a Piggy Bank

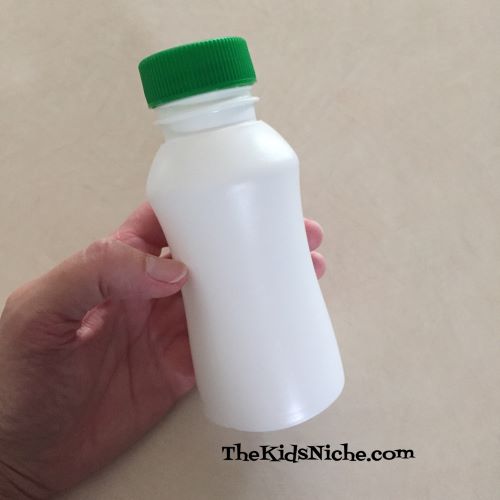
Here’s a fun (and maybe a little bit weird!) idea for you to craft with the kiddos! NOTE: It does require an adult to do a bit of cutting with something sharp like a utility knife. Do your kids get milk in a little plastic bottle when you go to McDonalds? (Maybe other places too.) We grabbed some breakfast items there the other day and I got a milk. Here’s what mine looked like:

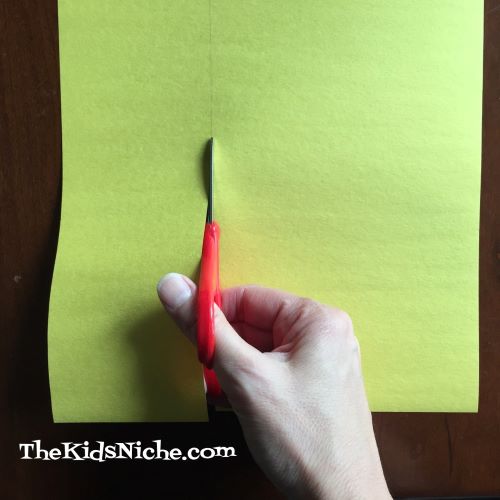
Remove the outer wrapper carefully. I used a sharp knife to get it started.

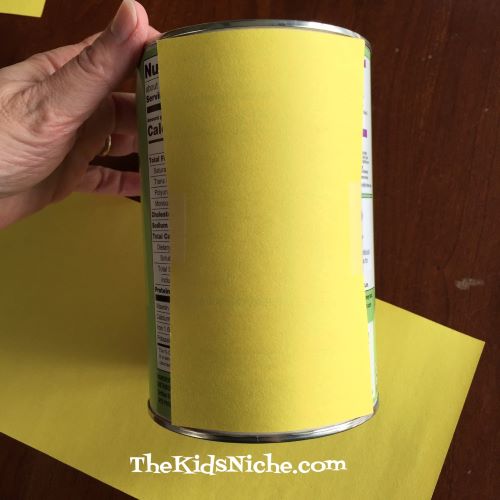
Presto! You have a white bottle!

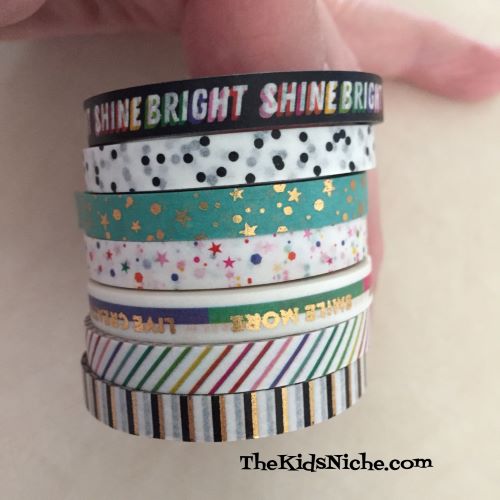
I had some Washi tape on hand that worked nicely for this project. In fact, I had just purchased it on clearance from a Joann store.

This pack had 7 different colors/patterns.

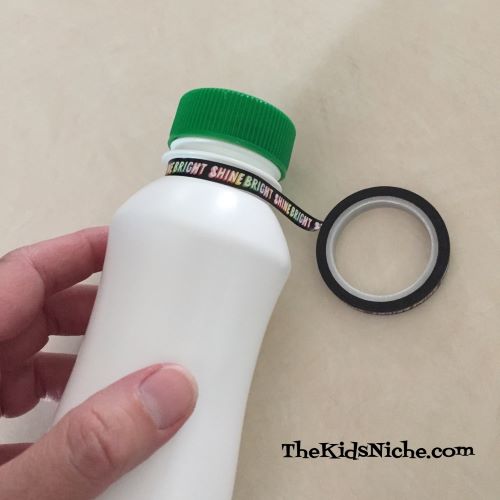
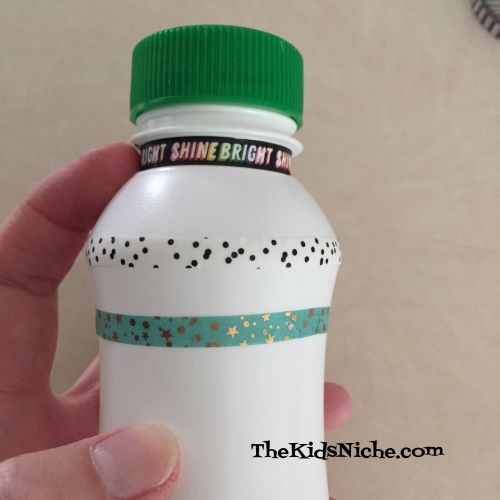
Starting at the top, right below the rim of the bottle, I taped a piece of the Washi tape around the bottle, overlapping a little.

You can continue wrapping the different patterns of tape down the bottle. Add as many or few pieces as you like. I left some space between my layers, but you can place them closer together too. Layer number two…
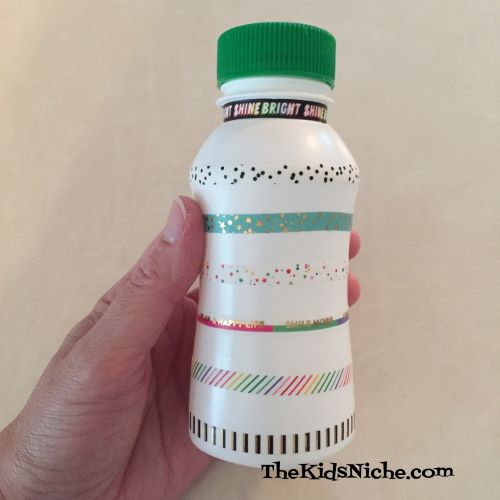
Layer number 3…

Keep wrapping until your bottle looks just right to you. 🙂

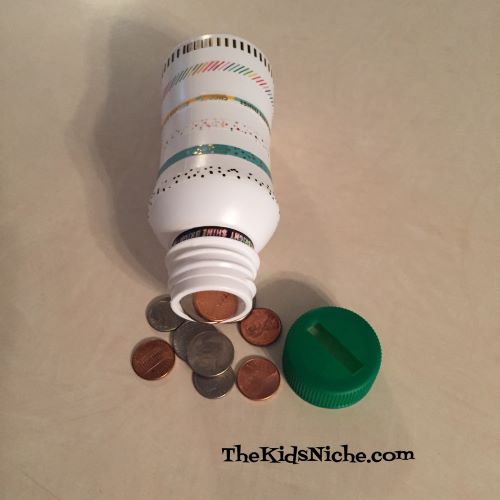
There are 2 ways you can turn this into a bank…one requires cutting the lid and the second way does not. You can add Washi tape to the top of the bottle as decoration and remove the lid each time you wish to store money inside.

The other way is to cut an opening in the lid so money can be dropped inside without removing the lid.

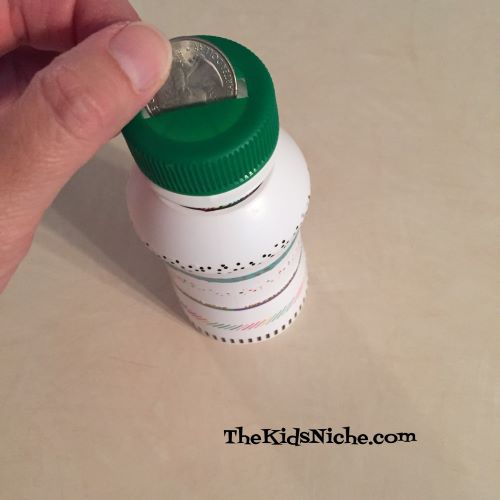
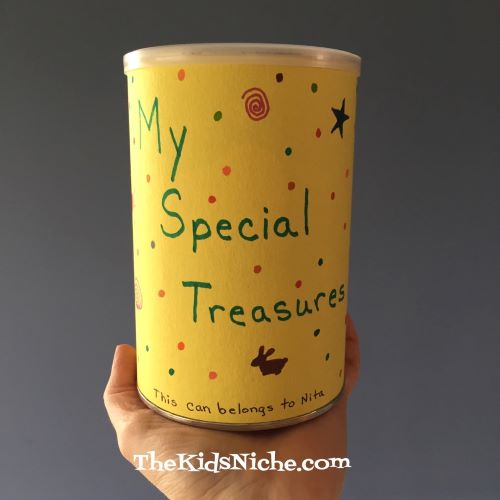
And you have a new bank for saving money! It’s a great way to re-purpose an item that would usually just be thrown away. Have fun and save those pennies! 😉

More Re-purposing With Kids

Hello! Hope things are going well for you! Today let me show you a couple more fun ways to re-purpose things you might have around your house into some entertainment for the kids. This first one I have to show you is using and empty…and washed…plastic container that had spinach and artichoke dip in it. (Oooo, that’s making me hungry!)

The outer plastic wrap came off very easily for me.

The sticker on the lid however, didn’t come off so I simply cut a circle out from a white piece of paper and glued it on top.

Then I cut a slightly smaller circle out of a piece of scrapbook paper and glue it on top of the white paper circle.

Your project can be finished here or you can add a piece of ribbon or duck tape around the side of the container. You’ll want to glue it in place.

And there you are! Another great little container for storing special treasures inside!

Item #2 on today’s blog post is super simple! Do your kids like to play outside in the warm weather and use squirt guns on each other? (Or on an unsuspecting parent or grandparent! Ha!) But you really don’t want to pay the price for squirt guns? Save up a few dish soap bottles or spray bottles…make sure they are washed out and rinsed well. Fill them up with water and let the kids have a grand time spraying each other to cool off! (That actually sounds really good for today – it’s currently 92 degrees with the “real-feel” temperature of 95. Whew!)

Hope these suggestions spur you to do something similar for a fun project today! 🙂

Turtle Suncatcher Craft from Crayola

Wow, it’s been raining for DAYS here and it’s getting tiring! I went looking for something fun to do to cheer ourselves up and I came across this adorable craft on the Crayola website – Turtle Suncatchers!

Turtle Suncatcher_Step 09

Aren’t they adorable?! Here’s the link to check it out: https://www.crayola.com/crafts/turtle-suncatcher-craft/

It looks like a great rainy-day boredom buster! Have fun! 🙂

Washcloth Animals – #3 – Chick

It’s been a fun week of making washcloth animals! If you missed making the bunny, you can find it here: https://thekidsniche.com/2020/05/11/washcloth-animals-1-bunny/ If you missed the bear, this is where you can find it: https://thekidsniche.com/2020/05/13/washcloth-animals-2-bear/

So let’s make one more washcloth animal! This little chick is quite adorable and fun! You’ll need 1 washcloth (a yellow one makes him super cute), 1 regular size rubber band, a piece of ribbon or twine, 2 wiggly eyes and a small piece of orange construction paper.

Lay the washcloth out flat on your work surface.

Starting at one corner and working across on the diagonal, roll the washcloth up tightly into one long thin roll.

The place where the end of the washcloth is in the center, you will want to make sure it gets folded inside with the next step.

Fold the rolled up washcloth in half.

Bend one side down so that the tip reaches the bottom or is just slightly longer.

Fold the second side down in the same manner.

Squeeze the top part a bit to make a rounded head and wrap the rubber band around it several times.

Glue on the 2 wiggly eyes.

Tie a piece of ribbon or twine around the chick’s neck to cover the rubber band.

Using the orange construction paper, cut a rectangular piece about 1 inch by 1/2″.

Fold it in half.

Keeping the folded edge on top, cut from the center of the bottom up to the top outside edge on both sides so you end up with a triangle.

Open the triangle and you have a beak for your chick.

Glue the beak in place and your adorable little chick is done! 🙂

Thanks for visiting my blog! I hope you’ve had fun making washcloth animals with me! 🙂 Tune in next week to see what other kinds of fun things we’ll be doing!

Washcloth Animals – #2 – Bear

It’s time for another edition of making washcloth animals! Our first washcloth project was making a bunny. If you missed that project and would like to check it out, you can find it here: https://thekidsniche.com/2020/05/11/washcloth-animals-1-bunny/

Today’s washcloth animal is a cute bear. Let’s get started! You’ll need 1 washcloth, 1 regular size rubber band, 2 tiny rubber bands and a piece of ribbon. If you want to, you can also add 2 wiggly eyes and a nose and mouth made from felt.

Lay the washcloth out flat on your work surface.

Begin rolling from one side and roll to the middle of the washcloth.

Then roll the opposite side to the middle too.

While holding each end of the rolled washcloth, twist one end over.

While keeping the washcloth from unrolling, bend the twisted end down about 3/4’s of the way.

The bottom 2 rolls become the bear’s legs. Open the top part just enough to place the top 2 rolls along each side for the bear’s arms.

Using the larger rubber band, pinch the washcloth in to make a neck and head and wrap the rubber band around as many times as you can.

Now pinch up a little bit of the washcloth on each side of the head to make 2 ears. Wrap a tiny rubber band around each one to hold it in place.

Tie the piece of ribbon around the neck to cover the rubber band.

Ta dah! Your bear can be finished now. Or you can add some wiggly eyes or even make a nose and mouth from felt. I like the look without the eyes better but here’s what it looks like with eyes so you can decide which way you like better.

I hope you found this project fun! 🙂 Be sure to check back on Friday for Washcloth Animal #3!

Let’s Draw Carly the Cat

Hello and welcome to today’s drawing fun! All you need is some paper and something to draw with. Let’s get started drawing Carly the Cat. Meow!

Start out with a circle.

To add Carly’s ears, draw 2 triangles on the top side of the circle. Then add 2 smaller triangles inside the first ones, and color the smaller triangles in with your pencil.

Now for 2 eyes. Draw 2 ovals, then a circle in the bottom part of each oval. Color in the circles.

Draw an upside down triangle for her nose.

Now draw 2 circles, one on each side of the triangle you drew for her nose. Under that draw a “U” with a smaller “U” inside of it. This is Carly’s mouth. Color in the smaller “U”.

Now let’s add some whiskers by drawing 3 lines out on each side of Carly’s face, starting inside the mouth circles.

If you want to draw only a cat’s head, then you are finished! Good job! If you would like to add a body, then keep going with me. Add 2 curved lines under the head like you see in the following picture.

Let’s add 2 front legs and 2 front feet.

Draw the lines for the body on down till they meet the legs and then draw a small line between the legs to finish Carly’s body.

Add 2 ovals for her back feet and add 2 curved lines to each foot to make her toes.

Let’s see…are we done? Have we forgotten anything? Wait…check again…what’s missing? Her tail? Of course! Draw her tail coming out the side.

If you would like your cat to look like a boy, then you are finished. If you’d like your cat to look like a girl, then you can add 3 eyelashes to the top of each eye.

Great job! Now you’re ready to draw a whole litter of kittens! Hope you had fun with our latest drawing project! 🙂

Paper Packet Surprises

Are you looking for a little something to cheer up some kids that have been cooped up inside waaaaay too long? Here’s a fun idea for making packets out of paper and sticking a little surprise inside. Its a sure way to liven up an otherwise boring day. Or a way to send some little surprises to those grand kids you can’t be with right now…which is what I’m doing with the ones I’ve made. 🙂

Let’s start out with a piece of paper, scissors and glue. Your paper can have a design on it or just be plain or solid colored. You can draw pictures, make designs or add messages to them. I decided to use some white printer paper and some scrap booking paper I had on hand. Depending on the item you would like to hide inside, how big you need to make the starting piece of paper. This one I think started out at 6″ x 8″. If you cut a piece of 8 1/2″ x 11″ paper in half to make it 8 1/2″ x 5 1/2″, it makes a nice sized packet.

Put a line of glue across one of the shorter ends.

Bring the other shorter end around so your paper forms a tube and glue the two ends together. Press it flat with the glued line in the center of the side. Like this picture…

It doesn’t matter if it’s exactly in the middle or not. Next fold in both long edges approximately 1/4″ or a little more and crease. Again, no need to be exact. Side #1…

And side #2 is folded up too.

Working with one of the folded sides at a time, open the folded edge up.

You’ll see 3 creases…the 2 creases on the outside edges need to be folded “out” and the center crease needs to fold “in”. It’s a little hard to explain this way, but hopefully the next two pictures will help you see what I’m trying to explain.

Do that for both folded sides. This makes your packet able to hold something inside it. Next apply a thin line of glue to ONE of the open ends.

Press that end closed and hold for a few seconds while the glue starts to work.

Slide your surprise inside the open end. Here are a few ideas that I came up with to use for surprises. Stickers…

Granola bar…

Small candy bars…

Color with water pages and a few Q-tips to use for painting…

Just fold the color with water page and it will fit nicely inside your packet along with the Q-tips.

How about a package of hot chocolate mix? I folded the end in on them to make them fit inside better.

Maybe some pom poms or pipe cleaners…

For older kids you might use a Sudoku puzzle page or another type of puzzle sheet. Gift cards would be awesome! Once you have your surprise inside, glue the other end closed. If you like, you can cut the ends with scrap booking scissors to give it a more finished look.

I added one more twist to my packets by writing a message on the outside of something the kids need to do before they can open the packet. For instance…”Sing a song”, “Do a somersault”, “Clap your hands”, “Hop on one foot”, “Do 5 jumping jacks”, or “Run in slow motion”. You can tailor the message to fit the age of the child you’re making the paper packets for.

Hope this craft will brighten your day! Thanks for visiting! 🙂

Sharing Free Corner Bookmarks

I love sharing free things to help you or just things to make you and your kids’ lives more fun! Today’s fun comes from The Country Chic Cottage in the form of free corner bookmarks. Angie is offering 3 corner bookmarks that you can print, fold and use on your favorite books. All you do is sign up for their email newsletter and she will send the files for the bookmarks to your email address. Here is the link to go to her page: https://www.thecountrychiccottage.net/corner-bookmarks/ These bookmarks are cute, fast and fun! There is a video or pictures to help show you how to easily make these. Let me show you the ones I enjoyed making. 🙂

Click on the link above and sign up for her newsletter. When the files come to your email address, open them and print the ones you’d like to make. You’ll need scissors and double sided tape or glue.

Cut out each shape using your scissors.

Turn the bookmark over and fold in one side of the semi-circle over the square.

Fold in the second printed semi-circle in the same way.

With one side folded in, apply the double-sided tape or glue to the top of the semi-circle you folded in first.

Fold the second side on top and you’ve made your corner bookmark!

I printed and made all 3 bookmarks.

Now you can keep your place in your book marked until you can read the next time. 🙂

A special thanks to Angie at https://www.thecountrychiccottage.net/corner-bookmarks/ for sharing this fun project! 🙂

Making a Paper Treat Box

Are you stuck at home and wishing you had some little treat boxes for your kids? You can make some with just a piece of paper and some glue or tape! Let me show you how. If you have card stock paper it will make a sturdier box, but I made one with printer paper, so you don’t need anything fancy. Using a piece of scrapbook paper will mean you don’t even need to color the box. Let’s start by making a 6″ square piece of paper.

Using a ruler, mark each side of the paper at 2″ intervals.

Draw 4 lines – 2 in each direction – across the box at the 2″ and 4″ marks.

Line your ruler up with each line and bend the paper up and run your finger along the ruler edge to make a crease in the paper.

Remove the ruler and press the paper flat to make a stronger crease.

Make a similar crease along each line for a total of 4 times.

Now we will make 4 small cuts. Using the following picture, cut on the crease between squares 1 & 2, then between 2 & 3, then between 7 & 8 and finally between 8 & 9 – ONLY up to the first crease!

Next turn your paper over. Color or draw on the squares EXCEPT for each corner square. You can make an X on the 4 corner squares so you’ll remember which squares to color.

Here’s an example of what it will look like after the correct squares have been decorated.

After you are finished decorating your box, it’s time to fold the paper up into a box. Begin by bringing up 2 opposite sides of the paper.

Fold one end square piece in until it matches up with the crease on the bottom.

Fold the end in from the opposite side so the 2 pieces meet and cover each other.

Using tape or glue, fasten the 2 pieces together.

Now fold the bottom square up to meet the box. Glue or tape it together.

Turn your box around and repeat the steps for the other side. And you’ve made a treat box! 🙂

Fill it with whatever special goodies you have on hand and enjoy!

I’m sure it will bring a smile to your children’s faces. Thanks for stopping by!

A Place for Special Treasures

When you were a child, did you ever have a place where you stored your special treasures? A box or a can that was just yours and you kept important little things hidden in it? Maybe it was a special picture that you colored or a keepsake from a vacation trip or a picture of you and your best friend or a really cool seashell or stone that you found or any number of other things. Today let’s make such a spot for your kids to hide their special mementos! You can use a box if you have one, but I used an empty oatmeal container.

First remove the lid and take a slightly damp paper towel and wipe out any tiny bits of oatmeal that might be left behind. Keep the lid off for a while so the container will dry completely inside. Now collect the other items we’ll need for this project such as a piece of construction paper, markers, a ruler, scissors, a pencil and tape.

Using the ruler, measure to see how long the side of the can is. We will be wrapping a piece of construction paper around it, but first we’ll need to cut the paper to the right size to fit top to bottom.

My container measured 5 3/4″ long in between the top and bottom rims. The size of my construction paper was 9″ x 12″. Take your piece of construction paper and mark a spot on each end whatever the length of your container is. Draw a line between those 2 dots and then cut along the line. For example, since my container was 5 3/4″ long, I cut my construction paper to a piece that was 5 3/4″ x 12″.

Take the piece of paper that you cut and wrap it around your container to see if it will wrap all the way around. Mine was a bit short and the edges didn’t meet.

I used the leftover piece of construction paper to cut another piece that was 5 3/4″ long and the width of the paper that was left.

I taped it on to the backside of my oatmeal container.

Now wrap the first piece of paper you cut around the container to make sure it will fit…but don’t tape it down just yet.

Mine fit just fine so then I was ready for the next step. Lay the first piece of paper you cut down on your table and write, draw and color whatever words and designs you would like to have on your special treasures container. I chose to write “My Special Treasures” in large letters and then in tiny letters at the bottom I wrote “This can belongs to Nita”. You can decorate your container in your own way. I drew some flowers, a bunny, a couple hearts, some designs and lots and lots of polka dots.

Once you have decorated your paper, its time to tape it onto the container. I used double-sided tape so that I could tape on the back side of my design. You could also tape it from the front side or use glue to hold it in place. I like the idea of using tape because later you can remove this cover and put on a new one.

On the back side of the container where I added the extra bit of paper so the container would be completely covered, it looked like this.

You can leave it like this or you can add a few more tiny designs to make that part blend in with the rest of your design. Since I had drawn so many polka dots, I just added a few more on this part.

And that’s it! Place the lid back on the top and go find some treasures to store inside!

I hope you’ve enjoyed our fun craft for today! May you find lots of wonderful things to store in your special treasures container! Thanks for stopping by! 🙂